|
Focke-Wulf Fw 190F-8
by
Arkut Yuksel
|
|
|
Focke-Wulf Fw
190F-8 |

Tamiya's 1/48
scale Fw 190F-8 is available
online at Squadron.com
Tamiya’s 1/48 scale Focke-Wulf Fw 190F-8 kit has been so well covered in
articles and galleries here on HyperScale that there is very little left
to say. As most of you already know, it is simple to build, fits
together perfectly and so on.
My main objective is to build a model that looks like the real thing. I
am not so concerned about minor inaccuracies.
I followed the kit instructions when building this kit. Not too many
extras were added - seatbelts for the cockpit, brake lines on the main
legs (the support leg wires were not in my range but next time they will
be), antennas, landing gear indicators, bulged tyres.
Also the underwing antenna was omitted per the instruction of the
decals.
I used the decal sheet from Kommandeur Decals instead of the kit' s one.
Painting,
Markings and Weathering
|
As the decals are from Kommandeur Decals I used the scheme shown in
their instructions. The decal sheet includes 4 aircraft.
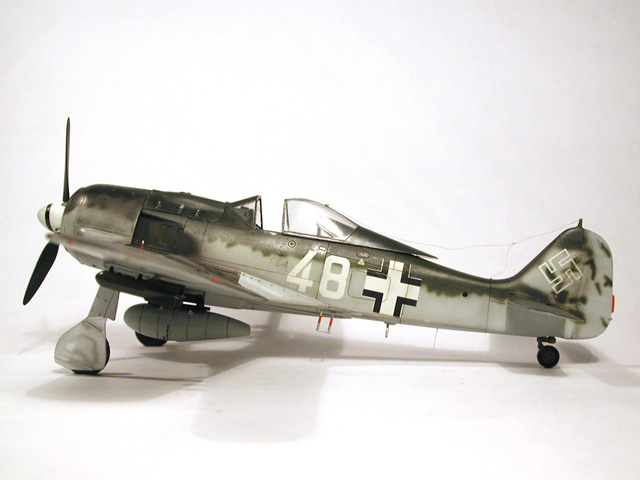
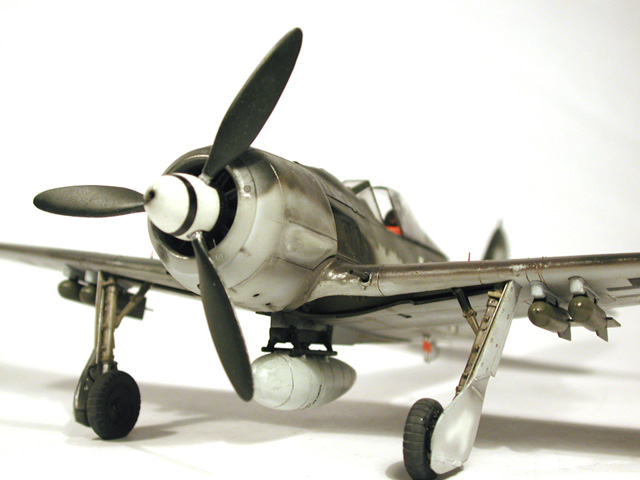
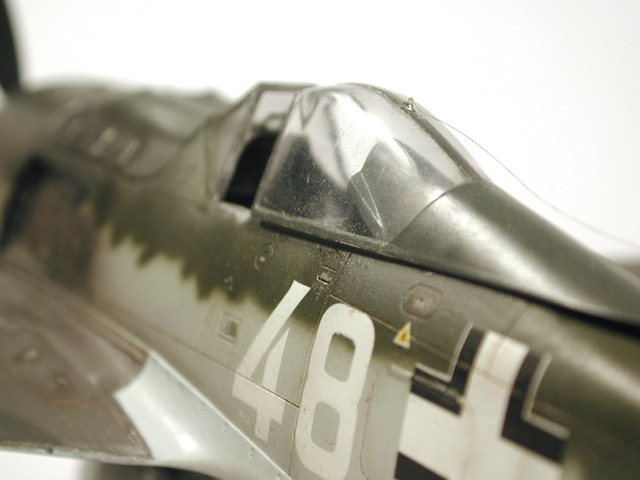
I chose "White 48" which has a different cowling and unpainted landing
gear doors as can be seen. The aircraft is also shown on Squadron's
recent Walkaround book about Fw-190 A/F on pages 75 and 78; but I did
not have any idea about this until I bought the book by which time the
kit had been finished.
The colours shown in the instruction are RLM 02, 74, 75, 76 and 83. They
are from JPS (74, 75) hand mixed (02, 76) and from Gunze Sangyo (83).
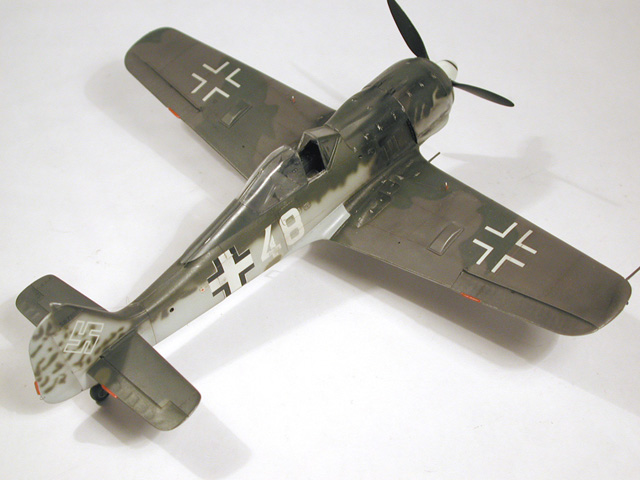
In the instructions it is shown that the wings are painted with regular
paints; but only a small portion of the right wing, close to the
fuselage, is painted RLM 83 with the RLM 74, the difference between the
tones are nearly invisible!
The under colour of the aircraft is a mixture that is done with Aircraft
Gray and White from Pactra Acrylic. I had chosen the Aircraft Gray to be
mixed with White as the colour itself, from Pactra, contains blue
pigments as RLM 76. The actual colour also contained the blue pigments
but as the quality of the blue pigments was so bad that they had shaded
away immediately; the colour usually appeared as a very light gray. In
these pictures the colour appears as completely gray but in sunlight the
colour shows the blue shade hidden inside!
I mixed the gray to white to get the tone.
After much of the patience and time my model was waiting for me to do
the decaling and weathering job.
I prepared the model by first spraying Dullcote from Revell that would
protect the model from dirt and accidents and started to search the
pictures in the books. I used the ones that I had in my library.
Checking every close-up photo of the other FW-190' s pictures, I tried
to simulate weathering on mine. Since at that time there were no
pictures that I had seen of "White 48" I just had to apply the
weathering in a logical way. In my opinion the result does not seem that
bad.
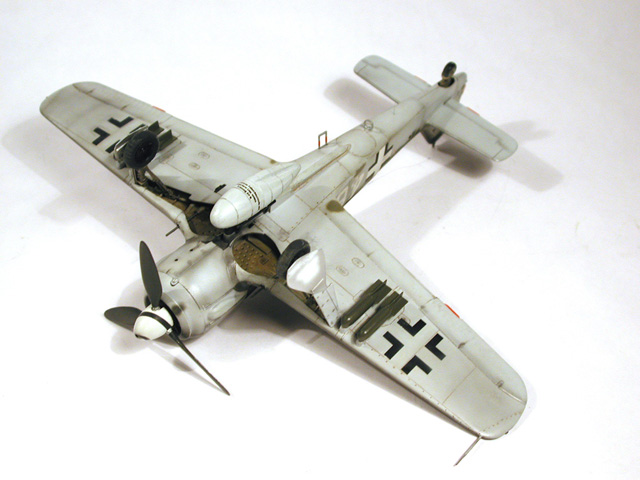
By the way, some may ask why there are some RLM 02 paints at the right
wing root and on the right flap. While I was painting the model the
paint stripped from there showing the bare metal foil underneath; as I
had thought that it would be too weird I decided to paint it in RLM 02
with a "what if" idea, as I know the Germans did paint the planes in
that way, but sometimes they had used a red- primer instead of 02.
Also some attention must be paid to the wing root guns. One can see that
there is no weathering of the gun powder although the rest of the plane
is considerably weathered. This is same as on the real aircraft. That
part of the plane never got the powder weathering due to firing. Until
now I could not see any close- taken picture showing that area blackened
because of the gun powder; more I would be very glad if one sends me any
photos because I am still surprised about that; well what can I say, I
tried to do what I saw.
The antenna is slack because the mechanism was so on the blown-hood
canopied Fw 190s.
The wing root panels are left unweathered because that is what suggested
in the decals instructions. From there one can understand how much
weathering I did to my model, the paint there is the fresh one!
The wings were sprayed freehand.
I would like to thank to Ufuk Aydýner who took the photos.
Click the thumbnails below to view larger images:
[../photogallery/photo26704/real.htm]
Model, Text and Images Copyright © 2001 by
Arkut Yuksel
Page Created 13 September, 2001
Last Updated 04 June, 2007
Back to HyperScale
Main Page
Back to Features Index |
 Home
| What's New |
Features |
Gallery |
Reviews |
Reference |
Forum |
Search
Home
| What's New |
Features |
Gallery |
Reviews |
Reference |
Forum |
Search