Home
| What's New |
Features |
Gallery |
Reviews |
Reference |
Forum |
Search
Home
| What's New |
Features |
Gallery |
Reviews |
Reference |
Forum |
Search
|
|
|
DFS Habicht by Floyd Werner
Here is a little model of the DFS Habicht in 1/48th scale. It is manufactured by a Czech firm whose name I can't remember. The kit consists of about 8 parts including a clear canopy. The instructions are just a copy of an article from Flugzeug. No construction help is given and none of the parts are identified. Parts are molded in a dark green fragile resin which includes two wings, two fuselage halves, a cockpit enclosure, a one-piece horizontal tail, and two parts that I couldn't identify (so they didn't get used) plus the clear canopy. No decals and no painting instructions are provided.
Construction was straightforward except for a couple of issues. The fuselage was badly warped and had to be straightened with hot water and the bottom of a pan. They were joined with superglue and epoxy.
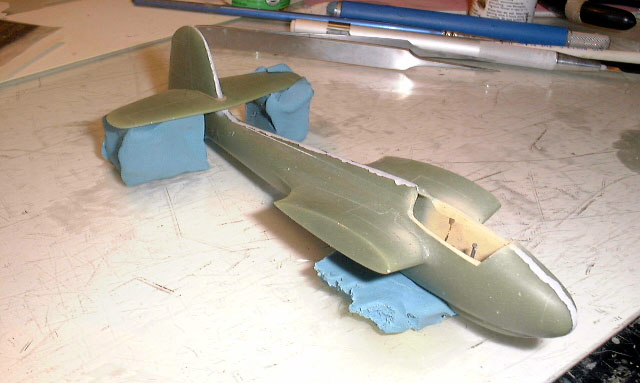
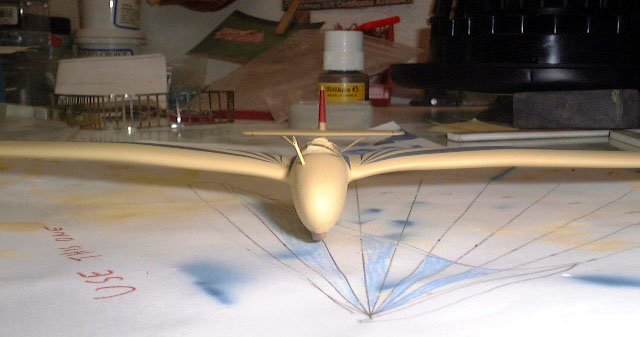
The cockpit was scratch built using Evergreen plastic and Waldron instrument and bezels. I had to build the fuselage first and then insert the cockpit. The only part that had to be put in first was the instrument panel because I couldn't get to it later. Under the cockpit floor I put putty to provide some stability to the plastic. The rudder pedals didn't exist because there was just a rudder bar. When it came time to do the tail it required some ingenuity to get them straight. I thought about how to keep the fuselage and tail perpendicular because its fit was terrible. The gap was too big to use superglue and letting it set. I came up with the idea of using modeling clay to anchor the fuselage and level the tail. Just a small drop of superglue to tack it in place and the gap was filled with two-part epoxy. If done properly the amount of filling or sanding is kept to a minimum. To finish the tail I needed to install the tail supports like the 109E had. This was done with airfoil shaped styrene.
The clay and epoxy worked so well that I did it for the wings too. They had huge gaps, almost 1/4 inch and I drilled holes and inserted wire for strength. This step was important because the kit has some exquisite fabric detail molded on the wings and I didn't want to loose it. I ensured the bottom was mated perfectly and then filled it in with epoxy. The skid tube was built with some piano wire for the vertical part and some plastic supports to finish it off.
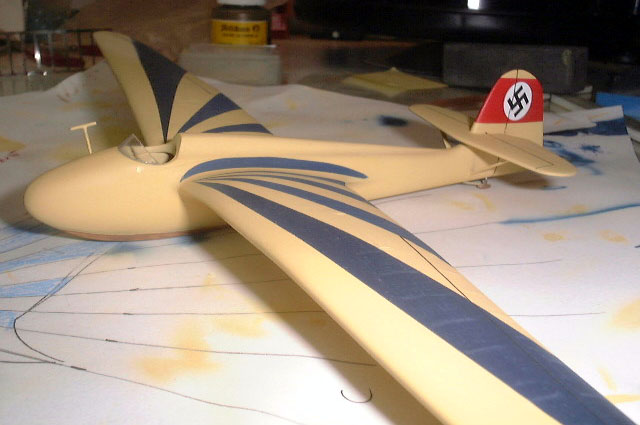
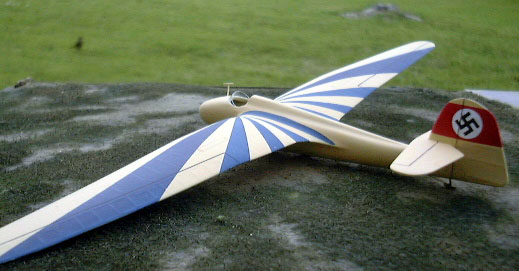
The whole aircraft was washed and then primed with Floquil Primer. After fixing any problems that I found I painted the tail red for the band behind the swastika. After masking it off I painted the whole kit Polly-S RLM 05 Cream. It was beautiful, but still required a couple of coats to cover completely. After it was dried it looked good but needed something. A quick look at the provided article showed the answer.
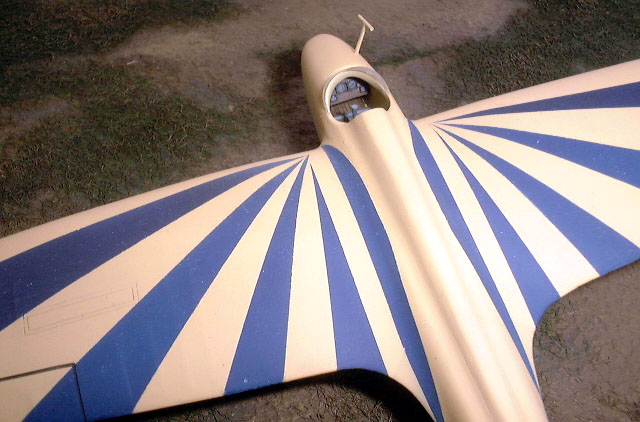
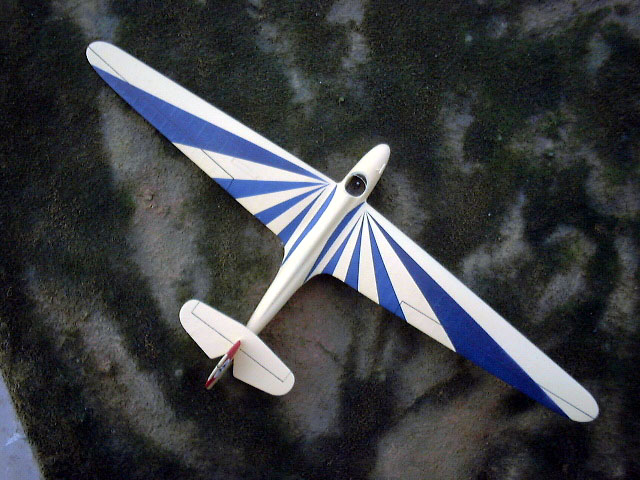
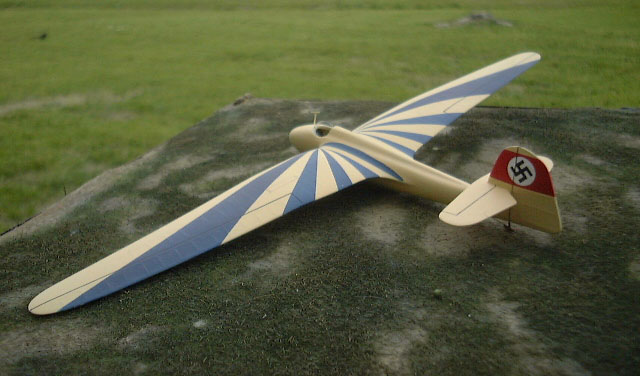
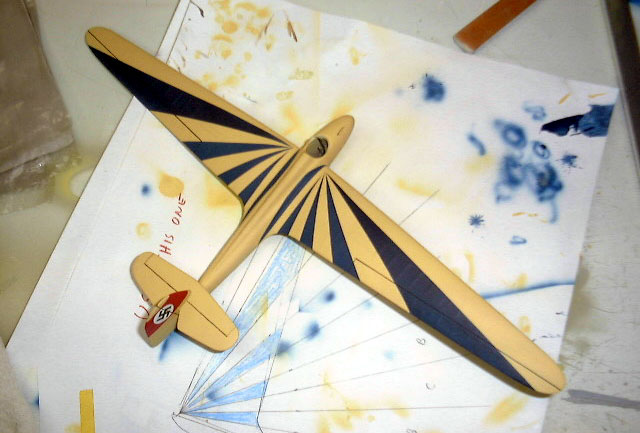
There was one aircraft that had dark color sunburst pattern applied to the top of the wings. Actually I'm not sure if it was on the bottom, so I elected not to put it on. Prove me wrong. I thought that black was too dark for the tonal qualities of the photograph so I opted for a dark blue, RLM Floyd likes the way it looks. It was masked with Tamiya masking tape in 15-degree arcs. Each arc was painted separately to ensure they were symmetrical between wings and that the points were crisp. The landing skid was painted a wood color and stroked from front to back to simulate a wood grain like the cockpit floor. A couple of coats of Future sealed the paint job and prepared the kit for the decals. I used some Aeromaster decals for the He-51. The white and the swastika looked great.
I highlighted the control surfaces with a little dark gray india ink and sealed that with Polly-S Flat. Once everything was dried a quick dry brush of white brought out the great fabric detail. Sealed one last time with Flat. Removing the vacu-formed canopy and dipping it in Future cleared up most of the imperfections. I attached the canopy with Elmer's White Glue and the model was done.
Now came the real fun part, entering it in some shows. The first show was the Region VI contest where I entered it in the civil category as it depicts a pre-war airplane. I thought that this would raise some eyebrows to have a swastika and flat colored airplane with the glossy airliners. Well, I got the results that I expected as arguments ensued on the Internet after the Nazi glider won 1st place. It got modelers talking and I really like that. It was a fun kit and would recommend it to anyone who can find it. It is different than the drab colors of tactical aircraft and definitely adds some color relief in my display case.
Click the thumbnails below to view
the images full-sized.
Model, Text and Images Copyright © 2000 by Floyd
Werner
|