Home
| What's New |
Features |
Gallery |
Reviews |
Reference |
Forum |
Search
Home
| What's New |
Features |
Gallery |
Reviews |
Reference |
Forum |
Search
|
|
|
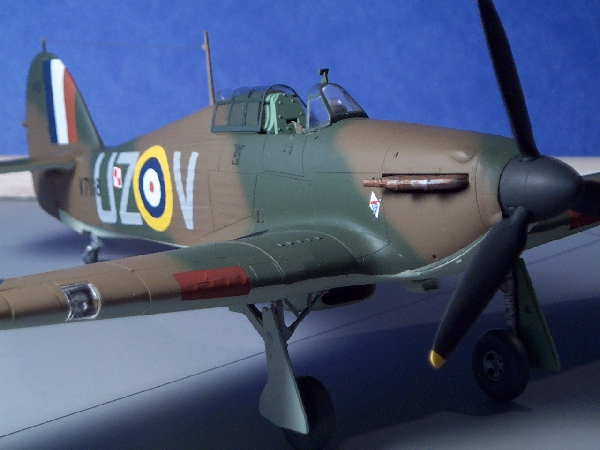
Hawker Hurricane Mk. I by Matthew F. Dyer
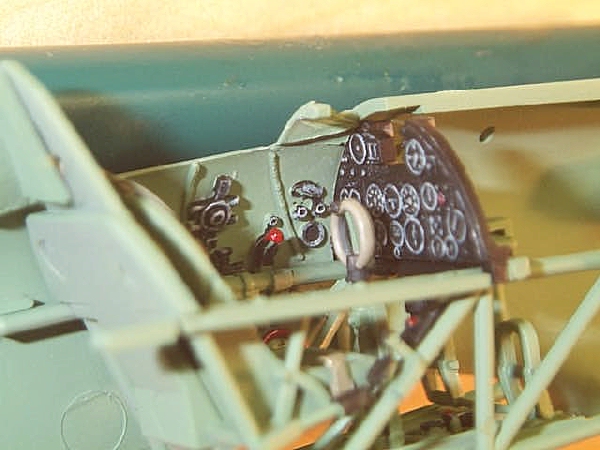
I have just returned to plastic modeling after about a ten year break. WWII subjects in 1/48 scale have always been my favorite, and coming back to the hobby I was astounded at the quality and quantity of available kits in this scale. I used Internet searches to find some pictures of Hurricane interiors which I did not have in my library. I found some pictures of an aircraft under restoration at the Air & Space Museum with what appeared to be the original coloring. It is so hard to tell what is accurate on restored aircraft with modern instrumentation installed. A lot of what we do in creating a historical miniature is guesswork anyway, is it not?
This is Hasegawa's 1/48 scale Hurricane Mk. I kit, No. JT 65. The kit was basically built straight from the box. The only additions were Eduard RAF seat belts, Aeromaster decals (48079 Battle of Britain Hurricanes), and a Squadron vacuform canopy. Without the latter, all of that excellent cockpit detail would have remained hidden.
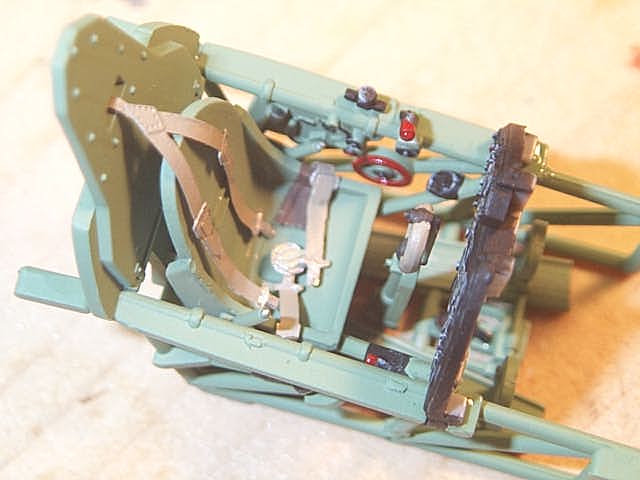
The interior is all kit parts except for the seat belts. Little of this detail would be seen if the one piece kit canopy had been used.
The cockpit assembly before installation in the fuselage is shown above. I found that assembling the fuselage and then inserting this assembly from the bottom worked well. Having spent so much time recently in R/C aircraft, I learned to use cyanoacrylate glues and I used them for much of the assembly here and in my other plastic models. They stick metal beautifully, and painted parts can be joined to other parts without scraping paint away and then watching liquid plastic cement migrate through the paint. I tiny dab of CA applied with the point of a pin often does the trick. Use the medium viscosity CA or even thick. It gives one plenty of time to work. The thin CA sets up instantly, which is what it is supposed to do. This rest of the kit went together perfectly. The only seam requiring some attention is where the rear portion of the lower wing joins the fuselage. A bit of putty and sanding were called for. Otherwise, the kit just about falls together.
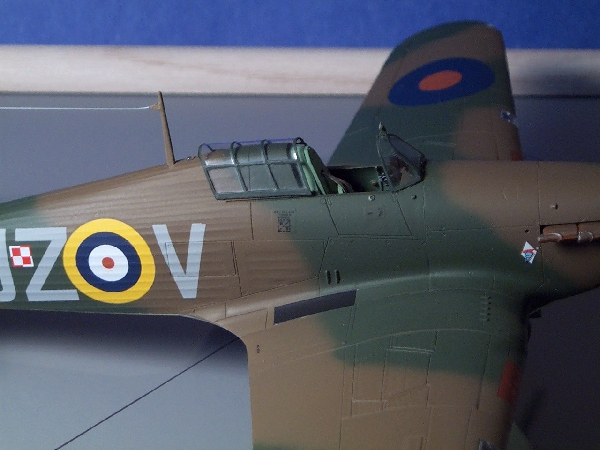
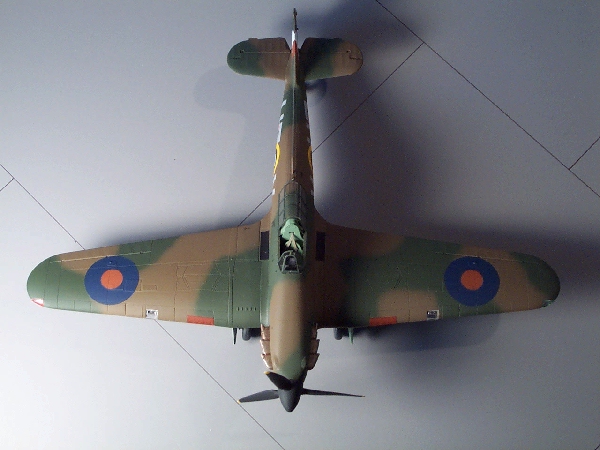
I used Pactra enamels (now out of production) for the camouflage and Model Master enamels for the interior and other details. I have a stock of old Pactra paints, but I have found Model Master to be easily available and very good for airbrushing as well as regular brush painting. The kit decals were used for stenciling and the taped gun port covering. Microscale decal solvents made all the decals snuggle right down. Everything was sealed with Testors Dullcote. The markings are for a plane from 306 (Polish) Squadron, RAF, October 1940.
Aeromaster decals are a dream to work with. It is amazing how they conform to the surface once dry. I glossed the model first with Microscale gloss, which dries very quickly and does not alter the paint color.
The Hurricane must have had the thickest wing of any W.W. II fighter. You notice it building this model.
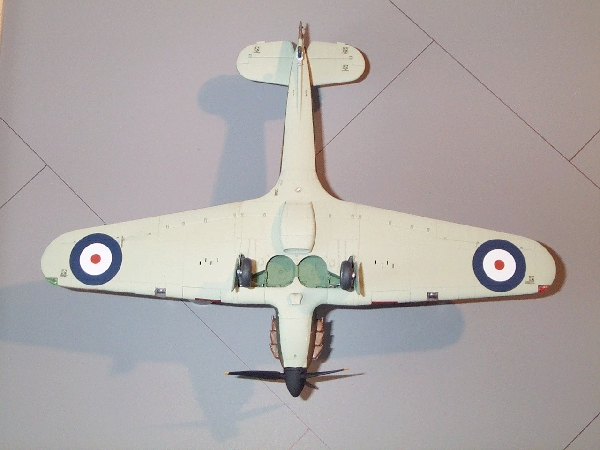
Bottom view. The wheel wells are highly detailed in this kit. Model, Text and Images Copyright © 2000 by Matthew
Dyer
|