|
IS-2M
by
Ulf Andersson
|
|
|
IS-2M
|

Shanghai
Dragon's 1/35 scale IS-2M UZTM version is available online from
Squadron.com
I was chatting with a fellow modeller at the C4-exhibition in Malmö
during fall 2000 about unique and exciting techniques to get an
interesting model - something eye catching. One of the endless
possibilities that took my fancy was depicting a tank that had recently
gone through a major field modification/repair.
Imagine the following scenario - Tank A with its turret destroyed and
tank B with everything except the turret blown to pieces. A quick
match of the two for fastest possible replacement for a unit under
pressure. This instantly suggests a million ideas about how to reinforce
the impression of two different beasts married as one.
I'll come back to this concept later.
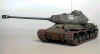
I decided to use Dragons 1/35 scale IS-2m. Why the IS-2? Because, in
my opinion, nothing's comparable to the heavy Russian tanks in terms of
raw design, lack of extra detail and brutality. This helps when there
are aspects beside the tank design itself that's the main point.
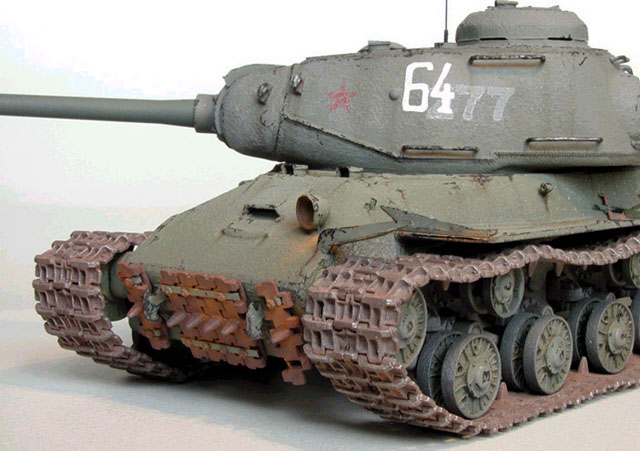
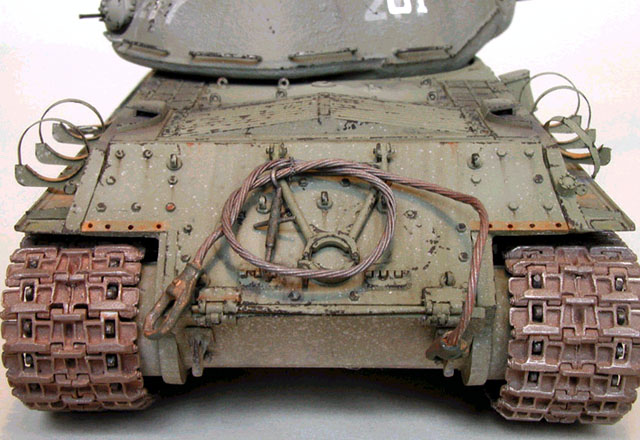
The track was replaced with Anvil Miniatures' resin
"click-link" item, and the Eduard PE-set was used. This
photo-etched set was designed for Italeri's IS-1 but was also suitable
for the model I built.
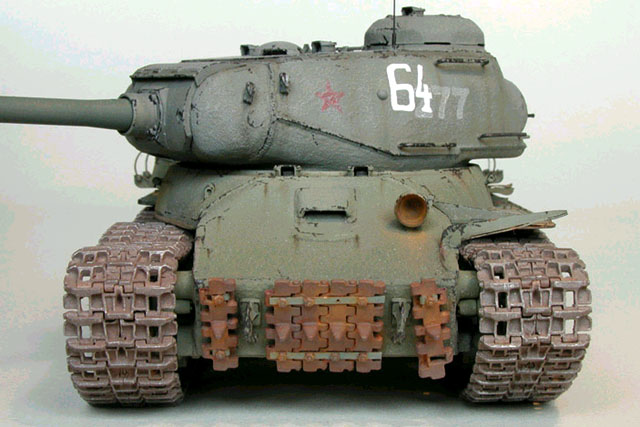
The gun barrel (as always) was replaced with Jordi Rubio, but the
muzzle brake from Dragons gun was retained. The white metal lump that
came with the turned aluminium barrel was poorly detail and simply
didn't match the plastic one!
The only other serious modification was the addition of cast texture
on the front hull sides and weld seams on the rest of the lower hull. I
used Milliput to add this texture.
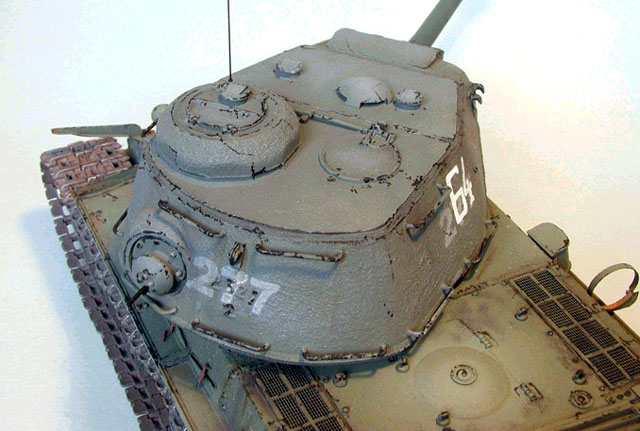
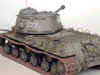
Tank A was hit from the right, turret put out of action. Another
shell from a smaller calibre gun hit the tank on the same side just over
the fender. Shrapnel from this hit ripped of part of the fender and
caused some damage on the tank. Later, the repair crew removed the whole
section and welded a piece of scrap armour on the damaged part of the
hull. Tank B had only it's turret in workable shape after running over a
mine.
Both tanks were recovered and towed away to a field repair unit.
Standing side by side it was quite obvious for the repair team what to
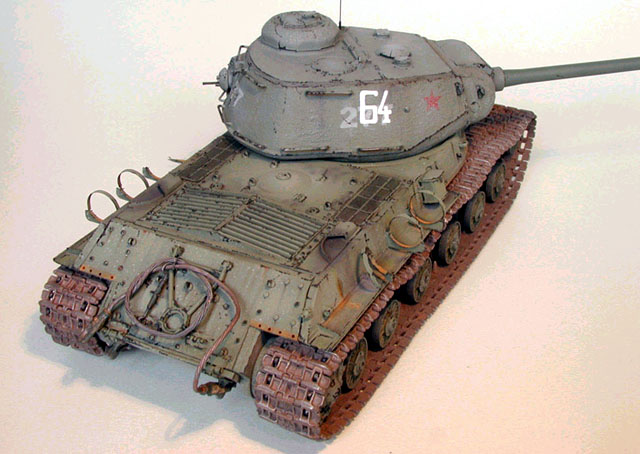
do…. Consequently two wrecked tanks became one operational. I painted
the turret in a slightly different shade and added new turret numbers
over the old ones so that the new vehicle was given appropriate ID
linked to it's new unit.
Paint was Humbrol and weathering was achieved with oils and pastels
plus some touches of thinned Humbrol, mainly on the engine deck. Chipped
paint was painted with Humbrol as well.
Painting step by step (same technique but different colours for
turret and hull):
-
Base colour airbrushed - hull
Humbrol 98, turret 98 mixed with 92
-
Lightened base colour airbrushed on
turret roof and top of tank
-
Dry brushing with a
couple of different shades to further enhance variations. NOT
ON EDGES!
-
Painting of the original markings.
-
Markings dry brushed with light base
colour until nearly invisible.
-
Chipped paint. Humbrol 33
-
Raw Umber oil paint carefully
painted in places and streaks of dirt painted along the sides.
-
Rust painted with Humbrol 62 and
pastels.
-
New fresh markings put in place (dry
transfers, Verlinden)
-
More Raw Umber.
-
Different shades of pastels
-
Smoke over engine grilles and behind
exhaust pipes airbrushed and pastels added as streaks of smoke
down the sides.
I didn't use my airbrush as much as I usually, do but stuck to
brushes to a greater extent. Its nice to try a new approach sometimes.
The kit with all the aftermarket parts has been laying around for a
year, so it's nice to finally have this creature sitting on my shelf.
Click the thumbnails below
to view the images full-sized.
Use the "Back" arrow of your browser to return to this page.

Model, Text and Images Copyright ©
2000 by Ulf Andersson
Page Created 17 April, 2001
Last Updated 04 June, 2007
Back to HyperScale
Main Page
Back to Features
Index
|
 Home
| What's New |
Features |
Gallery |
Reviews |
Reference |
Forum |
Search
Home
| What's New |
Features |
Gallery |
Reviews |
Reference |
Forum |
Search

