|
Junkers Ju 388L
by Brett Green
 |
Junkers Ju 388L |

Planet
Models' Junkers 1/48 scale Ju 388L
is available online from Squadron.com
The Junkers Ju 388 was the ultimate operational development of the versatile Ju
88 family.
After the Ju 288 programme was abandoned, the simpler Ju 388 was accelerated.
The primary focus was to find a fast bomber capable of outrunning late-war
Allied fighters, however the flexible design was also adapted to other roles.
The first production version was the photo-reconnaissance model, the Ju 388L.
The Ju 388K bomber version was externally almost identical to the reconnaissance
bird. The main difference was the ordnance in the ventral pannier. A
night-fighter version, the Ju 388J, was also under development.

The Ju 388K and L were based on the Ju 188 series, but differed considerably in
appearance and specification. The crew worked in a redesigned cockpit and
simplified glazing. The wooden ventral pannier bulged from the fuselage. The
vertical tail was a new, larger design, and the tail carried a sting via a
remote-controlled barbette equipped with twin MG131 13mm machine guns. Two BMW
801TJ engines in revised cowlings drove four-bladed VDM-Dural propellers.
Maximum speed was 615km/h at 12,285 metres.
|
Planet Models' Ju 388L
In The Box |
I was initially surprised at the size of the box that arrived on my doorstep.
Surely this big 1/48 scale aircraft could not fit in a box this small?
It can!
My second surprise came when I opened the sturdy little box. Except for three
clear vacform parts, the kit is all-resin. I expected some photo-etched brass
for details.
A quick measurement confirmed that the kit is indeed 1/48 scale, although
references are ambiguous about some dimensions.
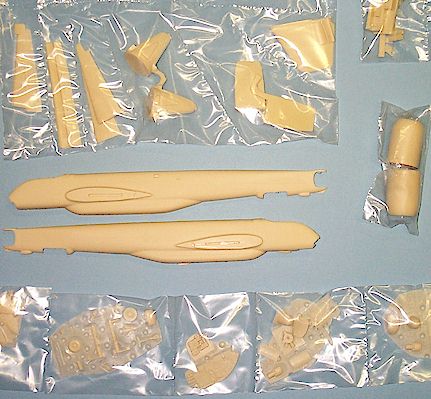
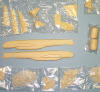
The kit comprises around 89 resin parts in lightweight, pale cream coloured
resin. Surface detail is recessed and very fine. The wings are particularly
impressive, but the fuselage surface detail is so fine that many panel lines are
almost invisible
Casting blocks are small and quality is very high. The main imperfection on my
model is a bubble on the top-rear tip of the rudder. No warping was evident
despite the long journey to Australia.
Click the thumbnails below to view
a larger image.
Use the "Back" arrow on your browser to return to this page.

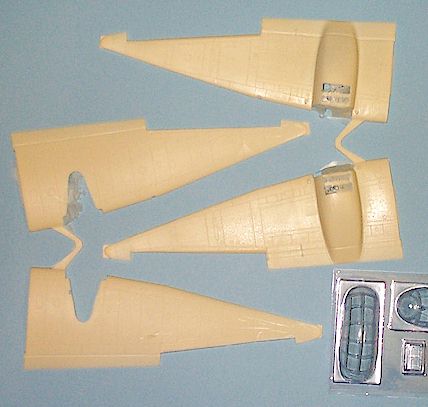
Parts breakdown is sensible. The fuselage and each wing are supplied in halves.
The wings feature an insert for the engine nacelle, indicating the possibility
of different versions in the future. Ailerons and elevators are supplied
separately but the flaps and rudder are fixed.
The relatively small number of parts and absence of photo-etch does not imply
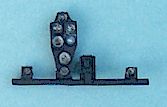
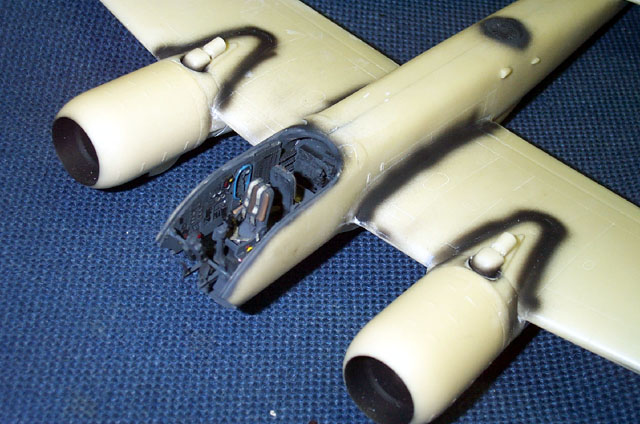
that detail has been skipped. The cockpit and wheel wells boast nice detail.
Harnesses are moulded on to the seats while sidewalls and the rear cockpit
bulkhead are appropriately busy. However, overall cockpit detail is a little
softer than we have come to expect from the top-tier of resin producers.
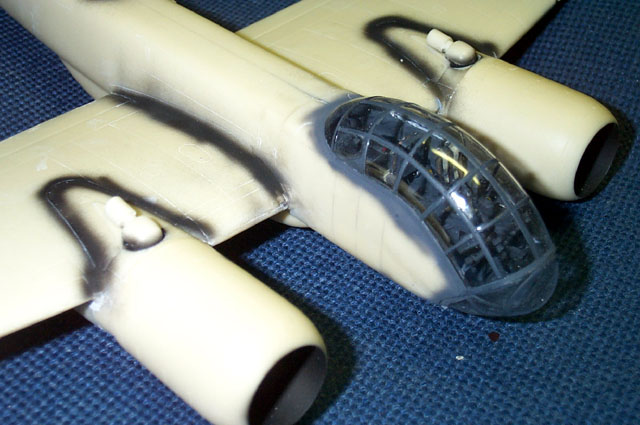
Clear parts comprise two parts for the big glazed nose and a window for the
cockpit floor. The vac parts are very clear but miss some of the prominent
circles on the glazing of the real aircraft. Two sets of clear vac form parts
are provided in case of problems.
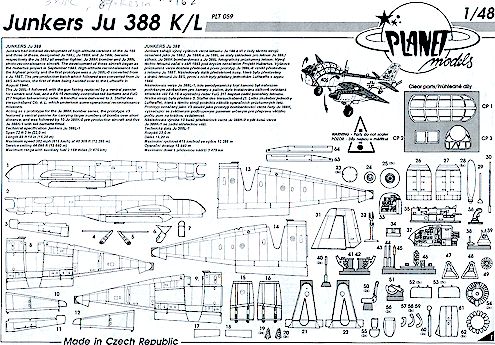
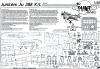
The instructions are simple but adequate. Three exploded-view drawings clearly
indicate the location of all parts.
Markings for one Ju 388L and one Ju 388K are supplied. Swastikas are present,
but split into two parts each.
Test-fitting is essential when building any limited run model. My first task
was to match the fuselage halves. To my horror, one fuselage half was 2-3mm
shorter than the other. I considered a number of remedies, including the
installation of a plug in the short fuselage half. In the end I decided to
simply trim one side of the mounts for the tail barbette.
There was also a step present on the bottom of the fuselage where the halves
met. This was eventually filled with Milliput, sanded and rescribed.
Some reinforcement of the main subassemblies was required. Locating tabs for the
wings are very shallow, and no locaters are provided for any of the tail
surfaces. I drilled holes in the tail surfaces, wings and fuselage in
preparation for the installation of brass locating spars.
With these initial preparations complete I commenced construction.
The cockpit was assembled and painted. I used Reheat instrument decals for the
small instrument panel and starboard sidewall. Lenses were drops of Krystal
Kleer.
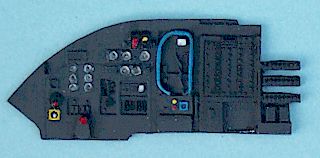
I thought the harnesses looked somewhat skinny, so I overlaid Reheat brass
photo-etched Luftwaffe Harnesses on top of the moulded-on kit parts. The
assembled cockpit tub was offered to the fuselage halves. I had to remove some
resin from the bottom of the tub to achieve a decent fit. I broke off one of the
delicate rudder pedal mounts while preparing the cockpit. This was the first of
about five times that one or both of these parts broke off. I would recommend
leaving the rudder pedal mounts off until immediately before the canopy is
installed.
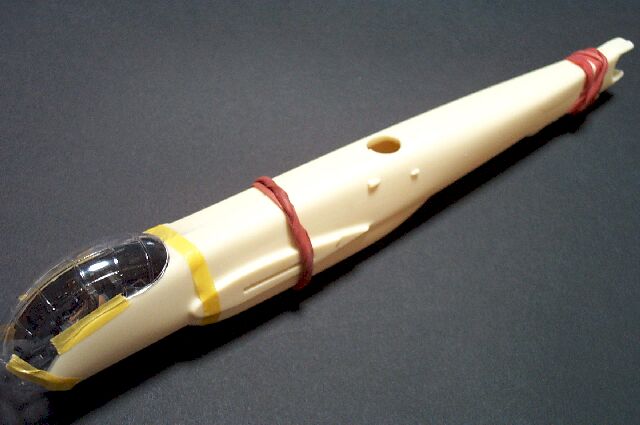
I glued the cockpit sidewall to the kit fuselage, added the rear bulkhead and
tub, and joined the fuselage halves using two-part epoxy glue. I secured the
fuselage with rubber bands while the glue dried.
I then assembled the wing and engine nacelle sub-assemblies. Removing the waste
resin from the wingtips of the model proved to be tricky, but the assembly of
these parts was trouble free and the fit was extremely good.
When the epoxy glue was thoroughly set, I filled the step on the lower fuselage
and trimmed the tail. I also painted the DF antenna on the upper fuselage before
adding a layer of clear epoxy cement to the top of the assembly. The epoxy was
intended to represent the clear lens over the top of the delicate circular
antenna.
Brass rod was inserted in the pre-drilled holes in the fuselage. The wings and
tailplanes were test-fitted and adjusted. A spot of super glue was applied to
the outer extremes of the joining surfaces of the wing, and two-part epoxy was
smeared on the larger area in between. The purpose of this two-glue strategy is
to “tack” the wings in place using the super glue, ensuring the correct dihedral
while the more robust (but slow-curing) epoxy glue dries.
The model was starting to look very much like a Ju 388! While the main airframe
was setting, I worked on the smaller details such as the propeller assemblies
and the undercarriage.
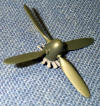 There
are no locating holes in the one-piece spinner to accommodate the propeller
blades. There are, however, dots marking where the holes should be. I drilled
these carefully using a pin vice and assembled the propellers using super glue (click
thumbnail at the right to view a larger image). There
are no locating holes in the one-piece spinner to accommodate the propeller
blades. There are, however, dots marking where the holes should be. I drilled
these carefully using a pin vice and assembled the propellers using super glue (click
thumbnail at the right to view a larger image).
I then assembled and painted the main gear. This is a big, heavy model. I was
worried that the main gear might not locate positively with the gear bay, or
that the resin gear may not take the weight of the model. My concerns were
unfounded. The undercarriage assembly has been well thought out and located
positively without any extra work. The main gear legs are reinforced with steel
rod (cast into the resin), so strength was not a problem either.
By far, the biggest challenge presented by Planet Models’ Ju 388 is the vacform
glasshouse. I packed the nose cap and main canopy transparencies with Blu-Tak,
then cut the parts free with a new Exacto blade.
The forward upper fuselage features a small raised ridge to help positively
locate the vac-form canopy, but there is no corresponding guide for the nose
transparency. The only suggestion I can make here is to test fit, then test fit,
followed by more test fitting. Fortunately, a second canopy is supplied if there
are fatal problems with the vac formed parts. I decided that the most complex
procedure would be matching the clear nose cap with the main upper canopy. In
order to simplify this operation, I glued these parts together using epoxy
cement before they were secured to the fuselage. This was fiddly but ultimately
successful.
The glasshouse was fitted to the fuselage using epoxy glue. The vac parts were
taped onto the fuselage while the epoxy dried.
I still had a few problems with gaps and poor alignment with the starboard
fuselage side. The gaps were addressed with plastic strip and putty, and I
sanded the fuselage side to improve its relationship with the canopy glasshouse.
In preparation for painting I filled the few remaining gaps (mainly around
the lower wing root and the joins between the engines and wing leading edges)
with Milliput, followed by sanding and rescribing as required. I sprayed the
filled areas with a dark colour to ensure that the repairs were perfect.
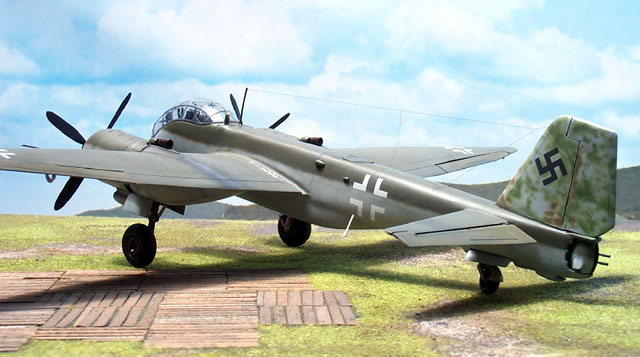
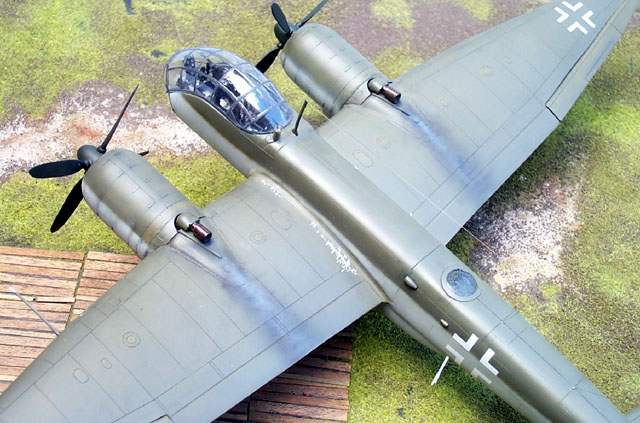
The paint schemes on the handful of operational Ju 388Ls were quite simple.
They appeared to be finished in RLM 76 lower surfaces, with a single solid
colour on the upper surfaces. The tail was sometimes painted with a large,
capsule-shaped mottle while others wore a more conventional mottle in two
colours.
As is my usual routine, I masked the canopy and pre-shaded the panel lines
using black Tamiya Acrylic paint.

I chose to finish the upper surface of my Ju 388 in RLM 83 Dark Green. The tail
was mottled in a combination of 83 Dark Green and 81 Brown Violet.
Planet Models' 1/48 scale Junkers Ju 388K/L is an ambitious model that stretches
the use of resin almost to the limit. There is no doubt that the very labour-intensive
production of this large kit contributes to its expense. Fortunately its high
cost is matched by its quality.
Having built one of Dragon’s 1/48 scale Junkers Ju 88G kits some years ago, I
can attest that this kit is actually easier to assemble than the
mainstream plastic kit.
Planet Models has since released the Ju 388J Night Fighter version of this
aircraft. Despite the hefty price tag, I snapped up that version too!
The Ju 388 will suit anyone who has some experience building resin kits. If you
have always wanted to build a 1/48 scale Ju 388 and money is not an issue, this
is the model for you!
Click on the thumbnails to
enlarge.
Use your browser's "Back" arrow key to return to this page.
[../photogallery/photo27439/real.htm]
Model, Images and
Article Copyright © 2001 by Brett Green
Page Created 14 August 2001
Last updated 04 June 2007
Back to HyperScale Main Page
Back to Features Page |
 Home
| What's New |
Features |
Gallery |
Reviews |
Reference |
Forum |
Search
Home
| What's New |
Features |
Gallery |
Reviews |
Reference |
Forum |
Search