|
Junkers Ju
52/3m
by
Ian Robertson
|
|
|
Junkers Ju 52/3m |

Revell-Monogram's 1/48 scale Ju 52/3m is available from
Squadron.com
Believe it or not the Ju.52, which first flew in 1930, was originally
designed as a single engine civil transport. The design was soon
modified to include a total of three engines, hence the designation
Ju.52/3m (driemotoren, or three motors). A military version produced
in the mid 1930s saw action as both a transport and medium-bomber
during the Spanish Civil War. Although an excellent transport
aircraft, the Ju.52/3m was ill-suited as a bomber and was soon
replaced in this role by more specialized aircraft. During WWII the
Ju.52/3m, nicknamed "Tante Ju" by the Germans and "Iron Annie" by the
Allies, served in all fronts as a versatile and reliable transport of
both men and supplies.
The Ju.52 was never at the top of my "wish list" for 1/48 kits.
Let's face it, this aircraft would not even place in a beauty contest!
However, the Pro-Modeler Ju.52/3m kit that debuted in 1999 is by all
accounts a winner. When I first opened the box I was struck by (1) the
sheer size of the aircraft and (2) the incredible detail and crispness
of the parts - particularly the distinctive corrugations on the wings
and fuselage. To tip the balance in favor of the kit even more, it was
surprisingly affordable by today's increasingly expensive standards.
This model will add character to any WWII collection, and be assured
that it will crowd all but the largest model shelf.
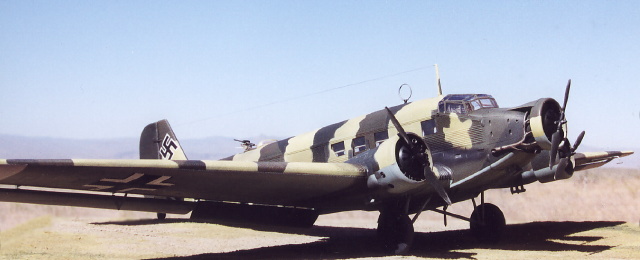
After purchasing the kit I was stumped when it came to a color scheme.
I toyed with the idea of a Legion Condor scheme or a winter Luftwaffe
scheme, but when Third Group decals came out with a stunning set of
markings for a yellow-striped Mediterranean transport hack (4U+NH) my
mind was made up.
Once I was set to tackle this project I had a decision to make
regarding camouflage colors. Third Group's instructions called for a
highly unorthodox scheme of RLM61/62/69/75. This translates into dark
brown (61) / green (62) / yellow-sand?(69) / over light blue (75). My
doubts about this scheme were raised further when several Hyperscale
contributors provided me with a scanned image of the color photograph
that Third Group cites as their reference for this aircraft (from Ries
1972, Markings and Camouflage Systems of Luftwaffe Aircraft in World
War II, Vol. IV). After helpful discussions with Steven Eisenman
(a.k.a. Steven-Modeldad) I opted for the more likely color scheme of
RLM70/71/65 with Italian yellow stripes. Based on the reference photo
I believe this is a more justified interpretation of colors,
especially since most Ju.52s in Luftwaffe service wore the standard
RLM70/71/65 splinter scheme. The yellow stripes were likely a field or
hangar modification once the aircraft reached the Mediterranean
theatre.
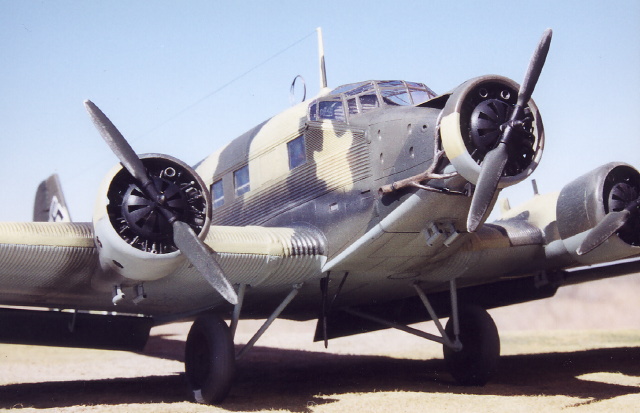
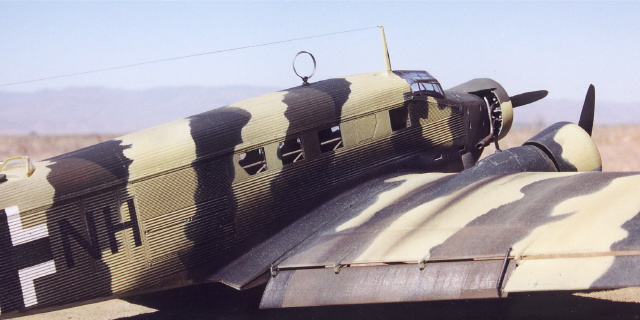
Despite its large size and detail the kit is easy to build. I made
only four minor modifications to the kit. (1) 4U+NH had a fairing
above the nose engine to protect the windshield against oil spray (at
least I believe that was its purpose). Third Group fails to mention
this modification, but it is clearly present in the reference
photograph.

I fashioned the fairing from a piece of evergreen sheet styrene.
(2) I replaced the plastic loop antenna behind the cockpit with fine
wire. (3) I deflected the horizontal control surfaces on the tail. (4)
I dropped the "flapperons" on the wings. Ah yes, the flapperons. A
word of advice: Add them after construction is complete. If you add
them earlier, as indicated in the instructions, you will break them
off time and time again. Trust me!
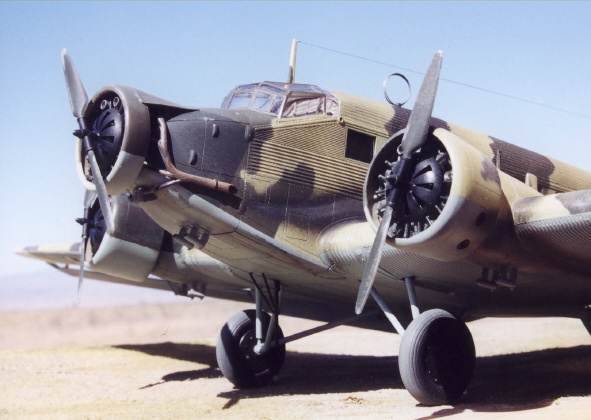
Almost all painting was done using Polly Scale acrylics. Interior
sections were painted RLM02 and then weathered with chalk pastels. SNJ
aluminum metalizer powder was rubbed sparingly with a cotton swab
(Q-tip) on the floor panels to simulate scuffed surfaces. The white
bands on the fuselage, horizontal stabilizer, and underside wing tips
were applied and then masked until the rest of the camouflage was
complete. I painted the model a standard RLM70/71/65 splinter scheme
starting with the RLM65 underside. Using paper masks I then applied
stripes of Italian Camouflage Yellow (diluted 25% with Light Gull Grey
for a faded effect) over the upper surfaces. Only the right fuselage,
tail and wing of the aircraft are visible in the reference photograph
- the rest of the camouflage scheme was left up to my imagination. Any
similarity between the yellow patch underneath the left side of the
cockpit and a map of Italy are purely coincidental.
The model was treated with a coat of Future prior to addition of the
decals. I had considerable trouble getting the larger decals to settle
into the corrugations on the fuselage and wings, even with Micro-sol
and Super-sol decal solvents. In the end it worked out to my
satisfaction (read - I gave up and moved on to weathering). After a
second coat of Future I applied a dull coat of clear lacquer.
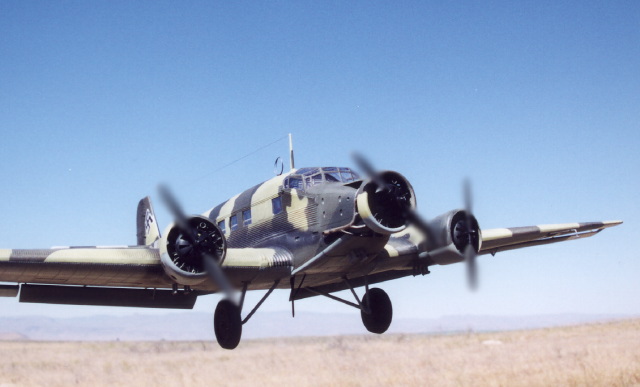
To weather the model I started with an uneven application of highly
thinned light brownish-yellow paint (Israeli khaki + Italian
camouflage yellow) to create a faded dusty appearance. Chalk pastels (ochres
and browns) were used to further this effect, particularly on the
wings and over the decals.
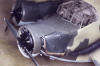
The exhaust pipes were painted metallic grey (Tamiya XF-56 acrylic)
and then brushed with orange-brown chalk pastel. Exhaust stains were
sprayed on using highly thinned black paint. Grey chalk pastel was
added by brush to the fuselage exhaust stains.
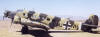
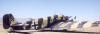
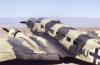
The outdoor photographs were made with a manual 35mm camera and
35-80mm lens, 200 ASA film, tripod, and a shutter release cable (to
avoid shaking the camera while using slow shutter speeds and high
F-stop).
In the background are the Owyhee Mountains south of Boise Idaho.
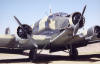
The close-up photograph of the nose and cockpit was made using a macro
lens with a mounted ring flash.
Thanks to Kent Eckhart (IPMS Boise - MadDog Modeler), Doug Fritz,
and Steven Eisenman for their helpful suggestions and reference
material.
Model, Images and Text Copyright © 2001 by
Ian Robertson
Page Created 02 August, 2001
Last Updated
04 June, 2007
Back to HyperScale Main
Page
Back to Features
Index
|
 Home
| What's New |
Features |
Gallery |
Reviews |
Reference |
Forum |
Search
Home
| What's New |
Features |
Gallery |
Reviews |
Reference |
Forum |
Search