|
Junkers
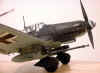
Ju 87G-2 Stuka
by
Clint Hill
|
|
|
Junker Ju
87G-2 Stuka
|

Hasegawa's
1/48 scale Ju 87G-2 Stuka is available online from Squadron.com
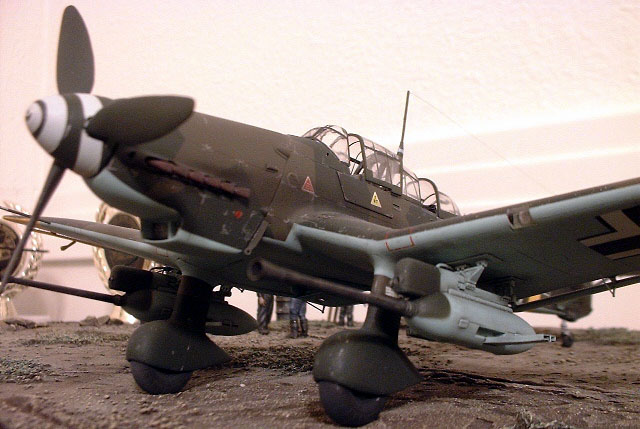
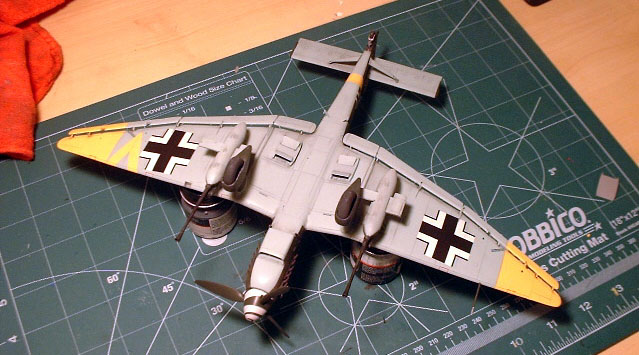
The last of the line in the Stuka family, the G series mated two
37mm anti-aircraft flak cannons to the D series airframe. This
arrangement produced the heaviest, slowest and least maneuverable
variant of the Stuka, but in the hands of pilots like Hans Rudel
became one of the most deadly weapons on the eastern front able to
take out virtually all Russian armor it encountered.
I have always liked the G-2 Stuka. There is just something about
two giant cannons slung under this already gruesome looking aircraft.
After I read a short construction article in Tamiya Model Magazine I
decided to tackle the project.
Hasegawa's
1/48 Scale Ju 87G-2
|
Hasegawa has always produced some of the best kits around and this
kit is no exception. Although the kit is well detailed I decided to
add a little extra, so I ordered the Eduard photo-etch cockpit detail
set for the Ju-87 G-2. Since I knew it would take a week or so to get
the detail set in I decided to start on the wings and that is were the
trouble started!
First Hasegawa has decided to model the aileron and flap actuators
as very unrealistic triangular blocks. To get rid of these I carefully
cut of the ailerons and flaps and put them aside. Then I cut off the
triangles and cleaned up the area with files and sanding pads. I was
planning on replacing the actuators with stretched sprue and styrene,
but Eduard provided excellent replacements on their fret, which I
glued on toward the end of construction.
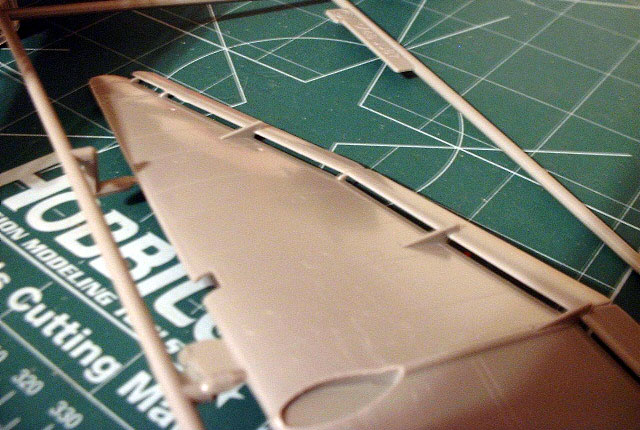
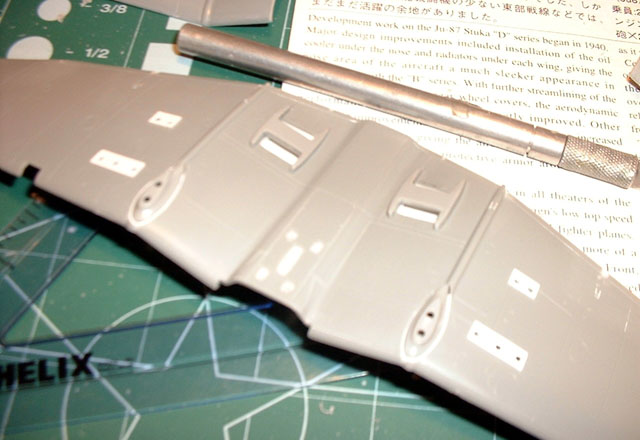
I next turned my attention to the outer wings. Instead of remolding
the entire wing for the later D and G series, Hasegawa decided to mold
on an extension to the outer wing. This is by far the biggest problem
with the kit. There is a noticeable step where the old and new molds
meet. This will require you to cut, sand and rescribe the area. It
took me a lot longer than I thought to get it to look right and if you
look closely you can still see a bit of a wave where the joint was.
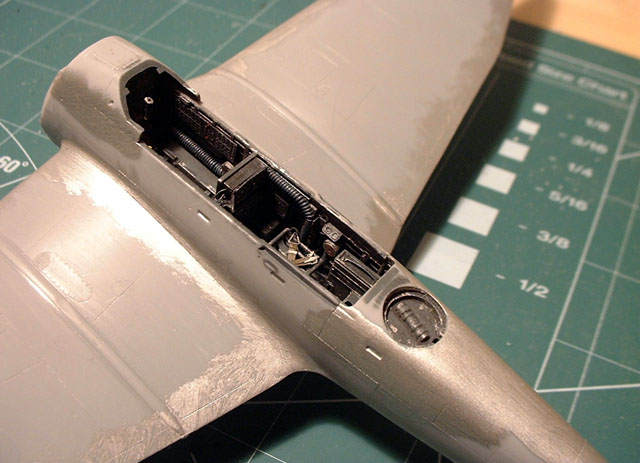
Next it was time to do something about the radiators. Hasegawa has
provided two rather thin looking radiator housings that just sit on
the wing and I thought I could add to this detail. I first cut out the
wells where the radiator assemblies go, and then I boxed them in using
thin styrene. Don't make the radiator boxes to thick or you will not
be able to glue the wing halves together later (trust me). I
then made some radiators using brass screen I found at the craft store
and styrene strips.
About this time I received the Eduard set in the mail and to my
surprise they had included all of the radiator modifications that I
had just completed (Murphy's Law). Eduard also provided replacements
for the retractable radiator flaps, which were a perfect fit once I
cut off the old ones.
I then turned my attention to the wheel pants. I had previously
built the earlier B-2 version and the fit was so perfect I didn't need
glue for the fairing that joins the pants to the wing, not so with
this one. There was a HUGE gap between the fairing and the wing. I
added some styrene shims and some gap filling supper glue and
proceeded to sand and file until I was satisfied with fit. Next came
the cannons.
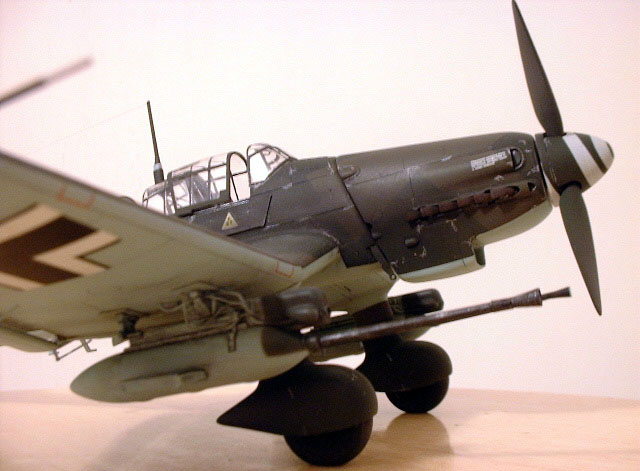
The Hasegawa kit that I bought was a limited run kit that included
Jaguar replacement cannons in resin plus brass gun barrels.
 After
much fiddling and dry fitting, I decided to use the plastic kit
supplied main body and the brass gun barrel with the resin mussel
flash suppressors. I then added the necessary tubes and wires needed
to heat cool and charge the cannon. I used florist wire from the craft
store and copper wire from an old extension cord. I then drilled tiny
holes with my pin vise in the underside of the wing so that the cannon
wires and tubes would have some place to go. All that was left was to
make thin plates of styrene where the cannon would attach to the wing.
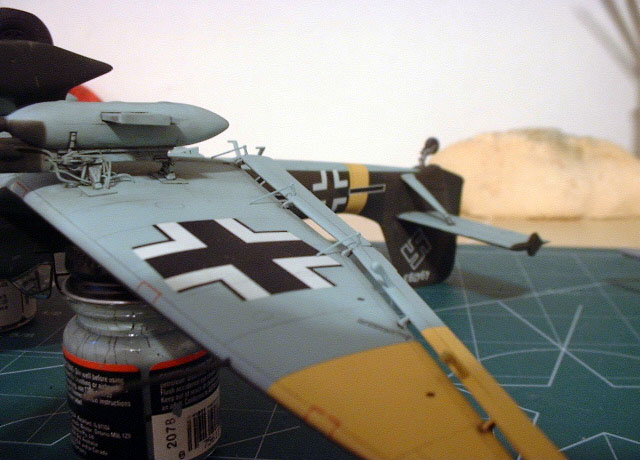
I waited until after painting to install the cannons. After
much fiddling and dry fitting, I decided to use the plastic kit
supplied main body and the brass gun barrel with the resin mussel
flash suppressors. I then added the necessary tubes and wires needed
to heat cool and charge the cannon. I used florist wire from the craft
store and copper wire from an old extension cord. I then drilled tiny
holes with my pin vise in the underside of the wing so that the cannon
wires and tubes would have some place to go. All that was left was to
make thin plates of styrene where the cannon would attach to the wing.
I waited until after painting to install the cannons.
Now that the wing was mostly finished I could start on the front
office of the airplane. I don't know about you, but I feel like I
could build cockpits for a living. The Hasegawa cockpit is very good
and with creative painting could look very sharp with out any
additions, but I have never been able to resist adding at least
something in that small space. I replaced the instrument panel with
the photo-etch and acetate that Eduard provided and I also replaced
the rear cockpit radios, gunner's seat, rudder pedals and ammo boxes.
I then added various control boxes and various wires to the sidewalls
and radio gear.
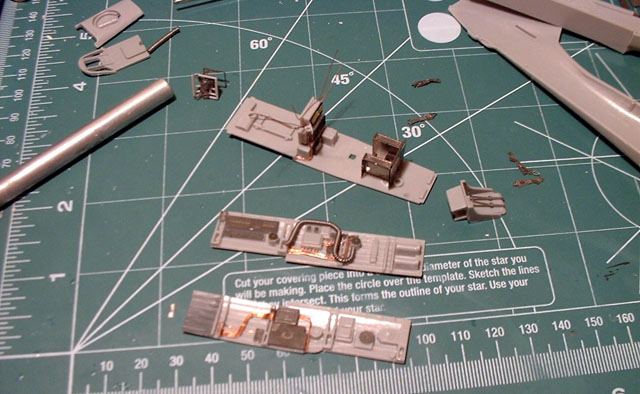
After all of the photo-etch, styrene and wire was added I then
painted the entire cockpit Model Master RLM 66. After drying overnight
I dry brushed the cockpit with light gray and silver then I added a
wash using artist oils. The sidewalls in the rear don't fit as well as
hoped and there is a noticeable gap. I added a bit of styrene to cover
over the gap and it makes a world of difference. I also replaced the
kit supplied rear machine guns with an Aires piece I found in the
spares box.
After I finished with the cockpit things started to speed up. I
then glued the wings together and the wings to the fuselage. After all
of the big stuff was together I filled any gaps with gap filling super
glue. To check seams I brush on a little silver paint. The silver
shows everything and its works great to spot check areas and seam
lines as you go. I then needed to rescribe some areas that had been
sanded heavily. To scribe panels I put a needle in a model knife
handle where it sticks out about ¼ of and inch and use label tape
from a label gun as a guide. Two passes are all that is needed. Once I
was satisfied with everything I gave the model a final go around with
the extra fine grit pads and washed the model to get rid of finger
print oils and other residue.
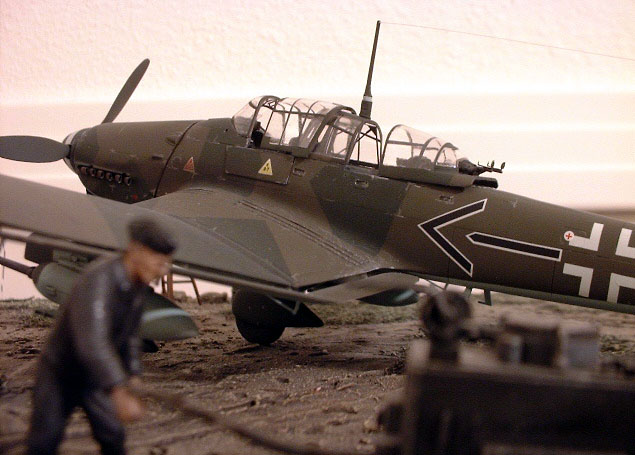
I now was ready to lay down some paint. I started with Model Master
RLM 4 yellow. After the yellow areas had dried I masked them of with
Tamiya modeling tape and them preshaded dark brown on the panel lines.
I then sprayed RLM 65 on the under surfaces trying not to cover up the
preshading entirely.
After all had dried for about a week (Business Trip) I switched to
Polly Scale Acrylics for the RLM 70 and 71 top colors. Most of the
time I try not to mix acrylics with enamels, but the Polly Scale RLM
70 and 71 are a must closer color match than Model Master and if you
make sure everything is good and cured you shouldn't have a problem.
After I resanded and touched up a few spots I laid down a coat of
future floor wax.
I used the kit decals because there are not a whole lot of options
anyway. I thought that the decals were a bit on the thick side and I
had real trouble with the prop spiral ( I think I might try and paint
the spiral later). Everything went down with some Micro Set and Sol.
Once the decals were dry I hit the model again with a one more coat of
Future.
My favorite aspect of modeling besides cockpits is weathering. I
think weathering is the only way to really make a model look like an
actual aircraft. I first mixed up a batch of Burnt Sienna and Black
artist oils thinned down with turpentine. I went over all of the panel
lines and access panels with a thin brush. When that had dried for
about 15 to 20 minutes I wiped off the extra with an old white cotton
t-shirt in the direction of airflow and blended it in.
Next I dry-brushed some of the high spots with lighter shaded of
the base coat.
I then used a silver pencil to add paint chips to the worn areas
around the cockpit and engine, and the leading edged of the wings and
stabilizers.
I sprayed the entire model with Testors Dull Coat to seal
everything and to give the pastel chalk something to grab a hold of. I
used an old brush and cotton swabs to add artist chalk exhaust stains
and gunpowder stains to the model.
I finally added all of the tiny pieces unmasked the canopy and
added the aerial antenna to finish her off.
I enjoyed building this kit and someday I might get around to
building another one. I spent about three months on it, which is about
average for me. Until next time!
Click the thumbnails
below to view the images full-sized.
Use your browser's back arrow to return to this page.

Model, Images and Text Copyright © 2001 by
Clint Hill
Page Created 15 June, 2001
Last Updated 04 June, 2007
Back to HyperScale Main
Page
Back to Features
Index
|
 Home
| What's New |
Features |
Gallery |
Reviews |
Reference |
Forum |
Search
Home
| What's New |
Features |
Gallery |
Reviews |
Reference |
Forum |
Search