Home
| What's New |
Features |
Gallery |
Reviews |
Reference |
Forum |
Search
Home
| What's New |
Features |
Gallery |
Reviews |
Reference |
Forum |
Search
|
|
|
Messerschmitt Me 410B-2/U4 by Yves Fournier
Here is the Revell boxing of a Messerschmitt Me 410B-2 in 1/48 scale. The 1/48 scale Revell and ProModeler kits are identical except for the armament options. In Canada the Revell kit sells for about half the price. The ProModeler instructions are much better but if you do your homework concerning references, they will not tell you anything you do not know already. Unless you want to build a version only found in either kit, the Revell kit is your best bet.
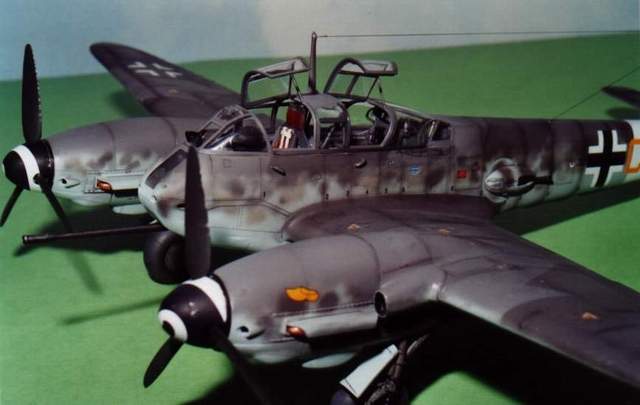
After reading in HyperScale about the setbacks of both the CMK and Aires detail sets, I decided to approach the cockpit straight from the box. A close look at the parts also helped convinced me to save my hard earned dollars. The tub and sidewalls were painted overall Aeromaster RLM66 Dark Gray, instrument panels were drybrushed white, the cockpit floors and sidewalls were drybrushed silver. Throttles, knobs and buttons were painted the usual green, red or yellow as per the references. Seats and armrests were painted a brown leather color and drybrushed white. The gunsight, braces and pilot`s headrest were painted but not installed until the kit was complete.
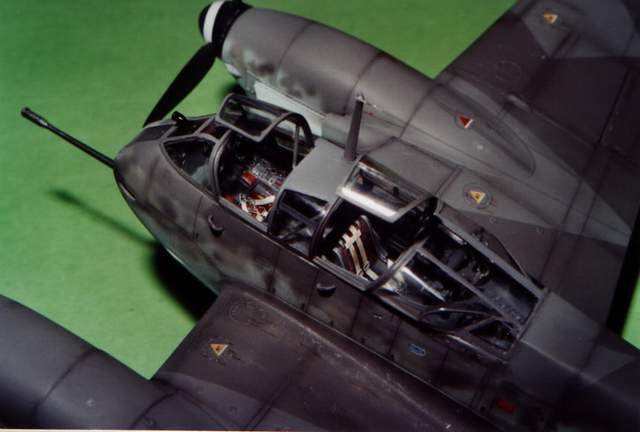
Fitting the complete cockpit assembly together must be done very carefully with a lot of dry fitting on the fuselage sidewalls before gluing. If not glued properly to the sidewalls, the canopy will tend to wrap the fuselage out-of-shape when the two fuselage halves are joined, be careful ! I joined the fuselage in steps, starting from the vertical stabilizer and working my way to the front. Using Tenax 7R, I glued the vertical stabilizer halves, let it cure, then re-applied glue on the top and bottom of the spine all the way to the side gun turrets. At this point you must decide which gun pack armament you want to install. It is essential to align the lower nose cover correctly in order to get the two fuselage halves together properly. Note that I decided not to install the BK5 gun in my lower nose cover at this point figuring I could do it at the very end. It's also nice not to have it in the way! A good measure of success to see if the cockpit halves are joined correctly is the fit of the front window (part #90). It should fall into place perfectly ! The side gun turret holes were what I used to hold the kit with my fingers or with the but end of a large round paint brush for the entire construction, painting, decalling, and weathering. The gun turrets were the last pieces to be glued to the kit.
Wing and radiator assembly is straightforward. I decided not to glue the nacelles on the wing until after painting to ease the mottling (painting) of the front fuselage. Assembly of the wings to the fuselage was a little tricky. Having decided to hide any seam along the wing root, a lot of puttying and sanding was required. One must be careful not to sand away any of the raised details (and recessed ones also for that matter). I decided to glue the horizontal stabilizers first, making sure they were at the correct angle with the vertical tail. Once this was done, I used the horizontal stabilizers as my reference for the angle of the wings.
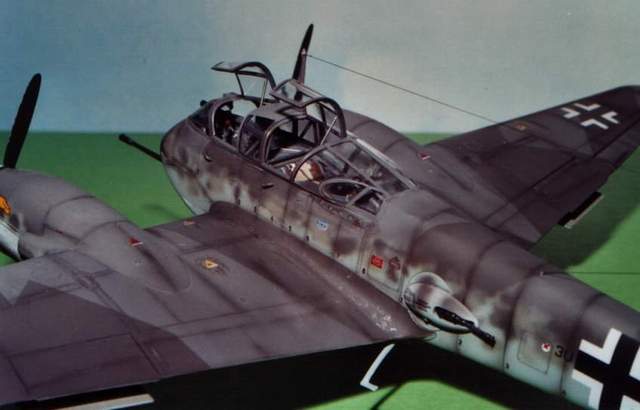
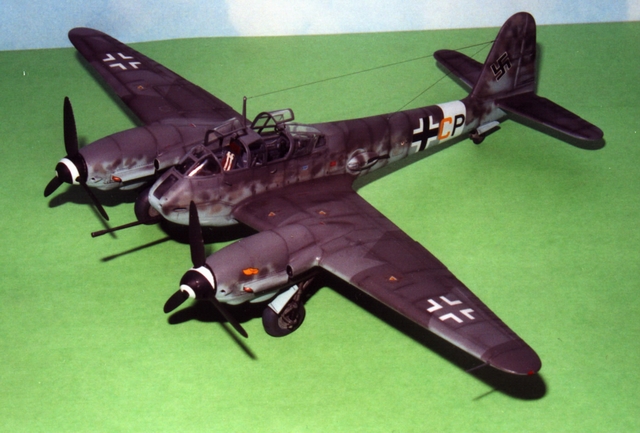
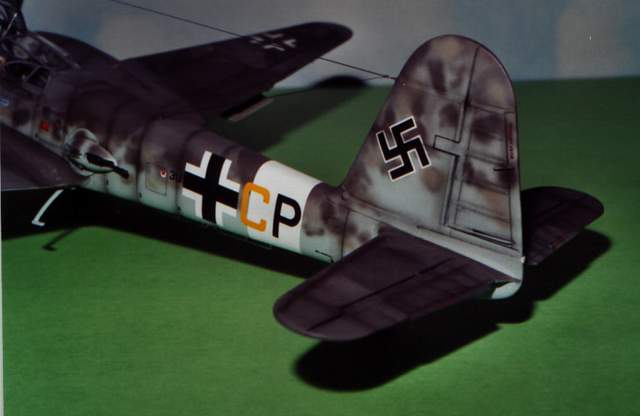
The first things to get painted were the wheel wells, radiators, landing gear struts, and doors. All of this was sprayed Gunze RLM02 Gray-Green. With the wheel wells, cockpit and front window masked off (Bare-Metal foil for the front window works great, also note that for the U4 version, the lower part of the front window is painted over), I started by painting the underside RLM 76 Lichtblau from a mixture of Tamiya paints. The Monogram Painting Guide to Luftwaffe Aircraft is an excellent reference for color accuracy. It is now out of print, but ask around, you never know who might have one in his closet. The splinter camouflage on the wings and fuselage spine was applied using Gunze colors RLM 74 Graugrun and RLM 75 Grauviolet. Fuselage sides were mottled using these two colors as well as RLM 02 Gray-Green. Mottling was done using the finest tip of the Aztec airbrush. This was my first attempt at mottling, and I found that, as with most of everything, practice makes perfect. The nacelles were then glued in place. Careful sanding and paint re-touching was needed here. Study real aircraft photographs carefully to figure out how the mottling effect should come out. The Germans seemed to favor relatively broad coverage for their "mottles", making it difficult to discern the different mottling colors when viewed from anywhere but very close to the aircraft. This is what I tried to achieve (Just one man's opinion !) I airbrushed a coat of Tamiya gloss clear then laid down the Aeromaster decals with the stencils from the kit decals. The aircraft is from 6./Zerstörergeschwader 26, Hildesheim, Germany, 1944. A final coat of Aeromaster flat sealed off everything. I find that if you spray flat acrylic clear coats too thick over gloss or semi-gloss acrylic paint, it will crack after drying. If not too deep, these cracks will disappear when further coats are applied. The best way to avoid this was to spray the flat coat "dry" which means it dries instantly when reaching the model. I weathered the kit using water based acrylics flowed into the panel lines, metal scuffing around some panels and walkways, oil and fuel stains at strategic locations. Gun stains and exhaust stains were made using dry pastels, panel lines were also accentuated using dry pastels.
The cockpit masking was removed and the remaining bits attached to it. In the meantime, the canopy halves were joined, (a major project in itself) masked with EZ-Masks and painted. The ZFR 4a gunsight was attached to the front window which was glued in place using white glue. The landing gear, radiator covers and various other bits were installed as well. Surgery had to be performed on the rear gunsights to make them fit under the canopy. The canopy was glued to the fuselage using white glue. Cockpit side grab handles were found in the spares box and glued as well as braces for the open hatches of the canopy. The propellers were painted RLM 70 Schwarzgrun, the spinners flat black. The assemblies were then attached to the nacelles. The wing pitot, aileron counterweights and the wing step were glued and the stretch sprue antenna glued in. Lastly, the side gun turrets were installed.
This was my first foray away from modern jets in over 20 years of modelling. I must say, I have enjoyed it thoroughly (to the dismay of many of my modeller friends !!). Kits of this quality are a joy to build and affordable when compared to some Japanese makes.
The challenge of a Luftwaffe mottled camouflage scheme is a test every serious modeller should attempt at least once. The diversity of aircraft and paint schemes of Luftwaffe modelling is very appealing. This will not be the last one for me… My thanks to all my friends who helped me with this kit:
Click the thumbnails below to view
the images full-sized.
Model, Text and Images Copyright © 2000 by Yves
Fournier
|