Home
| What's New |
Features |
Gallery |
Reviews |
Reference |
Forum |
Search
Home
| What's New |
Features |
Gallery |
Reviews |
Reference |
Forum |
Search
|
|
|
MiG-15 By Jimmy Cancino
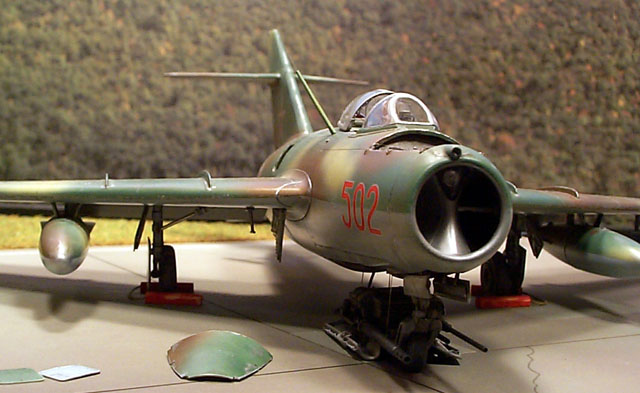
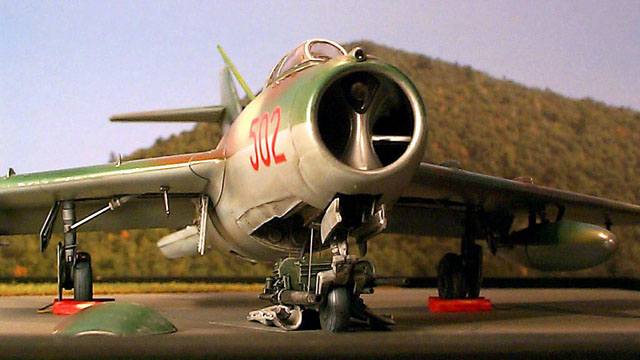
When Tamiya released their 1/48th scale Mig-15bis kit I just knew that I had to build one . It is an excellent kit with superb engraving and impeccable molding. The tail section is removable, revealing a very nice multi-piece engine. A color profile in Squadron's "Mig-15 in action" inspired me to build a fully detailed Hungarian version. Murphy's Law Footnote: this project was completed before Aires announced a full resin detailing kit to dress up the Mig-15!
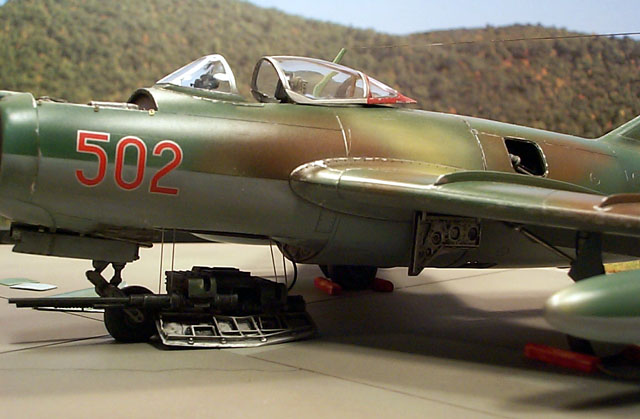
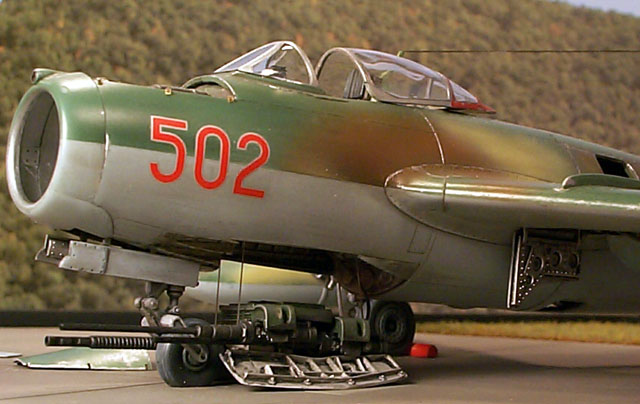
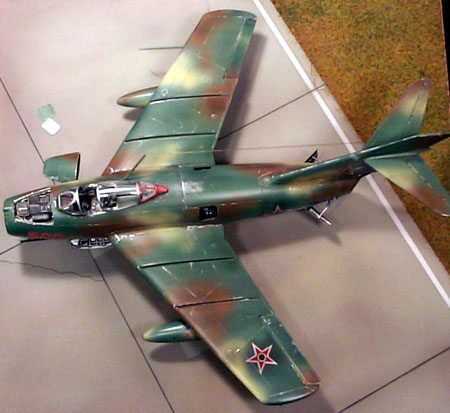
The first step was to make a list of commercially available upgrades. Eduard made a sheet of photoetched parts and True Details supplied the resin cockpit and the bulged wheels. A resin gun pack was also available from KMC along with resin control surfaces. Decals would have to be homemade. Planning the changes and improvements came next. After closely examining the kit along with reference photographs an action list was created. The aircraft would be displayed with the tail section installed so as not to break-up the overall lines of the plane. The engine would be fully detailed and viewable through four open access panels in the tail section. The gun pack would be lowered to the ground, the flaps deployed and the speed brakes opened. The forward avionics bay would also be displayed open. I would also need to scratchbuild new wheelwells, speedbrake wells, gun bay compartment with winch system and of course avionics compartment.
Getting construction underway, the kit's speed brake wells were cut out of the fuselage halves and rebuilt using 0.020" styrene sheet. Ribs were made from Evergreen styrene extrusion to match reference photos. The speed brake doors from the Eduard sheet were then assembled and dry-fitted. New speedbrake actuators and their associated plumbing were then fabricated from styrene rod and piano wire.
Next up was the cockpit. The True Details unit is very nice indeed. Excess resin was ground off to reduce floor thickness and the rest was pretty much left as is. I elected to use the Eduard instrument panel, as the film type instrument faces were more convincing than the True Details resin panel. The basic interior color is a custom mix resembling light gull gray mixed using ModelMaster enamels. The intake surfaces were then smoothed out and ejection pin marks filled-in. The forward avionics compartment access panel was cut out from the individual fuselage halves and the walls thinned-out. The compartment floor and bulkheads were the fashioned from .015" styrene sheet and the fuselage halves were joined at this time. The avionics boxes and oxygen bottle were then made from styrene extrusion according to reference photographs and test fitted. Wiring harnesses were fashioned from DetailMaster 0.015" white detail wire. The wheel wells now were in for the treatment. The bottoms and ribs were cut out and replaced with the Eduard units. Lightening holes were also drilled in the forward and inboard partitions before joining the wing top and bottom halves . Hydraulic plumbing for the retraction actuators and brake system were then fabricated out of .010" stainless steel hardwire and splitter valves were carved out of styrene. The wing-mounted fittings for the gear retraction cylinders were also added at this point from leftover photoetched brackets from another project. The wheel well compartments were then painted aluminum using ModelMaster Metalizers. The ailerons were cut off the wings and the wing halves were joined. The resin ailerons were cleaned up and set aside to be painted separately. The kit's flap well was dressed up with a few additional structural members made from 0.010" styrene sheet and the Eduard photoetched flaps were assembled using extra thin CA glue, to be installed on the wing after paint. The flap compartment and flap inner faces were also painted Testors Metalizer aluminum. I then detailed the gun pack compartment. Ribs and doublers were fabricated from styrene. The forward and aft torque tubes for the winch system were made using several sizes of contrail "thin wall" plastic tubing and K&S brass rod. The gun pack itself is the excellent Kendall unit and was built as supplied. The compartment was then painted using aluminum.
The wings were attached at this point in preparation for painting. The engine was the next undertaking and turned-out to be a model in itself. The Klimov VK-1 engine was a Soviet built copy of the Rolls-Royce NENE engine, so it was relatively easy to find detail photographs to work with (thanks to the internet!). First, the molded screen-like intake grill was cut out thus separating the front of the engine along with the accessory gearbox from the rest of the engine. To keep all components in proper alignment, a 0.050" hole was drilled through the main components so a brass rod could be inserted through the engine to keep things aligned. Based on reference photographs, a new inlet plenum and venturi was fashioned from styrene and a thin-mesh photoetched screen was fitted to cover the inlet. All the engine accessories received additional scratchbuilt details including fuel injector lines. The engine and the fuselage bulkhead both received a full plumbing and wiring treatment. To get a view of the engine once the tail section was installed (although quite a limited view) four access panels were cut out at the forward end of the tail section following the kit's engraved lines. A flange was then made from .010" styrene all around the opening. The excellent fit of the main components meant that virtually no filler was needed before painting.
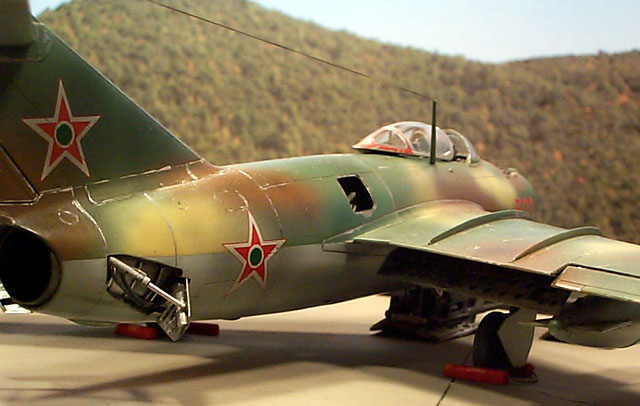
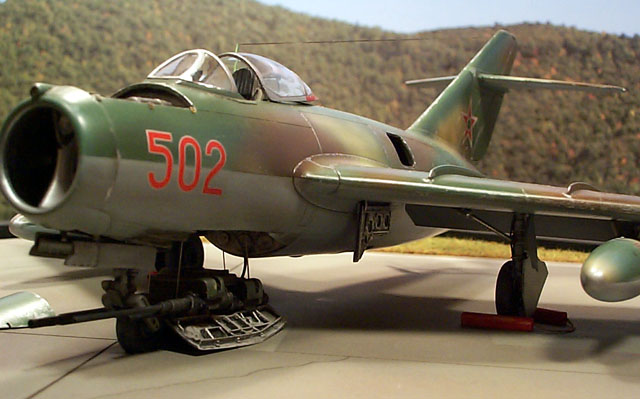
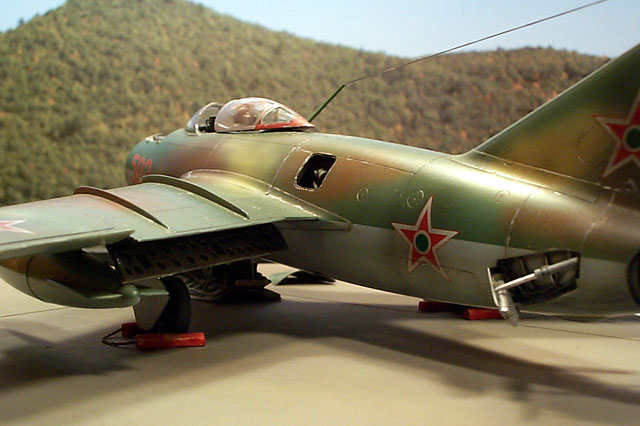
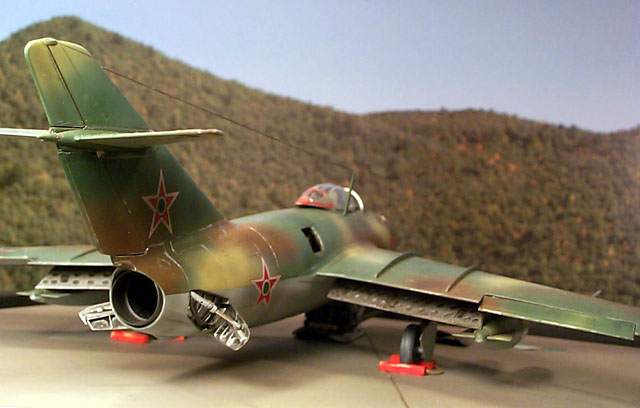
I elected to paint the model using my old favourite Testors' ModelMaster enamels. The actual colors were custom mixed to match the color profile in Squadron's "Mig-15 in action" book. This profile turned out to be my main color reference since I could not find any good color photographs of camouflaged Hungarian Migs. The Hungarian stars were made from Cutting Edge decals' Soviet stars with The white and green center disks punched out of colored trim film and applied separately. The nose numerals are also Cutting Edge items. Chipped paint was the simulated using Tamiya enamel flat aluminium XF-16. (for that oxydized look) Panel lines were then highlighted using a wash of dark gray/brown artists oils in Weber & Costello "no odor" thinner. I find this thinner great for washes especially on enamel based paint jobs since it is not very strong. However a coat of acrylic clear flat is always a good safeguard against "Eat throughs". The decals were then applied using the time honored technique of "Microset under / Microsol over" The aircraft then received a good dusting of Aeromaster acrylic clear flat.
The True Details resin main and nose tires were drilled and tapped to accept "1-72" screws from Woodland Scenics as was the gun pack.
The tarmac is Evergreen 0.060" styrene engraved and textured to resemble typical concrete slabs. It was then mounted to the wood base and drilled from underneath using a paper pattern made from the models tire and gunpack centerpoints. The gunpack's "winch-up" cables were then attached to the gunpack. I used fine elastic thread painted steel to simulate these, as I needed the cables to be taut between the pack and the aircraft. The whole assembly was then screwed to the base. Here you have it … one Mig to go ! Now let's check out this Sturmovik!
Click
on the Thumbnails to view images full sized.
Text, Models and Images Copyright © 2000 by Jimmy
Cancino
|