|
MiG-29 UB in 1/32
Scale
by
Frank Mitchell
|
 |
|
MiG-29 UB |

HyperScale is proudly sponsored by
Squadron.com
There has been some talk of late about the 1/32
scale Revell MiG -9 kits and the problems with their engine
exhausts. I thought it might be of interest to some modelers to
hear about my trials with these kits and see how I attacked the
problems.
Several years ago, I built the 1/32 scale single-seater, and
even went so far as to make a mold for a new nose. However, I
did nothing to the significantly undersized engine/nozzle area,
which bugged me every time I looked it. Eventually, it bothered
me to the point that I stripped that model for its usable parts
and decided to tackle a MiG 29 UB.
Although the engine problem was said to have been fixed on the
UB kit, I found that was not the case. I should underline that
my conclusions about the changes on this model are based on my
interpretations—your mileage may vary.
After staring at all my references (there is a bunch out there)
and scaling up several sets of plans, I came to the conclusion
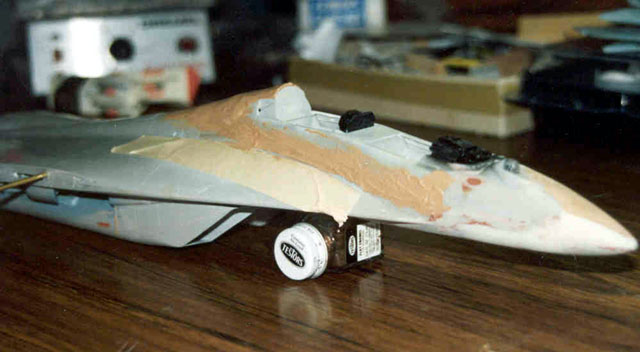
that I could use 35mm film cans as the basis for the nozzles.
That meant that I would have to build up the lower fuselage area
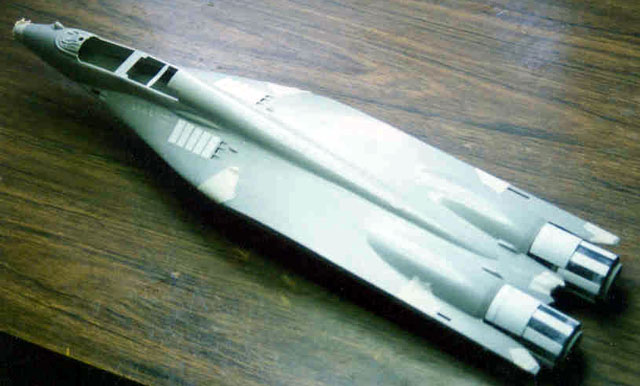
to match that diameter. I found that I could use the kit nozzles
for the inner sets on the modified engines. The nozzles also
needed to be extended in length. Most of the work would be on
the bottom fuselage half; the top bulges appeared to be
reasonably good, only some matching of curvatures being
required.
I first heated and smashed some styrene around the film cans and
simply tacked those in place on the bottom fuselage half. When
adjustments were made so that everything lined up to my
satisfaction, the plastic was firmly glued in place and faired
in with epoxy to meet the kit engine contours farther up the
fuselage and to meet the new nozzles at the proper angle.
The pictures below show the basic structure when roughed in and
when later smoothed off with epoxy:
Click the
thumbnails below to view larger images:
[../photogallery/photo12586/real.htm]
 Once
all that work was done and the areas re-scribed, I started on
the interior. Lots of scratch-building was required, but I did
add two K-36 resin seats, which helped a lot. Once
all that work was done and the areas re-scribed, I started on
the interior. Lots of scratch-building was required, but I did
add two K-36 resin seats, which helped a lot.
A couple of etched-brass sets were also used,
but they weren’t of great help since many of the pieces had to
be modified both because of fit and because of accuracy.
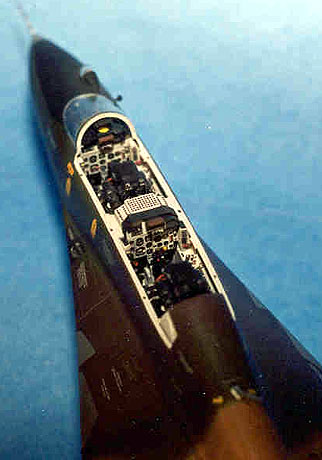
As I worked on this area, I could not get over the feeling that
it just didn’t look right, so it was back to the plans and
photos. I finally decided that the cockpit area was too low and
that the entire area needed to be lifted in a kind-of upside
down half-moon arc that was, if I remember correctly, between
about 1/8 and 3/16” at its greatest height (at about the point
of the rear seat).
The fuselage sides were sliced and plastic
inserts added to raise the cockpit area to where I thought it
was be close to accurate. The area was not completely removed
since I had already done a lot of cockpit work.
|
 Home
| What's New |
Features |
Gallery |
Reviews |
Reference |
Forum |
Search
Home
| What's New |
Features |
Gallery |
Reviews |
Reference |
Forum |
Search