Home
| What's New |
Features |
Gallery |
Reviews |
Reference |
Forum |
Search
Home
| What's New |
Features |
Gallery |
Reviews |
Reference |
Forum |
Search
|
|
|
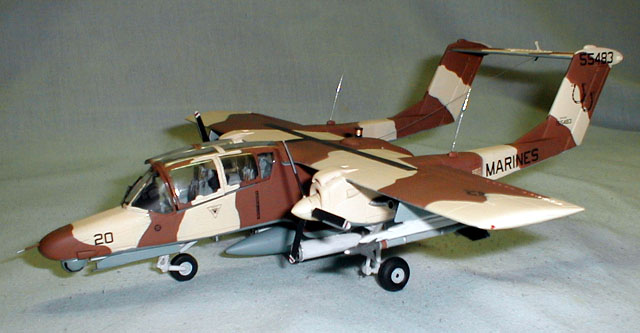
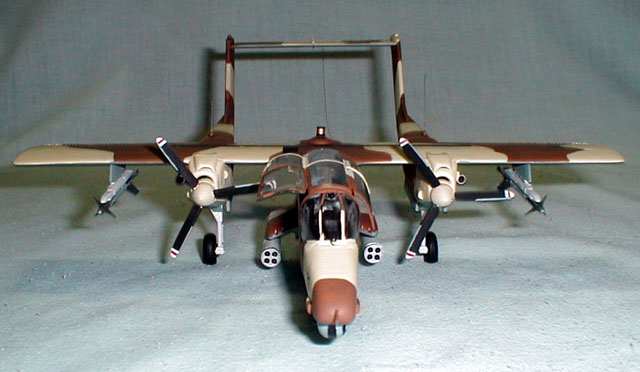
OV-10D Bronco by Mike Phillips
The kit is the older Testors OV-10A. Out of the box, this kit is hardly spectacular. It is not a bad kit, but there isn't much in the way of detail. I added the Paragon OV-10D conversion kit to the basic model. This is the second time I have used this conversion. The last time was my first attempt at converting a kit and the first time using resin/photoetch parts. This is a hard kit to test out your skills at resin parts! It didn't come out quite like I hoped. Dave Aungst's OV-10 article on HyperScale encouraged me to try again.
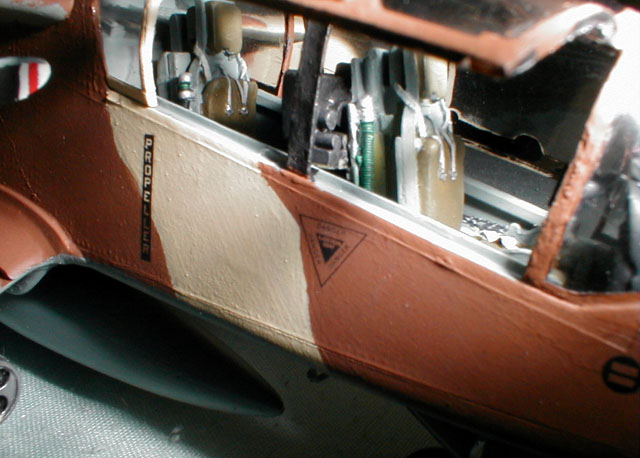
The fuel tank is a modified ESCI tank from their A-4 kit, the Zuni pods are from the Hasegawa weapons set, and the Sidwinders are from my spares box with pylon spacers made from half round stock. Landing gear bays were made with sheet stock The antennae are made from guitar string. And now I come to what I am most pleased with myself about. The "Disco Light" IR jammer on top of the wing. I really couldnt think of anything to make it out of that was the right size, so I had finally decided to use a section cut out of a 1/2 cc hypodermic needle syringe. As I was pulling the plunger out of the syringe, it made that "pop" noise, which made me look at the rubber stopper at the end of the plunger. It was shaped about as close as you could hope for, and was what I felt to be pretty much the exact size I needed! A little paint and there you have it!
The model is brush painted with Model Master Acrylics for the brown and sand colors, and Model Master Enamel for the undersides. My airbrush wasn't quite up to the task of painting this one (or maybe I wasn't up to the task of airbrushing it!). Decals are from Super Scale.
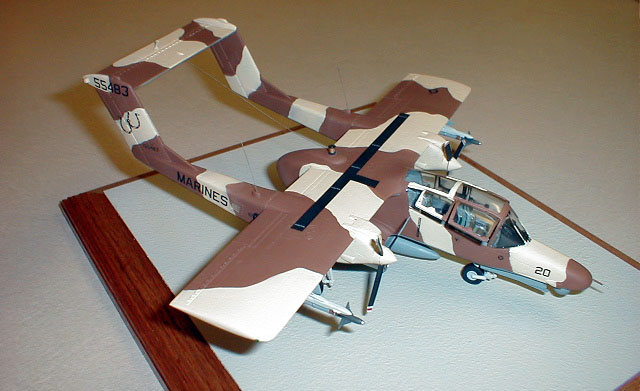
I actually invested more money in the base than I did in the original Testors kit! It is a cheap picture frame base, about $3 at Walmart. I first sprayed it with light aircraft grey paint. Then I sprayed over that with Plastikote brand "Fleckstone" paint.
This is the paint that looks like stone when it dries. I used a greyish color, but it really doesn't matter because I ended up spraying it with the light aircraft grey again after lightly sanding the Fleckstone. This gives a pseudo-concrete look to the base. The first coat of grey was applied because the Fleckstone didn't seem to want to adhere to the glass.
I learned a lot about new techniques building this kit. Patience was the biggest lesson. This kit took plenty of sanding to make the conversion fit, and I spent a lot of time working with putty, sandpaper and primer. I even tried rescribing some panel lines that were lost, which is something I've never done before either. I did some scratchbuilding too.
Click the thumbnails below to view
the images full-sized.
Model, Text and Images Copyright © 2000 by Mike
Phillips
|