Squadron.com
The P-40K was a direct continuation of the P-40E series, equipped with a more
powerful Allison V1710-73 engine. Increased power with the short tail moment
required the distinctive vertical fin extension faired into the rear fuselage to
allow better directional stability at higher power levels. Originally, the K
series Kittyhawks were to be exported to China, but many were winterized for
duty in Alaska and the Aleutian Islands and sent north. In addition, at least 21
of the early P-40K aircraft were sent to Britain and designated Kittyhawk Mk III
aircraft.
The RCAF’s use of the P-40K was limited to nine aircraft that were “lent” to
them by the USAF in the Aleutians. No. 111 Sqn., RCAF, was based at Kodiak,
Alaska, and had a limited number of P-40E Kittyhawk Mk. I aircraft, and to bring
the squadron up to strength, nine of the USAF’s P-40K’s were assigned to the
squadron in August 1942. These aircraft retained the standard American
camouflage and serial numbers, but were adorned with the RCAF insignia.
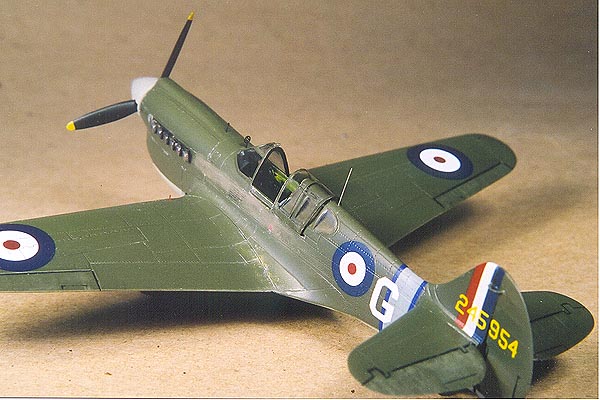
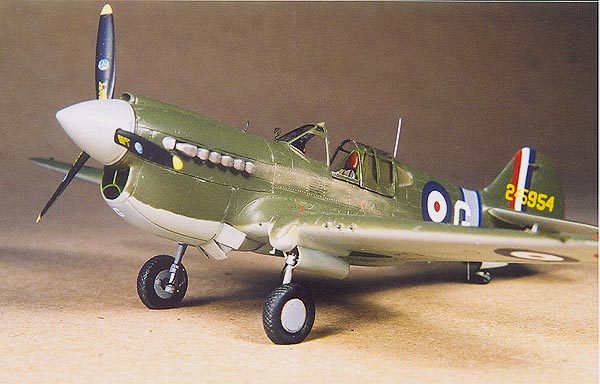
The model depicts the P-40K-5 flown by Squadron Leader K.A. Boomer who led a
four ship raid on Kiska where he was able to shoot down an enemy Rufe
floatplane. This was the only Japanese aircraft to be destroyed by an RCAF unit
in WW2. S/L Boomer and his wing mates were also subsequently awarded the
American Air Medal, and in addition, S/L Boomer was also awarded the
Distinguished Flying Cross.
I was in Ottawa on business in the early ‘90’s and noticed this kit on the
shelves of one of my old haunts- Hobby House. With the disintegration of the
former Iron Curtain, more products from eastern European countries were
beginning to find their way west at that time. I’d read a review of the
Kovozavody Semily kit of the P-40K somewhere, and recognized it immediately as
something I needed as “Canadian content”, since the P-40K was used in a limited
way by the RCAF in the Aleutian campaign in 1942-43.
The green pasteboard box opened to reveal a set of light grey sprues containing
a reasonably well shaped set of parts to portray a P-40K in 1/72 scale. The
smaller parts were borderline “crude”, but the basic airframe parts looked
pretty good on first examination. Recessed panel lines and recessed rivets
reminded me a lot of the old Otaki 1/48 scale kit of the P-40E. Dimensionally
the kit scales out to “close enough” for my purposes but closer inspection
indicated that some of the panel lines and fabric surfaces would need correction
and refining. The clear parts were somewhat heavy-handed in terms of framing and
thickness, but with a bit of polishing up looked not bad. I was going to display
the model with the canopy open, so that required the use of a Squadron brand
vacuformed section from their P-40E, which was tucked away for later use.
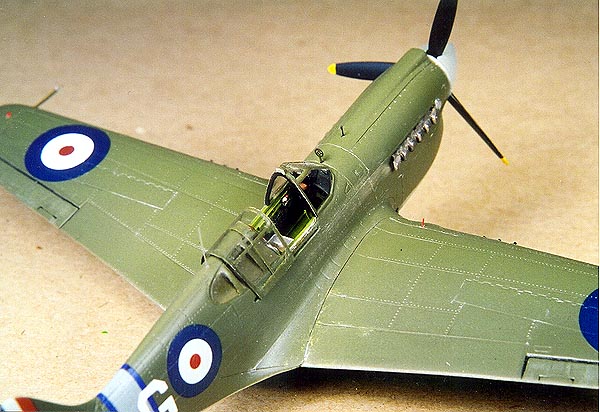
The cockpit was in serious need of embellishment, and I spread out my various
references and proceeded to cut and glue various pieces of Evergreen styrene
strip, small boxes and other fiddly bits to the thinned down fuselage sidewalls.
Just a bit of time and some fine work over a few evenings with a sharp blade,
some photos, and plastic is all it takes. Accessories used in the cockpit
included Reheat RH-033 etched brass cockpit switch consoles. I used Interior
Green FS 34151 as the base colour and then gave the area a bit of depth by a
wash with dark grey water paint and then a dry-brushing of Zinc Chromate green
and aluminum in the more worn areas.
 Once the
pilot’s office was suitably detailed, my attention turned to the engine radiator
zone. The kit parts were not usable, so I built a new bulkhead and created the
round radiator sections from plastic rod and finished them off with sections cut
from an old screen from an electric razor (shaver). These were painted, glued
onto the new bulkhead, then fixed into one side of the fuselage against small
mounting tabs I’d glued in earlier. The fuselage halves were assembled,
carefully lining up the instrument panel, radiator bulkhead and armor plate
bulkhead to insure a correct line-up. I used Zap-A-Gap to get a quick set-up
time and in a few moments the seams were sanded down and the panel lines were
cleaned up. I cut off the rudder so I could reposition it later for a more
casual appearance. I also “accurized” the horizontal stabilizor and rudder post
area by opening it up and adding a couple small lengths of plastic rod.
Once the
pilot’s office was suitably detailed, my attention turned to the engine radiator
zone. The kit parts were not usable, so I built a new bulkhead and created the
round radiator sections from plastic rod and finished them off with sections cut
from an old screen from an electric razor (shaver). These were painted, glued
onto the new bulkhead, then fixed into one side of the fuselage against small
mounting tabs I’d glued in earlier. The fuselage halves were assembled,
carefully lining up the instrument panel, radiator bulkhead and armor plate
bulkhead to insure a correct line-up. I used Zap-A-Gap to get a quick set-up
time and in a few moments the seams were sanded down and the panel lines were
cleaned up. I cut off the rudder so I could reposition it later for a more
casual appearance. I also “accurized” the horizontal stabilizor and rudder post
area by opening it up and adding a couple small lengths of plastic rod.
The wings were detailed a bit by drilling out the machine gun ports to accept
short pieces of hypodermic needle gun muzzles. The wheel bays were detailed with
some strip styrene and painted interior green prior to the wings being glued
together. I also deepened the scribing of the ailerons and access panels a bit
to enhance them. The wings were then glued onto the fuselage and tacked in place
with Zap-A-Gap. Seams were filled and obliterated panel lines rescribed and the
model was almost ready for paint. I glued the polished up kit windscreen in
place with white glue, which helped act as a gap-filling agent that was smoothed
out with a water soaked cotton swab. The rear canopy sections were thinned down
and polished so they fit flush with the fuselage and also glued in place with
thinned white glue run into the mating edges.
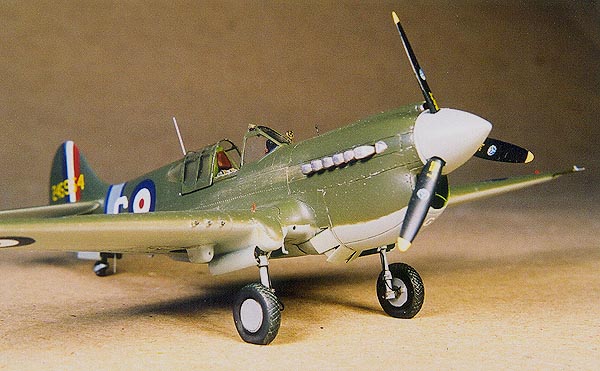
I masked off the clear bits with Bare Metal Foil and cleaned up the model’s
surfaces with some 4000 grit polishing cloth to get a smooth surface that still
had enough “texture” for the paint to bite into. As these P-40K’s were
relatively new when they were delivered to 111 Sqn. in Alaska, I chose to use a
blend of Gloss Olive Drab (XtraColour) with a few drops of yellow and white in
it, to fade it a bit for a “scale colour” effect on the top surfaces, while
gloss Neutral Grey was sprayed on the undersides. I used masking tape with the
edges “bent” up along the demarcation line between the Olive drab and the grey
undersides the get a fine feathered edge.
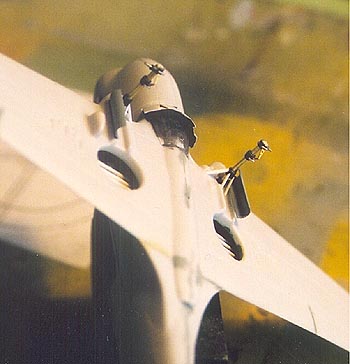
While the paint was drying, I took another scan through my references and my
attention turned to the kit landing gear. Yikes, pretty coarse, and even trying
to refine the kit pieces was going to be a “no-go”. I pulled out some brass rod
from my stock on hand and some scrap plastic and plastic tubing and scratchbuilt
the two gear legs. I used some etched brass oleo leg scissors (from Airwaves
AC7221 RAF Accessories set) and then painted the gear legs grey with a wash of
dark grey-brown. I high-lighted the details with a dry-brushing of silver-grey
and then painted and detailed the True Details brand cast resin wheels and
tires. I find the True Details tires are cast a little too flattened and look
like a tire left out in the field for too many years, so I sanded and re-shaped
the tire to look a little less soft.
Once the paint was dry, I polished off the usual little “dusties” that wet paint
is known to attract, and got out my “spares” box of misc. WW2 British roundels.
The right size roundels were applied to the various locations and a sheet of
Microscale brand letters and numbers contributed the letter “G” for the fuselage
code. Microscale brand coloured decal stripes were used for the blue outline to
the rear fuselage band and a small letter “G” was applied to the underside of
the nose. Once all the decals were dry, and the watermarks cleaned off the
model, I sprayed on a couple coats of Testor’s Dullcote to blend them all in and
provide a satin sheen.
The last stage in the model assembly was to add the fiddly bits - on went the
landing gear, gear doors from sheet plastic and cut sections of plastic drinking
straws, and navigation lights. The navigation lights were built up from small
blobs of white glue which were painted appropriate colours when dried. I spent
quite a bit of time researching the radio and antenna arrangements for the
Aleutian aircraft that the RCAF used, and could not find any definitive photos
or documentation on that issue, so the one antenna I was reasonably sure of was
made from stretched silver sprue, and glued into a hole drilled into the
fuselage spine. The pitot tube was fabricated from a short section of insulated
silver wire (Radio Shack Wire Wrap Wire) and glued into a previously drilled
hole in the wing leading edge, and painted. A small chip of plastic was glued
onto the pitot tube to match photos of the actual device. As previously
mentioned, the machine gun muzzles were made from short sections of hypodermic
needles which had been heated cherry red in a candle flame to take out the
temper and give them that “burnt metal” look. The kit propellor was too crude to
use, so I went to my wall’o’parts and used an Aeroclub white metal Curtiss
Electric prop of the proper diameter and blade type (Aeroclub AP-026)
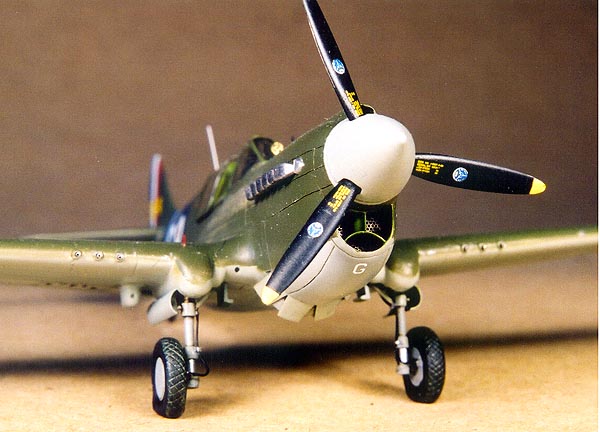
Exhaust stains were added using chalk pastels and the wing root areas and access
panels were weathered slightly with small dabs of silver paint and zinc chromate
paint. I added brake lines to the landing gear using model car “scale spark plug
wire” made by Detail Master. The canopy framing on the vacuformed sliding
portion was added with clear decal material which had been given a squirt of the
OD green when the model was painted. The ring and bead gun sights came from a
spare set found on an Eduard photo-etched brass set for the P-40.
While it was a bit more than a “straight from the box” exercise, building this
model was not overly difficult and just required a bit of TLC to achieve a
pleasing result.
Model, Description and Images Copyright ©
2001 by Geoff McDonell
Page Created 26 October, 2001 Home
| What's New |
Features |
Gallery |
Reviews |
Reference |
Forum |
Search
Home
| What's New |
Features |
Gallery |
Reviews |
Reference |
Forum |
Search