|
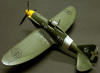
Reggiane Re.2001
by Brett
Green
|
 |
|
Reggiane Re.2001 |

Classic
Airframes' 1/48 scale Re.2001 is available online at
Squadron
During 1940, the airframe of the
lacklustre and unreliable Reggiane Re.2000 was adapted to the Daimler-Benz
DB 601. The resulting design was more streamlined than the original
radial-engine Re.2000, and the German in-line powerplant improved
performance dramatically. This new combination was officially designated
the Reggiane Re.2001.
Following numerous design
changes and production difficulties, the Reggiane Re.2001 entered service
in September 1941. The Re.2001 proved that it was a match for its main
adversary, the Spitfire Mk. V, over the skies of Malta and on bomber
escort missions during 1942. The Re.2001 continued to see active service
with diminishing effectiveness until the armistice in September 1943; and
limited action beyond this date with the Italian Co-Belligerent Air Force.
|
Classic Airframes’ Re.2001 In The Box |
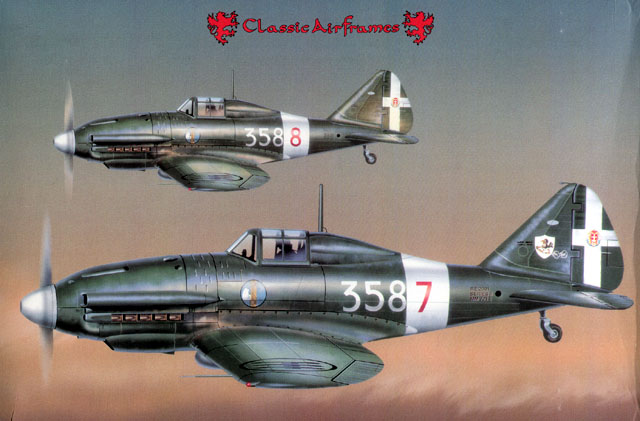
Classic Airframes 1/48 scale
Re.2001 is packed in their familiar black-trimmed box adorned with
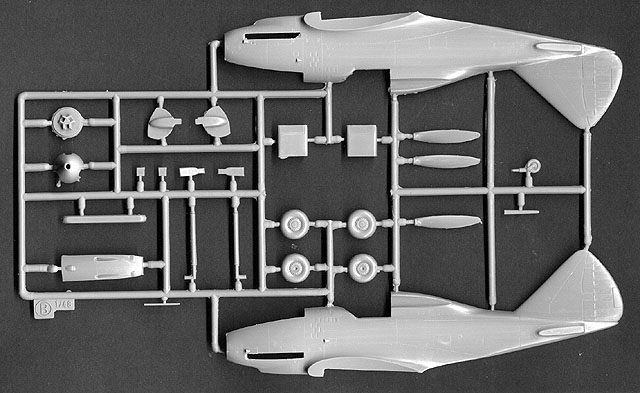
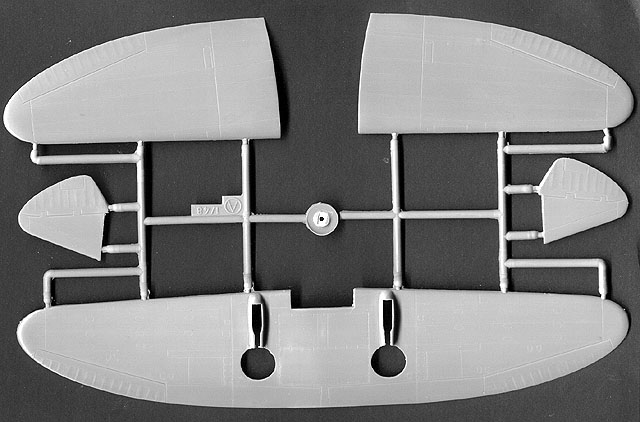
attractive art by Don Greer. The parts count is surprisingly small – 32
styrene pieces on two sprues, 18 crisply cast resin parts, 9 clear parts
(only 3 are used), a vacform canopy and a spare.
The first impression upon
opening the box is the high quality of the plastic mouldings.
The plastic is finished in a
shade of “Tamiya Grey” and features very crisp, very fine surface detail.
Panel lines, vents and grilles are all convincingly rendered, and fabric
surfaces are subtly realistic. There are no sink marks or other
imperfections on the outside of the plastic, but the larger parts suffer
from prominently raised ejector pin “buttons” that will need to be removed
before assembly.
Click the thumbnails below to view larger images:
The plastic is quite shiny and
resembles the material currently favoured by the mainstream manufacturers,
although Classic Airframes’ plastic is a little softer.
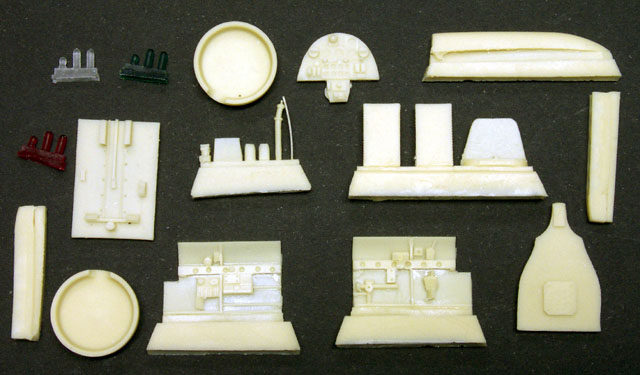
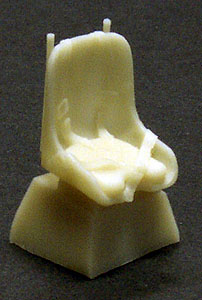
Resin
parts are supplied for the cockpit, the exhausts, intake, radiators and
small scoops. These are also very well done. The cockpit is adequately
busy although more detail might be added if desired. The seat features a
cast-on cushion, a harness plus rear rails.
This
multi-media model is rounded out by the inclusion of three tiny sprues of
coloured navigation lights. One sprue is translucent green, one is
translucent red and one is clear.
Any
model requires careful preparation. Classic Airframes’ Re.2001 is no
exception.
The
high-quality mouldings do not alter the cottage-industry origins of the
kit design. From previous experience, I knew that extra care would be
required with the fit of the cockpit, the wing to fuselage join and
alignment, and with the cleanup and/or fabrication of minor details.
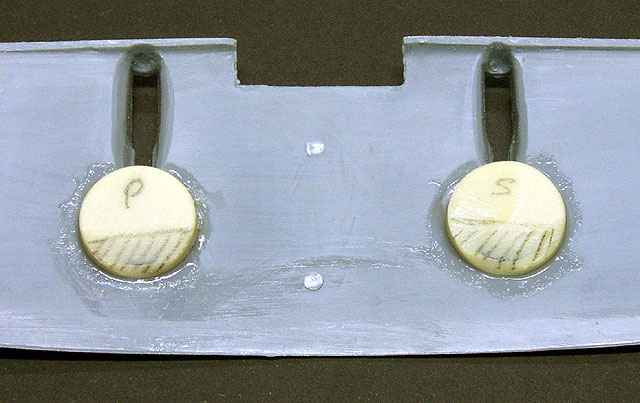
Wings
I
commenced with the wings. The trailing edges of the wings looked quite
thin, but I decided to sand them a little thinner. Classic Airframes
supply round resin wheel-well inserts. These feature prominent casting
plugs on top of the wheel well. Fortunately, the resin is quite soft and
easy to sand. I used a coarse, damp sanding stick to reduce the waste, but
the rear of the well still fouled against the top wing even after a large
pile of resin muck had accumulated. I sanded the back of the resin circles
at an angle until I could almost see daylight through the roof of the
wheel well. This was sufficient to clear the top wing. I glued the top
wing halves to the full-span lower wing.
Click the thumbnails below to view larger images:
|
|
|
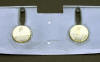
|
Resin wheel inserts in place after sanding
|
|
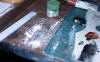
|
|
The mess resulting from sanding one wheel well insert!
|
|
|
The
interior of the two radiator housings were painted, and the resin
radiators received a coat of silver and a generous wash of thinned black
oil paint. The radiators were too tall for their housings so I took the
easy route and sanded the resin to fit. These were super-glued into their
housings and added to the lower wing.
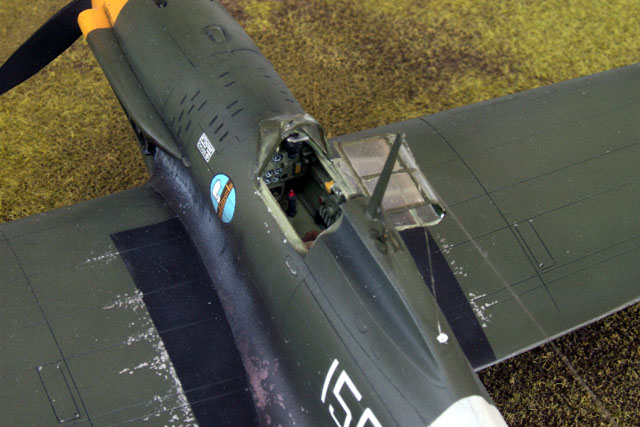
Cockpit
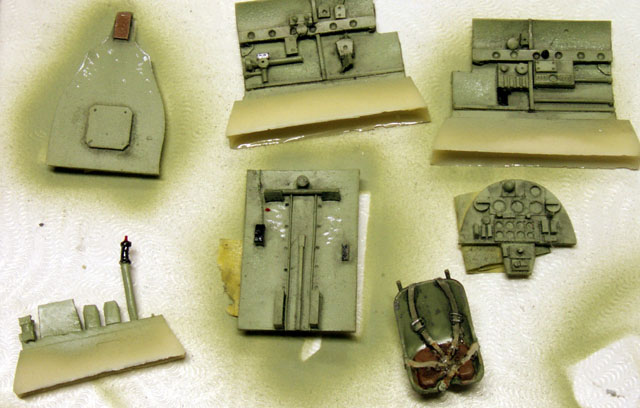
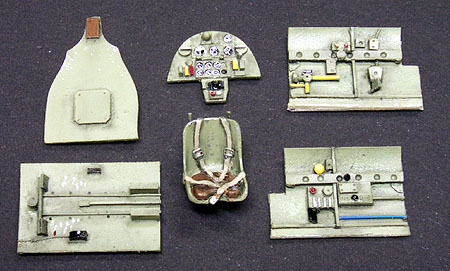 The
resin cockpit components look good in their sealed plastic bag, but they
look even better after a coat of paint and an oil wash. The
resin cockpit components look good in their sealed plastic bag, but they
look even better after a coat of paint and an oil wash.
I tried
to match the suggested cockpit interior colour, FS 34558, with a mix of
Gunze H312 and Tamiya XF-57 Buff. The resulting colour actually looks like
a pale shade of RAF Interior Grey Green. After a wash of thinned black oil
paint, I picked out details with Tamiya acrylics. I did suffer from a case
of brain fade and painted the instrument panel Interior Green when the
instructions (and reference photos) clearly call for the panel to be
black.
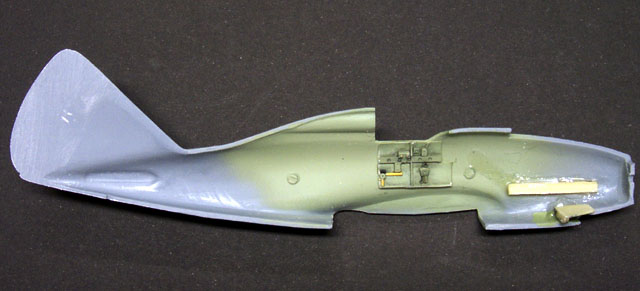
The kit
instructions imply that the cockpit should be assembled prior to
installation in the fuselage. One word of advice – DON’T!
If the
cockpit is assembled as logic would suggest, with the cockpit floor
trapped between the sidewalls, the whole assembly will be several
millimetres too wide to fit in the fuselage. I also found that the
sidewalls as supplied would be located a few millimetres too far forward,
hiding the instrument panel way behind the coaming.
I
followed this sequence:
1.
The waste on the rear bulkhead was sanded until it was very thin.
2.
The fuselage halves were taped together.
3.
The armoured rear bulkhead was dry-fitted. Note that the top of
this part rests in front of the rear fuselage upper deck. In the
absence of locating pins on the fuselage interior, this dry-fitted
bulkhead acts as a point of reference for the other cockpit components.
4.
The fuselage sidewalls were removed from their casting blocks. I
also scored along the bottom horizontal line on each of the sidewalls
and removed the material below this line.
5.
I dry-fitted the fuselage sidewalls. Note that the right-angled
cutout in the front of the sidewalls is where the instrument panel will
be located. It looked to me that the panel would be located too far
forward so I made a vertical cut at the rear of the sidewalls to remove
around two millimetres of resin.
6.
With the rear bulkhead still dry-fitted, I glued the shortened
sidewalls to the fuselage interior using super-glue.
7.
The instrument panel was dry-fitted inside the taped fuselage. I
found I could easily manipulate the panel with a pair of tweezers. The
panel only needed a light sanding around the upper contours to achieve a
perfect fit.
8.
The seat and control column were glued to the cockpit floor. I
mounted my seat well forward on the small moulded blocks. Even so, the
seat barely cleared the rear bulkhead.
9.
The cockpit floor was inserted in the taped fuselage halves for
test-fitting. The floor should sit in front of the rear bulkhead; and
align with the bottom of the resin sidewalls.
10.
The tape was removed and dry-fitted cockpit components stowed for
later assembly.
Fuselage
The
fuselage needed a little more preparation before assembly. The inlet for
the oil cooler was partly flashed-over, so I cut it open with a sharp
hobby knife. The oil cooler bath is supplied in resin. I painted the part
and glued it to one fuselage half.
The
exhaust stacks are also resin parts. The locating slots in the fuselage
sides were too short and fractionally too narrow. I used a knife to
lengthen the slots and a sanding stick to correct the height. The resin
parts were a tight, gap-free fit. I flowed super-glue around the back of
the exhausts to ensure a permanent bond.
I ran a
sanding stick around the joining surfaces of the fuselage halves with
special attention to the trailing edges of the rudder.
The
fuselage halves were now taped together. Care is required for perfect
alignment – there are no locating pins on this kit. When I was happy with
the alignment of the fuselage halves, I applied Tamiya’s Super Thin Liquid
Cement to the joins with the tiny brush provided.
When the
fuselage had set, I removed the tape and slid the resin rear bulkhead into
place behind the sidewalls. I ran a bead of super glue down each side of
the back of the bulkhead through the bottom fuselage opening. Next came
the instrument panel. Using tweezers, I carefully manoeuvred the panel
into place on top of the notches in the fuselage sidewalls. Once again a
bead of super glue was applied to the back of the panel to secure it
permanently. A few spots of super glue were applied to the bottom edge of
each sidewall and the cockpit floor was also secured in place.
I did
not add the resin gunsight at this stage, as I was concerned that it would
interfere with the alignment of the panel or be knocked off during later
handing.
The
forward upper cowl is supplied as an insert. This part features nice deep
gun troughs, but no holes for the gun muzzles. I drilled holes behind the
troughs using a twist drill, and inserted fine brass tube to represent the
muzzles of the 7.7 mm guns. At first, the cowl part seemed too wide for
the fuselage, but after some minor trimming and juggling it actually
fitted very well.
Sub-Assemblies and Details
The
horizontal tail surfaces are a simple butt-fit against the fuselage side.
I wanted to reinforce this join so I drilled holes in the fuselage
tailplane roots and the mating surfaces of the tailplanes. A short spar of
brass rod with a few dabs of superglue was inserted. I secured the bond
further by flowing Tamiya Super Thin Liquid Glue into the join lines.
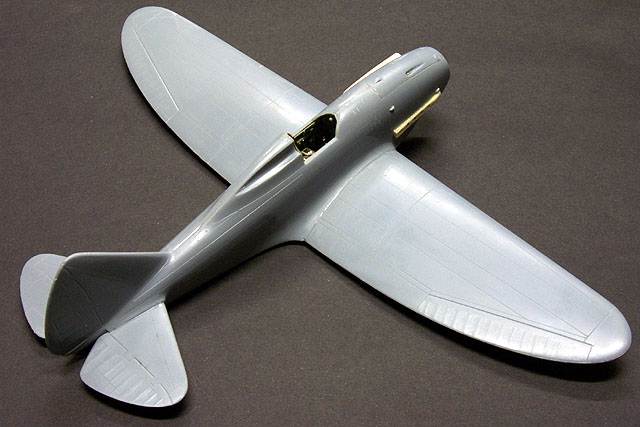
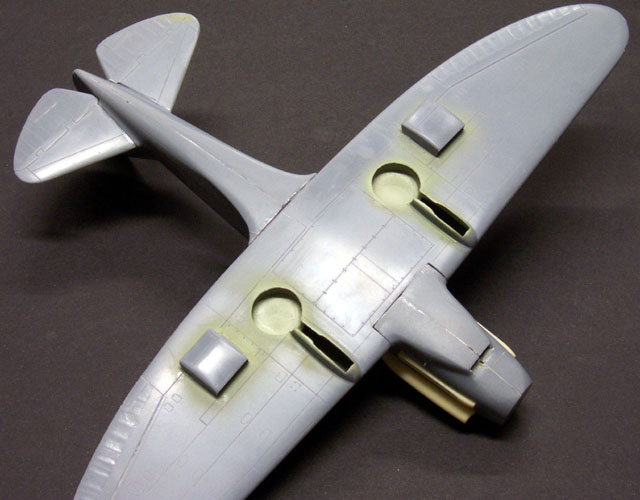
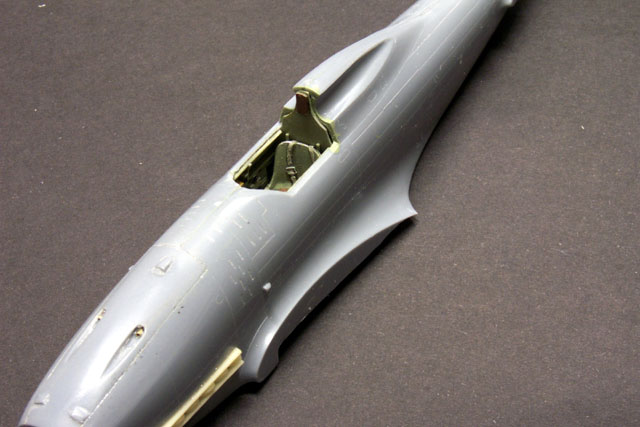
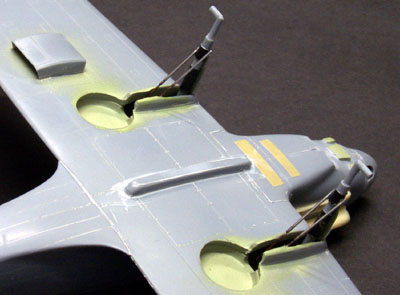
The wing
and fuselage assemblies were test-fitted. I noted a step between rear of
the lower wing and the fuselage. I trimmed the wing root and the problem
disappeared. Dry-fitting suggested that the upper wing root join would be
very good, but that there would be a slight gap at the front and rear of
the bottom of the wing.
I glued
the wing to the fuselage. The wing root join was almost perfect, but the
lower wing needed filling and smoothing with a little Tamiya Putty and Mr
Surfacer. I rescribed the panel lines on the lower rear fuselage at this
point.
I also
added a few lines of Mr Surfacer to seams on the upper fuselage.
Click the thumbnails below to view larger images:
|
|
|
|
Excellent fit between upper wing and fuselage at wing root |
|
|
|
Slight gaps on lower fuselage at front and rear wing joins
|
|

|
|
Gaps filled with Tamiya Putty, sanded and panel lines restored
|
|
|
The spinner was glued to the
backplate with the addition of a short length of Contrail plastic tube
behind the hole in the spinner boss. This tube was necessary to blank off
the hole from broad daylight.
Minor
details such as the scoops, bomb rack and navigation lights were now
secured. I also added a pitot tube. Some photos show a strange bulbous
shape towards the end of the Re.2001’s pitot tube. I used a filament from
a big industrial light bulb to represent this peculiar shape.
 The
undercarriage legs are oversimplified as supplied. I therefore detailed
the gear legs with lead foil and fusewire. The three gear covers for each
side were thinned down before securing them to the gear legs using
superglue. The
undercarriage legs are oversimplified as supplied. I therefore detailed
the gear legs with lead foil and fusewire. The three gear covers for each
side were thinned down before securing them to the gear legs using
superglue.
I
drilled a shallow hole in the upper wing using a 2mm twist drill. The
location of this hole is indicated by an indentation on the inside surface
of the upper wing. The new hole was deep enough to accept the locating pin
of the gear legs. The completed undercarriage legs were secured with a
combination of liquid cement and super glue.
Drag
struts are not supplied so I cut four length of 1mm diameter Contrail
plastic rod for the job. The picture above shows the struts located too
low down the gear legs. I corrected the position of the struts at a later
stage.
The kit
wheels looked okay, but I decided to use the True Details resin wheels for
Macchi C.202/205 (Stock No. 48031). I bought these wheels in 1995 – I knew
they would come in handy sometime!
Diversity of colour schemes is not the strong suit of the Reggiane
Re.2001. On the other hand, if you appreciate green and grey, you will
love this aircraft!
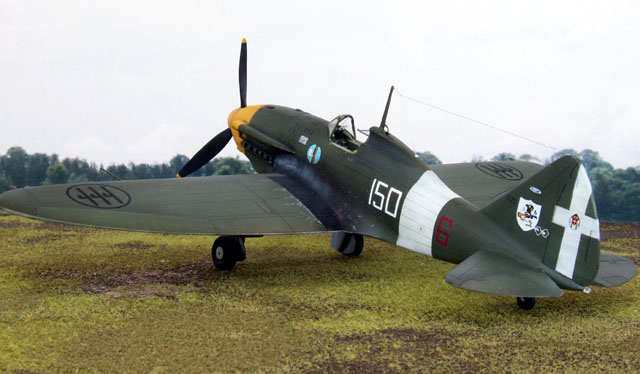
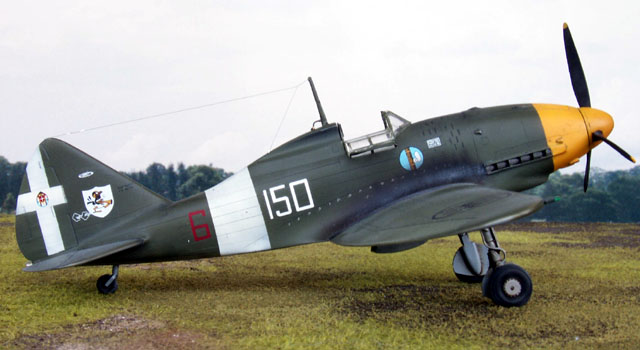
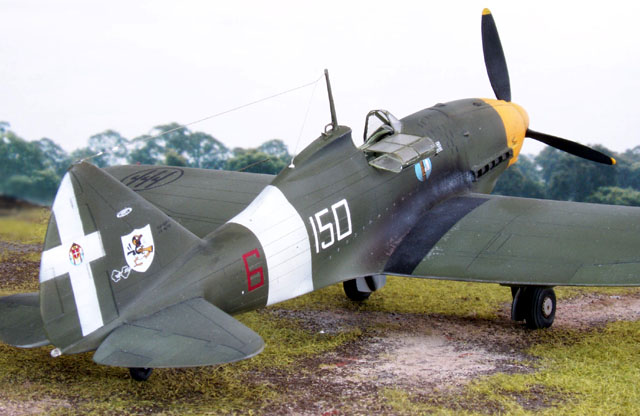
I
decided to add a dash of colour by finishing my bird as the aircraft on
the cover of the Squadron book,
“Reggiane Fighters In Action”. This Re.2001 has a yellow nose and
spinner.
The
vacform canopy was packed with Blu-Tak and masked with tiny strips of
Tamiya masking tape. The Blu-Tak preserves the shape of the canopy while
it is being masked, and also eases the task of slicing the part away from
its backing sheet. The masked canopy was shot with a coat of interior
green followed by my equivalent of Verde Olivia Scuro.
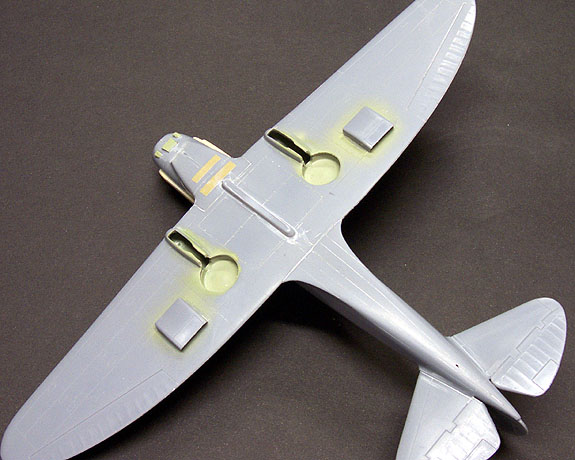
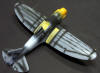
Force of
habit led me to pre-shade the panel lines in black despite the dark upper
surface colour. I also sprayed the wingwalk area black, then masked the
walkways before proceeding. Next, the fuselage band and cross of the
“House of Savoy” were roughly sprayed onto the fuselage and rudder. I also
sprayed the nose and spinner using Tamiya XF-3 Flat Yellow with a tiny
spot of red. When dry, these markings were carefully masked off. I also
masked the tips of the navigation lights using Blu-Tak.
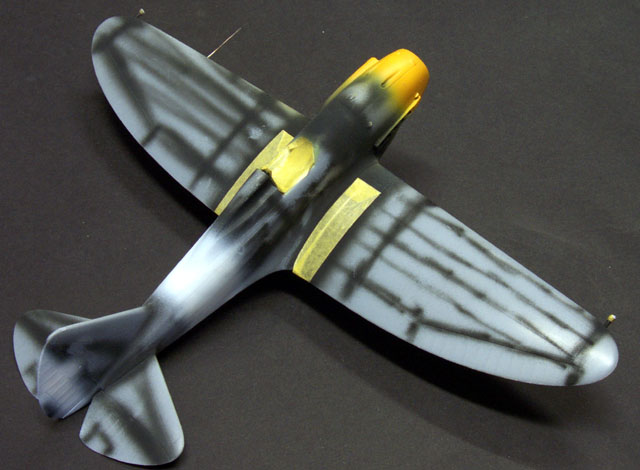
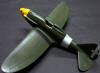
Gunze
Acrylics were used for the main camouflage colours. I used H308 Gray FS
36375 for the lower surfaces, and H420 RLM 80 Olive Green for the uppers.
Click the thumbnails below to view larger images:
|
|
|
|
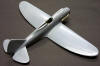
Black pre-shading plus white and yellow markings ready for masking...
|
|
|
|
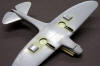
Basic camouflage colours applied. A coat of Testors Metalizer Sealer has been applied. Ready for decals...
|
|
|
|
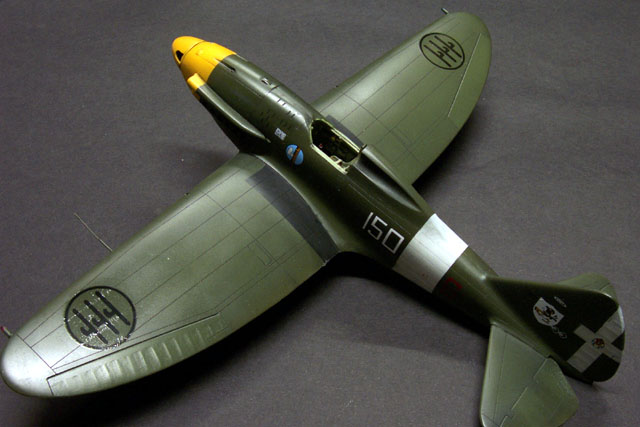
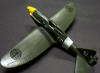
Decals and black oil wash completed. Waiting for weathering...
|
|
|
|
Almost finished! Walkway chipping and exhaust stains are complete. A coat of Gunze Flat Clear has been applied.
|
|
|
When the
camouflage paint was dry, I prepared the model for the decals.
In his
recent article on
building
Classic Airframes’ Re.2001 on Modeling Madness, Lynn Ritger suggests
the use of Testors Metalizer Sealer as a prep coat for decals. I tried
this on my own Re.2001 and was delighted with the results. Metalizer
Sealer provides a hard, smooth finish and dries in minutes.
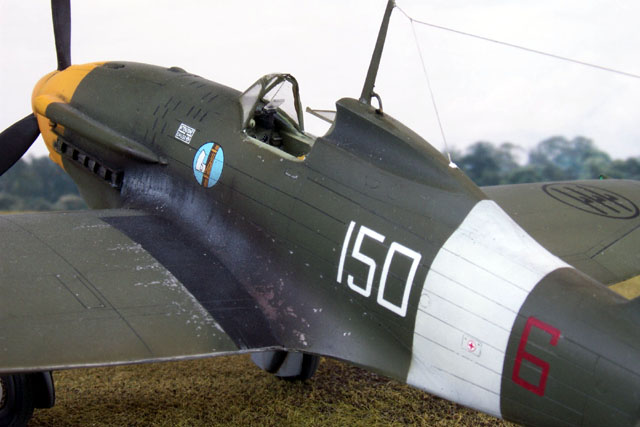
Decals
were a combination of kit markings (national markings, the fasces,
stencils and the chick kicking up dust on the rudder) and decals from Sky Models
“Caccia Reggiane” sheet (Squadriglia and individual aircraft
numbers). The kit decals are especially worthy of mention for their
thinness, opacity and cooperative nature. The Sky Decals were also a
pleasure to work with, but the red individual aircraft number “6” was a
somewhat translucent.
|
Weathering and Final Assembly |
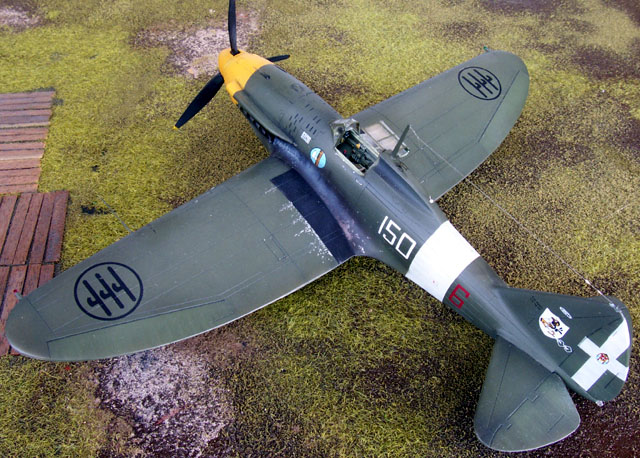
I
applied a thin black oil wash to the upper surfaces of the model. The
Metalizer Sealer took the wash very well.
Some
wear and tear was added either side of the wing walkways using tiny spots
of Tamiya Chrome Silver applied with a 10/0 brush. The exhaust stain
comprised a sooty brown-black mix with a blob of Tamiya Flat base,
followed by a thin streak of chalky grey over the top.
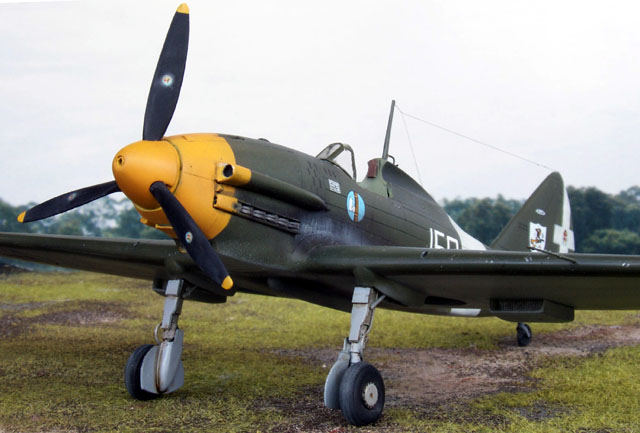
This
stain was also heavily applied to the lower mid-fuselage behind the
engine.
A coat
of Gunze Flat Clear was sprayed over the entire airframe and the final
components were added:
·
The gunsight
was glued in place and an acetate lens added
·
The vacform
windscreen was secured with White Glue (which also acted as filler)
·
The folding
canopy was sliced in two and rejoined at the hinge line using 1mm plastic
rod. This new assembly was then glued to the cockpit opening
·
The tailwheel
and mainwheels were glued into place
·
A spot of
Future was applied to the tips of the navigation lights, furnishing an
appropriate lustre that was missing earlier
·
The tail
navigation light was glued in place
·
Smoke-coloured
nylon mending thread was used for aerial rigging
I
thoroughly enjoyed building Classic Airframes’ Reggiane Re.2001.
The new
metal moulds result in a quality of plastic that, until recently, could
only be expected from a mainstream Japanese manufacturer. The surface
detail and texture of the styrene really is first-rate.
However,
quality of plastic alone does not define a “mainstream” kit.
In
common with Classic Airframes’ earlier releases, this kit does not have
locating pins and the modeller needs to fabricate some minor details to
complete the kit. Be prepared to expend a little extra effort in
preparation and test fitting too – especially for the cockpit and
wing-to-fuselage join. This preparation will be rewarded with a highly
detailed and attractive model.
Classic
Airframes’ 1/48 scale Re.2001 is an ideal candidate for the modeller who
wants to test out his skills on something slightly more challenging than a
Tamiya single-engine fighter kit.
Click the thumbnail to view
the larger image on this page.
Thanks to Jules Bringuier of Classic Airframes for the
sample kit.
Text, Images and Model Copyright © 2001 by
Brett Green
Page Created 01 October, 2001
Last Updated
04 June, 2007
Back to HyperScale Main Page
Back to Features Index |
 Home
| What's New |
Features |
Gallery |
Reviews |
Reference |
Forum |
Search
Home
| What's New |
Features |
Gallery |
Reviews |
Reference |
Forum |
Search