|
L.F.G. Roland D.VIa
by Robert
Baumgartner
 |
L.F.G. Roland D.VIa |

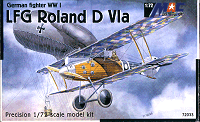
MAC Model's 1/72
scale Roland D.VIa is available online from Squadron.com for USD$14.96
Although the Roland D.VI was not destined to achieve fame during WW1, the
elegant lines of this fighter make it a favourite among bi-plane modellers.
The klinkerrumpf style of fuselage was a carry over from Roland’s earlier
D.IV triplane and gave good strength with an appreciable saving in weight. This
method of construction consisted of the overlapping of slightly tapered strips
of spruce which were wedge shaped in section. These were then glued and nailed
to the basic fuselage longerons and formers to give the D.VI its characteristic
look.
When the prototypes competed at the first Fighter Competition at Adlershof in
Jan/Feb 1918, the Roland was found to be inferior to other competitors such as
the Fokker D.VII and Pfalz D.VIII. As a result, it was only ordered in small
numbers in the hope that it could be developed into a better product.
Deliveries to the Front occurred in mid-May 1918 and the type did not receive
much praise there either.
The aircraft performed well enough in manoeuvrability and speed but could not
climb as well as other types already at the Front, such as the Albatros D.V and
Pfalz D.IIIa. Thus the Roland D.VI was destined to play a minor role in
activities at the Front and be used as a “filler” until more advanced fighters
arrived.
 MAC’s 1/72
scale L.F.G. Roland D.Via is a well thought out kit. It consists of a sprue of
33 plastic parts, a small fret of etched metal, and a printed acetate sheet for
the windscreen. A decal sheet is supplied for the individual aircraft markings,
but the builder will have to look elsewhere for the lozenge to cover the wings. MAC’s 1/72
scale L.F.G. Roland D.Via is a well thought out kit. It consists of a sprue of
33 plastic parts, a small fret of etched metal, and a printed acetate sheet for
the windscreen. A decal sheet is supplied for the individual aircraft markings,
but the builder will have to look elsewhere for the lozenge to cover the wings.
The main parts are cleanly moulded in soft tan plastic with no flash and very
good surface detail.
There are two types of tailplane, engine and aileron provided. The redundant
parts are for the Roland D.VIb.
The instructions also show the latter types of fuselage halves on the sprue
count but these were not included in my example.
My primary reference source was Albatros Productions Datafile 37. As
expected, the major outlines matched Ian Stair’s plans very well. This is
because MAC themselves say that they used this piece of literature as a guide in
making the product.
The question of engine/ventilation panels is a tricky one and MAC has done
well to correctly portray those seen on the production D.VIa.
By using the 160hp Mercedes D.III engine, most production D.VIa were seen to
have four of these panels on the port side and two on the starboard side.
Naturally there were exceptions, so study of the individual subject you are
modelling is vital.
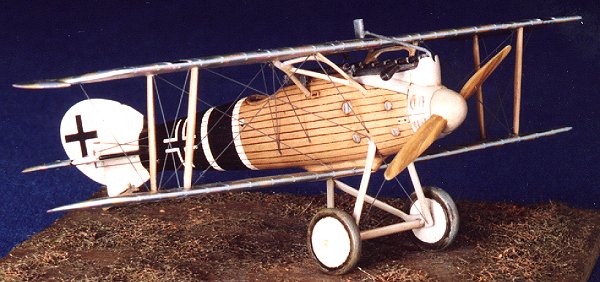
Fuselage
The first operation is removal of the moulding plugs from inside the fuselage
and engine halves. Sanding of the floor and instrument panel is needed to
provide a good fit later on.
A lovely seat is provided that I decided to thin slightly and make seat belts
for, as none are supplied on the etched metal fret.
The etched fret does give you the control column, rudder pedals and engine
piping which can be detailed or layered with glue to give the desired thickness
you require.
The fuselage halves come together very nicely and, if you are careful with
alignment, no filler will be required.
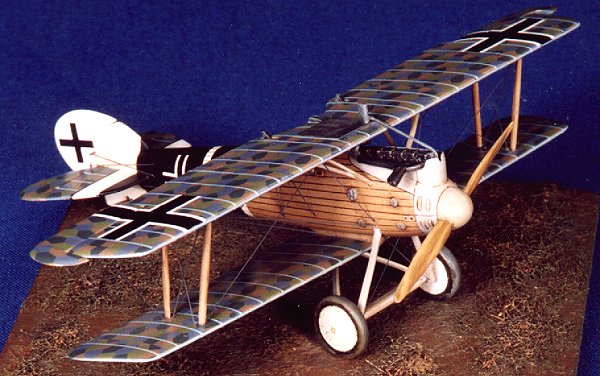
Wings
I found the rib detail to be quite heavy and therefore sanded it to a more
realistic level. This gave another added benefit in that it allows the trailing
edges of the wings to be refined without destroying detail. The tailplane and
separate rudder were also treated to the same process.

The dubious box art suggests that the lower wing is one piece. Ignore this
suggestion and assemble the lower wing as per the instructions. Very slight
sanding of the tailplane gives a perfect fit when slid on to the rear fuselage.
Moulding limitations don’t allow parts like struts to be in scale, so these were
given some attention with a sanding stick.
The moulded in upper wing aileron horns were drilled out and scratch built
items installed instead. This was to make the rigging to this unique area stand
out better.
Final Assembly
The well moulded machine guns and exhaust had their ends drilled-out and the
photo etched water hose to the top wing was replaced with stretched sprue.
I found the printed windscreens to be too large for the model so used the
supplied acetate to make my own.
After painting the various assemblies, the model came together very easily.
This was helped by enlarging the location holes for the various struts,
undercarriage and wings.
The spinner and prop come as a single moulding, which calls for some rather
careful painting. Rigging was done with grey painted nylon thread.
This is where the fun really begins. All comments are based on photos from
the aforementioned Datafile.
The decal sheet gives markings for at least six aircraft, but no painting
guide is included in the instruction sheet. Unfortunately, not all subjects are
appropriate for the Roland D.VIa.
a) Serial 7502/18 - this is a D.VIb, not a D.VIa
b) Serial 1219/18 - the kit supplied crosses for this aircraft are of the
wrong type
c) Serial 3615/18 - can be done out of the box
d) Serial 3612/18 - wrong exhaust pipe supplied in the kit for this
aircraft.
e) Serial 5012/17 - wrong exhaust pipe supplied in the kit for this
aircraft.
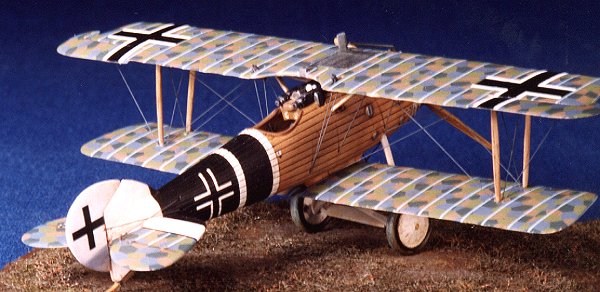
f) Serial unknown (box top) - This is the aircraft I chose to do and is
featured on the cover of the Datafile.
The white circle on the fuselage sides is believed to have been applied by
the Americans, so I left this off on my model. A photo of this machine on the
inside cover of the Datafile shows the wheels to be white, both inside and out.
Any perception of a black colour I would put down to American origin when the
machine changed owners.
The crosses supplied are not of the correct proportions for the rudder or the
lower wing, therefore alternatives will have to be sought.
Weight tables are supplied, as is a datum line and Roland factory logo. The
latter was improved by adding the missing black areas at the top and bottom of
the shield.
Not shown on the decal placement diagram is number 17, which is the
manufacturer’s plate. This should appear on the starboard side of the fuselage
near the nose. Unfortunately my decal sheet was horribly out of register, so
substitutes were made using decal strip.
Iron crosses are supplied so that examples from Jagdstaffel 35b can be built,
but no serial numbers are available for these aircraft.
Since no lozenge decals are provided, the opportunity was taken to try the
Eagle Strike range. These decals were found to have good colour density, were
very thin and provided great adhesion. A look at the names of those involved in
the research of this product should be testimony enough to the accuracy of the
colours used.
From the photos of this machine, the rib tapes are very light in tonal value
and were thus interpreted to be of the light blue type. Controversially, this
was applied to both top and bottom surfaces of the wings.
This is a first class effort from MAC. Their Roland D.VIa has been well
researched and moulded to a level that modellers of all skill levels can enjoy.
Although there is a written explanation of general camouflage and marking
practices, I feel that a proper diagram of each subject on the decal sheet is
needed.
Since the majority of the parts will be the same for the Roland D.VIb, I
suggest you get these gems while you can.
Thanks to Squadron for
the Review Sample.
Model, Images and
Article Copyright © 2001 by Robert Baumgartner
Page Created 25 July 2001
Last updated 04 June 2007
Back to HyperScale Main Page
Back to Features Page |
 Home
| What's New |
Features |
Gallery |
Reviews |
Reference |
Forum |
Search
Home
| What's New |
Features |
Gallery |
Reviews |
Reference |
Forum |
Search