|
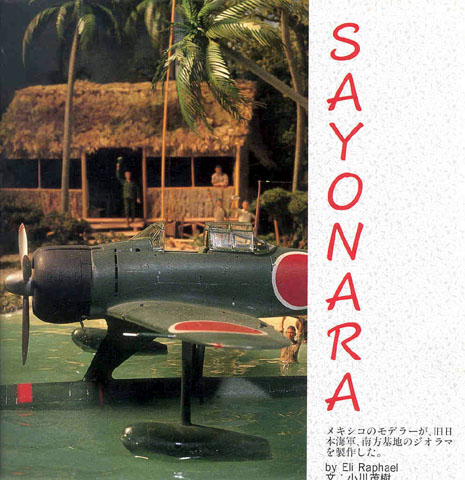
"Sayonara" Diorama
by Eli Raphael
Images by Leon Raphael

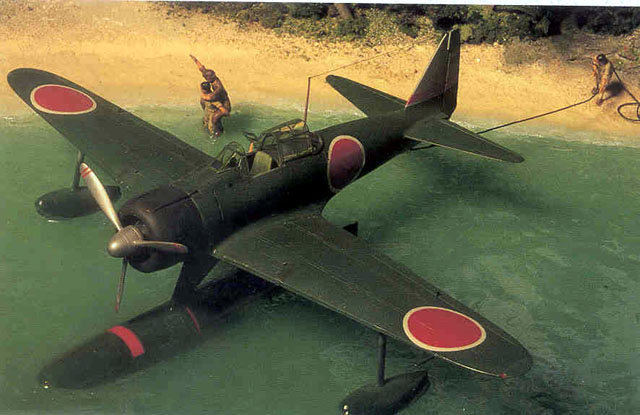
Tamiya's 1/48
scale Rufe Floatplane is available online from Squadron.com
I have always been
enthralled with the South Pacific, especially during WWII.
The opportunity to make a
diorama presented itself when a Japanese friend came
home to visit us. To my surprise, he carried some WWII photographs his
dad had given him before passing away.
This diorama was based on those pictures.
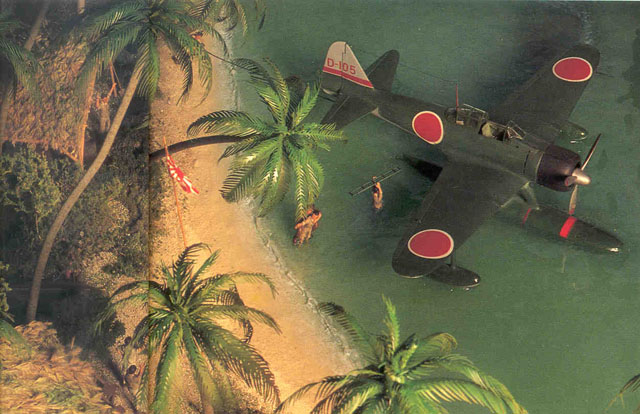
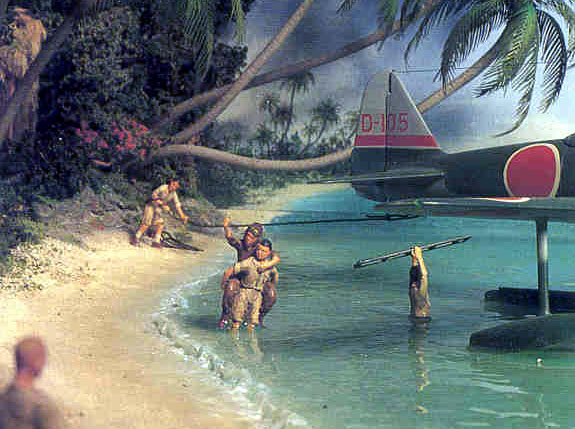
The aircraft
kit used is the Tamiya 1/48 Rufe.
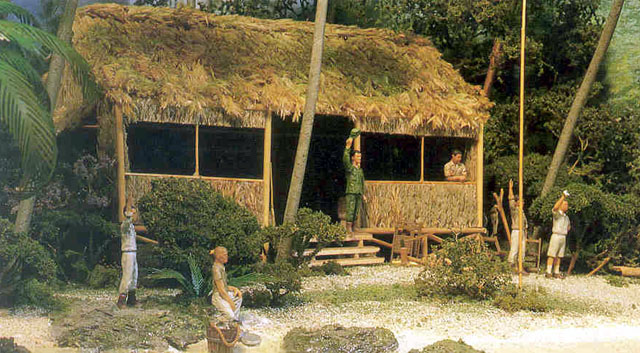
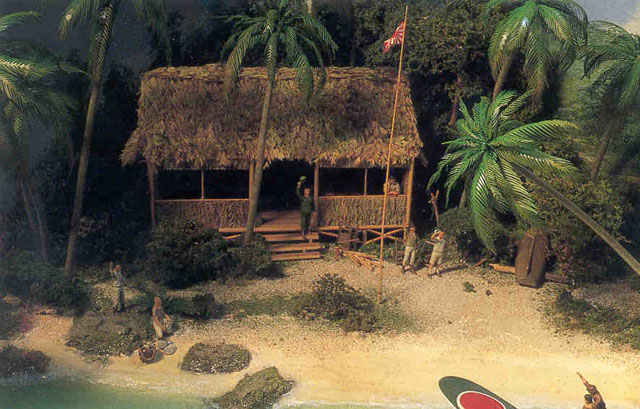
All the figures came from
Monogram and Tamiya, some used with and some without modifications.
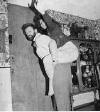 You
can see the photo (click thumbnail for the larger
image) taken of me supporting my wife used as body position to
modify the pilot and helper! You
can see the photo (click thumbnail for the larger
image) taken of me supporting my wife used as body position to
modify the pilot and helper!
That was the easy part.
Problems
started to pile up when I could not find any palm trees in approximately 1/48
scale. Verlinden makes a species in 1/35, but they were based on the African
palm tree that has a wider and shorter trunk. South Pacific species are taller
and smoother. I therefore had to sculpt one based on photos.
Unfortunately, the cast
resin used was of the stiff type and even when using hot water to bend and shape
it to my liking, it returned to its original position. After poking around I
could find a flexible resin when cured, but it stayed sticky and it was annoying
to handle it! I made a test leaving one palm tree bended for a week and to my
surprise, it started to upright itself! Finally I decided to stick an
electrical copper wire in the middle and started casting a bunch of them.
Bending them was now easy and they stayed crooked! To my relief, when priming
them, the stickiness was no longer. After resolving this, the leaves were next.
Obviously, the Verlinden photoedge ones were of a different type. After
searching, found someone that could make several PE palm fronds using one that I
made out of paper clippings.
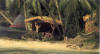
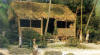
The huts were made using
balsa wood, reeds and little dry plants that grow here in Mexico.

The water in the lagoon was
simulated with clear epoxy resin. The bottom layer was painted dark greenish
blue, diluting the same shade on overlapping layers until the surface was
finished using pure clear resin. 12 hours lasted between layers to avoid heat
build-up.
The advantages of using
epoxy over polyester resin are many, but mainly you avoid heat that can distort
the aircraft and the figures. The other are the toxic fumes! With epoxy resin
you are also sure that it will not shrink from the boxlike base. This resin
takes, if mixed correctly, 12 hours to cure, so I tested doneness almost at the
end to produce the small beach waves and almost smooth surface that
characterizes lagoons.
To tie everything in,
an artist friend painted the cyclorama (more commonly known as a
backdrop).
Click the
thumbnails below to view images full-sized.
Click the "Back" arrow on your browser to return to this page.


Article and Model Copyright © 2001 by
Eli Raphael
Images Copyright © 2001 by Leon Raphael
Page Created 01 August, 2001
Last updated 04 June, 2007
Back to HyperScale Main Page
Back to Features Page
|
 Home
| What's New |
Features |
Gallery |
Reviews |
Reference |
Forum |
Search
Home
| What's New |
Features |
Gallery |
Reviews |
Reference |
Forum |
Search