|
Sea
Harrier FRS.1
by
Piero de Santis
|
|
|
Sea Harrier
FRS.1
800 Sqn, HMS Hermes
Falkland Islands, Spring 1982
|

HyperScale is proudly sponsored by
Squadron
I would first like to thank everyone who said they enjoyed my Jaguar
model. This time, I chose one of my favourites from the Harrier family.
I have a particular affinity with the Harrier, probably because we
both "entered operations" in the same year!
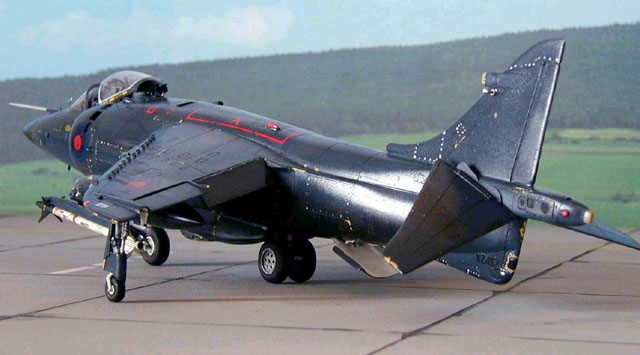
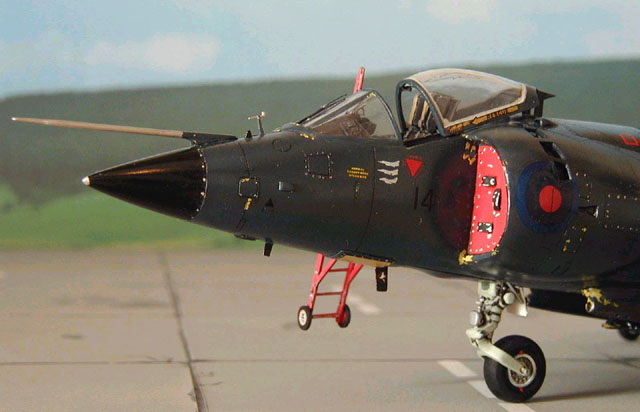
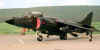
This is a BAE Sea Harrier FRS.1 (serial XZ457 code 14) from the Royal
Navy's 800 Squadron on the carrier "HMS Hermes" during the
Falklands War in the spring of 1982, with a score of 4 air-kills.
The Sea Harrier (SHAR) was the star of the conflict, with a ratio of
21-0 scores in air-to-air fights, maybe because RN's pilots were better
trained, maybe for the AIM-9L, maybe something else… but at the end
the result tell the story!
When I decided to build a SHAR FRS.1 in 1/48th scale there were two
choices: Airfix and Tamiya (but don't think about today's Tamiya
standard!).
Each has its pros and cons. The Airfix kit has a good shape, but with
wrong flaps and nozzle plates moulded as part of the fuselage. Tamiya
has "strange" shape, but better detailed undercarriage and
separate nozzle plates. Both has a lot of work to do before became a
"real" SHAR!
My decision was radical. I decided to take an old (out of production)
Monogram's AV-8A Harrier GR.1, the Airfix's FRS.1 and a Flightpath's
detail etched set. I know, it's not "cheap", but also when we
have to build a Hasegawa's kit, it is hardly ever built straight from
the box either!
Monogram's AV-8A has good fuselage, wings, undercarriage, intakes,
nozzles, airbrake, cannons pods and cockpit tube.
Conversion
and Construction
|
The task was not difficult. Cut off the front of the fuselage of both
kits from the pointed nose to just aft of the cockpit tub. Take the
Airfix nose and discard the Monogram one.
Use all the tail fin and the tail cone RWR fairing, inner wing pylons
and fuel tanks from the Airfix kit… Oops! Clear parts and pitot too,
obviously.
From the Monogram kit: cockpit tub, fuselage (minus nose, tail fin
and tail cone end), undercarriage, outboard wing pylons and rails,
cannons pods, horizontal tail surfaces, nozzles and plates, intakes and
airbrake.
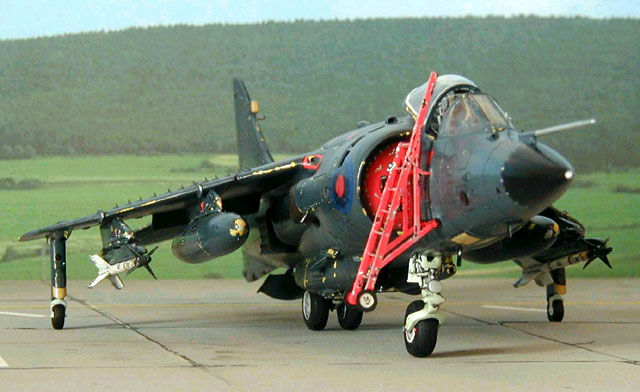
From Flightpath's etched sheet: instrument panel, cockpit details,
undercarriage doors, horizontal tail plates, yaw sensor, antennas, wing
fences… what else? Yes, access ladder! Martin Baker MK.10 seat is in
resin from Airwaves.
Today, Neomega make a resin cockpit set for the SHAR… a must if
somebody want to build one! AIM-9L Sidewinders are from a Hasegawa
Weapons set.
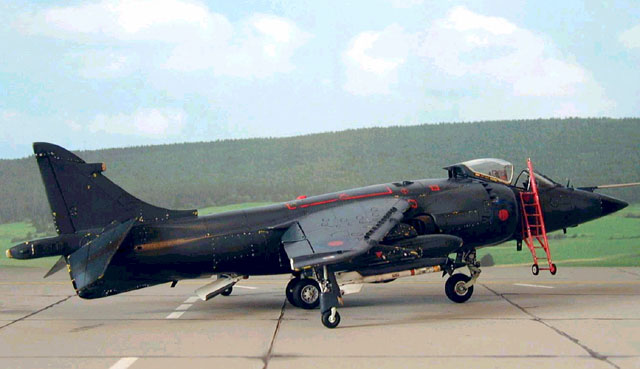
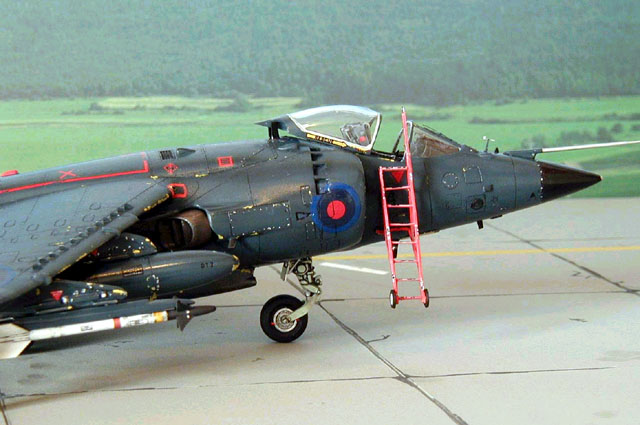
In early service, the SHAR was finished in gloss Extra Dark Sea Grey
with White undersurfaces. Roundels were Blue-White-Red and a large
Squadron badge was on the tail: too hi-viz for operations!
During the Atlantic- trip to the Falkland Islands, the aircraft were
repainted on board. The first thing to do was to overpaint all the White
surfaces with the Extra Dark Sea Grey. Tail badges were overpainted too.
The White of the roundels was overpainted with Blue. Codes were repaints
in Black or Dark blue. Aboard on the "Hermes" this job was
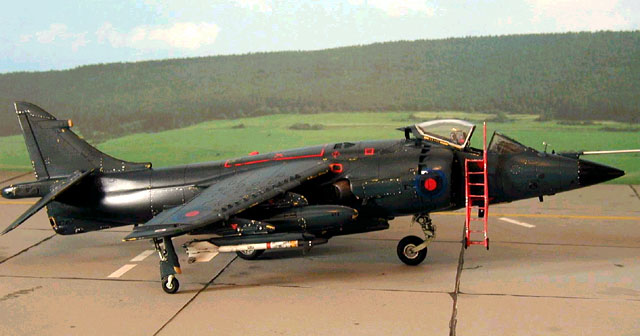
hand-made(!), because there was no air-condition locals. The end result
was that the SHAR look very "stealthy" and Argentine pilots
dubbed it "La Muerte Negra"!
Other SHARs arrived in the middle of the operation were in Medium Sea
Grey and Light Aircraft grey.
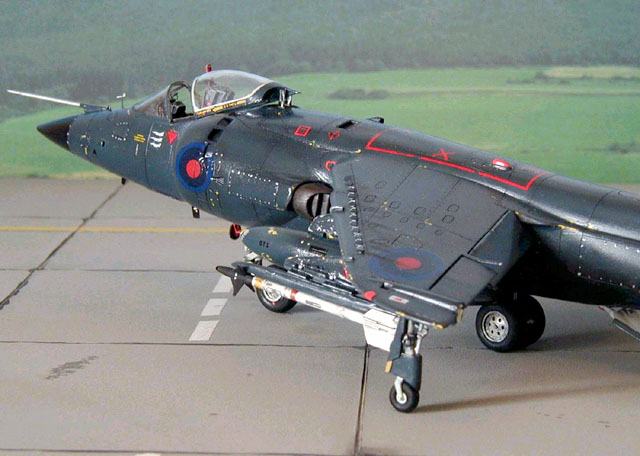
I always prefer to use Humbrol enamels: Extra Dark Sea Gey was 112.
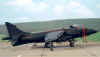
During the war, operational tasks were very frequent and in really
bad weather, so the paint flaked off many significant areas including
panels, flaps, pylons and cannons. This sometimes exposed the zinc
primer colour. I depicted this on my model.
For the decals, I did the same job for the roundels as described for
the real airplane. Stencils came from the Airfix kit, while serial and
code numbers came from other decal sheets.
I hope this article provides some answers to the many questions that
I read daily on HyperScale.
Click on the thumbnails to
enlarge.
Use your browser's "Back" arrow key to return to this page.
Model, Text and Images Copyright ©
2001 by Piero de Santis
Page Created 15 July, 2001
Last Updated 04 June, 2007
Back to HyperScale
Main Page
Back to Features
Index
|
 Home
| What's New |
Features |
Gallery |
Reviews |
Reference |
Forum |
Search
Home
| What's New |
Features |
Gallery |
Reviews |
Reference |
Forum |
Search