|
Douglas
F4D-1 Skyray
by
Henry Juarez
|
|
|
Douglas
F4D-1 Skyray
|

Tamiya's
1/48 scale Skyray is available online from Squadron.com
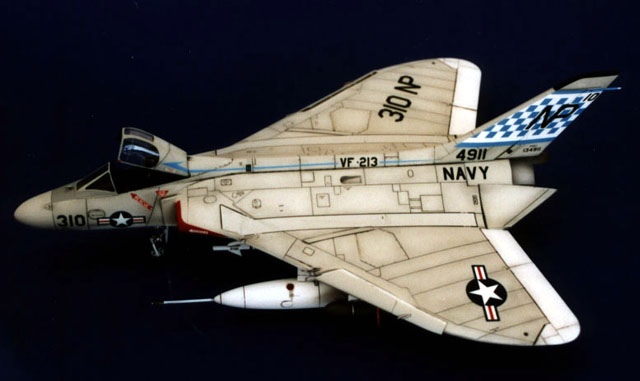
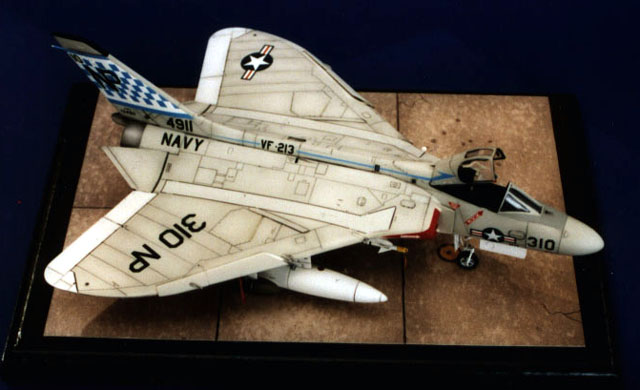
This is Tamiya's 1/48 scale Douglas F4D-1 Skyray. For this project
I used Cutting Edge cockpit set and decals, as well as Eduards
photoetch set.
The kit is well done with recessed panel lines and overall
shape.
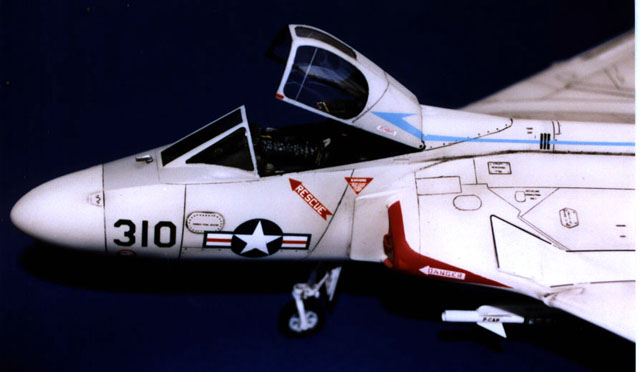
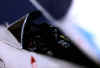
I began by painting and installing the cockpit. I opted to use the
Eduard photoetch instrument panel as it looked much better and brought
the cockpit to life. The tail pipe brace (PE) was installed and gave
the back end a more realistic look overall.
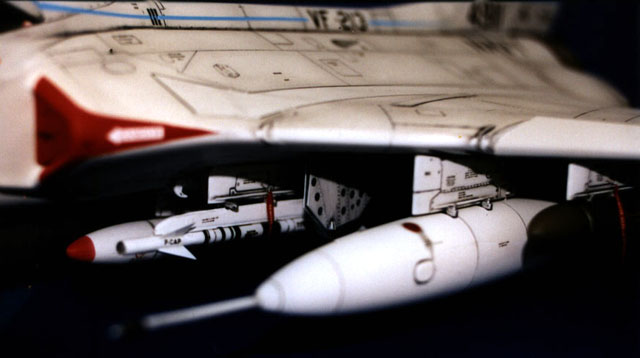
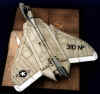
At this point things were going pretty good, until I got to the
wings. The kit comes with folded wings and I wanted to show this plane
with them down. That's were I ran into problems. In order to have the
wings in the extended postilion, I had to align the main wing with the
wing tips. This left a noticeable step which had to be corrected with
the use of Magic Sculpt putty. Once the putty hardened, I sanded the
wing surface flat and smooth. I then had the laboring task of
re-scribing all that lost panel line detail.
Once the wings were completed, the rest of the kit went together
without any further problems.
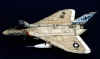
I began by pre-shading all the panel lines with flat black.
Once the panel lines are painted I took Model Masters Gloss Gull
Gray and mixed it with 50% thinner. This is my base paint. I sprayed
the entire model in light coats until a hint of the panel lines showed
through. I then took the base mixture and added white to make a
highlight. I thinned it down to a 70/50 mix, thinner to paint. I then
sprayed the inside of the panels until it was lighter than the
surrounding panel lines. Going back to the base mixture, I thinned
this down to a 70/30 mix and sprayed the entire model in light coats
until a had the balance I liked.
This method is subjective to your own taste and is only one
technique that works for me.
After letting the model dry for a day or two, I sprayed the model
with Future. Again, this was allowed to dry for a day or two.
Next came the wash. I like using a flat black enamel wash thinned
with mineral spirits. I don't know what properties flat black has, but
this mixture allows the paint to dry faster than oils or gloss
enamels. All recessed panel lines are given this wash and allowed to
dry for a few minutes before wiping the excess of with a damp cloth
with mineral spirits. I then allow the model to set for a few hours
before applying the decals.
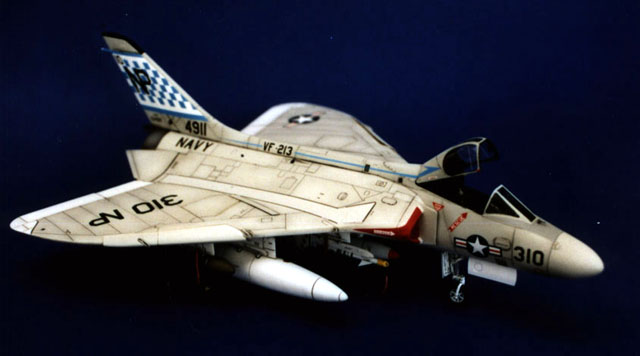
For this model I chose Cutting Edge's decal sheet of VF-213
"Black Lions". After the decals were applied and set with
Solvaset setting solution, I carefully went back and sliced the decal
were it ran over a panel line. A second application of setting
solution was applied and let dry. I then went back with my wash and
applied it over the decaled panel line.
The entire model was then sprayed with Testors' Dullcoat.
This was a fun project except for the wing problem. With the
cockpit set and decals, I think it turned out quite well. I wish this
was a more in depth article, taking you step by step, but I'll leave
that up to the guys who are better qualified and articulate.
Click the thumbnails
below to view the images full-sized.
Model, Images and Text Copyright © 2001 by
Henry Juarez
Page Created 18 May, 2001
Last Updated 04 June, 2007
Back to HyperScale Main
Page
Back to Features
Index
|
 Home
| What's New |
Features |
Gallery |
Reviews |
Reference |
Forum |
Search
Home
| What's New |
Features |
Gallery |
Reviews |
Reference |
Forum |
Search