|

HyperScale is proudly sponsored by
Squadron.com
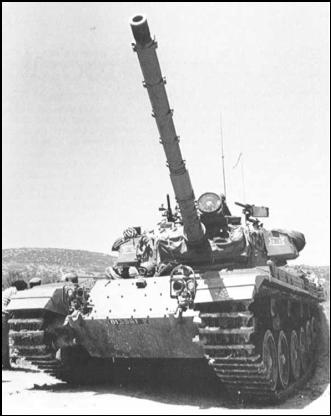
During the period 1950 to 1960,
Israel acquired some 400 Mk3 Centurion tanks, followed by 400 Mk5 tanks,
mounting the 20 pdr gun. The original configuration did not suite the
desert conditions the Israeli's were faced with. The Meteor petrol engine
was not suited to these conditions.
Most of these tanks were
extensively modified by the Israeli Ordnance Corps. A 105mm L7A1 gun was
mounted, the engine compartment was reconfigured to house the 750hp
Continental AVDS-1790-2 series diesel engine, a new Allison CD850-6
automatic transmission was fitted and the fuel capacity was increased. A
total of some 2000 modifications were made. The modified tanks have a
travelling range of about 400km, a road speed of 43km/h and a
cross-country speed of 17km/h. A power-to-weight ratio of 14.2 H/ton, and
a turning radius of 13 metres instead of the original 40 metres.
These modified Centurion tanks
were then referred to as the Super-Centurion. All Israeli Centurions were
upgraded and modified to this standard.
The Airfix 1/76
Scale Centurion
|
I used the Airfix 1/76 scale
kit, this was not a new assembly as I had actually attempted to build this
conversion many years ago. The kit was retrieved from the scrapyard and
given a new lease of life. I firstly needed to strip the kit of all paint
and body putty, I made use of oven cleaner in a spray can for this
purpose. The oven cleaner seems to strip the paint much quicker than brake
fluid and it has the added advantage of being oil free.
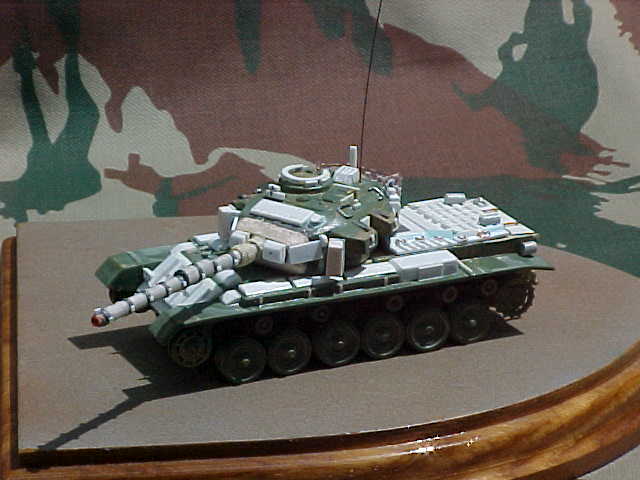
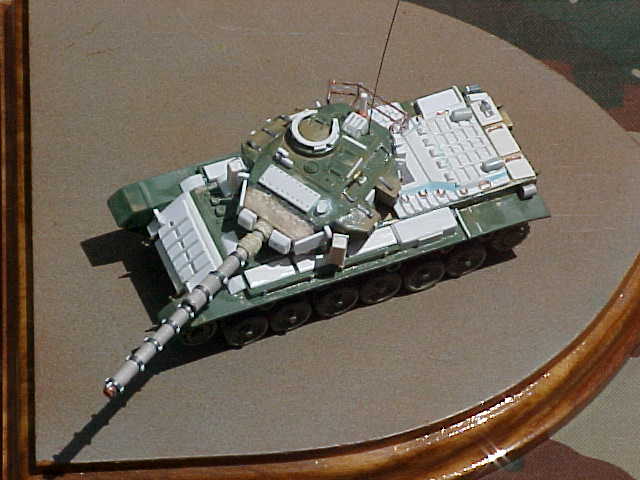
Overall view of the completed
and unpainted model (Photo: Author)
I
started the modifications to the kit using mainly two sub-assemblies, the
turret and the hull including the suspension.
Turret
Corrections and Additions
The
basic modifications needed to the turret are:
a.
New Main
Gun with Thermal Sleeve.
I scratchbuilt the main gun barrel by gluing three pieces of sprue
together, of the correct diameter. The sprue was first sanded to the
correct shape in a Dremel. I then covered the barrel in tissue paper
soaked in white glue to simulate the thermal sleeve. I then added the
thermal brackets and clamps from lead foil. Take note that the Centurion
and Merkava have different types of clamps, check your references.
b.
Modify
Main Gun Mantle.
The mantle was made from epoxy putty covered in tissue soaked in white
glue. Mantle cover attachment brackets were made from lead foil. A new
co-axial Browning 12,7mm machine gun and mounting bracket were added from
sprue.
c.
Turret
Basket. The
turret basket was made from fuse wire covered in fine bridal netting. This
was then given a supeglue wash to strengthen the assembly. The rear
jerrican holder was added after scratchbuilding it from plastic strip
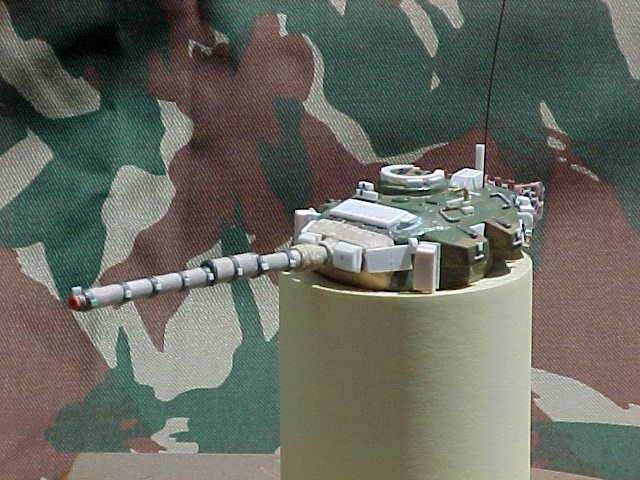
Modifications to the left
side of the turret. (Photo:
Author)
d.
Modifications to the Commanders Cupola.
All detail was sanded off, new visor blocks were added from plastic card.
The commander’s machinegun bracket was scratchbuilt from plastic strip and
added.
e. The
Gunners Hatch. The hatch is in the correct configuration and needs
no modification, a bullet splash rail can be added to the left side of the
hatch in the form of a suitable piece of plastic strip.
f. Search
Light. No light was added as some vehicles did not have this
feature and I felt that the Browing MG gave a good overall impression of
the turret modifications.
g. Reactive
Armour. This armour was added using various sizes of square pieces
of plastic sanded to shape, with bolt heads simulated by drilling small
holes in various positions on the reactive armour blocks.
h. Other
Additions. The wind sensor was made of various pieces of sprue and
added to the rear of the turret deck. The
commander’s magazine
box to the rear of the commander’s hatch was scratchbuilt and added.
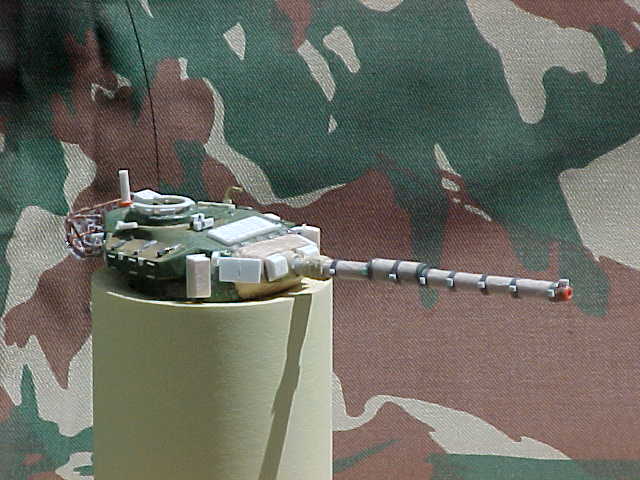
Modifications to the right of the turret. (Photo: Author)
Hull and Suspension Corrections and
Additions
The hull
and suspension needed the following corrections and additions:
a.
Front
Glacis Armour.
I added the additional armour by cutting a piece of plastic card to the
correct shape and gluing it to the front of the glacis. It was then
trimmed to the correct dimensions and sanded smooth.
b.
Modify Engine Deck I scratchbuilt the rear engine
deck to the correct Israeli version. This being the one with the five rows
of louvers, similar in appearance to the M48/M60 type. I added hinges and
handles from plastic and copper wire. The rear lights were made from
sanded sprue.
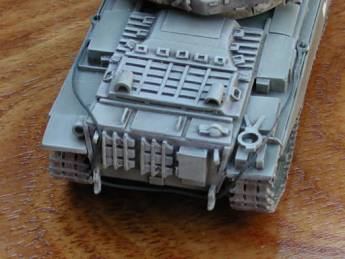
Modifications to the engine
deck can be seen on this over head view. (Photo: Author)
c.
Modify
Hull Stowage Boxes.
I removed these boxes and cut them narrower by about 1 mm, this is to
ensure that they do not extend to the edge of the sandguard.
d.
Modification to the Air Filter System.
The air filter system was incased in a plastic card box on both sides of
the vehicle. The intake pipe connection to the engine compartment was
added. The assembly placement and spacing was checked with references.
e.
Add Gun
Travel Bracket.
The bracket was scratchbuilt from plastic card and tube. Glued together
with MEK and sanded smooth.
f.
Modify
Main Lights.
The lights were scratchbuilt from plastic card shaped to the desired form
and drilled out with a fine drill.
g.
Add
Towing Cables.
Making realistic towing cables is an art form in itself. There is only one
way. You have to use the same technique to make the miniature as was used
on the full-scale cable. Begin by using three strands of fine copper wire
(you must use three or more, as a cable always consists of no less than
three strands) You should then use uneven numbers i.e. three, five, seven,
etc. Start by twisting them together in short lengths, making sure that
the ends do not get tangled. The technique consists of twisting short
lengths, unravelling the ends, doing another short length and unravelling
the ends, this goes on until the desired length is reached. It takes time
and care must be used to get a realistic result.
h. Add
Reactive Armour. This armour was added using various sizes of
square pieces of plastic with bolt heads simulated by drilling small holes
in various positions on the reactive armour blocks.
The
engine deck after painting . (Photo: Author)
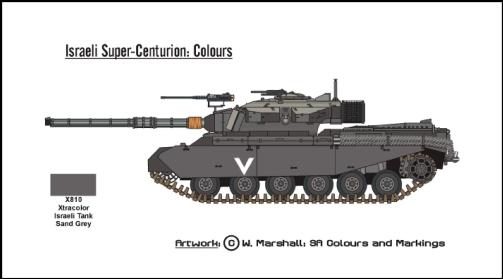
Drawing showing the colours
and markings.
The
IDF used a unique colour of paint on its armoured vehicles during this
period. I have seen it described as Israeli Olive Green or Golan Green and
various other names. Various Humbrol colours can be used to mix your own
colour. I used the easy way and made use of the Xtracolor X810 Israeli
Tank Sand Grey. The chevron identification markings were airbrushed on
with some matt white paint sprayed through a mask cut in sellotape.
After the paint was dry I airbrushed it with Future
and gave it a couple of days to dry. A light wash of dark grey oil paint
was added. Road wheels were painted dark grey. The entire vehicle was
drybrushed using a lighter shade of the base coat. The towing cable was
painted dark grey and drybrushed with the same lighter shade.
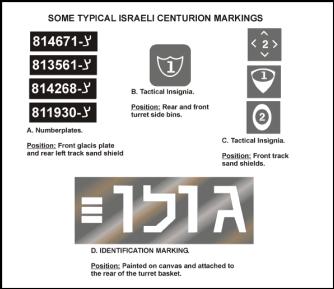
Supercenturion detail markings
[1] Caiti P, Modern Armour, Arms and Armour
Press, 1978.
[2] Weller J, Tanks in the Middle East,
Military Review, May 1976.
[3] Barbic' V, Upgraded Centurion, Military
Modelling, March 1985.
[4] Underkircher
T, Building an Israeli Centurion Mk V, Fine Scale Modeler,
Vol 14, No1, Kalmbach Publ. Co, 1996.
[5] Hodgson A,
An Israeli Centurion, Military Modelling, June 1980.
[6] Neate T,
Israeli Upgraded Centurion: The Second Upgrading, Airfix magazine,
February 1983.
Click
the thumbnails below to view the images full-size.
Use the back arrow on your browser to return to this page.
[../photogallery/photo6701/real.htm]
Model, Text and Images Copyright © 2001 by William
Marshall
Page Created 01 September, 2001
Last Updated 04 June, 2007
Back to HyperScale
Main Page
Back to Features Index
|
 Home
| What's New |
Features |
Gallery |
Reviews |
Reference |
Forum |
Search
Home
| What's New |
Features |
Gallery |
Reviews |
Reference |
Forum |
Search