|
Fairey Swordfish Mk.II
by Ian Robertson
|
 |
|
Fairey Swordfish Mk.II |

Tamiya's 1/48 scale Swordfish is available online at
Squadron
After passing by opportunities to purchase Tamiya's expensive 1/48
Swordfish I was lucky enough to receive it and the associated photoetch
(PE) as a birthday gift last year. I decided to build my kit as a Mk.II
version that served with No. 1 Air Gunnery School in Yarmouth, Nova
Scotia, 1943. There are no aftermarket decals for this particular
aircraft, but apart from the nose art it was not difficult adapting
decals from other kits. My inspiration for this project was an often
used port side profile of the aircraft (and because it was Canadian).
|
Tamiya's 1/48 Scale Swordfish |
Tamiya's Swordfish is a highly detailed kit in the style and quality
that we have come to expect from this manufacturer. Despite the
complicated look of the aircraft and parts in the box, it is not
difficult to build. Not surprisingly it is more time consuming to build
than a typical monoplane tail dragger, but this is due in large part to
the amount of detail in the kit.
Construction
Having said that the kit is easy to build, I must confess to having a
bit of trouble getting the wings attached properly. I credit this to my
own folly rather than a deficiency of the kit; none of the reviews I've
seen for the Swordfish have indicated any problems with fit.
The upper wing comes in three sections: left, right and a center
piece that anchors above the fuselage. The lower wings fit into wing
roots that emerge from the fuselage. During construction the upper and
lower wings are connected securely via struts that align easily into
slots on the wings. No problems encountered at this point. However, when
I went to plug the right wing (both upper and lower sections) to the
fuselage assembly I was forced use a lot of pressure to make the fit
work. Crrrraaaaack! - the two pieces that make the lower wing split
under the stress, as did one of the struts.
To add insult to injury, the PE bracing on the inner strut popped out
with a definite "twang" and sat there dangling from the upper wing. Once
I regained my composure the problem was fixed without too much
difficulty using CA glue and mini clamps. Oddly enough the left wings
went on with little difficulty, so I remain puzzled as to the problem.
Perhaps a number of small errors on the right side manifest in a large
error. In any case, I see no problem with alignment in the finished
model, although the stress on the wing and CA glue remains (I wonder if
it will ever give way? Just to be sure I'll keep my glasses on when I
get close).
Using Tamiya's Photo-Etched
Set
The PE is not included with the kit, much to the chagrin of many
modelers. I used the PE sparingly on my model, mainly because I just
couldn't get it to fit properly (again, my technique is likely to blame,
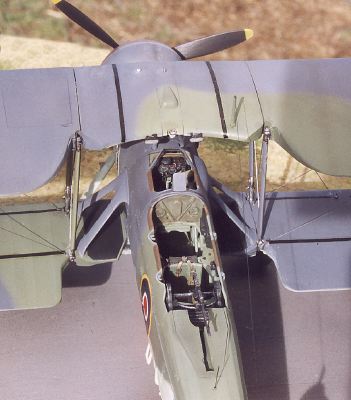
not the kit). I used the PE for the gun sight, torpedo aiming bars,
engine detail, and the cross bracing on the outer wing struts.
For the cross bracing on the inner struts I used 0.25 x 0.5 mm
styrene strips. I opted to use stretched sprue for the wing bracing and
tail bracing (including the additional control wires for the elevators
and rudder), both because I could make the sprue taught and I was
unhappy about the bulky appearance of the PE bracing wires*it looked out
of scale to me. Would I recommend the PE? Yes, it made a big difference
in the areas I used it. Moreover, some may have better luck installing
it than I did, and if the scale doesn't bug you then it may be a good
option.
Extras
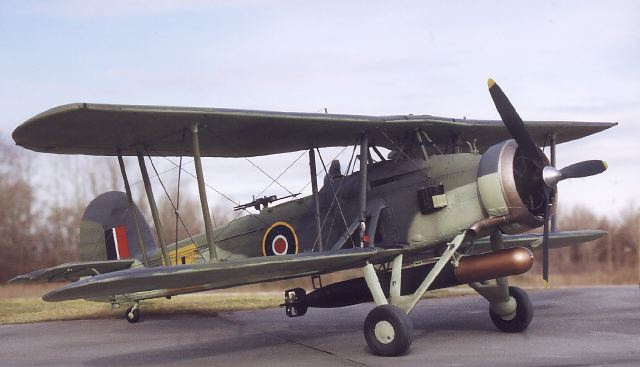
I made a number of minor modifications to convert the kit to a Mk.II.
Using Tom Cleaver's article on the Aircraft Resource Center web site as
a guide, I removed the starboard wing light, sanded the ribbing off a
portion of the lower wings (the Mk. II had metal skin on the lower wings
as reinforcement for rocket and bomb fittings), and I used the kit's
alternative cowl, pitot tube and breather tube (that hood ornament on
the nose behind the engine). I also modified the oil cooler slightly by
adding some details not present on the Mk I. However, I did not alter
the oil cooler's size even though it is somewhat larger in the Mk.II. No
changes were made to the cockpit, although Tom Cleaver identifies minor
changes there as well.
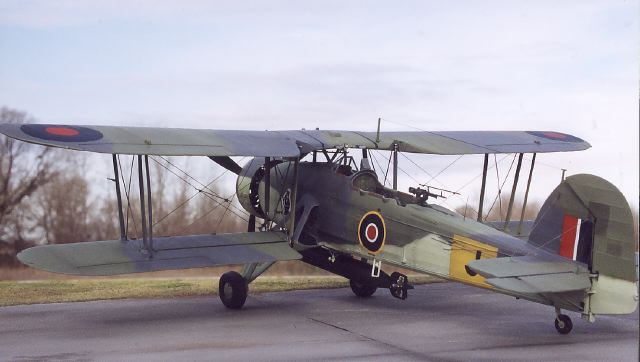
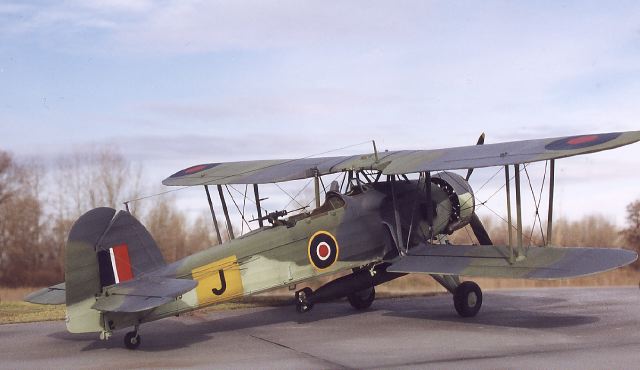
The paint and decals were added prior to attaching the wings to the
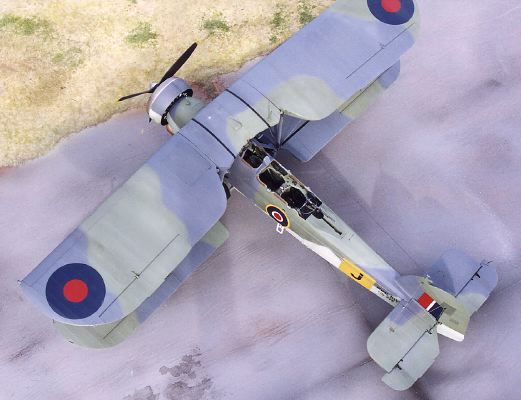
fuselage. Using Polly Scale acrylics I applied a standard camouflage
scheme of extra dark sea grey and slate grey over sky type "S". The
yellow fuselage markings were painted and then masked prior to adding
the camouflage. The metal parts of the cockpit interior were painted RAF
interior green, except the raised tread plates on the floor which were
painted flat aluminum. I used "doped linen" paint (Polly Scale) for the
inside fabric covering in the lower recesses of the cockpit. The linen
was then treated to splotches of red-colored chalk pastel to simulate
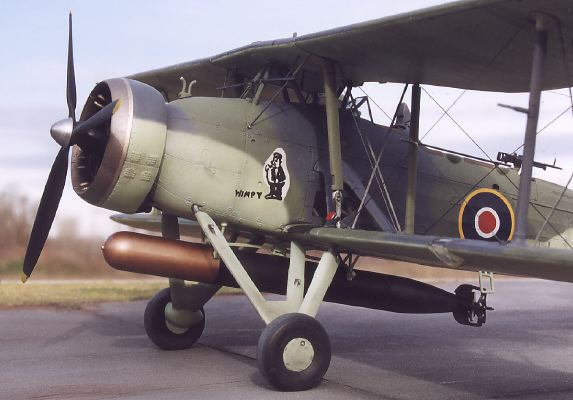
the red dope applied to linen surfaces. The cowl ring was painted using
an 4:1 mixture of metallic grey (Tamiya acrylic XF56) and dark copper (Tamiya
acrylic XF28). The torpedo was painted scale black with a copper nose
(similar to the Mk.II Swordfish display at the Canadian Aviation Museum
in Ottawa).
National markings were applied using the decals from the kit, although
no underside roundels were added. The letter "J" was obtained from
spares. The serial number "HS 275" was put together from a combination
of dry transfers (HS) and spare decals (275).
The nose art was produced by hand. I painted the white background and
then drew the cartoon character by hand using a black "gel pen". The
word "wimpy" was also applied with a gel pen.
Most of the talk about this kit surrounds its cost. True, it is
unusually (cross your fingers) expensive, and I received mine as a
birthday present because I was unwilling to fork out the bucks myself.
However, it is worth keeping in mind that this kit will occupy you
longer than say, for example, a Hasegawa Bf109 or Tamiya Spitfire Vb
(which sell at about half the price), and it will make a decidedly
unique addition to your collection. Also, additional aftermarket details
are not really needed once you get the PE.
My Swordfish certainly stands out on a shelf filled with WWII
monoplanes. Just something to consider.
Click the thumbnails below
to view larger images:
Text, Images and Model Copyright © 2001 by
Ian Robertson
Page Created 15 December, 2001
Last Updated
04 June, 2007
Back to HyperScale Main Page
Back to Features Index |
 Home
| What's New |
Features |
Gallery |
Reviews |
Reference |
Forum |
Search
Home
| What's New |
Features |
Gallery |
Reviews |
Reference |
Forum |
Search