|
T-45
by Fotios Rouch
 |
|
T-45 |

HyperScale is proudly sponsored by Squadron.com
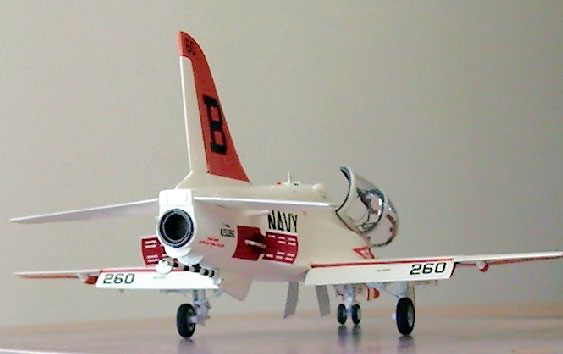
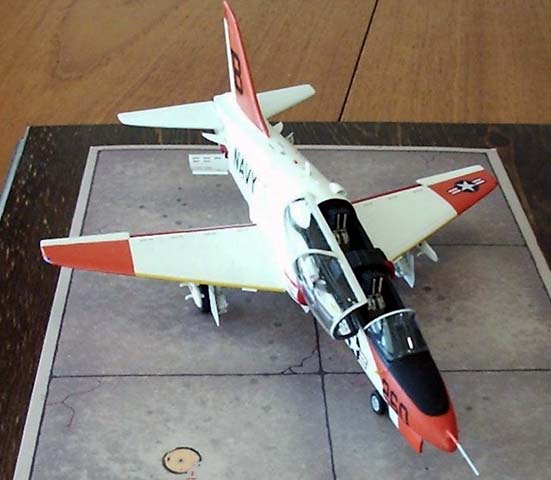
The T-45 may not be the prettiest trainer operated by the Navy/Marines, but
it is here to stay now!
It is a relatively small jet with a big hump, but it is white and orange and
therefore important to my collection of navy trainers. When the Hasegawa TA-4J
and the Collect-Aire T-39 get released I will have all the trainers I care for
(I still have to complete the Collect-Aire Turbo Mentor and Monogram Trojan).
|
Collect-Aire's T-45 In
The Box |
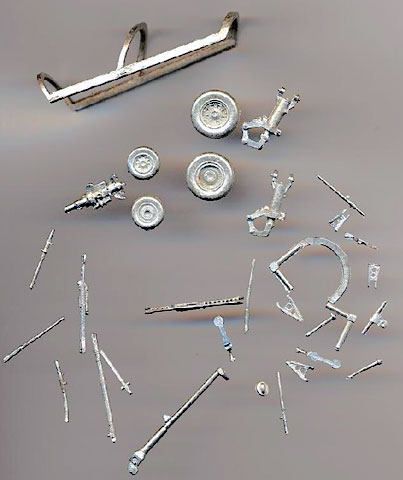
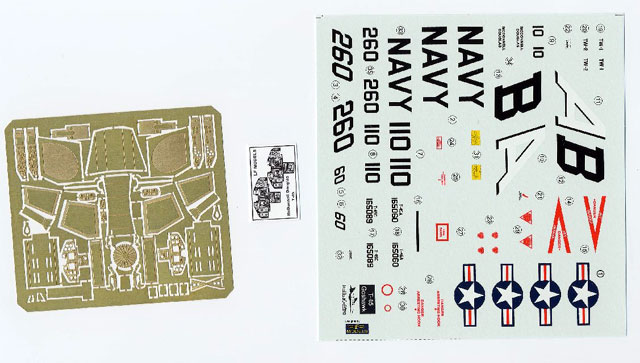
The kit is quite nicely done. It is sourced from the LF group in the Czech
Republic. As you can tell from the kit parts pictures included it contains
resin, photoetch, vacform and paper representing the instrument dials.
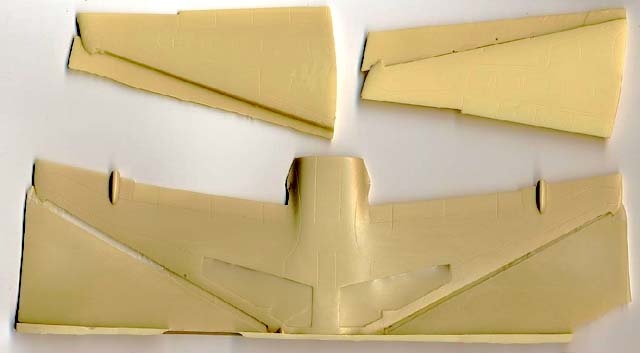
The fuselage and wing parts were very straight and there was no warpage. The
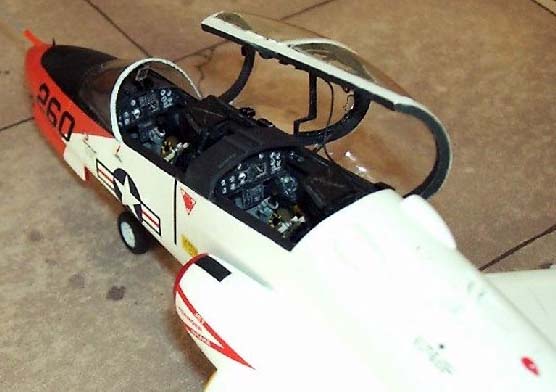
cockpit is fairly complete with nice photoech instruments that sandwich the
instrument paper printouts. The ejection seats will look familiar to some resin
aftermarket aficionados. It saved me from having to replace them with the ones
from Pavla for instance.
Click the thumbnails below to view
larger images:
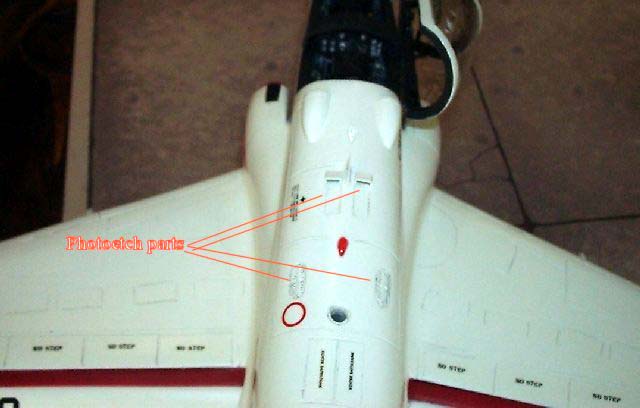
The airbrakes are nicely done in photoetch. They would very
difficult to do in resin being so thin and perforated. I was pleasantly
surprised to find little folding photoech parts to represent the two little
exhaust scoops behind the cockpit. All the blade antennae are provided in
photoetch.
You will enjoy the amount of detail provided in photoetch for the front
landing gear too. Pay attention there and use the World Airpower Journal issue
with the BAE Hawk on the cover because it has some great close-ups and you need
them since the instructions are a little vague on this part.
The fuselage went together very well and aside some minor sanding it needed no
putty whatsoever.
The only minor issues that I had were the following:
-
The wing comes in three pieces, one big bottom
piece and two top pieces. The fit from top to bottom is fine. I elected to thin
down the trailing edges. The problem is that there is a good gap between the
fuselage and the top surface of the wings. I solved it by inserting styrene
strips in the gap, sanding them flush with the top wing surface and the fuselage
and then used my favorite 3M Acryl Blue automotive putty. After a couple of
passes with Mr. Surfacer in the airbrush everything was fine.
-
The other "issue" was the lack of any type of wall
separating the front and back cockpit areas. This was easy to fix with a some
styrene sheet and some rod and wire.
-
It would have been nice to have some HUD
representation included in the photoetch fret. I used my Reheat stock for
details.
-
The little exhaust hole on the top of the fuselage
hump was also not present. Easy to fix, you might want to insert some hollow rod
in there for effect.
-
One thing that bothered me a bit and did nothing
about was the lack of vortex generators on the wings. I decided that it would be
too messy to start gluing so many styrene pieces in such close proximity to one
another.
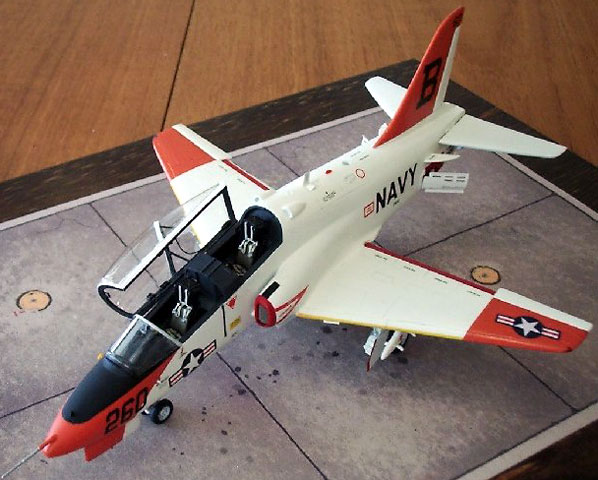
I enjoyed this one quite a bit. It was relatively
simple and as close to a "fast build out of the box" as it comes for me. It took
only a couple of weeks of late evening work to complete.
LF has also done the Mig-19S for Collect-Aire and
the upcoming Su-24 and Mig-31. Can't wait!
Click the thumbnails below to view
larger images:
Model, Images and
Article Copyright © 2001 by Fotios
Rouch
Page Created 27 December 2001
Last updated 04 June 2007
Back to HyperScale Main Page
Back to Features Page |
 Home
| What's New |
Features |
Gallery |
Reviews |
Reference |
Forum |
Search
Home
| What's New |
Features |
Gallery |
Reviews |
Reference |
Forum |
Search