|
Panavia Tornado IDS
by
Rick
Cotton
|
|
|
Panavia Tornado |

Revell's new
1/32 scale Tornado is
available online at Squadron.com
Every once in awhile we outsmart ourselves. That was the case when I
purchased a TAC Scale Dynamics superdetail set for Revell’s 1/32 scale
Tornado.
Don’t get me wrong - the TAC Scale set is incredible, with beautiful
resin parts, two big brass photoetch frets, and film instruments.
Unfortunately for me, the set was intended for the NEW Revell
1/32 Tornado issue, not my elderly one, but being dumb enough not to
read the directions in the first place, I dove right in anyway.
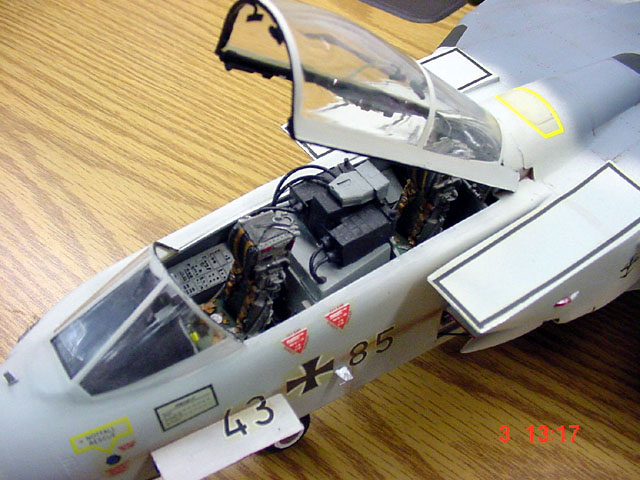
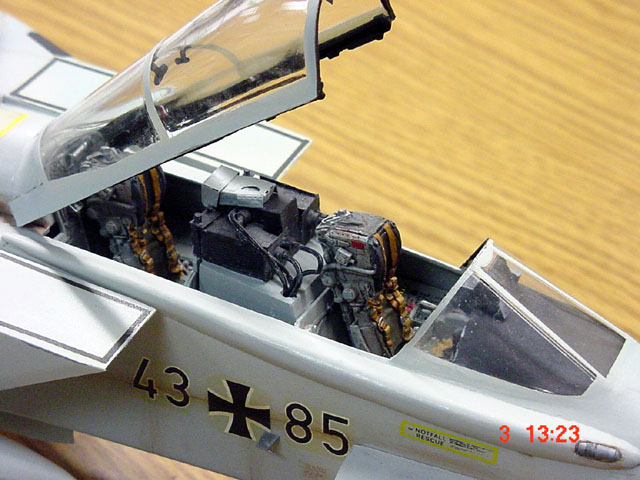
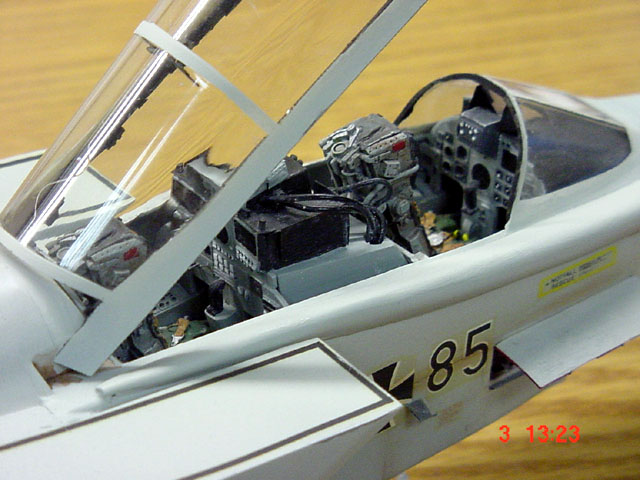
The resin parts in the TAC Scale (now Custom Aeronautical Miniatures)
set are little jewels, with greatly detailed seats, electronics bays,
canopy sills, and more, and they paint up beautifully. My first clue
that something was rotten in Denmark was when I noticed the part numbers
in the TAC Scale instructions didn’t match the numbers in the elderly
Revell kit. I had to shave back the rear part of the front cockpit to
get things to fit, and even then, it was a tight squeeze. I actually
relocated the instrument panel and cockpit coaming a fraction farther
forward to make more room to get all the goodies in. Nearly every
cockpit part in the set had to be shaved, sanded, or clipped to
fit…….The old Revell kit is a bit off in its dimensions.
The real fun began when I discovered that the electronics bays were too
deep to fit inside the old Revell fuselage, and butted up against the
sides of the cockpit tub, while still projecting outside the fuselage by
about a sixteenth of an inch. Taking some sandpaper and a deep breath, I
carefully sanded the backs off of all the bays,and shaved a fraction off
of the fronts as well. I also shaved a bit more off the sides of the
cockpit tub, prayed earnestly, and then dry-fitted the assembly
together……..it finally fit! Whew! The sides of the tub were painted
gloss white, and the forward portion of the fuselage was put together.
Revell’s old Tornado does have decent recessed lines, but the real
plane is covered with flush rivets, and there were none on my model yet.
I used an old probe from my wife’s high school biology class frog
dissecting kit (sans any frog residue), sharpened to a fine point, to
replicate the rivets….. hundreds of them…..along the panel lines.
Most of the rest of the kit went pretty normally (fill and sand and cuss
Revell’s fit) , however, having had one of these kits before, I decided
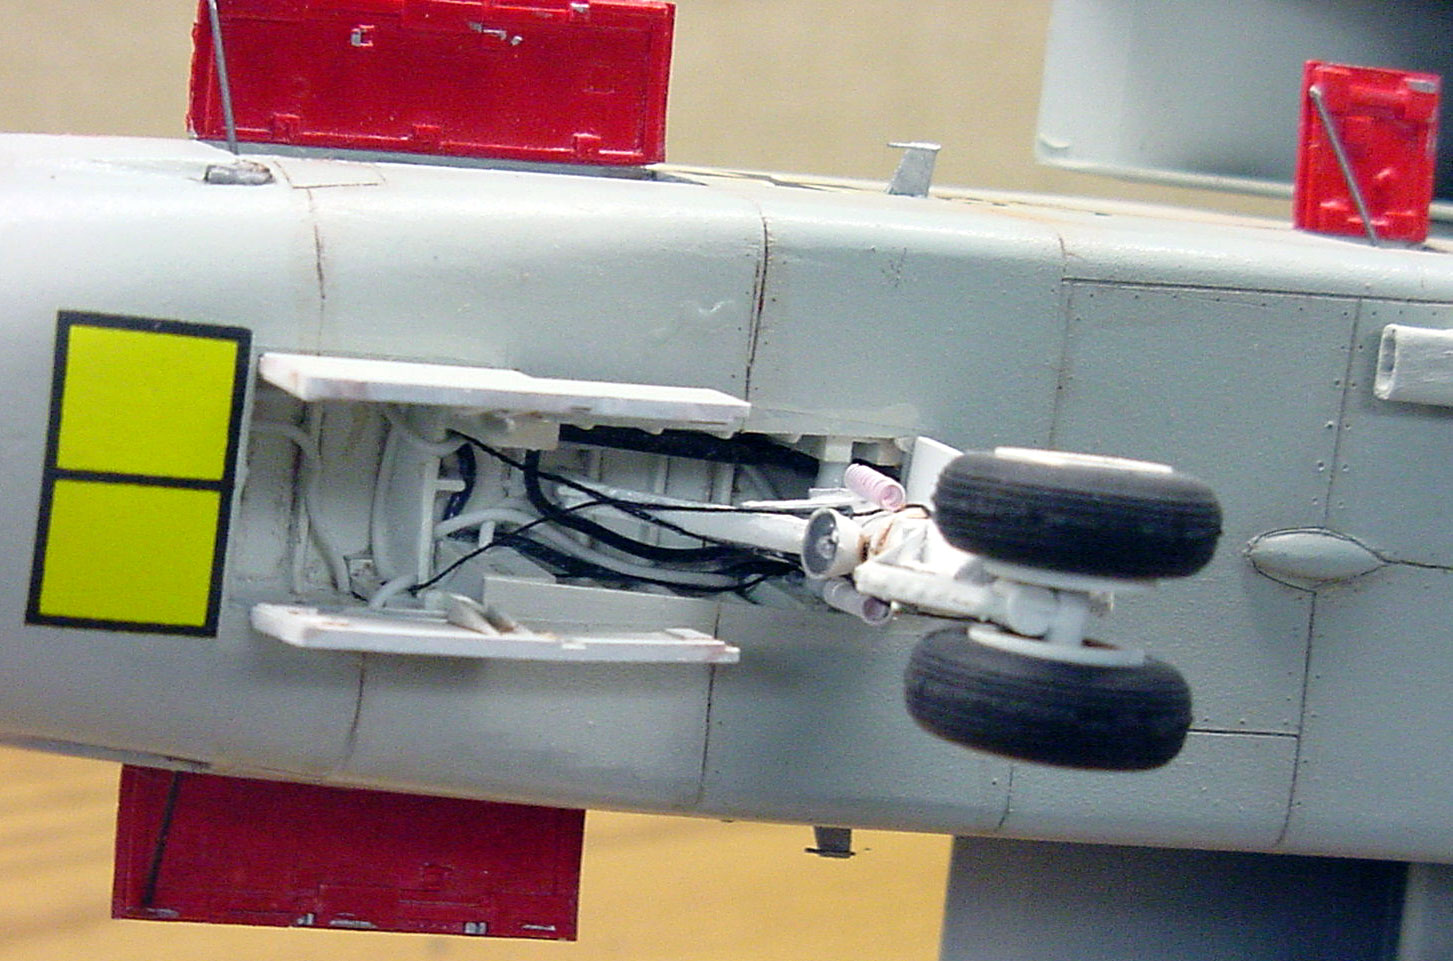
to shore up the main landing gear, which are notoriously weak in the
thin oleo section of the main struts. I cut and inserted brass rod
inside the main gear strut halves and superglued the strut halves
together.
I didn’t like the dark gray over light gray scheme on the box, so I
opted for the wraparound scheme on the side panel. The paint
instructions weren’t much help. They consisted of formulae of so much
percent “dark gray” plus so much percent “olive” and so forth, so I
mixed Testors Modelmasters to get an approximate match to the three
grays in the photo, plus 10% white for scale effect. Accurate? Who the
hell knows? I like it.
After airbrushing the scheme, the kit was sprayed with Future for
decaling. I used the kit German Navy decals, which responded well to a
mild setting solution, and when all was dry, overcoated with Testors
Acrylic Clear Flat, which dries very flat - good stuff!
Weathering was a combination of a watercolor/liquid detergent wash,
chalk pastels, silver chipping (not too much!) and black ink streaks
blown back into the slipstream, which brings up an interesting question:
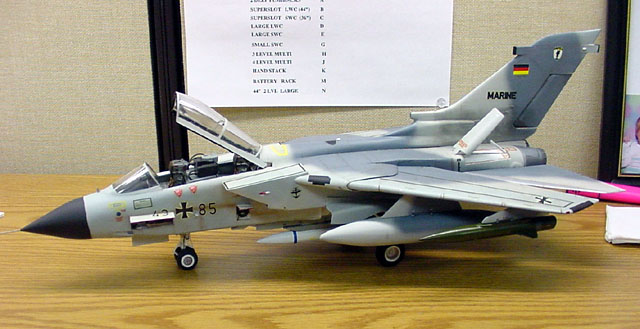
The Tornado is a swing-wing aircraft, with multiple wing positions,
so which way do the streaks go on the outer wing panels? Here is where
Verlinden’s excellent book, “Lock On – Panavia Tornado” came to the
rescue. It appears to me from the photos that the majority of the
streaking occurs when the wings are swept back.. That makes sense…….the
wings will be back most of time, except for landings, takeoffs, and some
of those wacky Tom Cruise maneuvers. So that’s what I did.
A final overcoat of Testors Acrylic Clear Flat and the “Fin” (RAF
pilot slang) was done.
Click the thumbnails below
to view larger images:
Model, Text and Images Copyright © 2001 by
Rick Cotton
Page Created 05 November, 2001
Last Updated 04 June, 2007
Back to HyperScale
Main Page
Back to Features Index |
 Home
| What's New |
Features |
Gallery |
Reviews |
Reference |
Forum |
Search
Home
| What's New |
Features |
Gallery |
Reviews |
Reference |
Forum |
Search