Home
| What's New |
Features |
Gallery |
Reviews |
Reference |
Forum |
Search
Home
| What's New |
Features |
Gallery |
Reviews |
Reference |
Forum |
Search
|
|
|
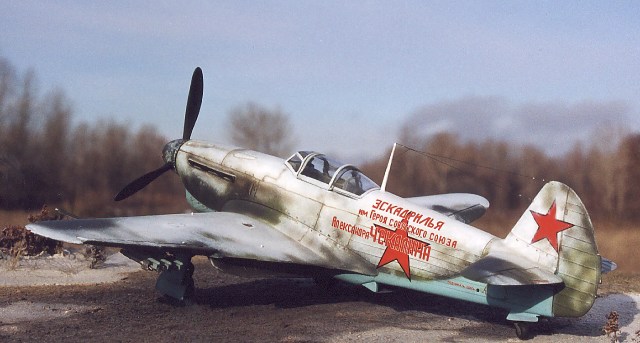
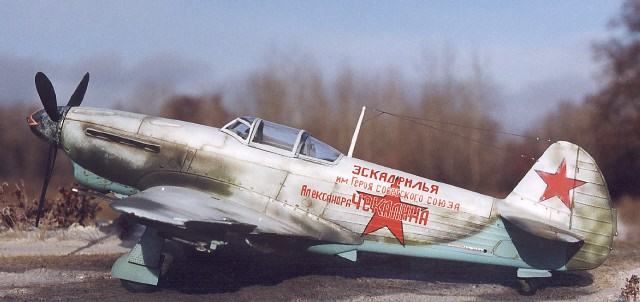
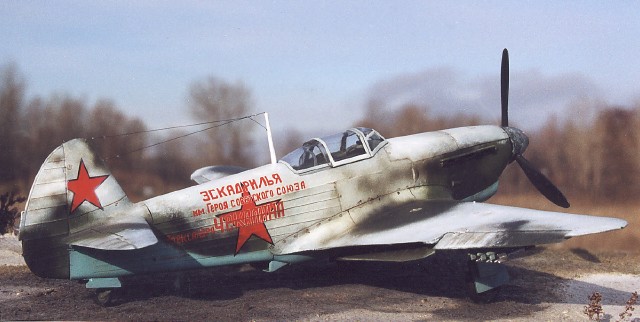
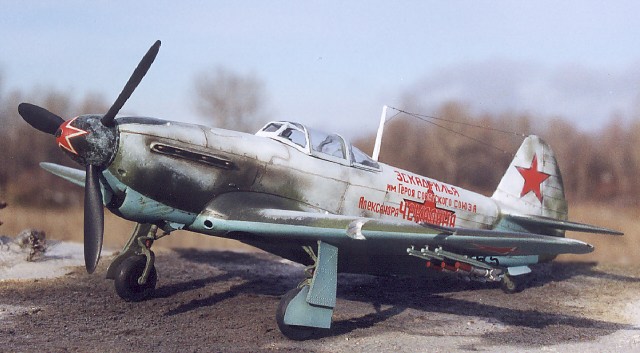
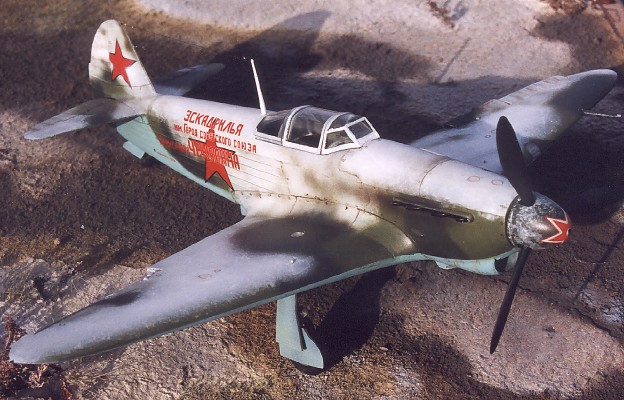
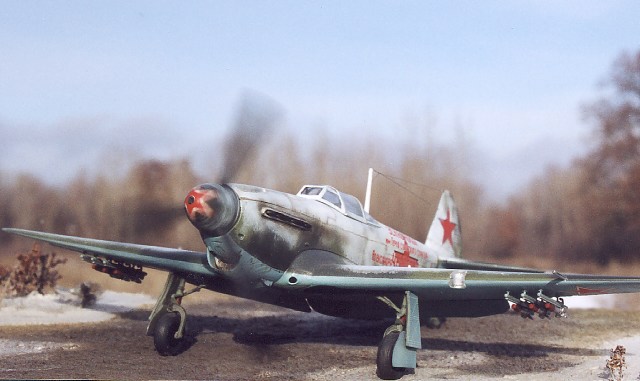
Yakovlev Yak-1b by Ian Robertson
Roughly the size of a Messerschmitt Bf.109, the Yak-1b with its distinctively shaped wooden wings and steel-tube fuselage first saw action over Russia in late 1941. Unlike the Yak-1, its razorback predecessor, the Yak-1b had the fuselage spine cut down to allow for a "bubble-top" canopy which offered pilots greater visibility. Early Yaks, including the 1b, were armed with only a 20 mm cannon in the propeller hub and a 7.6 mm machine gun above the engine.
The engine was oversized for the airframe, making it a difficult aircraft to handle for hastily-trained pilots. Nevertheless, Yaks played a major role in the ultimate defeat of the Luftwaffe in the eastern front. Almost 9,000 Yak-1's were built.
Accurate Miniatures came up with another winner with their 1/48 Yak-1b. Two other versions, the Yak-1 (razorback) and Yak-1 on skis are also available from Accurate Miniatures.
For the true Yak enthusiast, ICM recently released a number of Yak-7 kits (ICM also produces Yak-9 kits, although these early offerings have not received very high praise), and Eduard has a Yak-3 kit which gets good reviews.
The Accurate Miniatures kit is well designed and easy to build with only some minor fit problems around the carburettor air duct at the left wing root.
There is the option to drop the wing flaps; interior details are provided on the flaps if you choose to cut them from the wings to reposition position them. I built my kit straight from the box except for the addition of etched brass seatbelts and decals from my spares box. I chose to drop the flaps and repositioned the ailerons.
This model presented a great opportunity to experiment with a winter camouflage scheme. Using Polly Scale acrylics, I began by painting a summer camouflage scheme of olive green and black (I used dark grey for scale effect) over Russian sky blue (toned down with a touch of white). Winter distemper was simulated by hand brushing white paint over the wings and fuselage, taking care to ensure that some of the base camouflage remained visible.
The white paint was applied in blotches rather than with smooth brush strokes. No effort was made to hide the blotchiness while brushing, although I did try to minimize paint thickness by wiping off the excess with a cloth. I then used an airbrush to spray white paint over the brushed areas. This filled in many of the gaps caused by the brush and gave a more solid appearance to the white paint. The edges were left rough to give the appearance of distemper that had been applied in the field with mops or rags. A coat of Future was applied prior to adding the decals. I used decals from my spares box. The slogan on the fuselage is meant to reflect the common use of such slogans on VVS aircraft rather than depict a particular aircraft. A clear dull coat lacquer was applied once the decals had dried. I sprayed white paint lightly on the edges of the red stars on the tail to give the impression that the distemper had been added in the field. A mixture of burnt umber and raw sienna was used along panel lines. Exhaust stains were applied using an airbrush and highly thinned black paint. The antenna wires were made from stretched sprue.
This model was great fun to build and paint.
For those interested, Warriors makes some awesome Russian figures that would go well in a diorama with this or any other VVS model. Model, Text and Images Copyright © 2000 by Ian
Robertson
|