|
Zerstorer
Rommel
by LTCDR Stefano Schembri
|
|
|
Zerstorer Rommel |

HyperScale is proudly sponsored by
Squadron.com
The ship, of the “Lütjens” class, has been in active service till 1998
in the Bundesmarine as a destroyer. The ships of this class are
slightly modified Charles F.Adams class purchased by the Bundesmarine
from the U.S. Navy before completion.
Specifications
|
Displacement |
Dimensions |
Propulsion |
|
Standard |
3,370 tons |
Overall |
133.9m |
Boilers |
4 Foster Wheeler "D"
type watertube |
|
Maximum |
4,720 tons |
Beam |
14.29m |
Turbines |
2 GE geared system |
| |
Draft |
6.3m |
Shafts |
2 |
| |
Horsepower |
70,000ho |
|
Endurance |
4,030NM @ 18kts |
|
Maximum Speed |
34 kts |
Revell's 1/700 Scale "Rommel"
|
This Revell kit is very well moulded and detailed, apart from some
minor warps and sink marks on the hull and main deck which will be
very eye-catching once the model is built. With a careful filling and
sanding job all these problems can be solved, and the kit is no doubt
worth a couple of hours spent on its hull and deck. Take out those
sanding sticks!
The hull is cut along the waterline, but you get also a complete hull
with propellers, shafts, rudders and whatever you need to display it
on a base, also supplied.
There are a lot of small parts, half of them are to be left on the
sprues as they do not belong to the “Rommel” in its current
configuration, if you wish to build an older version you only need to
find some images of the sixties.
Among the extra parts you will find two helicopters (one SH-3D and
a Lynx), ASROC launchers, HARPOON launchers, a SEA SPARROW turret,
guns, antennas, Oerlikon anti aircraft system… a sparebox in a kit!
I started construction from the hull. Filler and sanding sticks are
essential here. I glued the main deck to the hull and got a perfect
join, no filler required. I sprayed a light coat of light grey Humbrol
enamel as a primer and tin order to highlight scratches and other
defects.
 While
that was drying I put my hands on the superstructures, assembling,
priming, painting, drybrushing and weathering them as separate blocks:
it’s better to build and paint in blocks, as masking and painting an
assembled ship would be very difficult. While
that was drying I put my hands on the superstructures, assembling,
priming, painting, drybrushing and weathering them as separate blocks:
it’s better to build and paint in blocks, as masking and painting an
assembled ship would be very difficult.
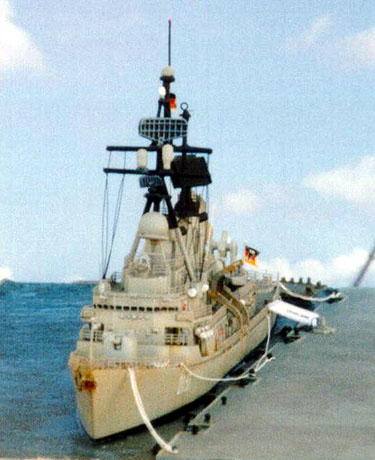
All the antennas, TARTAR launchers, MK47 launchers, ASROC launchers,
gun turrets and barrels were assembled, detailed, painted, drybrushed
and weathered separately. Try to spend an evening on each separate
weapon system and consider it a model in the model: this can really
improve the overall quality of your work.
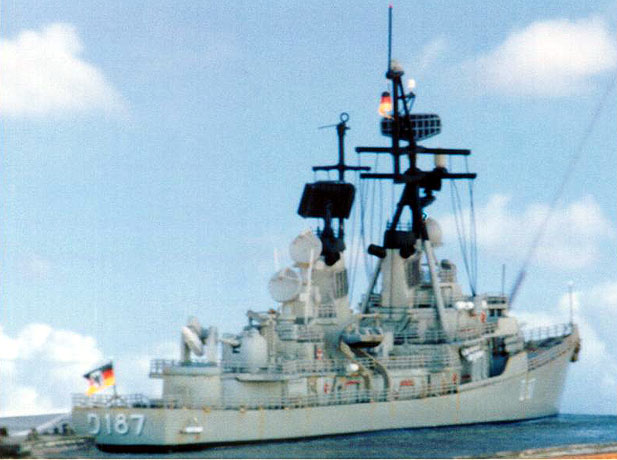
During construction I lost one of the two TERRIER antennas and this
forced me to scratchbuild the couple, this resulting in a very
time-consuming job, but the final result is much better than if I used
the kit pieces. Four hours were spent to build the TERRIER masts and
antennas, using styrene, copper and stretched sprue.
The SPS-52 3D search radar antenna (the square, black panel just above
the TERRIER antennas) was detailed using styrene sheet and steel wire,
then painted black and drybrushed with dark grey.
All the upper mast sections were scratchbuilt using steel wire glued
with cianoacrylate, then painted as appropriate and further detailed
using copper wire, stretched sprue and adhesive lead stripes. The
INMARSAT radome (the big bowl above the bridge) was completely
scratchbuilt as well as its platform and supports.
One thing I don’t like in this kit are the navigation and 2D radar
antennas, I used the kit pieces but if you want to do an excellent
model you do need some etched brass replacements. I wish I will have
the chance (and fancy) to cut them off one day and install brass
parts, but an etched brass set is out of budget for me now. The only
etched brass parts are the railings: these were painted light grey and
glued with CA.
Before assembling the superstructures I sprayed the deck with
Aeromaster gloss clear and put on the walkways and safety markings,
supplied by Revell in the form of decals. These are glossy, well
printed and thin, but careful trimming and a lot of setting solution
are required in order to get them right.
I used Humbrol enamels overall, trying to get the right tones of
gray mixing it on my own. I am satisfied with the results. Once
painted, the sections were sprayed clear gloss and a very thin mixture
of dark grey and white spirit was used to darken all the recesses.
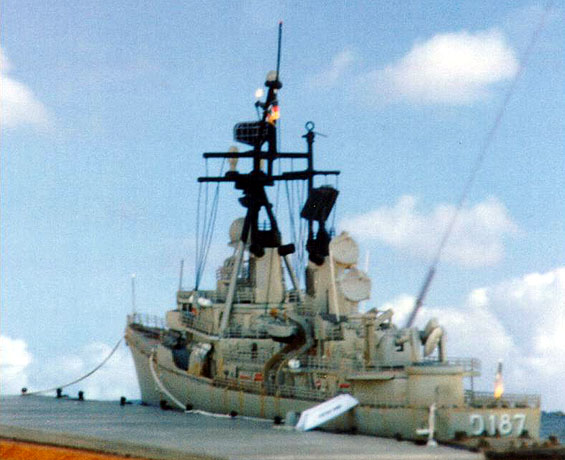
Then comes a light drybrushing and, once assembled, the model was
“rusted” with enamels thinned with white spirit.
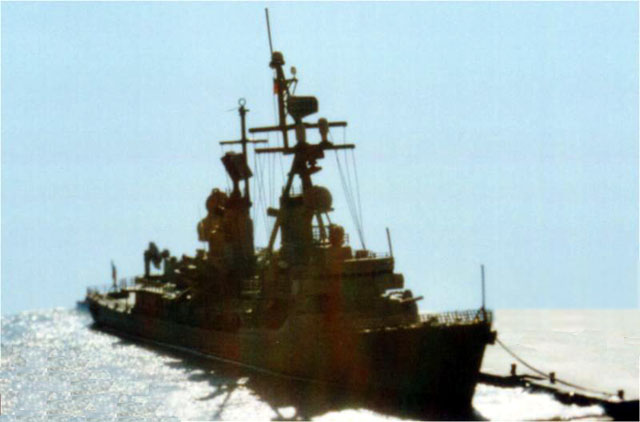
The diorama represents the ship moored on a dock, supposed to be in
a naval base somewhere in the Mediterranean, so the water is very calm
and rather greyish. I started with a base of sheet styrene, on which
the dock was built sandwiching three layers of styrene cut using some
computer made masks. The sea is painted with a mixture of blue, grey
and green, sprayed in an uneven pattern, then covered with a layer of
acrylic gel and textured with an old, big, flat, rough brush. The
mooring ropes are copper wire carefully “weighted” and painted flat
white.
I really enjoyed building this kit.
Click the thumbnails below
to view the images full-sized.
Use the "Back" arrow on your browser to return to this page.
[../photogallery/photo22976/real.htm]
Model, Images and Text Copyright ©
2001 by Stefano Schembri
Page Created 25 August, 2001
Last Updated
04 June, 2007
Back to HyperScale Main
Page
Back to Features
Index
|
 Home
| What's New |
Features |
Gallery |
Reviews |
Reference |
Forum |
Search
Home
| What's New |
Features |
Gallery |
Reviews |
Reference |
Forum |
Search