|
A-4K
Skyhawk
Royal New Zealand Air Force
by Brett Green
 |
|
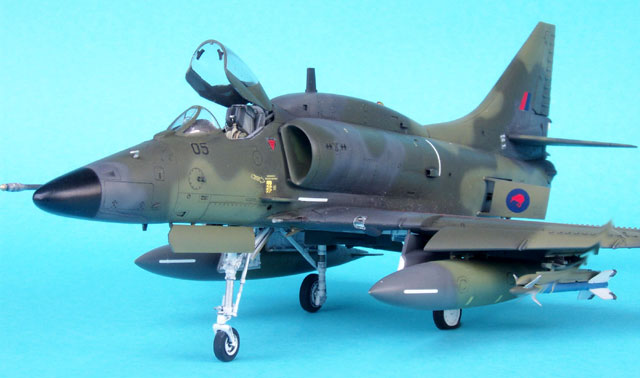
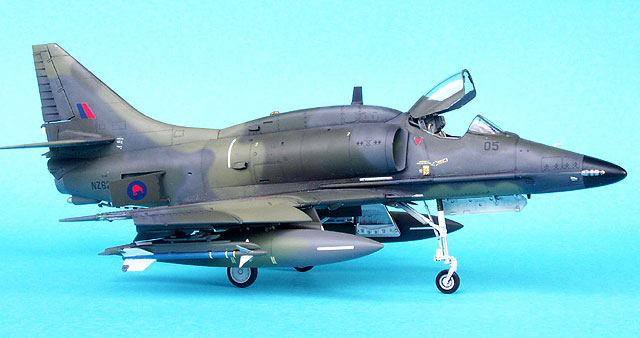
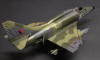
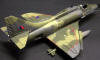
Douglas A-4K Skyhawk
NZ6205, 75 Sqn RNZAF, Ohakea Air Force Base, 1987 |

Hasegawa's 1/48 scale A-4E/F may be ordered online from Squadron.com
The Douglas Skyhawk was New Zealand's sole strike aircraft type
for more than 30 years until its retirement from service in 2002.
The New Zealand Government purchased ten A-4F and four TA-4F
Skyhawks from the United States in 1970. These aircraft were redesignated A-4K
and TA-4K in New Zealand service. New Zealand also purchased ten of Australia's
A-4G and TA-4G Skyhawks in 1984, two years after Australia's last remaining
aircraft carrier HMAS Melbourne was retired.
New Zealand's Skyhawks were upgraded from 1985 onward. They were
fitted with glass cockpits (per the F-16), Head Up Displays, new radar and
navigation systems, reinforced structural elements and the distinctive avionics
"hump" was removed.
A-4Ks were operated by Nos. 2 and 75 Squadrons RNZAF. They were
based in Ohakea in New Zealand, and Nowra on the south-eastern coast of
Australia - the old home of the Royal Australian Navy's A-4Gs.
The Skyhawk has not been replaced in New Zealand service.
Hasegawa’s 1/48 scale A-4E/F Skyhawk kit is one of the most
popular recent modelling subjects on HyperScale. The model is accurate, well
detailed and features first-rate surface features including finely engraved
panel lines and raised vortex generators.
I decided to make a few enhancements to my kit.
Getting Started – The Intakes
Jet intakes can be frustrating to modellers.
Due to the
limitations of the injection moulding process, most kit intakes are supplied in multiple parts. This results in a seam on the inside
of the intakes. Because intakes are large, located in a prominent position, and
often painted white, these seams are
pretty obvious even to the casual observer. However, they are difficult to
eliminate due to their relatively inaccessible position.
Fortunately, several after-market companies now produce “seamless” resin
intakes.
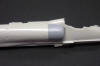
Cutting Edge makes a set of seamless 1/48 scale intakes for the A-4E/F/G/K.
These intakes are supplied in one part each, with no internal seam at all.
Casting is up to Cutting Edge's usual high standards.
I was a little worried about removal of the intake from an imposing looking
casting block. I girded my loins, braced the part securely, took a deep breath
and carefully cut the part away using a Tamiya razor saw. To my delight the part
almost fell away - very little effort was required to remove the intake. A few
swipes with a sanding stick finished the preparation. This operation took about
2 minutes.
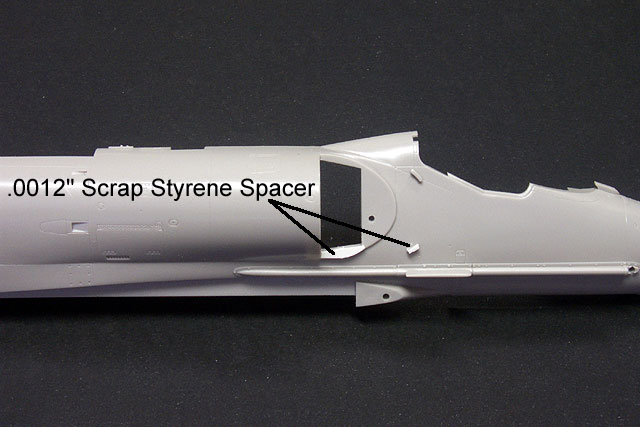
The fit of the intakes to the kit fuselage halves looked reasonably good, but I
added two scraps 12 thou scrap styrene to the lower intake braces on each
fuselage half to achieve totally gap-free alignment.
Cockpit
I also decided to use Cutting Edge’s Cockpit Detail Set.
 Hasegawa’s
kit cockpit is quite nice. The plastic side consoles, quilted upper sidewalls
and cockpit tub are all very well detailed. Cutting Edge has resisted the
temptation to simply duplicate these items, instead focusing on the areas that
will benefit from further improvement. Hasegawa’s
kit cockpit is quite nice. The plastic side consoles, quilted upper sidewalls
and cockpit tub are all very well detailed. Cutting Edge has resisted the
temptation to simply duplicate these items, instead focusing on the areas that
will benefit from further improvement.
The cockpit upgrade comprises only five parts in Cutting Edge's familiar grey
resin, and a small acetate sheet with instruments printed in black over clear.
The resin parts are the rear bulkhead, the canopy hinge base, the seat and
instrument panel.
Preparation of these parts was very simple, and the only modification to the kit
was the removal of a small bump on the cockpit floor. Test fitting proved that
there would be no problems in this area.
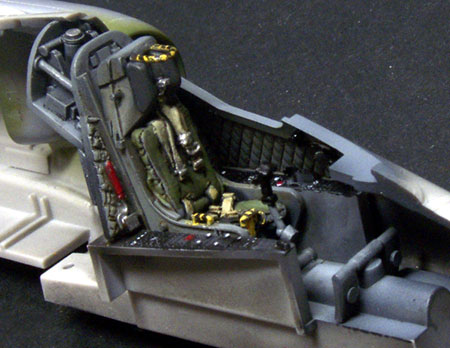
The parts look good in resin, but they really came to life under a coat of
paint. I sprayed the seat and cockpit in grey, then picked out details by brush. When
the basic paintjob was dry, I added a generous wash of thinned oil paint to the
seat, side consoles and quilted sidewalls. After a few hours, the excess wash
was wiped off the high-lying points of the cockpit with a dry fingertip. To
finish the job, buckles were painted silver and the parts were assembled.
Click the thumbnails below to view
larger images:
|
|
|
|
The fit of the Cutting Edge intakes is perfect after the addition of the spacers on the fuselage side.
|
|
|
|
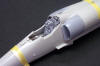
Dry-fitting the fuselage halves and cockpit components proves trouble free (and gap free!)
|
|
|
Assembling the Fuselage
Three small tasks were required before joining the fuselage
halves.
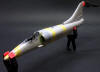
First, the ducting and engine fan had to be painted. The ducting and fan is
moulded as a single part. This looks good, but complicates painting. I first
brush-painted the engine fan area at the back of the ducting, then used my Olfa
Circle Cutter (a very handy modeling tool) to cut a mask for the fan from
Post-It Note self-adhesive paper. The mask was laid in place and the remainder
of the ducting was sprayed white. I used low air pressure and thin coats of
paint to prevent seepage under the mask. The results were quite pleasing when the
mask was removed.
I also decided to paint the interior of the intake green while the fuselage was
still separate. This would eliminate the very real possibility of overspraying
the pristine white finish of the ducting if the intakes were painted after
assembly.
The second job was to assemble and install the exhaust ducting.
This is a simple task, but extreme care must be taken when fitting the tabs on
Part D1 to the fuselage sides. It is very easy to get the alignment wrong, and
this will cause complications later in assembly.
This model needs plenty of nose weight. I first glued the cockpit to one of the
fuselage halves, then added small lead fishing sinkers mounted in Blue-Tack
inside each half of the nose. The advantage of using Blu-Tack to mount the
noseweight is that it permits the modeler to test-fit the fuselage halves and
add, remove, or relocate the weights as required. Try doing that with super
glue!
Click the thumbnails below to view
larger images:
|
|

|
|
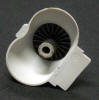
The engine turbine is painted Testor Metalizer Steel and masked with a Post-It Note cut with the aid of a Olfa Circle Cutter.
|
|
|
|
The intake ducting is then sprayed white and the paper disk removed to reveal a perfect demarcation for an otherwise tricky paint job.
|
|
|
|
The assembled intake ducting and cockpit are fitted. Nose weight is essential - in this case lead sinkers mounted in Blu-Tack
|
|
|
|
Taking no chances! The fuselage is taped and clamped while the glue dries.
|
|
|
With the intake duct, cockpit, noseweight and exhaust pipe in
place, the fuselage halves were brought together and secured with Testor Liquid
Cement. The assembled fuselage was taped and clamped until thoroughly set.
Building a Pre-Kahu A-4K – Step by Step
Hasegawa’s 1/48 scale A-4E/F kit supplies all the parts
necessary to build a New Zealand A-4K Skyhawk prior to the “Kahu” upgrade
programme.
Richard Chafer from Gekko Graphics supplied me with the following instructions
for the simple conversion:
-
Fit the dorsal hump (D14 and D15).
-
Part E5 is used for the blade antenna
on the hump, replacing Part E11.
-
The squared-off fin tip (Part A-14) is
used.
-
Add the cranked refuelling probe Part
E7, instead of the straight probe (E8).
-
Modify ECM receivers Parts F22 and F21
(two parts each) by shortening and rounding off the “spikes”.
-
Two of Parts F21 are fitted to the
tail under the rudder.
-
Parts E12 and E13 are fitted to the
rear of the fin for ECM.
-
Parts A3 and A4 are used under the
rear fuselage as Chaff/Flare packs were not used at this time.
-
Parts D17 and D18 are fitted to the
A-4K.
-
Do not fit Part E19
Apart from these substitutions and
additions, assembly was per instructions.
Wing to
Fuselage Fit
The only area where alignment problems was the wing to fuselage fit. Despite repeated
dry-fitting, trimming and firm joining of parts, I still wound up with a narrow
but tricky gap for most of the length of the wing root.
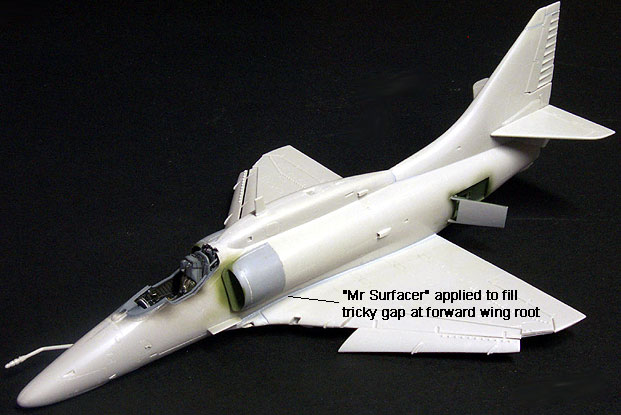
In the end, this gap was eliminated
with the application of Mr Surfacer 500
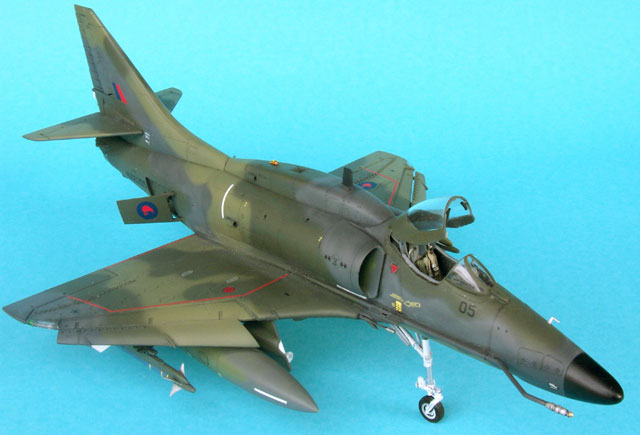
I was fortunate to have access to RNZAF four-view drawings of
the camouflage scheme for NZ6205, my chosen subject. However, the colours
proved more challenging than the European I pattern.
Painting
 The paint job commenced with an overall coat of Tamiya
XF63 German
Grey acrylic. This colour was quite close to the actual camouflage grey used on
the A-4K, and also served as a dark base coat for pre-shading the lighter
colours. The paint job commenced with an overall coat of Tamiya
XF63 German
Grey acrylic. This colour was quite close to the actual camouflage grey used on
the A-4K, and also served as a dark base coat for pre-shading the lighter
colours.
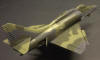
The contrast between the dark grey and the dark green is very low. After
experimenting with a few paints, I used Gunze H420 RLM 80 Olive Green as a fair
match.
The most elusive colour was the light green shade. In theory, this is FS.34102.
However, this standard colour does not seem to match any of the fairly wild variations observed in
photographs. In the end, I settled on a mix of Gunze H303 FS.34102 and Gunze
H422 RLM 82 Bright Green, plus a few spots of Flat Yellow.
Click the thumbnails below to view
larger images:
|
|
|
|
The model receives an overall coat of dark grey. This camouflage colour also acts as an undercoat for pre-shading the paler colours.
|
|
|
|
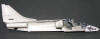
The two greens are added freehand with the Aztek airbrush.
|
|
|
|
The painted surface is buffed before the Gekko Graphics decals are applied.
|
|
|
|
Panel lines have been subtly highlighted and the model has received an overall coat of Aeromaster Flat.
|
|
|
After the three basic colours were applied, I added a low-contrast, random
mottled layer of a slightly paler grey (Gunze H68 RLM 74 Dark Grey) over the dark grey. I also added a few
mottled patches of different shades over the green colours. This subtly uneven
finish is noticeable in many photographs of A-4Ks in the European I scheme.
All paints were acrylic, and sprayed freehand using my trusty Aztek A470
airbrush.
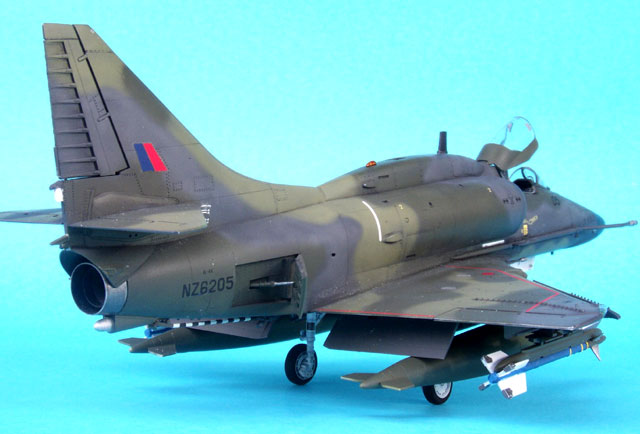
Markings
Markings were sourced from Gekko Graphics sheet no. GG48-001. This
debut release from Gekko Graphics really is excellent. The instructions,
printing and overall presentation are superb.
Gekko Graphics supply copious instructions and placement diagrams. I needed to
spread out to take advantage of all these resources while applying the decals.
Take your time and really read these instructions, as they contain important
information about the configuration of different aircraft. Also note that there
are variations in stencil detail for particular aircraft.
The decals adhered beautifully to the glossy surface of the Skyhawk. The only
problems I had were reading some of the tiny reference numbers on the sheet, and
running short of red walkway decals. The A-4K needs almost double the length of
walkway decal supplied in the set. Gekko Graphics are aware of this issue and
will be addressing it in later releases.
I used the kit decal for the tailhook stripes. The decal is
quite wide, and would have wrapped around the arm of the tailhook several times.
I sliced the decal in half lengthways to ease the application of the decal on
the assembled tailhook.
Weathering
I applied a thinned oil wash which, for some reason, seemed to
have no effect whatsoever. The oil paint beaded on the surface and would not
settle in panel lines. I tried again with the same result. I have no idea why I
had this problem – the technique has always worked for me on acrylic paints
before.
As an alternative, I applied localised washes of thinned black acrylic paint. At
last, this had the desired effect.
After the semi-gloss black nose cone was masked with Tamiya tape, the paint job
was now sealed with Aermaster Flat acrylic.
Although I was not looking forward to assembling and painting
the undercarriage, it proved to be completely trouble free except that the
forward actuator strut was broken on the sprue.
I decided to add some ordnance. Wing tanks and missile pylons were added to the
kit, and AIM-9L Sidewinder missiles were sourced from Hasegawa’s 1/48 scale
Aircraft Weapons Set C. I painted the Sidewinders to represent captive training
missiles.

The jet nozzle was left off until this stage too. It was painted Testor Burnt
Metal
Metalizer and glued to the jet pipe.
When the gear doors and ordnance received their final coat of Aeromaster Flat,
they were glued in place to complete the model.
The undercarriage legs almost clicked into place. They
immediately bestowed the characteristically defiant snout-up attitude displayed
by the Scooter in real life.
This is the most modern aircraft that I have ever built. I
enjoyed the experience.
Gekko Graphics' decals lived up to their promise of quality in
their application, and the Hasegawa Skyhawk was a sheer joy to build.
Acknowledgements
As a relative novice to jet aircraft modelling, I would like to
thank the following for their help in this project:
-
Richard Chafer from Gekko Graphics
(and, way before that, one of HyperScale's earliest contributors) for his
assistance with information for the conversion, feedback during the project and
the sample decals.
-
Paul Gillan for first-hand information
and feedback.
-
Dave Aungst for his involvement in the
project to build several Scooters from the new Gekko sheet, and ample
inspiration via his many Skyhawk projects on HyperScale.
-
Dave Klaus and Scotty Battistoni from
Meteor Productions for the review sample cockpit and intakes.
-
Darren Mottram for his wonderful
resource, "Motty's Aircraft Picture
Pages", which include four detail-packed web pages of Kiwi Skyhawk
photographs.
Thanks guys. This might be my first "modern" jet, but it will
not be my last!
Click the thumbnails below to view
larger images:
Model, Images and
Article Copyright © 2002 by Brett Green
Page Created 03 July 2002
Last updated 04 June 2007
Back to HyperScale Main Page
Back to Features Page |
 Home
| What's New |
Features |
Gallery |
Reviews |
Reference |
Forum |
Search
Home
| What's New |
Features |
Gallery |
Reviews |
Reference |
Forum |
Search


