|
BMW
Z8
by Valentin E. Bueno
 |
|
BMW
Z8 |

HyperScale is proudly supported by Squadron.com
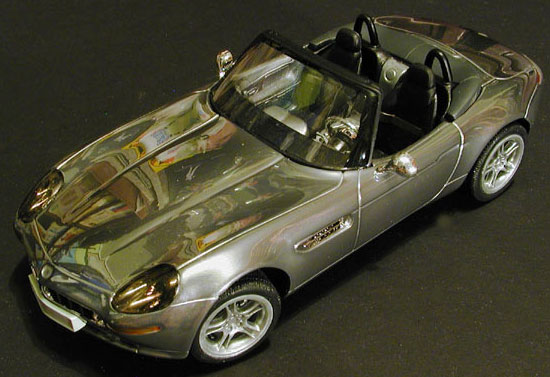
The Z8 is a severely limited edition Sports car from BMW and the car used by
James Bond in the movie “The World is Not Enough”. Unfortunately, it was cut in
half by the bad guys. Those stinking bums!
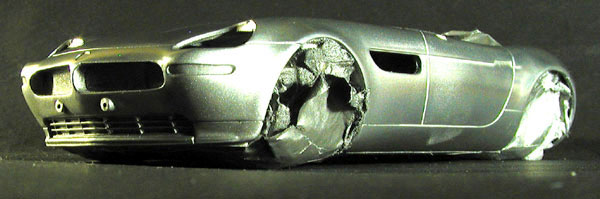
The 1/24 scale Revell of Germany kit of this BMW is molded in soft white
plastic. My kit was ordered from Hannants of Great Britain, and by the time it
reached the Pacific, the body of the car was broken. I wanted to paint this one
Metallizer and polish it up bright and shiny. I was doubtful about how well I
could re-glue the body together without leaving a crack. More about this later.
The first thing I worked on was the chassis.
I hand brushed Testor’s Metallizer Steel and Aluminum on various parts of the
chassis. They were then polished with Alclad Aluminum Powder. The exhaust was
painted Metallizer Exhaust (what else?) and the suspension painted steel and
black.
The interior was painted various shades of RLM 66 Scale Black (actually a
very dark Gray) and RLM 22 Night Black (a true Black color). The instructions
say that the back of the seats were painted a polished steel color, so on went
the Metallizer and Alclad Powder. Various portions of the interior were also
accented with Metallizer prior to final assembly of the interior.
The Hard Part
Now comes the hard part.
A portion of the lower rear of the body curves under the chassis pan. Revell
chose to mold this as a separate part to be added after the body is painted and
the chassis is attached.
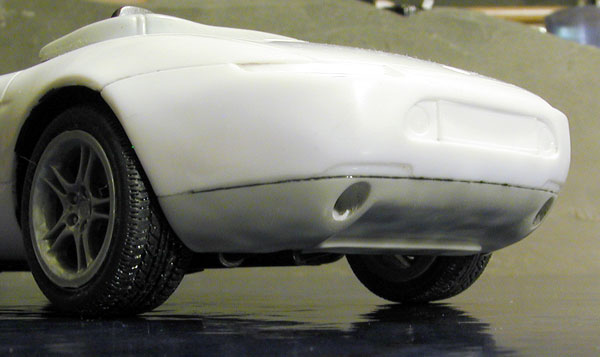
Revell’s mold makers for their car kits aren’t up the standards of their
other mold makers. The body panels required a lot of sanding to even out all the
high and lows and the sink marks had to be filled in. With this in mind, I
figured that the added lower body panel would leave a giant seam. I didn’t want
to have to work this seam after I had painted the model. I decided to add the
chassis, sans wheels, and glue the lower body panel in with lots of CA. I sanded
the seam smooth over the period of a week, sanding and filling for about three
hours each day. Whew! I also sanded the join between the broken body panel and
the rest of the body as smooth as I could.
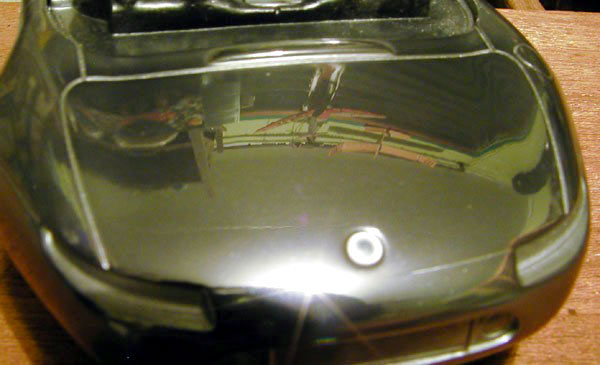
This was the toughest painting job I have ever undertaken. I knew I wanted a
mirror smooth surface, so I did a lot of experimentation. I used some car polish
to buff the bare plastic smooth. I polished the surface until I could count the
number of light bulbs in the ceiling fixture above my head using the reflection
off the plastic surface. I sprayed Testor’s Aluminum Metallizer from a spray can
and polished the model smooth. I wasn’t impressed. I tried to polish this finish
with Liquid Luster (LL) car polish and ended up eating right through the paint
to bare plastic. Arrrgghhhh. I sanded everything down again and re-polished the
bare plastic.
This time I tried Tamiya’s Gloss Silver Spray. I had used Tamiya’s Gloss
Black with very impressive results and hoped it would repeat that here. Nope. No
go. The paint dried rather dull and had a lot of dust particles and clumps. I
sanded this down again with some 1200 grit and sprayed a few more coats to see
if I did it wrong. I ended up allowing paint to pool and had puddles of silver
flakes. Drats. I sanded this smooth and tried to polish this paint job with the
LL again. I had done this successfully on the gloss black paint of another model
and hoped beyond hope to fix this one. Nope. The LL ate the Tamiya paint down to
the bare plastic again. ARRRGGGHHHAAARRRHHHGGGG……
By this time I was ready to throw the model against the wall, but I realized
that I chose to work on this and I’m not going to give up on it. It was James
Bond’s last BMW after all! This time I carefully sprayed three coats of Tamiya
Gloss Silver, sanding each coat smooth after letting each one dry a week. Then I
got two cans of Tamiya Clear Gloss. This is great stuff! It dried hard in
minutes and was almost as smooth as glass. One coat, two coats, so far so good.
As I set the model down to cure after the second coat, my finger brushed the wet
lacquer.
The wet lacquer softens all the layers of paint down to the bare plastic. My
little finger brush exposed the white plastic! Where’s the wall, Where’s THE
WALL!!!!
 I set
the model down and went far far far away for a few sessions with my psychiatrist
(a Chihuahua named Dolly, there is no psychiatrist in the world like a puppy
licking your face.) I set
the model down and went far far far away for a few sessions with my psychiatrist
(a Chihuahua named Dolly, there is no psychiatrist in the world like a puppy
licking your face.)
After sufficient time, I went back to the model, sanded the offending area
down (again and again), re-sprayed with silver, re-glossed with Tamiya clear and
very very very carefully set the model down. After three more coats of clear, I
felt I was ready for the Liquid Luster. I polished the Clear with an old T-shirt
and LL and this turned the surface in to glass. Yes! Finally something went
right! I polished the entire model free of orange peel using the light bulb
reflection technique again. Basically, I have a fluorescent light bulb that
bends back on itself to form two narrow bulbs. On most gloss finishes, I can see
only the reflection as one bulb. On highly polished gloss finishes, I can see
the dark area between the bulbs. In areas of orange peel, the image is
disrupted. It’s a neat and helpful trick.
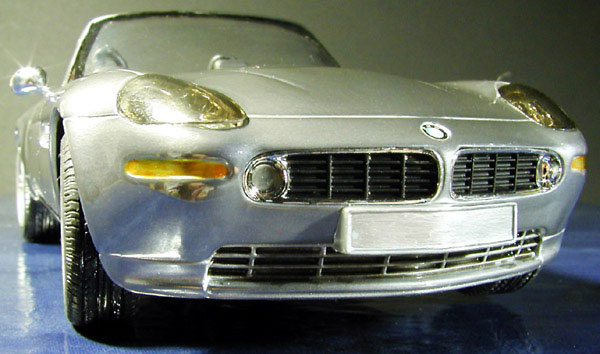
I then dipped a T-shirt wrapped finger into a bottle of Alclad Aluminum
Polishing Powder and proceeded to rub it into the LL surface. This produced a
brilliant and highly reflective silver surface. Great! I sprayed a coat of
Tamiya clear to seal the high gloss finish and promptly lost it. ARRGGhhh (a not
so aggravated yell this time.) I pulled out the LL again, polished this surface
again and re-polished with the Aluminum Powder. I polished the surface five
times with the powder, each time the silver got deeper and deeper. Kakoi desu
yo!!
Most women like shiny things (I apologize for this generalization, but this
does lead somewhere), gold, silver jewelry, and yes, shiny new BMW models. My
girlfriend walked into my shop and saw my mirror like Z8 on the desk. She picked
it up by the doors and turned it over to look at the underside. I caught her
putting the seats back in after they had fallen out. I yelped (eeek) and
promptly and gently took the model away from her beautiful little hands (YANK!!
“Mine precious, Precious!…”in my best Gollum voice). Of course this finish is
not the most durable finish, and she left some very nice clear fingerprints in
the metal polish. The grease from a fingerprint doesn’t polish out without the
use of chemicals. All I could do was break out the Liquid Luster, polish out the
grease, and rebuff with the Alclad powder. Oh well.
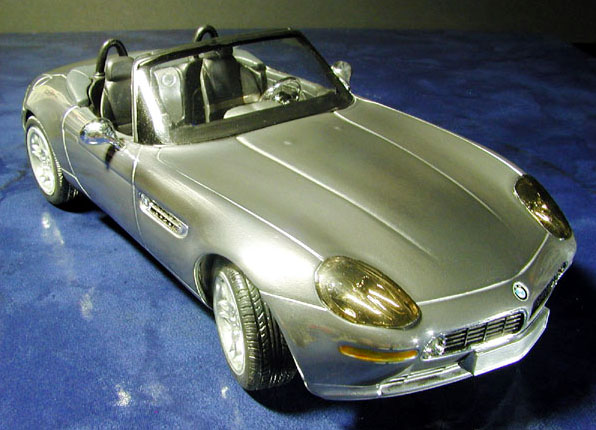
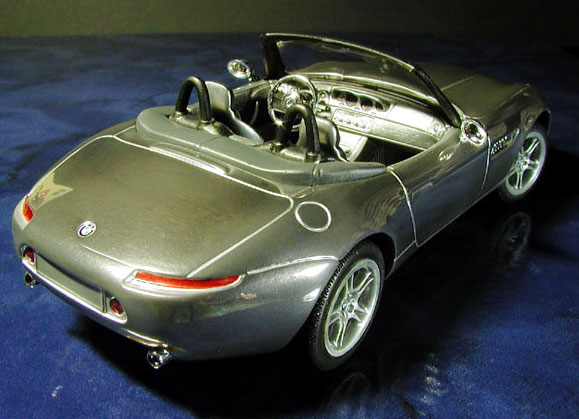
I had planned on making this a true Bond car complete with missiles and
machine guns. But after all the work that went into the paint finish, I just
couldn’t. I added all the missing parts to the model and placed her (the car,
not my girlfriend) into a Plexiglas prison. I didn’t want anyone else
accidentally picking up this model and putting fingerprints into the metal
finish!
Click the thumbnails below to view
larger images:
Model, Images and
Article Copyright © 2002 by Valentin E. Bueno
Page Created 22 January 2002
Last updated 04 June 2007
Back to HyperScale Main Page
Back to Features Page |
 Home
| What's New |
Features |
Gallery |
Reviews |
Reference |
Forum |
Search
Home
| What's New |
Features |
Gallery |
Reviews |
Reference |
Forum |
Search