|
Sopwith Camel
by Ara Hagopian
|
|
|
Sopwith Camel |

HyperScale is proudly supported by
Squadron.com
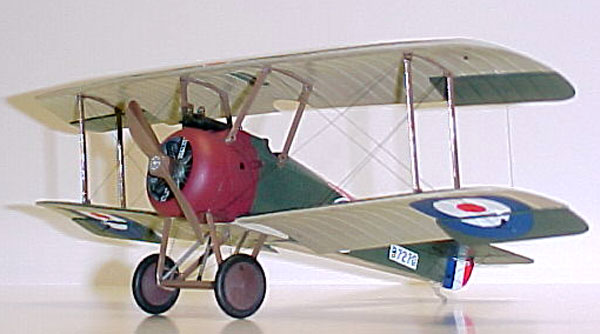
Here are a few photos of a Sopwith Camel I built as a favor for an old
gentleman I met in a hobby shop in December 2001. I found out he had
served in Patton’s Army in WWII, and as his eyesight was failing, I
offered to make the model for him. Six months later, it was done.
The kit is an old Revell 1/28 Camel, first issued in 1959 and long out of
production. It was bought on ebay, and thankfully, arrived with all the
pieces intact. I am a very experienced armor builder but have never
ventured into WWI era biplanes. I am happy to report I loved building this
aircraft and would not hesitate to try another.
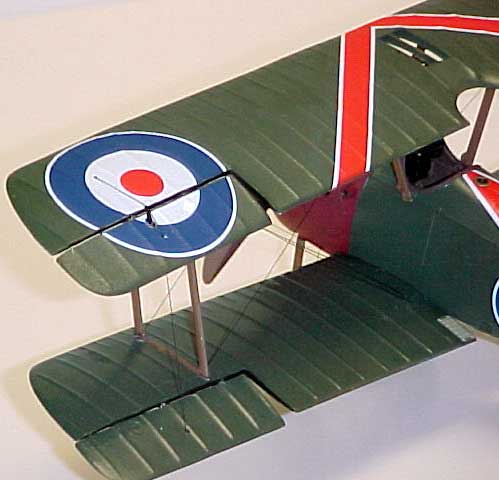
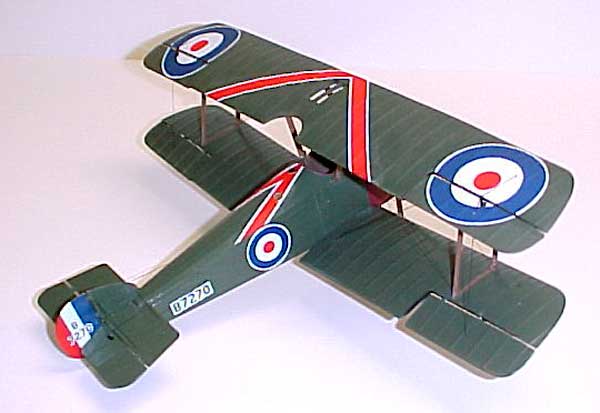
The ailerons were carefully cut off the wings, sanded, and fitted with
tubing at the hinge points for strength. Holes were hand drilled into the
mating sections of the wings, to be installed after painting.
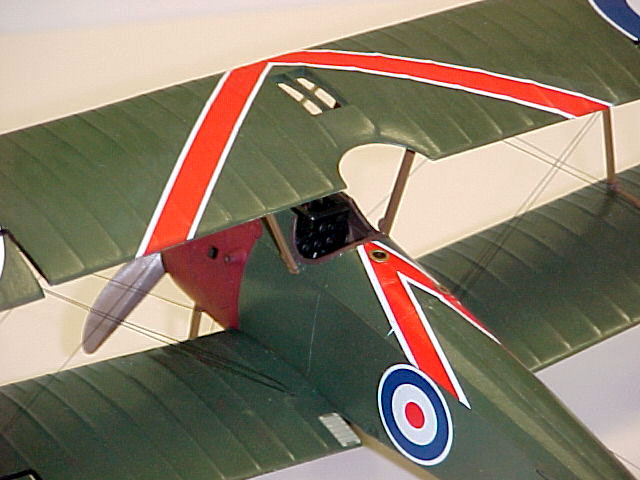
I will mention painting first because 95% of the painting and decaling
had to be done before assembly; this was due to the complex rigging.
All painting was accomplished using various soft bristle brushes. The
top wings and fuselage are painted Model Master IJA Green (first coat),
and Gunze Sangyo aqueous IJA Green (top and touch-up coats). No weathering
techniques were utilized.
The lower surfaces were painted with enamels first (Model Master Buff),
followed by acrylics (Tamiya Buff XF-57). As brush painting was chosen as
the finishing technique, the careful application of enamel/acrylic ensures
complete coverage without excessive paint.
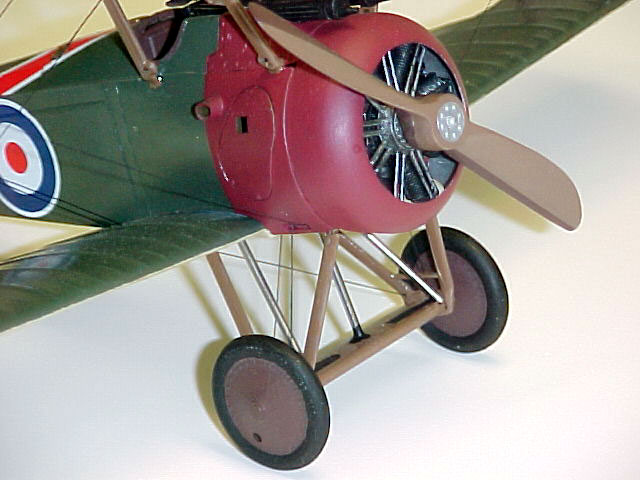
 The
cowling was painted Model Master British Crimson, the propeller was masked
and painted a very rudimentary two toned wood, the engine is pure flat
black with silver drybrushing, and the struts are a gloss Wood color. The
cowling was painted Model Master British Crimson, the propeller was masked
and painted a very rudimentary two toned wood, the engine is pure flat
black with silver drybrushing, and the struts are a gloss Wood color.
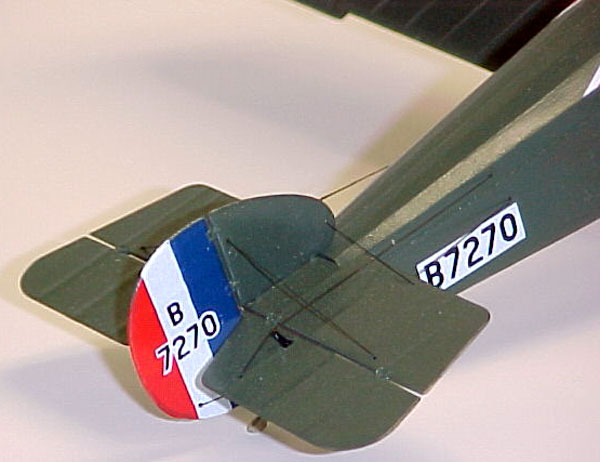
Most rigging had to be installed inside the fuselage before the halves
went together. Special, non-fiber sewing thread was used for the rigging
wires. All holes were opened using a #78 drill.
Decals were trimmed to their edges, and applied with Model Master
setting solution (a passive solution). Rips and tears, due to the decal
age of 30 years, were touched up with paint.
Finishing
Touches and Conclusion
|
The landing gear, as presented in the kit, is too weak to hold the
weighty model. Therefore, for reinforcement, I chose a field modification
of steel tubing, complete with a black rubber weather boot at the base of
the center tubing.
For extra detail, bits of spare photo etched brass made for fuel and
radiator caps.
I enjoyed building this kit but it certainly tried my skills and patience.
It took six months to finish but the gentleman who I built it for was very
appreciative of the finished piece.
Click the thumbnails below
to view larger images:
Model, Images and Text Copyright © 2002
by Ara Hagopian
Page Created 23 August, 2002
Last Updated
04 June, 2007
Back to
HyperScale Main Page
Back to
Features Index |
 Home
| What's New |
Features |
Gallery |
Reviews |
Reference |
Forum |
Search
Home
| What's New |
Features |
Gallery |
Reviews |
Reference |
Forum |
Search