Squadron.com for less than $12
The F-14 Tomcat is one of my favorite aircraft, no question; second only to
the F-4 Phantom.
When I started building and painting prototype models for a collectors' toy
company, I was happy to see a Tomcat in the line-up of required models. I
made sure to push a little so that I could build it. Then, after getting the
project, I learned that I was supposed to build a plastic kit of the Tomcat.
They would not be providing metal kits as they had done on the A-10 kits that I
had worked on previously. Reality suddenly set in. Could I build a plastic
1/48th scale Tomcat in only two weeks? Yikes!!!
Building a Hasegawa Tomcat kit was out of the question. Having finished one
(finally) last year, I knew I would never be able to build a decent
kit in only two weeks. This left Academy and Revell/Monogram. I initially
decided on using an Academy kit. However, I could not find an Academy kit at my local
hobby shop. Needing a kit as soon as possible, I reluctantly
decided to build the old Revell/Monogram kit.
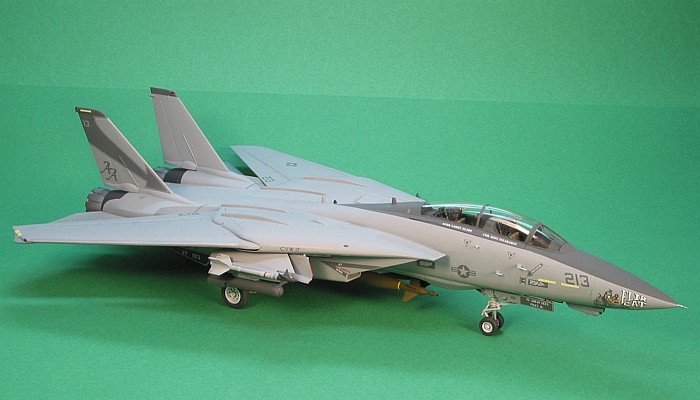
Yes, this is the Monogram 1/48th scale Tomcat kit. Oh, the SOFT DETAILS!
Oh, the RAISED PANEL LINES! Oh, the HORROR!
Well, wait just a minute, maybe it is not so bad. What you see here is what
can be done with the Revell/Monogram Tomcat kits with just a little care and a
strong need to complete the project.
When Hasegawa released their 1/48th scale Tomcat kit back in the 1980s, I
shuffled my one and only Monogram kit (already started) to the bottom of the
model kit stack, presumably to never be seen again. It suddenly was time to dig
it out and finish it.
The kit I started over twenty years ago was the original Monogram F-14A
Tomcat. While this was a good start, I needed an F-14B Tomcat for the specific
aircraft the toy company wanted me to build. As Monogram does not make an F-14B
Tomcat kit, I mixed and matched pieces from both my already started Monogram
F-14A and a brand new Revell F-14D kit to create a reasonable representation of
an F-14B Tomcat. For what the toy company was looking for, this combination
would do fine (and still have a combined cost that was less than buying one
Hasegawa Tomcat).
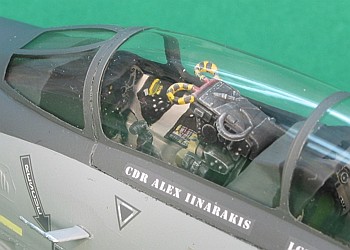
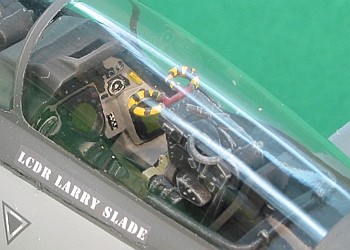
The cockpit is the standard Monogram issue. It has nicely raised detailing. All
I did was paint the kit provided panels. I used the seats from the F-14A kit.
The toy company benefitted from my twenty year ago start in that the cockpit
instrument panels were all painted up (from twenty years ago) much nicer than
they really needed to be.
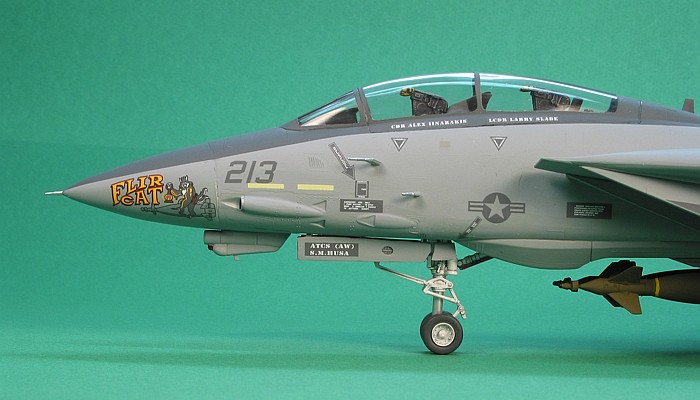
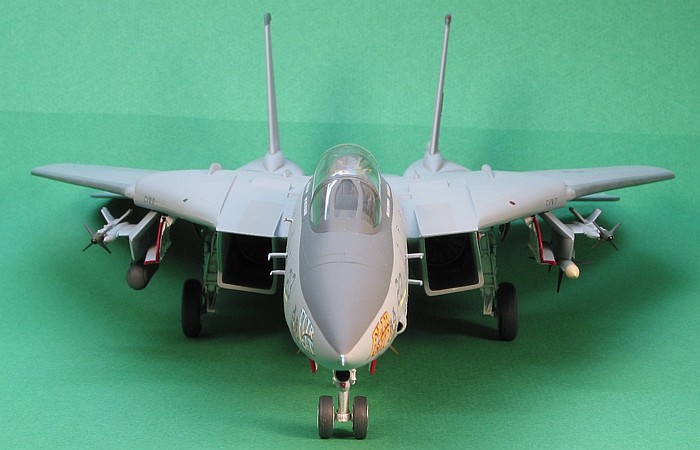
The shape of the nose is pretty poor in the F-14D kit. While shaped better in my
older F-14A kit, it lacked having a pitot on the tip. I decided to use the F-14D
nose and file the tip to the a more accurate shape. I then added the pitot in
the already present mounting hole in the tip of the newly shaped nose using a
styrene rod and some brass wire. I think the nose is still a little too pointy
in shape, but with a tight building time schedule, I was not going to get any
more crazy about it.
To build the fuselage, I combined the F-14A top piece (having an already painted
and installed cockpit from twenty years ago) with the F-14D bottom piece. I used
the revised gun gas vents found in the F-14D kit for the left side of the nose.
I also needed to fill in some panel lines around the engine exhausts for the top
piece. These lines are specific to the F-14A. The GE-engined F-14B and F-14D
have smooth composite panels in these locations. Revell/Monogram got this detail
right in their F-14D kit, so the bottom fuselage did not need any lines filled.
The engine intake trunks are integral portions of the process to assemble the
fusleage. In my zeal to get the fuselage together, I neglected to remember a
painting task that should have been done before assembly. I did paint the
interior areas white, but the camouflage paint comes back a portion of the
forward trunk. I wanted to paint this before I assemble the fuselage, but I
forgot. So, I found myself carefully reaching back the intakes using a paint
brush and hand painting the forward interior sections with the camouflage color.
The line I ended up painting inside the trunking is not completely correct, but
it had to do as I was not going to pull the fuselage apart to make it better.
The horizontal tails are molded as part of the upper fuselage piece. I did not
want to take the time to separate them and reattach them, so I scored a deep
line at the point where they meet the fuselage. This line, along with the
already present line on the lower side, achieves the effect of having the tails
look separate without needing to do the actual surgery.
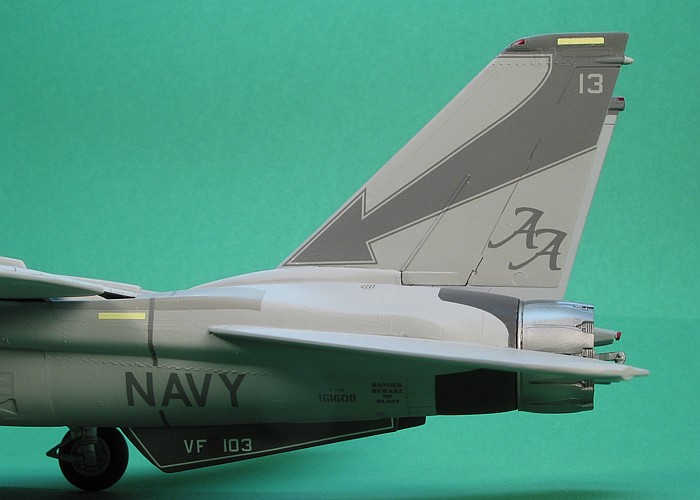
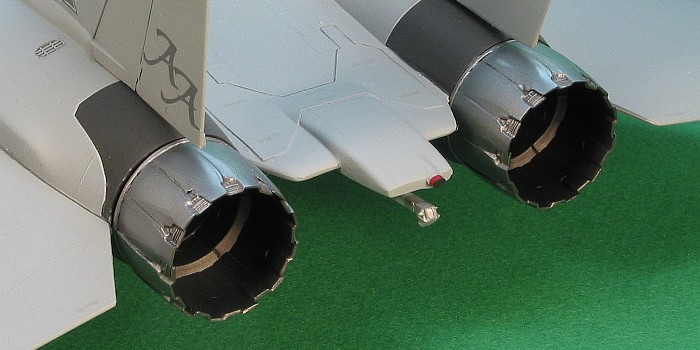
The engine exhausts are the biggest tell-tale difference between an F-14A and
F-14B. The Revell F-14D kit had the correct engine exhausts in it. I used these
in the completed model. They are remarkably similar to the make-up of the Hasegawa
engine pieces, down to having one of the eyelid petals include a slot in it
(that the Revell/Monogram kit does not even need). I wonder where Revell/Monogram
got their prototype pieces from?
The wings are simple two piece assemblies with upper and lower halves. The kit
provides for the wings to operate on the finished model with interlocking gears
to swing both wings at the same time. The toy company wanted the wings fixed in
one position, but could not be clear which position they wanted. I therefore built the
kit with working wings. I figured they could position the wings themselves when
they figured out what they wanted. To correct a noticable droop to the wings
when swept forward, I dipped the inner workings of the wings in boiling water
and bent them so that the wings would align correctly.

The vertical tails are hefty one-piece moldings with a small actuator fairing
attached to the lower right side of each tail plane. They plug into the upper
fuselage with no issues. As long as you get the correct tail on the correct side
(the tip details of each are different), they even align with the correct
slightly outboard leaning angle.
The landing gear are very detailed, although somewhat "soft". I cleaned up as
much of the mold marks as I felt I needed to and attached the legs per the
instructions. The nose wheel well doors are molded as part of the wheel well
sides. This complicated painting a bit, but was not impossible. Building the kit
with the landing gear up would require significant surgery.
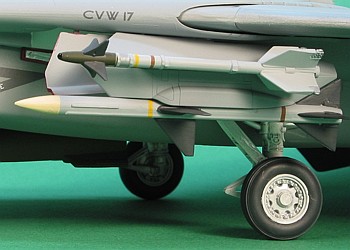
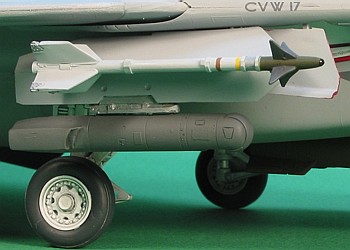
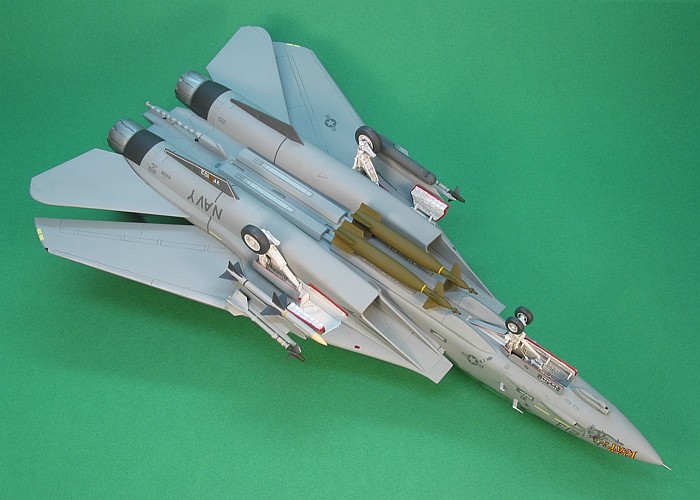
The weapons load on the model required me to go further away from being
out-of-the-box. Revell/Monogram provides an air-to-air load of two Sidewinder
missiles, two Sparrow missiles, and four Phoenix missiles. The importance of the
specific markings that the toy company wanted was in reference to the Tomcat
being upgraded for precission strike with laser bombs. Adding bombs and a
LANTRIN pod to the kit would require some work.
The hardest to modify would be the glove pylons. Monogram molds the Sparrow
missiles in place on the glove pylon pieces. I would need to remove the right
Sparrow missile and then replace the lower pylon with the LANTRIN pod adapter.
The break-down of the parts made me concerned about the time it would take to do
this surgery. Remember, I was under a two-week time limit.
I decided the path of least resistance would be to transplant the glove pylons
from a Hasegawa Tomcat kit and modifiy the right pylon using the Eagle Designs
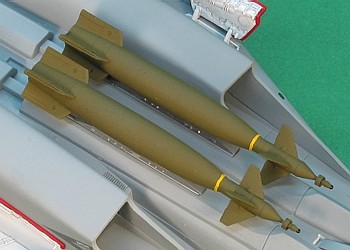
Bombcat conversion LANTRIN pod. So, that is what I did. The bomb shackles are
white metal pieces stolen from the Hasegawa "F-14A Bombcat" release. I "scabbed"
the shackles onto the forward Monogram Phoenix pallets. Under these shackles, I
hung two AMRAAM Line GBU-10 laser bombs.
This makes for quite a mish-mash of assorted parts, but they came together
rather easily to create the weapons load. The last items I needed were a couple
Sidewinder missiles (I used the Monogram kit provided missiles as they look
really nice) and a Sparrow missile which I took from a Hasegawa Weapons Set.
As I mentioned earlier, this was a contract job. The customer stated what
markings they wanted. All I did was provide them with the model they requested.
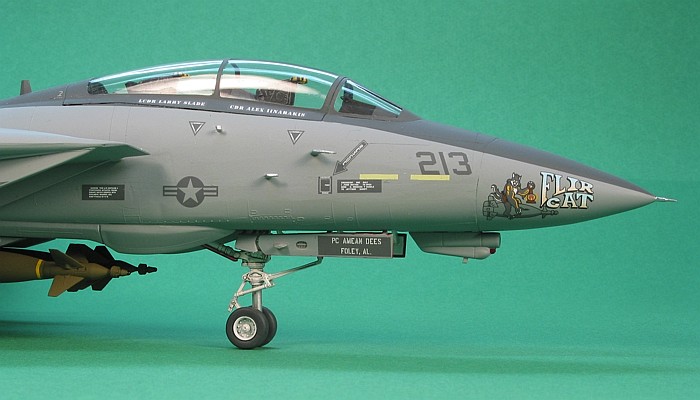
The nose art and the "famous" nature of this aircraft made it interesting to
build. This aircraft is "famous" in that it was the first "Bombcat" to be
modified to carry the LANTRIN targeting pod. The nose art celebrating the
aircraft's special purpose adds a nice touch of color to an otherwise drab paint
scheme.

 I used all Testor's Model Master enamel paints and metalizers. The camouflage is
one of several "standard" tactical schemes applied to the Tomcat. It is an
overall single color camouflage of Dark Ghost Gray (F.S.36320). I personally
prefer the three-color tactical scheme on the Tomcat, but "FLIR Cat" did not
have this.
I used all Testor's Model Master enamel paints and metalizers. The camouflage is
one of several "standard" tactical schemes applied to the Tomcat. It is an
overall single color camouflage of Dark Ghost Gray (F.S.36320). I personally
prefer the three-color tactical scheme on the Tomcat, but "FLIR Cat" did not
have this.
The landing gear and wheel wells were masked and painted white after I finished
applying the camouflage color. Masking this way is easier than trying to cover
up already painted wheel wells while painting the camouflage colors. I painted
the composite material around the engine exhausts using Interior Black. This
color matches fairly close to the color I have seen of this area. The exhaust
nozzles are metalized with Anodized Aluminum metalizer. I realize the exhausts
are not really Anodized Aluminum, but the shade of this color looked about
right.
The decals for the unit markings are from AeroMaster decal sheet 48-435. The
sheet is rather complete, including the unit markings, nose artwork, national
insignia, and "anti-glare" panel for around the cockpit. Additionally, there are
decals for most of the major aircraft data markings.
I feared that the tail tip and cockpit trim decals would cause me troubles
making them fit right. To solve the problem, I experimented and mixed up a
custom color to match the gray of the AeroMaster decals. I then painted the
"hood" over the cockpit as well as the tail tips and ventral strakes. This
eliminated the need to use gallons of decal solvent to try to apply the decals
over these areas.
I supplemented the data markings on the AeroMaster decal sheet with data
markings from CAM's low-vis Tomcat data decal sheet (48-066). Trouble is, on the
decal paper they looked plenty dark enough. On the model, they practically
vanished. While the model was gloss coated, they were nearly invisible. The flat
coat made them a bit more visible, but only a little bit.
The toy company wanted me to keep weathering to a minimum, so I used my typical
style of thinned down enamel paint washes and only highlighted the edges of the
control surfaces. I also applied a light black-wash to the landing gear. I left
the rest of the model otherwise clean and un-weathered.
 Home
| What's New |
Features |
Gallery |
Reviews |
Reference |
Forum |
Search
Home
| What's New |
Features |
Gallery |
Reviews |
Reference |
Forum |
Search