|
Gotha G.III
by Rob Baumgartner
|
|
|
Gotha G.III |

Roden's 1/72 scale
Gotha G.III is available online from
Squadron.com
Every now and then, a modeller feels the need to
try out some new techniques that he or she has either read about, or
seen on other peoples’ models. Such was the case for this individual who
wanted to experiment with weathering. I needed a subject that allowed
various effects to be tried on simulated wood, fabric and metal. The
Roden Gotha G.III fitted all these criteria.
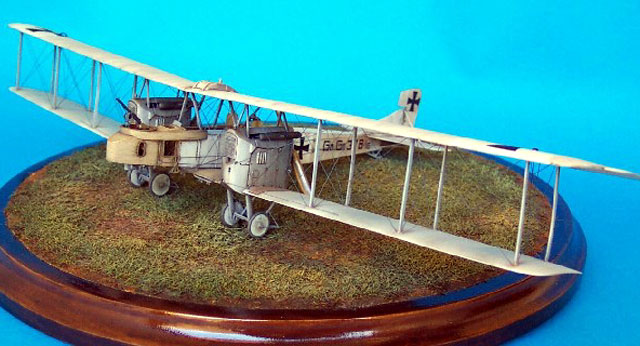
Roden have done a superb job with their Gotha bomber series. The overall
fit of the parts is very good and an accurate replica is easy to
achieve. The instructions have to be followed carefully and much test
fitting will reward with a pleasant build.
The PART photo-etched offering (available separately) is essential to
really set off the model. This photo-etched set contains all the items
that injection molded plastic cannot hope to replicate in scale. Most,
but not all, of this two fret set was used.
Here is a brief summary of the experience.
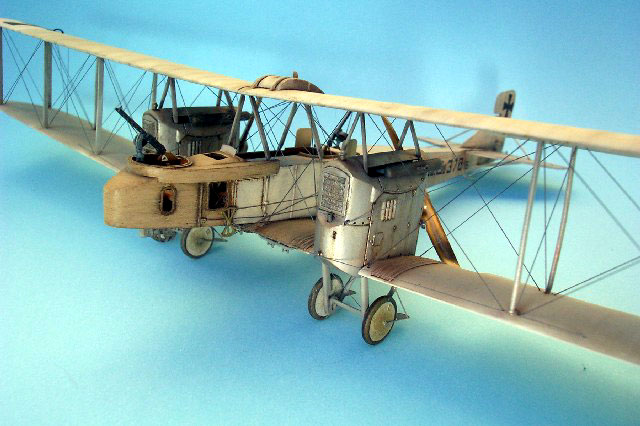
In general the parts are very well molded with
excellent detail. Unfortunately, one of the fuselage halves was short
molded around the rear gunner’s opening, resulting in this area having
to be scratch built. This was not too hard a task to accomplish due to
the simple shapes, but certainly an unwelcome one.
The first item on the agenda is to fit the one-piece p-e interior
structures into the inside of the fuselage halves. With only minor clean
up of the plastic parts, this was easily achieved and is a credit to the
PART designer. In fact, most of the components from this set fitted
perfectly.
Other items that reside in the interior were also added from the fret,
including an acetate sheet for the instruments, numerous cockpit
fittings and a bomb rack. Such is the thoroughness of this set that
acetate windows are also included along with separate interior and
exterior frames!
The various fuselage details fit well with the most filler being needed
around the cockpit hood.
The lower wing stubs need to be accurately lined up with the fuselage
before gluing or else the whole wing assembly will be askew. Using a jig
and masking tape, the lower wings were temporarily added and the main
struts lightly attached with white glue. Photocopies of plans were cut
up and used a guide for correct alignment. The three-piece upper wing
could now be assembled and matched to the struts to allow a perfect fit
later on.
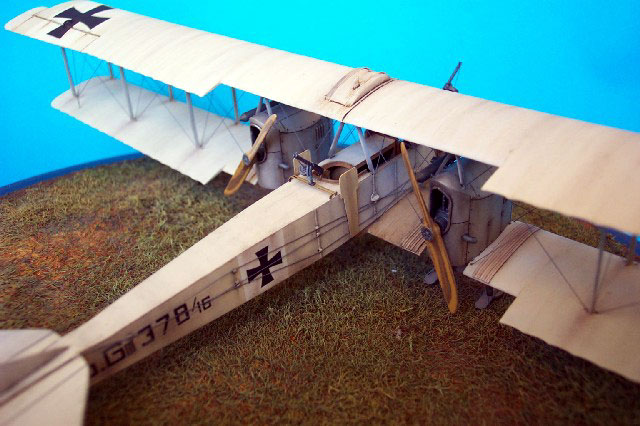
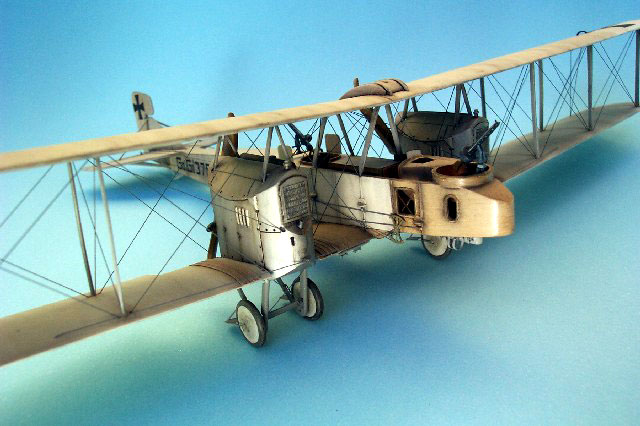
I wanted to create the impression that the struts above the engine
nacelles actually entered the casing as on the real aircraft. To do this
meant scratch building the top of the nacelle, relocating the openings
and inserting home made struts. This turned out to be more trouble than
it was worth and greatly complicated the final wing assembly. If the
kit’s instructions had been followed, the result, although simplified,
would have been far less painful.
The PART detail set once again comes to the fore with nacelle details
that allow the modeller to build subjects other than the kitted ones.
There were subtle differences between aircraft, even in the same
production batch, so the extra access hatches were very welcome.
More photo-etch was used for the exterior bomb racks, propeller shields,
and mudguards. One item I do regret using is the stitching for the under
belly. This was found to be over scale and needed a heavy coat of paint
to help it become less conspicuous.
Rigging was accomplished using invisible mending thread. It was first
drawn through 1200 grit wet and dry paper to roughen the surface to give
the paint something to “bite” on. The thread was then passed through a
cloth, which was dipped in paint to give it its final colour.

A wash with mild soapy water was gently applied to the model so that a
gloss varnish could be applied before decal application. Then it
happened…the rigging went slack, including the fuselage control wires!
Before reaching for my Heinecke, I walked away to cool down so that the
model didn’t enter the brick wall graveyard. After returning an hour
later, I came back to find that all rigging had tightened up during the
drying period. This was fine for the fuselage but the rigging for the
wings was a different matter. The thread had tightened so much that
three outer struts had bowed, and on subsequent handling…snapped.
Inserting a spacer between the strut halves and the subsequent puttying
and sanding was a nightmare on the fully rigged beast. I had never had
this happen on any other thread rigged model but will lay off the
“roughening” procedure for the time being!
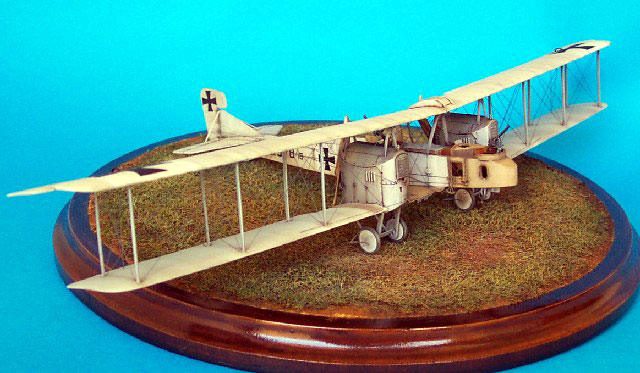
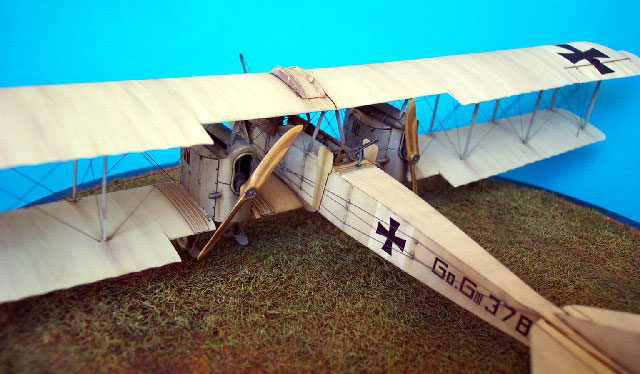
The subject represents an aircraft that most likely
belonged to Kagohl II, but at this stage it doesn’t have the black and
white halved wheel disks.
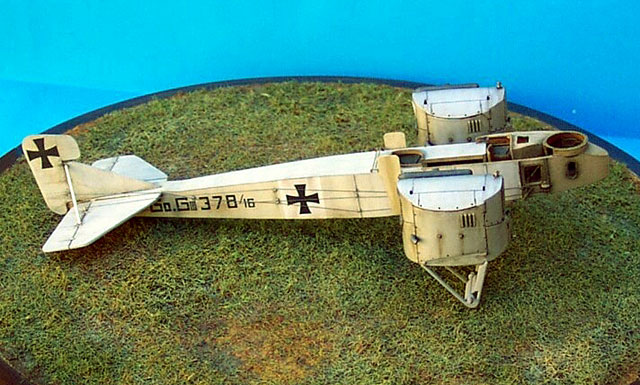
Like the G.II series before it, the early G.III machines did not have
the green or light blue painted fuselage or grey engine nacelles. Thus
378/16 represents an ideal subject for experimentation.
As usual, the Roden decals fought back when being applied and resisted
various decal-softening agents. Americal/Gryphon decals were used for
the fuselage numbers and behaved, as good decals should.
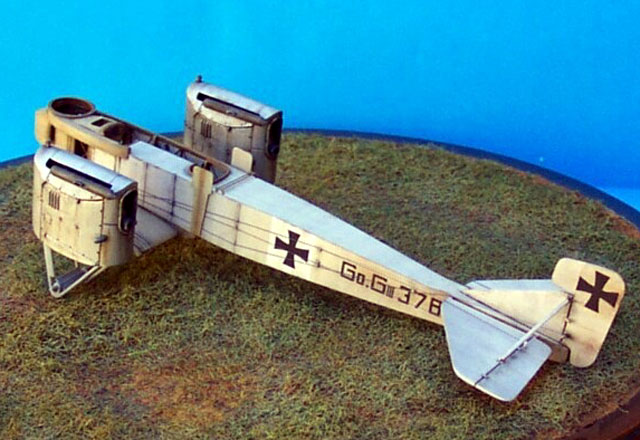
Xtracolor paint was used for the clear-doped fabric and vanished plywood
nose. Testors aluminium metalizer was used for the nacelles and then
sprayed with their proprietary sealer. An oil colour wash of raw umber
was applied and allowed to dry for ten minutes. This was then wiped off
with a cloth and cotton buds, leaving enough behind to “age” the fabric
and simulate grain for the wood effect. Pastel chalks of various shades,
including greys, browns and off whites, was used along the airflow to
give depth to the fabric surfaces.
In the box, Roden’s Gotha looks a lot more
complicated to assemble than it really is. This is due to the many spare
parts that are included for other releases. It is important to remove
these parts so that confusion during building is minimized.
With a little care and dry fitting, an excellent replica will result.
Thank you Roden!
Thanks to
Squadron for the review sample
Click the thumbnails below
to view larger images:
Model, Images and Text Copyright © 2002 by
Robert Baumgartner
Page Created 10 December, 2002
Last Updated 04 June, 2007
Back to HyperScale
Main Page
Back to
Features Index
|
 Home
| What's New |
Features |
Gallery |
Reviews |
Reference |
Forum |
Search
Home
| What's New |
Features |
Gallery |
Reviews |
Reference |
Forum |
Search