|
Junkers Ju 87D-1
Stuka
by Jordi Farre
|
|
|
Junkers Ju 87D-1 Stuka |

Hasegawa's 1/48
scale Ju 87D-5 Stuka is available online from
Squadron.com
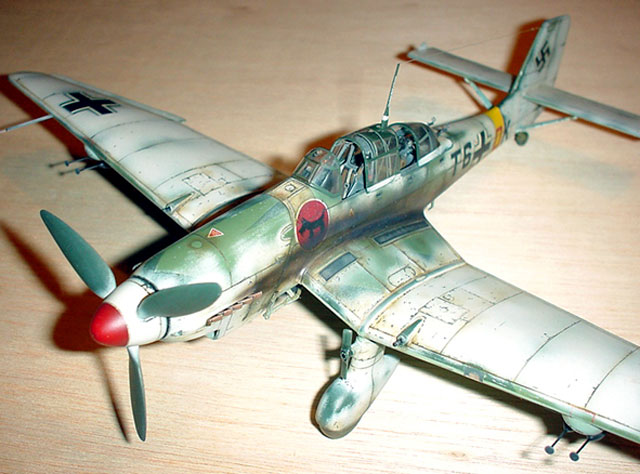
This is Hasegawa’s 1/48 scale Junkers Ju 87D-1
Stuka backdated to one of the first machines, still equipped with the
earlier Ju87B/R wheel spats.
The subject Dora-1 belonged to 2. Staffel, I
Gruppe/Stukageschwader 2 and was based on the Eastern front in
January-February 1942. A color profile can be found in Squadron/Signal's
Stuka in action book.
With the exception of a tricky fuselage/wing join
that needed some extra putty, the building process was straightforward.
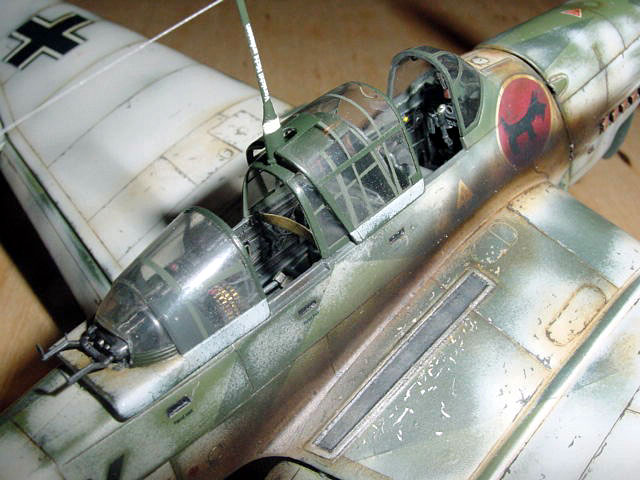
The cockpit was completed with the help of Eduard's
zoom photo-etched set for the Stuka D, the MG 81Z came from Aires and
other details were added using copper wire of different diameters. When
the cockpit was finished it was painted with Humbrol enamel Dark Grey
(#67) and, after sealing it with Tamiya's clear, I weathered the cockpit
with a diluted oil black wash and some drybrushing with Humbrol's dark
grey mixed with white oil paint.
The prominent wing control surfaces were removed in
order to facilitate the painting and aggressive weathering of the model.
These were put aside for the time being. I glued some tiny attaching
points for the control surfaces made from Evergreen plastic strip.
The early wheel spats were sourced from Airfix's
old Stuka. They were glued in place after rescribing the few panel lines
found there.
A disaster occurred when the kit's sliding pilot
canopy was broken while sanding and polishing with Tamiya compound
paste. Luckily I found an old canopy from Monogram's jurassic Ju 87D in
my spares box and, once reshaped, sanded and polished it fitted without
problems to Hasegawa's kit.
The kit was painted with old Italian Mo-Lak
enamels.
I paid no attention to the exact tone of the greens
because they would be inevitably be altered by the weathering process.
Once finished, the RLM 70/71/65 scheme was sealed with two coats of
Tamiya's clear. In order to allow the varnish to cure, I photocopied the
kit's national insignia and the required squadron codes found in the
spare decals box, then I carefully cut all the insignia and secured it
in the model's surface with small portions of blue-tack, after it I
painted the model with "dirty" (add one or two drops of black paint)
flat white from Tamiya's acrylic range.
Once the paint dried, I removed the photocopied
decals. This was done to give the impression that the white was applied
around the already painted insignia instead of under it.
Now comes the fun - start polishing the surface
with abrasive toothpaste and you'll see how the green begins to show
thru the recently applied white. This process must be done with extreme
care because if you are too coarse you might remove the varnish and the
greens found under it.
Once the model looks right to you, wash it with
dishwashing detergent to remove the toothpaste residue and give another
coat of Tamiya Clear. After applying decals and sealing them with a
third coat of clear, I enhanced panel lines with raw umber oil paint
straight-from-the-tube. I also stained the surface by applying more raw
umber and spreading it with a flat brush.
Little scratches were added with an small brush in
dark grey paint over the white camouflage, and Humbrol's Metalcote
Aluminium over the darker greens.
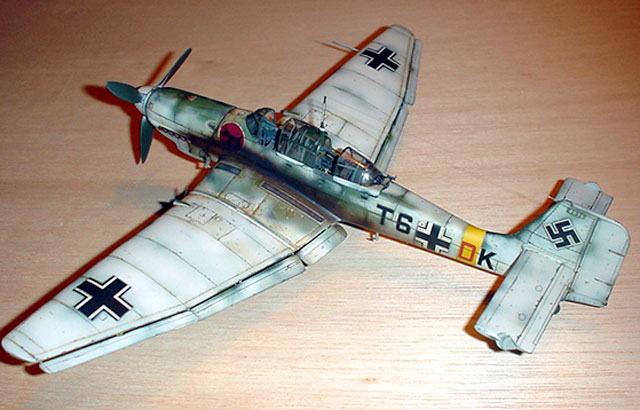
Remember the control surfaces? Well, the whole
weathering process was repeated for the ailerons and flaps. Once
finished, these parts were very carefully attached with super glue to
the attaching points previously installed in the wings'
undersurfaces. The flaps were left in a dropped position to give the
model a more realistic look.
Their control arms were reproduced with copper wire
and portions of discarded p/etched sets. This was the most challenging
part of the entire building process because I was attaching those tiny
parts with super glue to an already painted and weathered model.
However, the results are well worth the effort.
The canopy, pitot tube, antenna and aerial mast
were glued in place after a final coat of Golden's satin varnish.
Now, the slow-but-deadly Stuka is ready for another
mission against the Russians and General
Winter!
Click the thumbnails below
to view larger images:
Model, Images and Text Copyright © 2002 by
Jordi Farre
Page Created 23 April, 2002
Last Updated 04 June, 2007
Back to HyperScale
Main Page
Back to
Features Index
|
 Home
| What's New |
Features |
Gallery |
Reviews |
Reference |
Forum |
Search
Home
| What's New |
Features |
Gallery |
Reviews |
Reference |
Forum |
Search


