|
Messerschmitt
Me 410B-2/U4
by Andrea Mariottini
|
|
|
Messerschmitt Me 410B-2/U4 |

Fine Molds' 1/72
scale Me 410A is available online from
Squadron.com
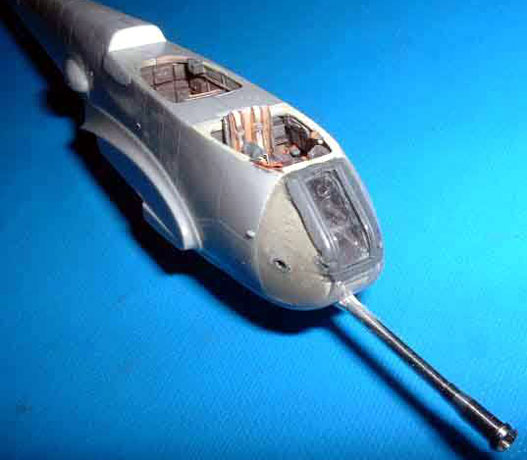
I do not think that it is necessary to introduce
the Messerschmitt Me 410. I would like just to remind that readers that
this version was equipped with a telescopic gunsight protruding from the
windscreen and a 50 mm BK5 cannon which was intended to break up bomber
boxes.
Fine Molds' 1/72 scale kit represents the A-1
version.
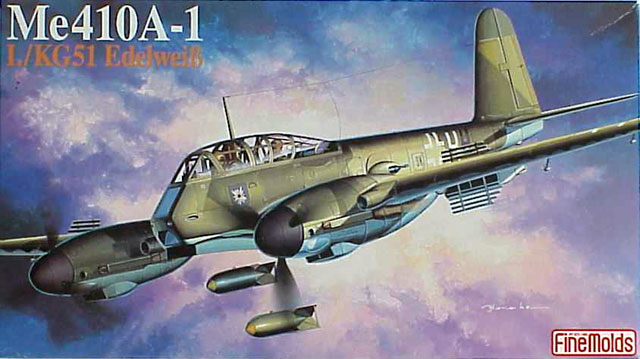
It is very good, well detailed and the surfaces are
provided with engraved panel lines. There are only 2 points that require
some attention:
I decided to use thin plastic strip instead of
filler in order to save the engraved panel lines. Moreover the
refuelling points and the access panels are represented raised. Since
this is an aircraft and not a tank, I made them flush.
I also removed the representation of the speed
brakes on the wing because they were not present on the B-2/U4 version.
Any kit can be improved by using aftermarket
accessories. For this project I used:
-
CMK conversion and detail
set (see the CMK instruction sheet photo) to transform the A-1 version
into the B-2/U4 version
-
Eduard photo-etched sheet
-
Falcon vacuformed canopy
-
Moskit exhausts (unfortunatly
partially hidden by the exhausts shrouds)
-
Aeromaster decal sheet
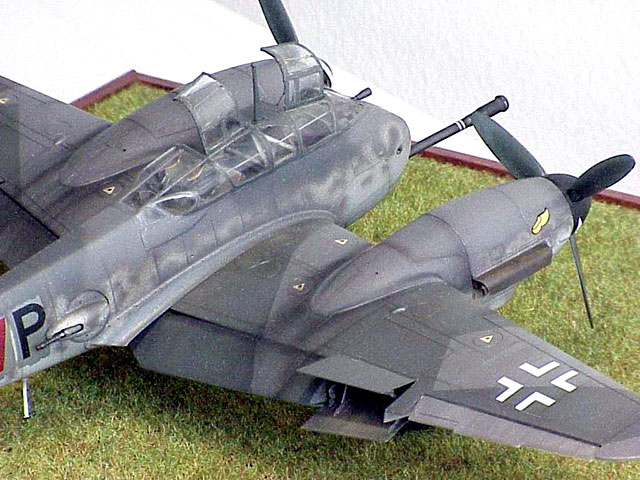
As I've mentioned before, the kit is very good so I
focused my attention on the cockpit details that are very evident
through the clear Falcon canopy.
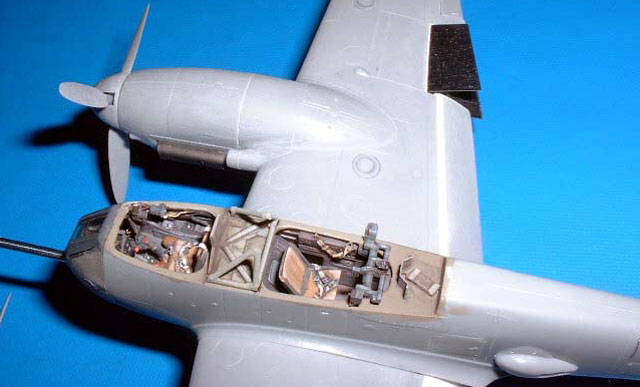
The main components of the cockpit are well
detailed but the Eduard photo-etched sheet, together with tens of hand
made parts, helps a lot to improve the level of detail. Nevertheless I
did work on the wing (cut and repositioned ailerons, dropped flaps, open
radiators flaps) and on the tail too (cut and repositioned elevators,
CMK rudder) without forgetting the landing gear.
Click
the thumbnails below to view larger images:
Since the CMK conversion set has been designed for
the Italeri kit, I could use only some parts of it: the cannon made in
turned aluminium, the rudder and the bulged part of the cannon fairing.
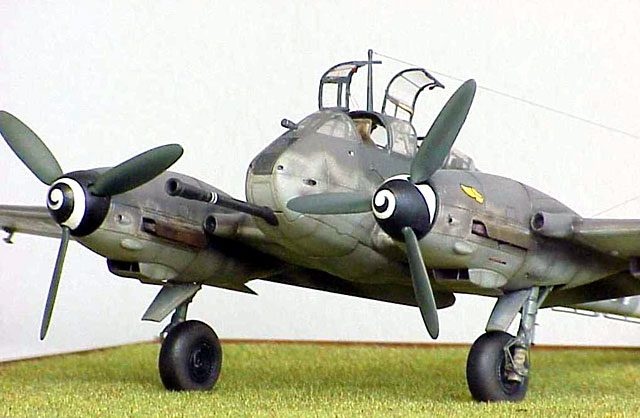
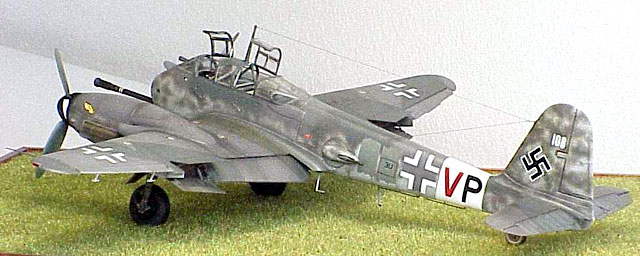
My model represents the aircraft coded 3U+VP of the
6/ZG 26 during 1944. One B&W photo and one color profile are shown in
the "Messerschmitt Me 210/410 in action" by Squadron/Signal
publications. It is not evident if the unit code "3U" was painted on the
aircraft because the photo is too small but I decided to apply it.
The model is handpainted in acrylic Aeromaster's
RLM 76 on the entire lower surfaces and fuselage sides while a splinter
pattern of Gloy's RLM 74/75 has been sprayed over all upper surfaces by
using the Tamiya spray-work air brush system set.
The fuselage sides have been heavily mottled in RLM
74/75; the previous unit code (factory code? unit code?) has been
overpainted in RLM02. The white spirals on the spinners have been hand
painted. The weathering has been achieved with pastels.
The decals are mainly from the Aeromaster decal
sheet with the only exception of the "P" letter (CMK decal sheet), "V"
letter (cut in a red decal sheet) and the number "108" (spare decal
sheets).
Since the "108" number is smaller by 1/3 than the original one, I put it
only on the left side of the fin.
After weatering and decalling, the entire model has been sealed with a
mix of Testor's Glosscote (60%) and Flat Coat (40%).
References and
Acknowledgements
|
-
Luftwaffe in action;
aircraft no. 2 Squadron/Signal publications
-
Messerschmitt Me 210/410
in action Squadron/Signal publications
-
Flugzeug bewaffnung by
Hanfried Schliephake Motorbuch Verlag
-
Flugzeug fahrwerke by
Gunter Sengfelder Motorbuch Verlag
-
Replic no. 63 November
1996
-
Replic no. 79 March 1998
-
Air International October
and November 1981
-
Aerei Modellismo March
1981
I have taken the photos of the finished model with
a digital camera Sony Mavica provided with a zoom.
I would like to thank my friends Francesco, Giuseppe and Paolo of the
"Al Soldatino" model shop in Milano (www.alsoldatino.it) that provide me
with all the "stuff" necessary for our hobby: kits, accessories,
documentation, suggestions and so on.
In particular, Paolo helped me take photos
of the model during construction.
Click the thumbnails below
to view larger images:
Model, Images and Text Copyright © 2002 by
Andrea Mariottini
Page Created 05 December, 2002
Last Updated 04 June, 2007
Back to HyperScale
Main Page
Back to
Features Index
|
 Home
| What's New |
Features |
Gallery |
Reviews |
Reference |
Forum |
Search
Home
| What's New |
Features |
Gallery |
Reviews |
Reference |
Forum |
Search


