|
Click the thumbnails below to view larger images:
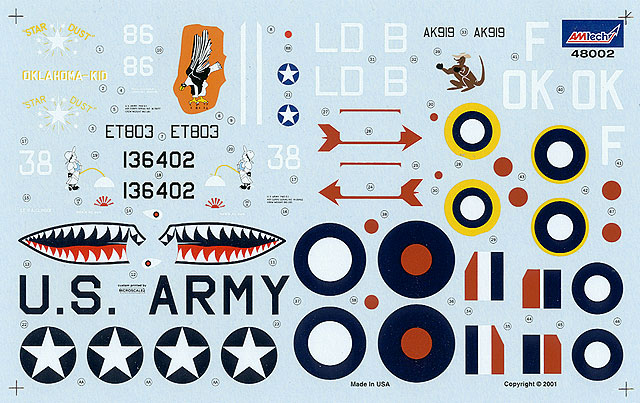
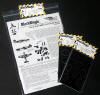
The decal sheet is excellent, with four fascinating
options. Two are USAAF, one RAF and the last is RAAF. The American
subjects are both finished in Tan and Medium Green over Sky Gray, while
the British and Australian Kittyhawks are both in Desert colours. One of
the options feature shark's teeth, and all have unique artwork on the
airframes. The instructions are quite comprehensive, with four-view
diagrams for all subjects, Federal Standard Number equivalents and additional notes.
I was fortunate to receive an early test-shot of
AMtech's 1/48 scale P-40E.
Since building this model I have received a production
version of the sprues, and one of the problems I encountered (the poor
fit at the wing root) has now been addressed by AMtech. This is described in more
detail below.
Otherwise, the kit I built was essentially the same as
the production version.
Getting Started
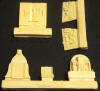
AMtech's fuselage halves feature separate parts for the
engine cowling panels. This is to permit a choice of panels to be fitted
for different variants. I
decided to tackle these panels first - even before the fuselage halves
had been cut from the sprue.
The rear edge of the panels were "tacked" to the
fuselage halves using a spot of superglue. I then held each panel flush
against the fuselage while I ran a line of Testor's Liquid Glue around
the inside of the join. The result was a gap-free fit, but a slight step
was evident at the top and the bottom of the panels. Also, the front of
the panel did not quite meet the front of the nose. I decided to deal
with these issues when the fuselage halves were assembled.
Cockpit
|
After-Market Accessories |
- True Details
resin cockpit
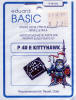
- Eduard "Basic"
instrument panel
- Cutting Edge
USAAF N-3 gunsight
- Squadron vacuum
formed canopy
- True Details
resin wheels
- Black Magic
camouflage masks and canopy masks
|
|
Additional Modifications |
- Drilled out gun
barrels and exhaust stacks
- Drilled out
holes in wing leading edge for cockpit fresh-air intakes and gun
camera
- Scratchbuilt new
headrest from styrene
- Scratchbuilt
rear-vision mirror from styrene
- Added aerial
wires from monofilament and isolators from white glue.
- I also should
have added brake lines from fusewire!
|
AMtech's cockpit is quite nice straight from the box.
However, I wanted more detail in my Warhawk's front office.
True Details released a resin replacement cockpit
for Mauve's 1/48 scale P-40N in the 1990s. This is a well-detailed
and inexpensive accessory. I discovered that modifying the True Details
cockpit to fit the AMtech fuselage just needed a different assembly
sequence, some serious trimming and a little patience.
The main dilemma is that the floor is far too wide for
the AMtech fuselage. I sawed off the edges of the floor close to the
locating slots for the sidewalls.
The rear
bulkhead and pilot's armour in the True Details set is for the
late canopy variants. The armour on the late variants slants forward,
whereas the earlier versions sloped backwards. The plastic kit part was
therefore glued to the resin floor
I sliced off the headrest because (a) it was a bit
small, but mainly (b) I wanted to fill and sand a gap at the top of the
pilot’s armour. I scratchbuilt another larger, longer headrest from
plasticard and Mr Surfacer.
I glued the sidewalls direct to the fuselage interior
after test fitting against the cockpit floor and bulkheads. Test fitting
revealed a narrow triangular gap between the rear of each firewall and
the rear bulkhead. I used a thin wedge of plasticard to bridge this gap
on each side. The resin front firewall fitted perfectly without
modification.
The True Details instrument panel was not appropriate
for the P-40E, so I used the Eduard P-40E “Basic” set. This inexpensive
photoetched fret supplies the instrument panel and acetate backing. It only cost me around USD$1 a few years ago. I assume that this is
designed for the old Revell or Otaki kit, as it was a bit wide. I
trimmed the edges and top corners until it eventually fitted.
The True Details seat looks good but it rides very low
in the cockpit. It also glues straight to the rear bulkhead, which looks
odd to me. I added vertical rails from strip styrene to the back of the seat to
space it from the bulkhead, and aligned the top of the seat so that it
peeked above the canopy sill line.
Although it was a fair amount of work, I was very happy
with the way the True Details cockpit looked in the assembled fuselage.
Unfortunately, it seems that this set is currently out of production,
but it is only a matter of time until somebody comes to the rescue with
a custom-designed cockpit for this kit.
Click the thumbnails below
to view larger images:
|
|
|
|
True Details' 1/48 scale Warhawk cockpit was designed for the Mauve P-40N kit, but it will fit AMtech's P-40E after some modifications
|
|
|
|
Eduard's "Basic" instrument panel is another inexpensive improvement.
|
|
|
|
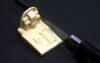
The sides of the resin floor must be cut off close to the locating slots for the sidewalls.
|
|
|
|
The sidewalls fit quite well. A narrow wedge of styrene has been used to fill a small gap between the sidewalls and the rear bulkhead
|
|
|
|
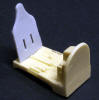
The bulkhead and pilot's armour are a different shape on the earlier P-40E, so the plastic kit part has been adapted to the resin floor.
|
|
|
General Construction
The remaining construction was generally straightforward.
I hollowed out the tubular exhausts by first marking the centre of
each pipe with the point of a scriber, then drilling a shallow hole with
a pin vise.
The composite oil cooler/radiator assembly inside the distinctive
chin was added. There was a gap between the front of the ceiling of this
assembly (part A5) and the front of the fuselage. This was quickly dealt
with using a strip of styrene glued in place and trimmed to fit when
dry.
With the cockpit sidewalls, exhausts and cowl panels in place, the
fuselage halves were joined. The fit was excellent. I offered the
instrument panel up through the empty cockpit and glued it in place
under the instrument coaming after test-fitting the cockpit. Finally, a
bead of superglue was run along the edges of the cockpit to secure it to
the fuselage.
P-40 wheel well sidewalls were fitted with canvas covers, but I did
not add this feature. Instead, the wing halves were glued together and
the holes for the bomb racks were filled with fine styrene rod. When the
wings and fuselage halves had set, I test fitted both assemblies. My
pre-production sample demonstrated a close fit at both wing roots, but
there was a big step on the upper port-side. There was also a gap at
the bottom trailing edge. I glued the wings to the fuselage and, when dry, I
took to the step with some coarse grade sandpaper until it was
eliminated.
I also took this opportunity to sand back the small steps between the
engine cowl panels and the fuselage; and the minor blemishes on the
fuselage. The total time invested in all this sanding was about ten
minutes.
Liquid Paper was used to fill the gaps at the trailing lower wing
join and (as an insurance policy) on the upper wing roots. A number of
panel lines were lost during filling and sanding. These were restored by rescribing.
Self-adhesive Dymo tape was used as a scribing guide for the straight
lines.
To fix the short cowl panels I tried sanding the nose, but in
retrospect I should have filled the gap with putty or a strip of
styrene.
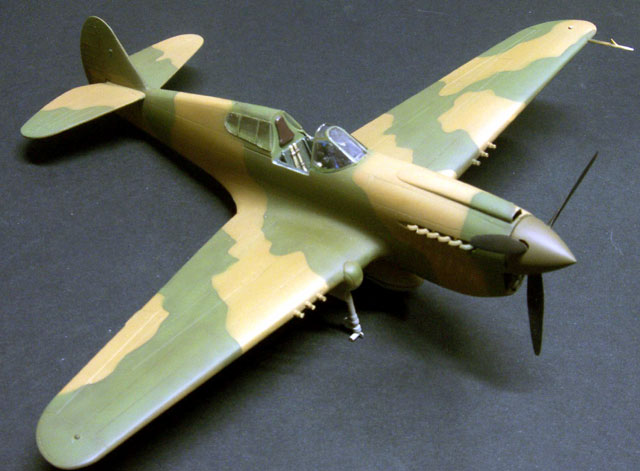
Although it is not my custom to undercoat my models, I decided to
spray a coat of grey primer to ensure that I had caught all the gaps and
restored all the panel lines. This primer buffed up to an impressive
gloss after polishing.
Click the thumbnails below
to view larger images:
|
|

|
|
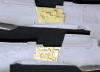
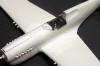
The fit of the kit was generally good, but there was a sizeable step at the port-side wing root, some fit problems on each engine cowl insert...
|
|

|
|
...and a further gap at the trailing edge of the wing where it meets the bottom of the fuselage.
|
|
|
|
Sanding and filling solved all these problems.
|
|
|
|
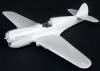
The model after re-scribing, polishing and a coat of grey primer.
|
|
|
The remaining smaller parts including the drop tank,
undercarriage and pitot tube were assembled per the instructions. The
fuselage antenna mast was not required for my aircraft choice. The wheels
were also left off at this stage.
Paints
I am a long time user of Gunze Acrylics, but with Testor's recent sponsorship of HyperScale I thought I would revisit some
of my old Polly Scale and Aeromaster Acrylics for this model.
I loved the huge range of colours in the various Testor
paint ranges, but I had terrible trouble with thinning and spraying when I
first used them some years ago. Any fine line work would result in the
nozzle of my Aztek A470 airbrush quickly clogging; or spraying semi-dried
"spiderwebs".
I did not have access to Testor's "new formula" acrylics,
but a local hobby store did have a bottle of Model Master Acryl Thinner.
This is a new product (stock #50496) and I decided to experiment with my
old paints.
To my delight, the results were very good indeed.
I added 20-30% Acryl thinner to Polly Scale and Aeromaster paints to
achieve smooth flow and an impressive finish. The paint was dry in
minutes and was safe to touch as soon as it was dry. One of my
frustrations with Gunze Acrylics is its susceptibility to fingerprints
even days after the paint has been sprayed.
The Spray Job
Other than the brand of paints, my approach was the same
as with my earlier models.
I started with a rough "preshading" of panel
lines in black. This was followed by a coat of Aeromaster Acrylic Neutral
Gray on the lower surfaces, which seemed to be a good match for the pale Sky Gray specified in
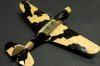
the marking instructions. Upper surfaces received a patchy application of
Polly Scale Olive Drab.
This dark colour was oversprayed with Polly Scale tan, resulting in an
uneven medium brown on the upper surfaces. Contemporary
photographs show that these early Warhawks wore a hard-edged camouflage
demarcation.
Black Magic has a camouflage masking set for Hobbycraft's 1/48 scale
P-40B. Fortunately, these masks fitted the later variant very well. I
only needed to slightly trim some sections, and add a few strips of
masking tape in other areas. There is no doubt that
camouflage masks save an enormous amount of time and effort. They also
mimic the method of applying the pattern to the full-sized aircraft. Black
Magic masks were also used for the canopy.
Click the thumbnails below to view larger
images:
|
|
|
|
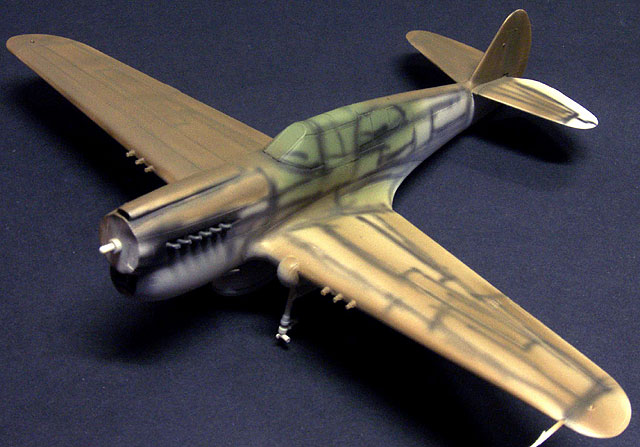
Black Magic masks from Cutting Edge Modelworks were used to paint the hard-edged camouflage pattern and to mask the canopy.
|
|
|
|
Although this masking set was designed for the Hobbycraft P-40B kit, it was 90% approppriate for AMtech's P-40E.
|
|
|
|
The masks are carefully removed to reveal the camouflage pattern. See text for more detail about techniques.
|
|
|
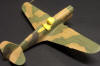
I sprayed Polly Scale US Tac Dk Green lightly up to the
edges of the masks, then filled in the gaps with the same colour. When the
pattern had been sprayed, the masks were removed and Aeromaster US Medium
Green was patchily oversprayed freehand
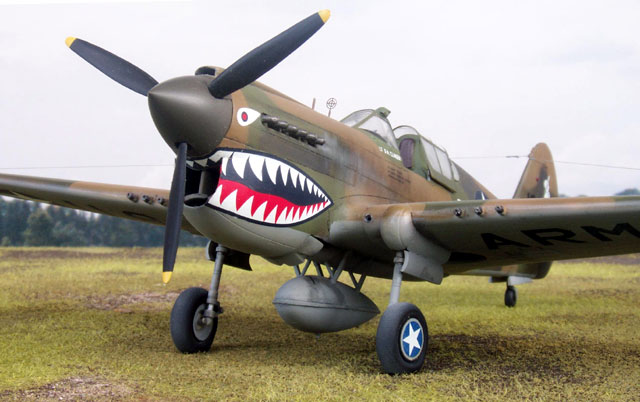
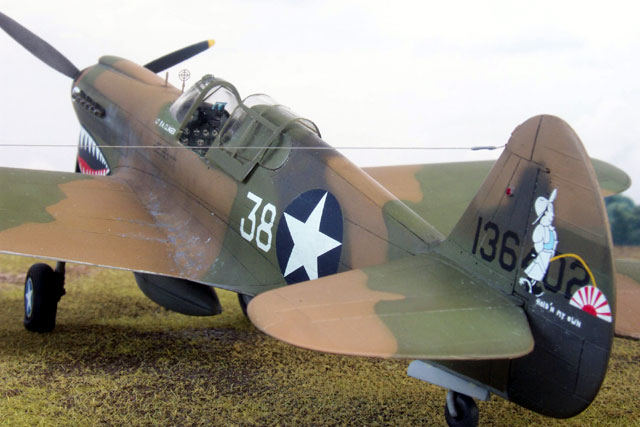
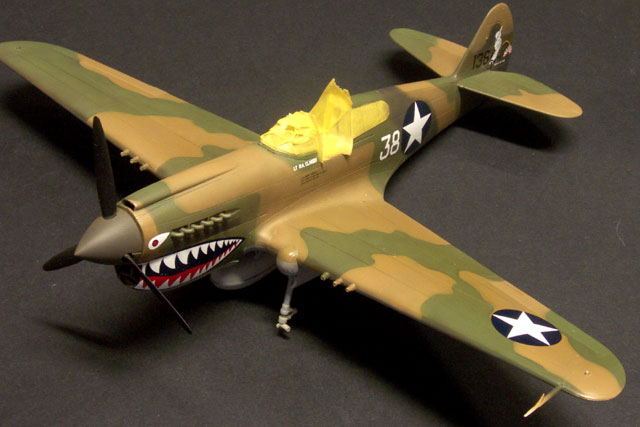
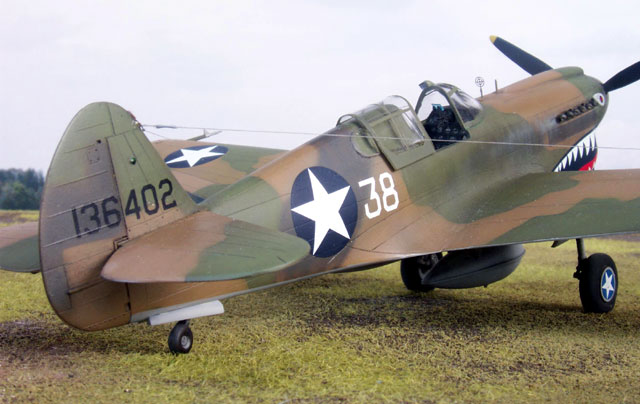
This P-40E of the 23rd Fighter Group in China was heavily faded and had
large areas of overspray. I mixed up a dark batch of Olive Drab by
adding a little black to the standard Polly Scale colour. This dark shade represented a fresh coat of paint
applied to large sections of the rear fuselage, tail and the spinner.
The instructions mention that the spinner may have been red, but given
the (justifiable) level of anxiety about "friendly fire", the colour red
was generally discouraged in the Far East and Pacific theatres. I
therefore opted for fresh Olive Drab. Alan Griffith of
AMtech has supplied several photos of this fascinating aircraft, and
they appear in a separate Reference Page on HyperScale.
Decals
As if the patchy and faded paint job was not interesting
enough, this Warhawk also wears a gaudy shark's mouth and an irreverent
cartoon on the tail. The marking instructions are very
good and the decals are simply superb. Carrier film is thin and runs
right to the edge of most markings. Colours are thoroughly saturated -
none of the dark aircraft colour shows through the white of the US stars
or the shark's teeth. The shark's mouth decals conformed to the compound
curves of the lower cowl after a liberal application of MicroSet setting
solution and a few tiny slices with a sharp knife while the decals were
in place.
The entire aircraft received a wash of thinned black oil paint, followed
by a flat varnish.
At this late stage, I noticed that
the kit canopy rode high when slid back. I decided to replace the
injection moulded kit part with a vacform canopy from Squadron. This was
designed for the AMT kit, and fitted the AMtech canopy perfectly.
|
 |
 |
|
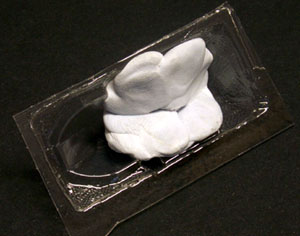
The vacform canopy is
packed with Blu-Tack. This improves the rigidity of the canopy, and
the solid background also makes it easier to see the clear part. |
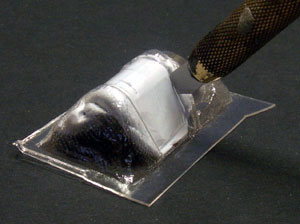
The canopy is cut free
with a clean slice from a new hobby blade. |
Other finishing touches included:
-
a ring and bead gunsight. The
ring was a photo-etched item from an old Eduard sheet for the Hobbycraft
MS 406; and the bead mount was a fine section of brass rod.
-
aerial wires from the top of the
tail to each wingtip. Isolators were made from drops of white glue,
painted grey; and the "wires" were smoke-coloured monofilament (invisible
mending thread).
-
a rear-vision mirror on top of
the port side of the windscreen was carved from a small styrene block.
-
ventilation holes were drilled in the leading
edges of the wings.
-
machine gun barrels were drilled out.
-
navigation lights were finished
by first painting the small bumps light grey, followed by a coat of Clear
Red (for the port side) and Clear Green (for the starboard) and finally,
when dry, a drop of thinned black oil paint to provide a tidy demarcation
from the surface of the aircraft.
-
an exhaust stain was sprayed using a combination of chalky
black and light tan paints, and the wing roots were "chipped" with a
silver pencil.
At last we have an accurate P-40E in 1/48 scale.
AMtech's P-40E was an enjoyable and straightforward
build. The kit offers enormous potential for after-market providers too,
with the possibility of superdetailed cockpits, optional ordnance and
other details.
The minor fit problems and blemishes were swiftly dealt
with, and should not present any difficulty to the vast majority of
modellers.
With the enormous variety of potential colour schemes,
markings and nationalities, my biggest problem will be limiting myself to building
only three or four of AMtech's P-40E!
Acknowledgements
Thanks to Alan Griffith from AMtech for the review
samples; and to Dana Bell for confirming the colour used on the
undersurface of 23rd
Fighter Group Warhawks.
|
 Home
| What's New |
Features |
Gallery |
Reviews |
Reference |
Forum |
Search
Home
| What's New |
Features |
Gallery |
Reviews |
Reference |
Forum |
Search