|
Canadair Sabre Mk. 6
by
Ian
Robertson
 |
|
Canadair Sabre Mk. 6 |

Hasegawa's 1/48
scale F-86F Sabre is available online from Squadron.com
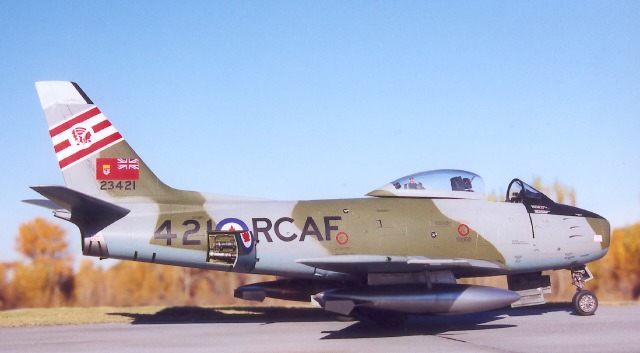
The Canadair Sabre Mk6 was the fastest of the F-86 Sabre variants. Based on
the F-86F Sabre, the Mk6 was fitted with an Orenda 14 engine and wide chord
'6-3' wing with leading edge slats. My model is of a Sabre Mk6 from RCAF 421
"Red Indian" Squadron, #2 Wing, Grostenquin, France (1953-63).
The basis for my model was a Hasegawa 1/48 F-86F-40.
Additions to the kit included leading edge slats (LES), a seamless intake
from Cutting Edge, Aires cockpit, and Leading Edge RCAF "2 Wing" Mk6 Sabre
decals.

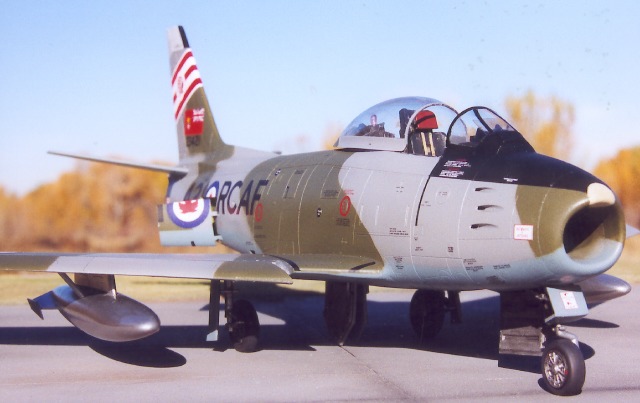
While the replacement cockpit and LES greatly enhanced the model, I'd
hesitate to buy the seamless intake in the future due to its high cost and minor
enhancement. Metal weights were glued to the interior areas of the nose to
prevent the nose wheel from elevating off the ground.
Conversion Summary
Using the detailed instructions included with the Leading Edge decals, as
well as other sources, the following alterations were made to the basic model:
-
Wing length was shortened to remove the 12" (x2)
wingtip extension of the F-40 variant
-
Raised section surrounding vent in front of tail
was removed
-
Port side refueling hatch was removed
-
Scoop in front of starboard speed brake was
removed
-
Underwing fuel tanks were taken from a Hasegawa
F-86F-30 kit to match photos of RCAF Sabres
All painting except for metallic colors were applied using Polly Scale
acrylics. The cockpit was painted scale black with a reddish-orange headrest.
The camouflage consisted of Dark Sea Grey, Dark Green, and PRU Blue. The wing
tanks and the interior surfaces of the LES were painted natural metal using SnJ
aluminum metalizer. The radome at the tip of the nose was painted "radome tan".

The painted model was given several coats of Future floor wax for a gloss
finish. Normally I apply just a single coat of Future, but because of the
extensive stenciling I decided a glossier coat was required to prevent silvering
of the small, predominantly clear decals. Leading Edge's stencils were clear,
crisp, impressively minute (unlike most stencils, which to my eye often seem way
over scale), and they settled beautifully without silvering.
In fact, all the decals were outstanding.
Click the thumbnails below to view
larger images:
Model, Images and
Article Copyright © 2002 by Ian
Robertson
Page Created 04 January 2002
Last updated 04 June 2007
Back to HyperScale Main Page
Back to Features Page |
 Home
| What's New |
Features |
Gallery |
Reviews |
Reference |
Forum |
Search
Home
| What's New |
Features |
Gallery |
Reviews |
Reference |
Forum |
Search