|
Supermarine Swift
by
Mike Grant
|
|
|
Supermarine Swift |

HyperScale is proudly supported
by Squadron
Have I taken leave of my senses? I've taken a
1954-vintage, wildly inaccurate kit of an obscure RAF aircraft, built
it, painted it AND put a pilot in it? And then mounted it on the kit's
display stand, for goodness' sake...
The motivation for this model came from a conversation with a friend of
mine in the U.S. about recapturing the raw enthusiasm for model building
that we had as kids, when 'accuracy', 'detail' and 'photo-etch' weren't
part of our vocabulary. I'd also just finished a particularly tedious
and fiddly model/conversion and needed a change of pace. The 1/72 Hawk
kit had been on my shelf for years though it had never seriously been a
contender for being built, but with just 7 usable parts I figured it
would be an ideal subject for my foray into nostalgia.
I had a set of plans for the Swift in an older
issue of 'Scale Aircraft Modelling International', and these showed all
that I needed to know- the kit was hopelessly wrong in length, shape and
cross-section. There was no opening for the cockpit, the wing had 2 sets
of spurious and grossly thick wing fences, panel lines were raised and,
in typical 50s fashion, the markings were engraved neatly into the
plastic. Perfect. Despite all this, when I did a dry-run it actually
looked a bit like a Swift. I battled with my conscience over whether to
do it as a literal, 'out-of-box' project or to make a token effort at
looking like a serious modeller.
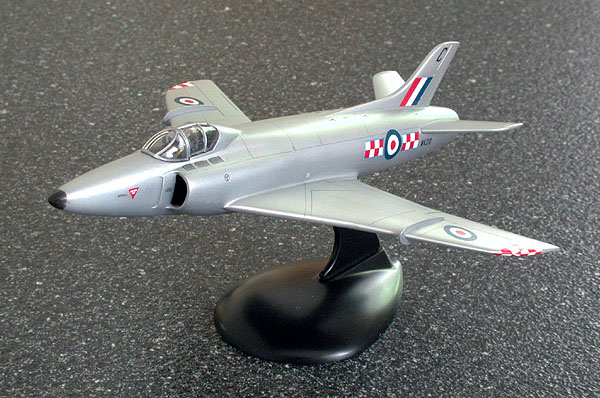
In the end I compromised and made improvements where I thought they'd be
most obvious. I hollowed out the cockpit and added a pilot, seat and
instrument panel. I sanded off all the panel lines and filled the
engraved markings. I removed the wing-fences (scaled up they'd be better
referred to as wing-walls) and replaced them with a thinner set. For the
most part the pieces fitted OK except for the starboard
wing-to-fuselage. I filled and sanded that joint so much that I could
literally see daylight through the fuselage side, but eventually all was
ready to paint.
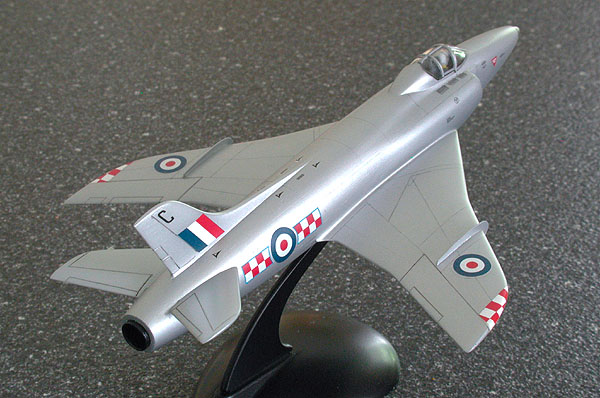
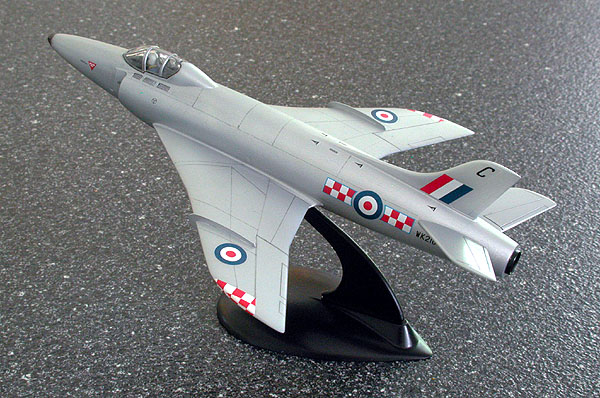
The Hawk kit's profile is closer to the F. Mk. 1/2
with its shorter tail fin so I opted for the all-over aluminium finish,
for which I used SNJ. I made the markings on my ALPS (before its demise)
depicting an aircraft of 56 squadron. Everything was sealed with a coat
of Future, then I added a few panel lines using a pencil. It wasn't
entirely succesful, I had to use a soft 4B pencil to make any impression
at all on the glossy surface and as a result some of the lines are a bit
fuzzy. In retrospect I should have lightly misted a satin or matt
varnish over the gloss which would have enabled me to use a harder grade
of pencil. It looked OK though.
Was I able to recapture those carefree modelling
days of my youth? Well, I did get a bit bogged down at the
filling/sanding stage which wouldn't have happened back then, but I had
to retain SOME of my self-respect. And I probably wouldn't have
painstakingly created a set of replacement decals.
But I thoroughly enjoyed the project as some
welcome light relief. And I have at last removed that Hawk kit from the
unbuilt pile.
Model, Images and Text Copyright © 2002 by
Mike Grant
Page Created 26 July, 2002
Last Updated 04 June, 2007
Back to HyperScale
Main Page
Back to Features Index
|
 Home
| What's New |
Features |
Gallery |
Reviews |
Reference |
Forum |
Search
Home
| What's New |
Features |
Gallery |
Reviews |
Reference |
Forum |
Search