|
The TIE Circus
Imperial
TIE Fighters
by
Valentin E. Bueno
|
|
|
TIE Fighter |

HyperScale is proudly supported by Squadron
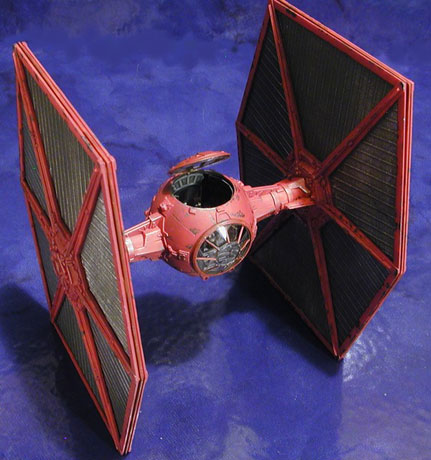
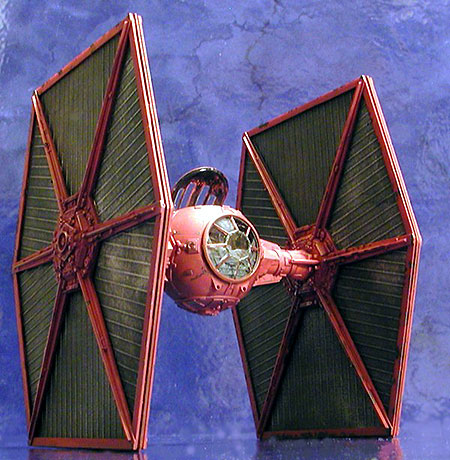
Byobob von Tunisikov was a rising star in the
Imperial Fighter Corps. With an open-minded commandant as his superior,
he was allowed to paint his TIE fighter an overall Primer Red as a moral
booster to the rest of his escadrille.
His fellow squadron mates were
allowed to paint the bodies of their TIE fighter red with other colors
used for the solar panels. His brother Rothar (also in the same
squadron) used yellow as his trim color.
Those Rebel scum don’t have a
chance when the Tunisikov brothers and the rest of the TIE Circus are in
the fight.
Ok, so I don’t have much of an imagination. And yes, I was drawing
from WWI history in making up this story line. Since everyone I know
would be painting there TIE fighter as per the instructions, I decided
to paint mine overall red and I needed a story to give them when people
ask, “Why is it red?”
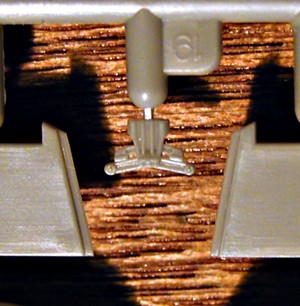
When Fine Molds of Japan picked up the rights to produce new 1/72 scale
kits of Star Wars vehicles, Star Wars Fans across the world rejoiced.
Known for their attention to detail and fit, Fine Molds have created
what I consider the ultimate Star Wars kits. The TIE fighter and the
previously released X-Wing have been thoroughly researched and molded
with recessed scribing and a multitude of raised detail where
appropriate. They clearly matched ILM’s use of old plastic model kits to
create the original movie vehicles. Part A19 of the TIE fighter kit is
clearly a Sherman bogie assembly. You could also see the Panther Tank
grills used in the creation of the X-Wing originals. Thank you Fine
Molds.
Enough of this, let’s get onto the kit…
Fine Molds 1/72
Scale "TIE Fighter" Kit
|
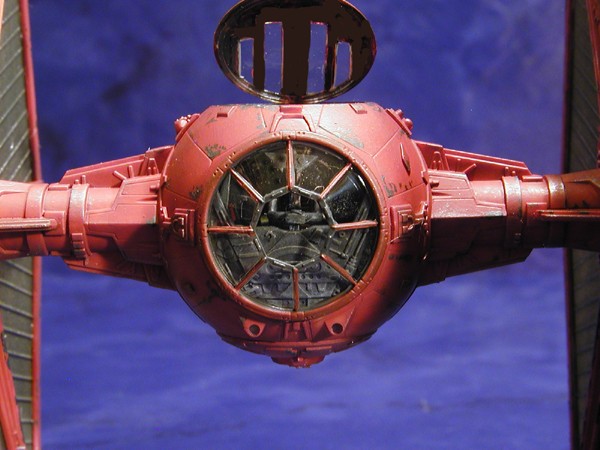
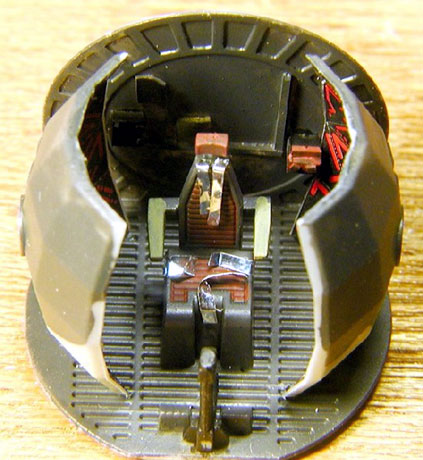 Assembly started in the cockpit. This area consists
of the floor, backwall, two sidewalls, seat back, stick and yoke. Assembly started in the cockpit. This area consists
of the floor, backwall, two sidewalls, seat back, stick and yoke.
I
added a few slivers of chopped rod and strip to the front body half. I
intended to leave the cockpit hatch open and the lack of detail in this
side of the instrument panel is very noticeable.
I also added
miscellaneous boxes, ribbing and wiring to the backwall as well. The
busier the merrier. The cockpit sidewalls have decals added to them to
imitate the complex interior. Each half gets four decals each. I added
the two edge decals first and allowed them to set for about half an
hour. Then I added one more strip adjacent to the previously added
decals and let this set for half an hour. Finally the last strip was
added and a generous coat of Solvaset was brushed on to get all the
decals to snuggle down.
The cockpit was painted RLM 66 everywhere with the instruments picked
out in RLM 22 black and RLM 23 Rot. Then everything was given a wash of
diluted white oil paint. White? Yeah, I wanted to try reversing what I
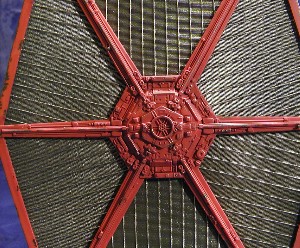
usually do on this cockpit. Call me weird. I also painted the solar
panels RLM 66. Fine Molds ingeniously molded the frame of these panels
separate from the actual black solar panels. This simplifies painting a
great deal. I also noticed that the solar panels were bagged separately
from the main body panels. Could this mean that the body parts can be
packaged with new TIE Interceptor Solar panels? I dare to dream…

After the cockpit had dried and the main body assembled, sanded (what
few visible seams there were) and all the tiny detail parts added
(including the Sherman Bogie), I added the clear windscreen. Fine Molds
supplied masking material for the clear areas. These mask are not
pre-cut, but they do include the shapes printed on them for you to
follow. Cool. Tamiya was the first to pioneer this idea with pre-cut
masks made from Tamiya masking tape material for their car kits. Now if
only they would do this for all their kits. I dream yet again…
The body and solar panel frames were hand brushed with Polly S Oxide
Red. The decals were applied directly to the flat finish paint and
melted in with Solvaset. Future was applied to the areas where decals
were applied to seal in the decal. A wash of black oil paint was applied
and allowed to dry. I mixed a little White oil paint with burnt umber
and red oil paint to create a lighter oxide red color. This was
drybrushed over the raised detail. Pure white was drybrushed onto a few
areas where I wanted to increase the appearance of light hitting the
model.
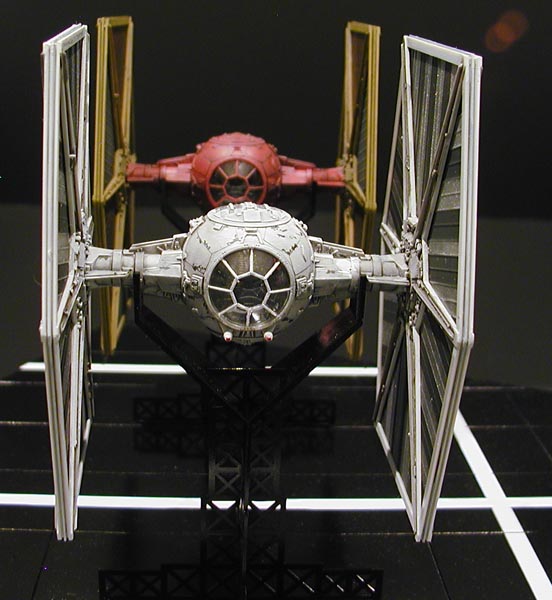
The latticework portion of the display stand was
assembled and painted in alternating bands of white and red. I caught
TheBus over to Weller’s Hobbycraft and picked up a basswood plaque. I
sanded the edges smooth and stained it.
I placed the plaque on a large
sheet of evergreen plastic and marked the top of the plaque onto the
plastic. This was then cut out and the edges smoothed with sandpaper. A
1” grid was scribed at an odd angle into the plastic sheet. Striping was
masked off in these areas and the entire thing sprayed Tamiya TS-X Gloss
Black from the spray can. The masks were removed and presto, a striped
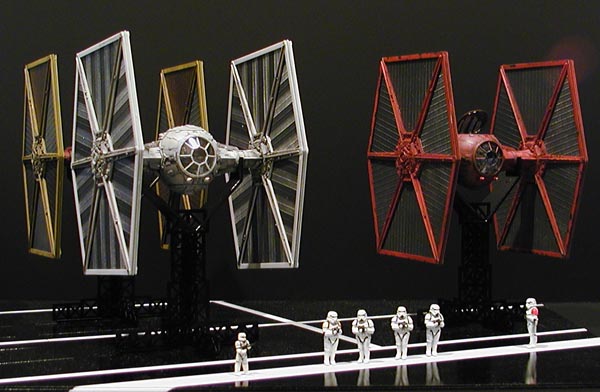
hanger floor. The latticework from this kit and three other TIE fighter
kits were positioned parallel to the grid. Rothar’s TIE fighter (built
simultaneously) and an overall light gray TIE fighter with striped solar
panels belonging to Herson Böring were also added to the other display
stands/landing gantries.
Well that was a lot of fun! I thoroughly enjoyed
putting these tiny little models together and eagerly anticipate the
release of the Wright Field Arrow-esque Jedi Starfighter and dare I
dream, a Tyderium Shuttle.
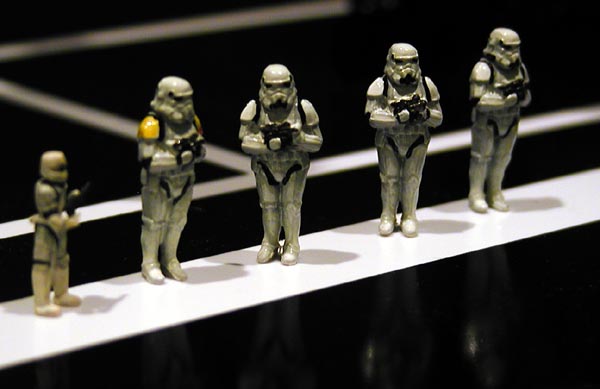
That shorter trooper on the left is an Emperor Youth member.
He was scratchbuilt by my buddy Neal Izumi back in the early 1980’s.
Click the thumbnails below
to view larger images:
Model, Images and Text Copyright © 2002 by
Valentin E. Bueno
Page Created 17 August, 2002
Last Updated 04 June, 2007
Back to HyperScale
Main Page
Back to Features Index
|
 Home
| What's New |
Features |
Gallery |
Reviews |
Reference |
Forum |
Search
Home
| What's New |
Features |
Gallery |
Reviews |
Reference |
Forum |
Search