Here is the AMT 1/72 AC-130U I recently completed. I had decided a
couple of years ago that I wanted to build displays of the two
aircraft I spent 24 years of my life on, the first 17 years being on
the B-52H at Castle AFB, CA and the last seven with the U-Model
Gunship program at Hurlburt Field, FL.

The AMT 1/72 AC-130U has been out of production for several years.
I originally had been given a box of them by AMT since I had was the
point of contact (POC) for some of their last minute research prior
to production, but at the time, I wasn’t a modeler so I handed them
out to modelers in the 4th SOS, 4th AMU and Boeing Gunship Support
to be built as displays in their respective facilities.
After my retirement, I got back into "sport" of modeling and decided
to build a gunship for myself. Unfortunately, the “U-Boat” was no
longer available in 1/72 scale and was a bit hard to come by on the
internet. I periodically looked for it without success, but finally
happened across one on Ebay 8 months ago and won it. As fate would
have it, I subsequently won another kit (sealed) on Ebay and this
one is in the stash for a future project.
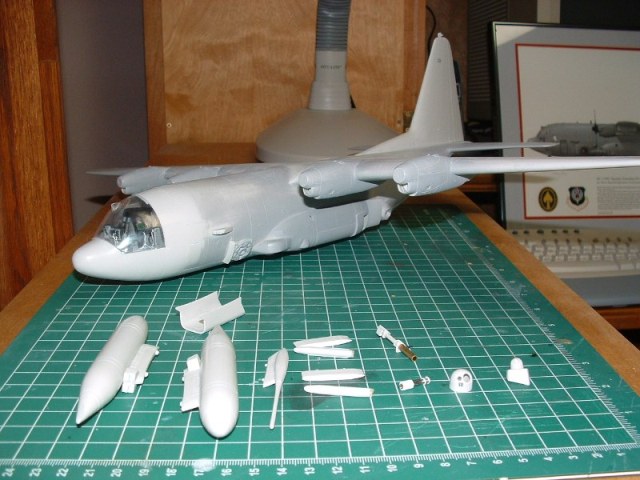
The levels of detail with these big AMT kits are pretty basic and
the parts they added to make this a U Model Gunship are a bit
crude.
Click
the thumbnails below to view larger images:
[../../photogallery/photo00020622/real.htm]
Needless to say, nearly every part had to be either scratch built or
modified in order to bring it up to a level of acceptance to a
"gunship guy".
-
Lengthened engines about a 1/4 inch (at the wing mount),
re-scribed and added detail.
-
Detailed the sensor balls and made lenses so they have that
'in-use' look.
-
Modified IR tubs.
-
Scratch built 84-02 pods, adapters and modified pylons
-
Scratch built 25mm gatling gun from syringe tubing and bits of
plastic
-
Scratch built 40mm cannon well and pressurization bellows seal
-
Modified 105mm cannon
-
Added detail and wiring to the interior along with a pilots HUD
and various crew members.
-
Scratch built various light lens and antennas.
-
Various mods to airframe to reflect a real U-boat to reflect the
gunship at the time of the late 90's.
 I
painted the aircraft as it was when I first arrived on the Gunship
program.
I
painted the aircraft as it was when I first arrived on the Gunship
program.
These aircraft had been destined to be H-model "trash haulers" so
they had an overall medium gray color. They sat in the California
desert for several years so the paint was a bit faded.
A lightened Testor's Model Master AMC Gray fit the bill and the
model was pre-shaded and highlighted which seems to be standard
procedure nowadays.

Future gloss coat, The Detailer wash, weathering with pastels and an
overcoat of Testors Dullcoat round out the finish
I had to make most of the decals and looking back, I wished I had
made them all since the few I used from the box were too thick. I
used Testor's Decal System for inkjet printers including clear and
white paper along with the Decal Bonder. I had used this system
on my B-52H and it worked great.
Several people have inquired
about the acrylic/wooden bases I've made to display these models.
Its really not that hard and all items are readily available. The
wooden bases can be found at any well stocked art/hobby store (i.e.
Hobby Lobby, Michaels, ect) and the acrylic pedestals are cut from
sheet acrylic I purchased at the hardware store (Lowes, Home Depot,
ect). I wanted to make an "in-flight" stand but not something that
was bolted or glued to the model. I came up with an acrylic
pedestal that uses interlocking cradles to hold the model in place.
I just cut out my patterns using variable speed scroll saw, cleaned
it up with a dermal and polished the edges. Then I notched out the
base along the bottom to accept the acrylic pedestal and used brass
strips and wood screw to hold it underneath.
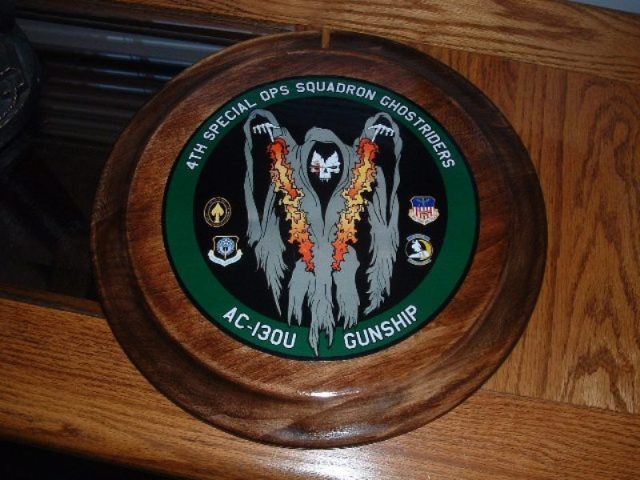
The graphic is something I put
together on Photoshop, printed it out on my inkjet printer and
coated it with Testor's Decal Bonder to seal it. The wooden base is
finished like any piece of furniture with stain and polyurethane.
The old 1/72 AMT AC-130U is not one of the
most detailed or correct kits I've ever seen, but with some patience
and scratch building, it can still be made into a decent
representation of the US Air Force's most potent weapons platforms.
Click on the thumbnails
below to view larger images:
[../../photogallery/photo00030231/real.htm]
 Home
| What's New |
Features |
Gallery |
Reviews |
Reference |
Forum |
Home
| What's New |
Features |
Gallery |
Reviews |
Reference |
Forum |
