| I must start by
apologizing to Lee Kolosna.
I know that these markings are
close to being #1 on Lee's list of modeling clichés. But
hey, it is still the only Airacobra I have ever wanted
to build.
Besides, our model club has an
annual "Boobs & Butts Nose Art" theme night in August
each year, and I wanted this to be my contribution.
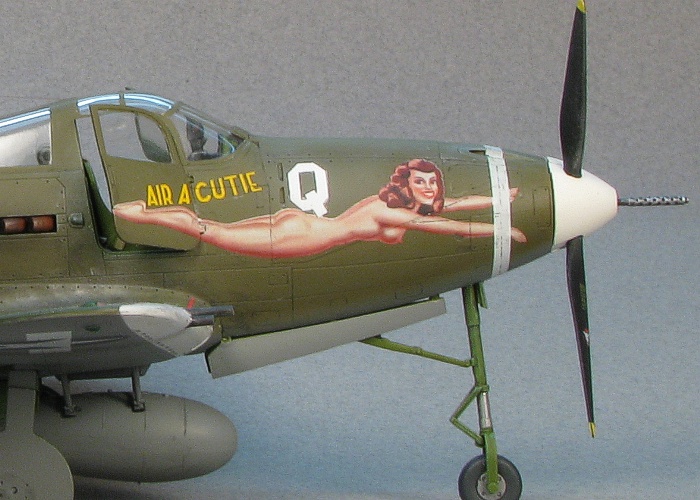
There are few modeling subjects that have so large of an
artwork on both sides of the aircraft.
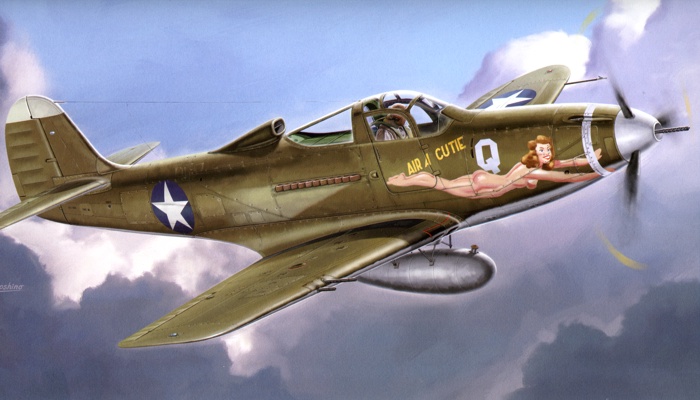
Hasegawa Box Art
Some years ago, I acquired an Eduard Airacobra
to do this project. When Hasegawa released the
special issue kit with the "Air A Cutie" markings
already in the box, I decided to buy that kit and use it
instead.
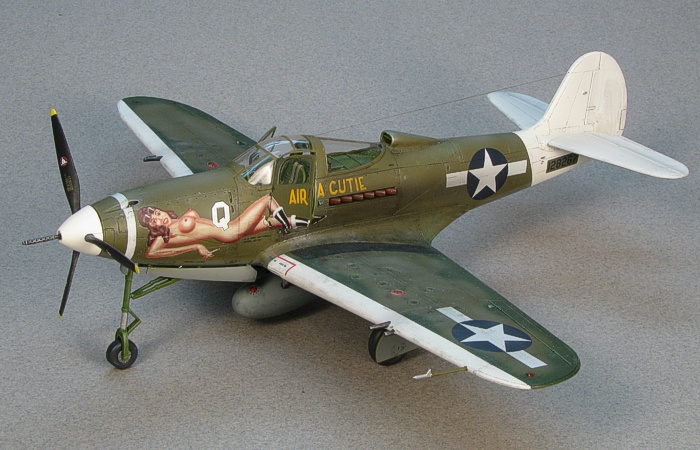
This is the Hasegawa 1/48th
scale kit. I built it almost completely out-of-the-box.
My only change to the kit was to add some etched metal
seat harnesses. The kit builds nicely, but not without a
few issues. The problems I had were in two places. One
was with the insert pieces in the wing for both for the
guns and the root intakes. These required some minor
filling and sanding.
Another problem point was with the cockpit glass. I
am unsure if I did this to myself in construction or if
the kit has a real problem, but I found the cockpit
glass was really much more narrow than the fuselage it
was supposed to attach to. I added a couple spacers
under the glass to stretch it out to better fit, but I
still had a noticeable step on the right side of the
cockpit glass, behind the door. Having never read of
anyone else getting this issue on the Hasegawa
kit, I think I may have had a distorted cockpit glass
piece in my kit.
The cockpit as provided by the kit is quite nice with
no upgrades needed. All I did was some careful painting.
There are two sets of decals provided for the instrument
panels. One set is black with white details. The other
set is clear with white details. I considered using the
clear set to see how they made the round instruments
look, but in the end I just did some dry-brushing with
no decals in the cockpit.
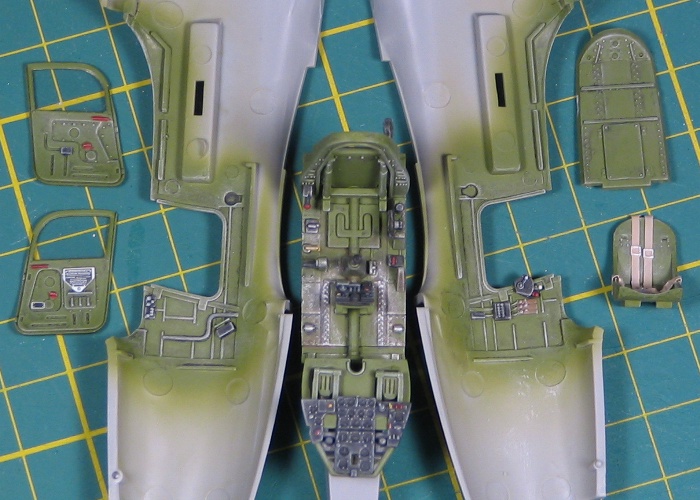
Cockpit Pieces Painted
|
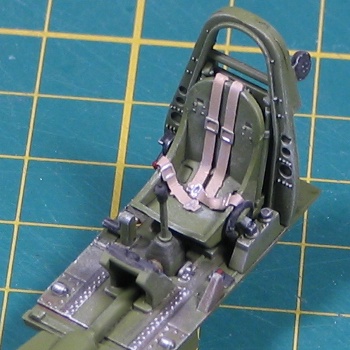
Seat and Harnesses |
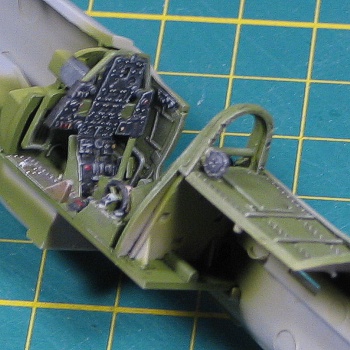
Cockpit in Fuselage |
The rest of the kit assembled
easily and I was painting the exterior colors in no
time.
 I
used Testor's Model Master enamels to finish this
model. I
used Testor's Model Master enamels to finish this
model.
The camouflage is the standard of Olive Drab upper
surfaces over Neutral Gray lower surfaces. I used the
modern colors (since it is what I have) and painted
these with F.S.34087 and F.S.36270, respectively. I
painted the white areas using Flat Header White, then
masked these areas and painted the camouflage.
The decals got interesting. "Air-A-Cutie" is pretty
much the only P-39 I have ever wanted to build. Over the
years, as different decal companies released versions of
these markings, I would pick them up. It is amusing to
see the variations in the decals when you compare them
(see below).
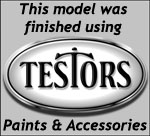
The first
company to release a set (that I bought) was
SuperScale on sheet 48-499. They had an
earlier release of these markings, but the art
work on that release had next to no definition
in the flesh tones, so I never picked that
release up. On sheet 48-499, they re-did the art
work, adding significant definition to the art
work.
|
|
|
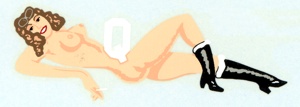
Much later, Cutting Edge released a
decal set with "Air-A-Cutie", CED48035. This set
was a big leg up over the SuperScale
release since the flesh tones were better
colored and there was much more definition to
the flesh tones.
|
|
|
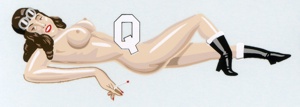
Still later, the Cutting Edge people
introduced a new line of super-detailed nose art
decals called PYN-up Decals. It was a
natural choice for them to re-make the
"Air-A-Cutie" markings using the new technology.
With this set, the flesh tones evened off into a
more photographic representation with an even
transitions from darks to lights.
|
|

|
| The final version of the markings comes from
the recent release of the Hasegawa P-39
Airacobra kit. The art work is not the best, but
it is work-able if it is all you can get. The
flesh tones are better than the old
SuperScale sheet, but not as good as either
of the Cutting Edge sheets. |
|

|
Now that I have reviewed the
decals, all I had to do was pick a set for the model. It
was easy to rule out the SuperScale and
Hasegawa versions. The two Cutting Edge
versions were the question. Things would have been
easier if I had some images of "Air A Cutie" to look at.
As it turned out, my meager P-39 file had only one
black-n-white image to look at (from the "In Action"
book), and that one was washed out enough to make it
pretty worthless.
What I was trying to decide, without any real
knowledge or evidence to base my decision on, was how
much time was spent on the real artwork on the real
aircraft. The nicely graduated flesh tones on the PYN-Up
Decals would have been time consuming to paint on
the real aircraft. Mixing a few highlight and shadow
flesh tones and applying them as seen on the original
Cutting Edge version would be simpler.
Here is where I made a trip to Meteor Productions
(for some shopping) and talked about the "Air-A-Cutie"
decals with Dave Klaus. While I did not get a chance to
see the reference images Dave has on this aircraft, he
was able to confirm the artworks had graduated flesh
tones. On the real aircraft they are much more crude
than the PYN-Up Decals make them, but Dave
explained that making the decals accurate to the real
artwork would have made them look like they were really
poorly printed decals. They chose on designing the
artwork for the decals to err on the side of being too
nicely rendered so that modelers would not complain of
poorly printed decals.
I could live with that answer, and I decide to use
the PYN-Up Decals for the model.
Just to be safe, I coated the PYN-Up Decals
with SuperFilm to make sure they would not explode when
I used them. I had a friend use PYN-Up Decals
that exploded on him. Only having one set of these
decals, I did not want to risk it. With SuperFilm on
them, the PYN-Up Decals behaved very well and
even conformed over the edges of the cockpit doors with
no real issues.
All the rest of the markings on the model come from
the Hasegawa decal sheet. The Hasegawa
decals are Cartograf printed, so they worked
really well with Solv-a-set. The white of the national
insignia is a different intensity from the painted
areas, but I could live with it.
For weathering, I used my typical style of thinned
down enamel paint washes and air brush shading. I
finished the weathering with some dry brushing to
further distress the painted finish and pop out some
surface details. For a more complete discussion of what
I do to weather my models, see my posting on
"Weathering Aircraft".
After painting and decals, all that remained were the
seemingly thousands of little things to finish up so
that the model can be completed. The landing gear came
first. It assembled without a hitch and plugged into the
locating holes in the wheel wells without problems.
Hasegawa provides clear lights for the
navigation lights in the kit, but I think they were an
afterthought of the kit designers. All the lights are
molded in place on the airframe. The instructions tell
you to cut off these molded bumps that are the lights.
Then, they say to glue in place the clear parts. Well, I
considered that to be too much trouble, so I just left
the solid lights in place and painted them in maroon (Humbrol
#20), Beret Green (Testors "little bottles"), and
silver.
According to Hasegawa, "Air-A-Cutie" was
actually two aircraft. I don't really buy this story,
but they claim the version without the white tail is a
Airacobra P-400 while the version with the white tail is
a P-39D Airacobra. I think they base this on the engine
exhaust stacks. According to the Detail&Scale book,
engine changes were a common practice on the P-39Ds and
P-400s. Hence the engine exhaust stacks could be
different without being a different airframe. I believe
that the engine was changed much more readily than
having all the nose body panels and doors being switched
between two airframes in order to preserve the elaborate
artworks.
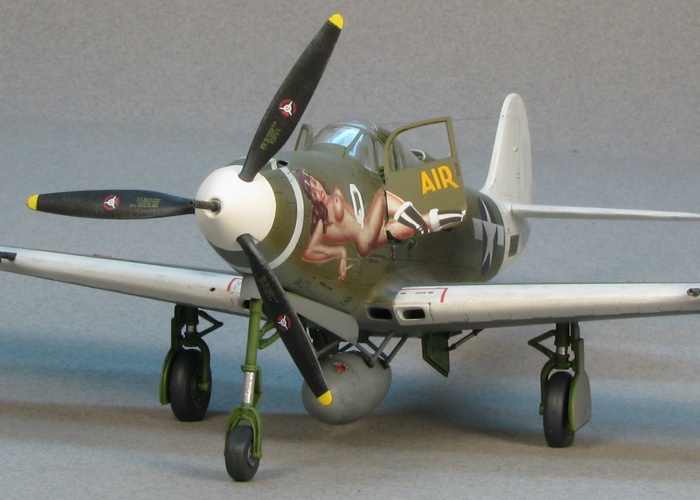
Either way, one of the last things I did on the model
was paint up the engine exhausts and attach them. Since
I like the look of the six-stack exhausts better, and
Hasegawa said it was right on the white-tailed
aircraft, I used those on the model.
Sorry, Lee. It is definitely a cliché in modeling,
but I am still happy to have it sitting on model
shelves.
Having yet to ever build any of the Eduard
Airacobra kits, I can not comment on the ease of
building this kit verses those. I can say that this kit
built pretty easy with only the few issues I mentioned
in the text above.
|
 Home
| What's New |
Features |
Gallery |
Reviews |
Reference |
Forum |
Home
| What's New |
Features |
Gallery |
Reviews |
Reference |
Forum |