|
TA-4J
Skyhawk Conversion
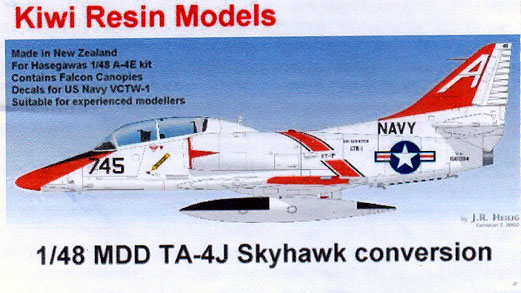
Kiwi Resin Models,
1/48 scale
Reviewed by Rodger Kelly

HyperScale is proudly sponsored by
Squadron.com
Yes, it is true!
Kiwi Resins, the company from the land of the long white cloud, New Zealand,
have answered the prayers of those amongst us who have been waiting a long,
long time for an accurate model of the two-seat version of the A-4 Skyhawk,
the TA-4J, in 1/48 scale.
Given their name, the entire conversion consists of resin (apart from the
canopy and windscreen) and it has been designed to be used with the superb
Hasegawa A-4E kit.
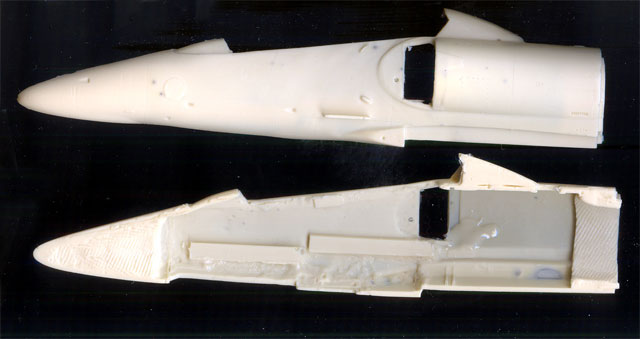
Essentially, Kiwi Resins provides you with left and right fuselage halves,
front and rear cockpit tubs, ejection seats, front and rear cockpit
sidewalls, rear instrument panel and coaming, front and rear control
columns, rear bulkhead, the centre of the canopy/canopy actuator ram, rear
cockpit rudder pedals and various other tiny details.
Click the thumbnails below to view larger
images:
[../../../photogallery/photo00011100/real.htm]
The conversion has been intelligently engineered so that the
resin forward fuselage halves attach the kit pieces at what is the transport
joint of the one-to-one-scale version of the TA-4J. Kiwi Resins correctly
identified that the join needs to be reinforced and has designed the pour
points to be structural and fit inside the kit pieces. You will notice from
the accompanying scan of the parts that this is missing on my fuselage
halves. I stupidly cut them off thinking that they were just casting residue
that needed to be removed. Always read the instructions first!
Speaking of clean-up, you will need to spend considerable time here removing
flash and casting plugs as there are plenty of both! (The image shows the
parts after I had removed the vast majority of the flash and pour plugs to
scan them). Not a hard task I know but it is time consuming and there is a
whole lot more than you will be used to if you are accustomed to using
Airies, Cutting Edge or True Details conversions and detail sets.
The pin-hole fairy has also paid a visit as there are pin holes in some of
the parts. To be fair to Kiwi Resins though, I suspect that this may be just
because the conversion I received was rushed out of the door for review as
none of their other products I have seen have any pin holes at all.
One problem that you may encounter is adding sufficient weight to the nose
to stop your kit from being a tail sitter. I say that as most of the nose
forward of the windscreen is solid resin. Kiwi Resins have done this to
reinforce the parts and prevent the resin cracking. Careful use of a Dremel
tool will be required here to hollow out enough of the nose to add fish
weights.
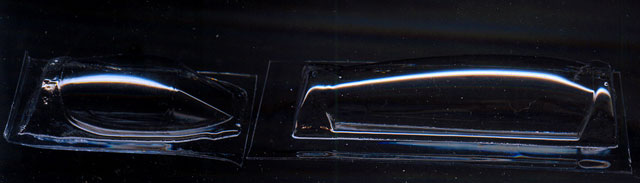
In regard to the windscreen and canopy, both are provided as vacform pieces.
You get a one piece A-4M canopy and the clamshell portion of a TA-4J canopy
so you will have to separate the windscreen from the canopy to use it for
the TA-4J. What this means of course is that you will have to have a raised
clamshell whether you like it or not. Judging by the clarity of both pieces
I would venture to say that they have been produced by Falcon.
The detail on the fuselage halves is scribed to match that of the donor
Hasegawa kit. If anything, it looks a little underdone and would benefit
with a gentle re-scribe with a sewing pin chucked into a pine vise – gently
does it here!
The detail that has been cast into the seats and the cockpit tubs is
excellent and will only need a very light wash and dry brushing to make it
stand out.
Instructions for the conversion are minimal and confined mainly to a couple
of pictures, a typed list of parts, and a couple of paragraphs of words to
guide the first time user of resin parts. It also contains the line "under
no circumstances should this (the plug cast onto the ends of the fuselage
halves) be removed as it aids in fitting the front and rear sections (of the
fuselage) together with good alignment". Doh!
Decals are also provided for the conversion. The decals are for a single
machine –TA-4J Bureau number 158094 of VT-7. The deals are of the silk
screen type and have been printed in the Czech Republic by International Airways
Graphics. They are thin and in perfect register and only application of the
white decals over the international orange of the vertical stabilizer and
the red of the flaps will tell if they are opaque enough. An A-4 sized page
with coloured left and right views of the fuselage and upper and lower plan
views of the wings is provided to aid decal placement.
Click the thumbnails below to view larger
images:
[../../../photogallery/photo00028538/real.htm]
The decal sheet and vacform canopies are packed in the same
plastic zip-loc bag whilst the resin parts are packed in a further plastic
zip-loc bag. Both bags are then placed into a stout cardboard box which
appears to be particularly robust.
Don't be fooled by the appearance of the kit in the box, whilst it really is
excellent you will be embarking on a major modelling exercise if you choose
to tackle it.
So, there you have it, a very, very nice conversion from Kiwi Resins. Even
though there is a fair amount of clean up required I still have no
hesitation in recommending the conversion to any modeller, new or old. One
thing though; read the instructions thoroughly first!
Recommended.
Footnote
The naysayers amongst us might say that "as soon as I
build one, Hasegawa will release the two-seat version in plastic". Maybe so
but I hasten to point out that it took Hasegawa a something like six or
seven years to release the two seat version of their F-104 Starfighter! I'll
be building my first TA-4J using the Kiwi Resins conversion.
Text and Images Copyright © 2007 by Rodger Kelly
Page Created 03 April, 2007
Last updated 24 December, 2007
Back to HyperScale Main Page
|
 Home
| What's New |
Features |
Gallery |
Reviews |
Reference |
Forum |
Home
| What's New |
Features |
Gallery |
Reviews |
Reference |
Forum |