|
Northrop YF-23
Collect-Aire Models, 1/48
S
u m m a r y
|
| Catalogue Number: |
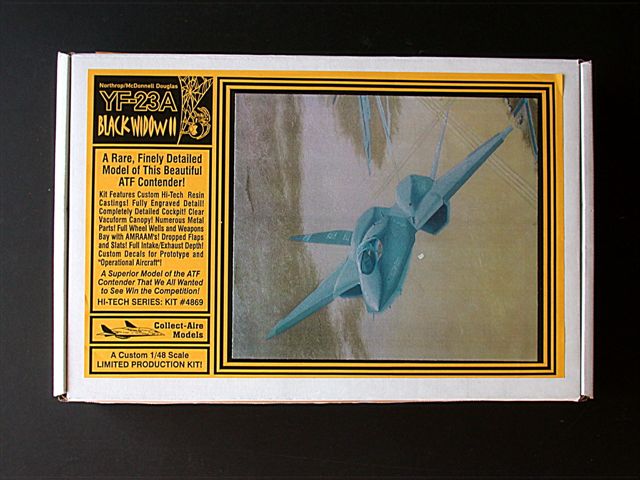
Collect-Aire Models Kit #4869 -
Northrop YF-23 |
| Scale: |
1/48 |
| Contents and Media: |
Cream-colored resin; 2 vac-formed parts; decals for two
prototypes plus hypothetical operational aircraft |
| Price: |
USD$209.95
available online from http://collectaire.com |
| Review Type: |
FirstLook Plus |
| Advantages: |
Neglected
subject; good detail; high quality castings; impressive
size; |
| Disadvantages: |
Instruction diagrams are lacking;
righteous bucks required to buy the kit |
| Recommendation: |
Highly Recommended to modellers with
some experience working with resin kits. |
Reviewed by
"Bondo" Phil Brandt

HyperScale is proudly supported by Squadron.com
Although the Northrop YF-23 “Black Widow II” is best known as runner-up
to Lockheed-Martin’s YF-22 “Raptor” in the high stakes 1990 Advanced
Tactical Fighter (ATF) flyoff, even today there is a contingent of aviation
fans that maintain that the YF-23 was not only more esthetically pleasing
than the Raptor, but was a superior performer. Test pilots who flew the
YF-23 have remained suspiciously tight-mouthed about the relative merits of
Northrop’s entry, so we might not know for years the political infighting
that led to the DOD selection.
Over the past six decades the innovations of Northrop Aviation–Donald
Douglas once said that every aircraft in the world had a part of Jack
Northrop’s genius in it--have suffered some most unfortunate non-selections
by the USAF: the cutting edge XB-35 and YB/YRB-49 flying wings, a concept
vindicated fifty years later by the B-2, and the more recent F-20 Tigershark,
a stunning high performance, single-engine conversion of the very successful
F-5.
Kit Chronology
Largely because of its real world non-selection, this is a little-done
bird; the only previous release is the 1/72 Testors injected kit of at least
ten years ago. Not a bad effort at all, but when Collect-Aire released the
big–in 1/48 this airframe is larger than either the F-15 or Flanker–Black
Widow II in resin, this curmudgeon had to have one.
As a battle-hardened owner-builder of many Collect-Aire releases I freely
accept the idiosyncrasies seemingly endemic in its eclectic, bigbuck lineup
of subjects. As in the case of the recently-reviewed Collect-Aire B-45, this
kit also seems at first look to not have as many problems as releases of the
past. Besides, who else ya gonna call to do this esoteric subject in 1/48?
Tamiyagawa is still busy recreating what seems like every version of every
WWII fighter extant, and Trumpeter has bigger–literally– fish to fry with
its most welcome foray into developing 1/32 Century Series kits.
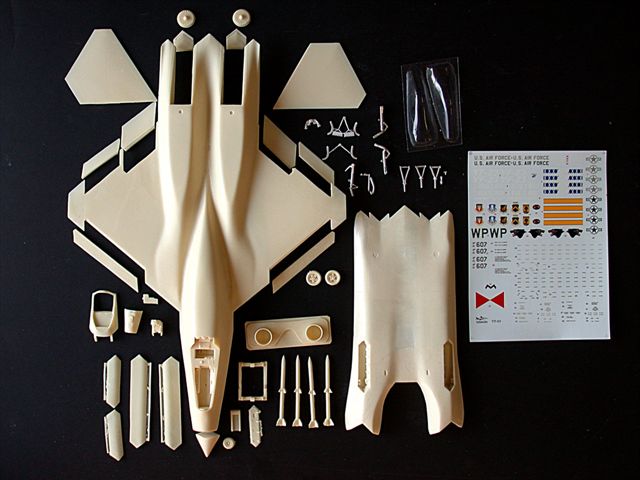
Molding
This is a simply-engineered kit; the fuselage top and complete wings are
one monolithic chunk of (hollowed-out in the main fuselage) resin. The
bottom fuselage is also a very large casting and embodies the engine
intakes, complete with deep, cast-in trunking that runs way back to the
compressor faces. The surface is very smooth, much like that of the recently
released B-45. I found no bubbles, but this is not to say that there are no
surface problems. The wingtop surfaces have obvious manufacturing sanding
marks, and there’s a surface discontinuity on the right wing. That is, the
outer wing is a thousandth of an inch or so thinner, and is defined by a
chordwise line that extends from the leading edge all the way back to the
flap. This will need to be block sanded, and I suspect that’s what happened
to the left wing also. The thickness discrepancies may be the result of
successive resin pours into the large top fuselage mold. The bottom fuselage
has one small area that is exceeding thin, so much that it’s almost
translucent and bears the look of a casting “fix”, that is, there’s a glossy
resin layer on a major area of the inside surface whereas the rest of the
casting has the same semi-gloss texture as the rest of the airframe.
Click the thumbnails below to
view larger images:
[../../../photogallery/photo00016022/real.htm]
Fuselage
Monolithic resin pours almost guarantee differential shrinkage of
adjoining components and, thereby, fit problems. The main difficulty is
getting the upper and lower fuselage halves to mate accurately so that the
cast-in intake trunks line up all the way back to the compressor faces, and
the stealthy zig-zag aft fuselage “tailfeathers” align at the same time.
This process took mucho Dremel work, hours in fact, and the intakes are
still not lined up completely. While casting the intake trunk channels in
upper and lower fuselage halves may sound like a neat idea, filling,
smoothing and painting the said trunk seams along their long (four inches)
join lines is going to be tough, so much so that I might have to opt for
intake covers. If not, good luck on working the seams back through a
3/4-inch cross section! Where’s Seamless Suckers when ya really need ‘em? In
fairness, though, the only way poorly finished seams will be visible, is if
one peers up into the intakes, and most everyone will be looking downward at
some angle. Nobody said modeling would be fair......
Wings
Integrated with the upper fuselage, the clipped triangle-shaped wings are
real chunks of resin, albeit well done, with sharp trailing edges. The
leading edge slats and the flaps and ailerons are separate and may be posed
in various deployed configurations.
Tail Surfaces
The two large, outwardly splayed tail fins (fifty degrees) are one-piece
with, again, nice, sharp trailing edges. The fins simply butt-join to
pre-angled aft fuselage strips, but I plan to use brass tubing so that the
joint is more substantial and so that the fins may be slightly canted from
neutral to simulate what often happens when a fighter’s hydraulics are off.
Engines
We’ve already covered the intake trunk layout, and the hidden exhaust
outlets are represented by two plain exhaust cylinders integrated with a
rear fuselage former.
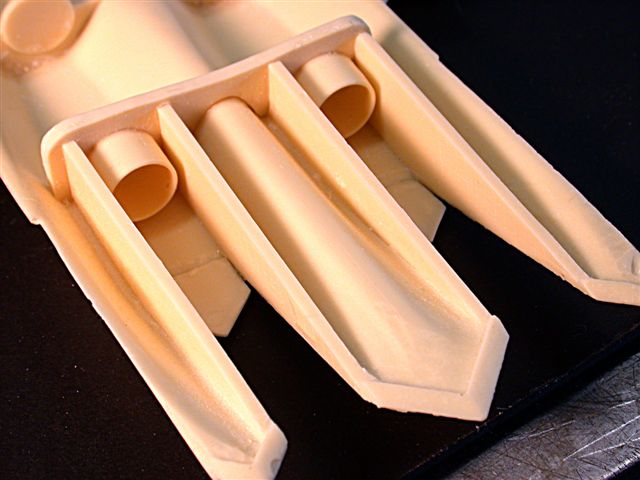
The cans are deep enough that the builder may not have to scrounge up a
couple of parts bin turbine faces.
Cockpit
The cockpit tub in integral with the monolithic upper fuselage casting
and has decent–we’re of course not talking Avionix or Aries here–raised
detail on side consoles. A separate center console fits into a cast metal
multifunction display instrument panel. The instrument panel nests in the
separate resin windscreen coaming. The Aces II seat is well done, if
relatively plain, with cast-in harness and belts. It seems to me that some
aftermarket seats may have more detail.
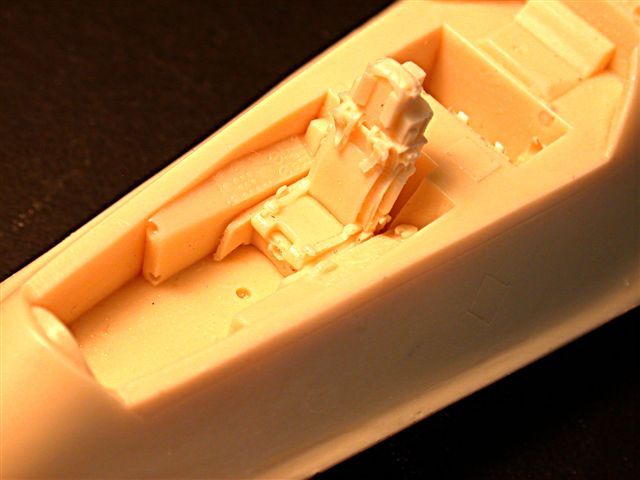
The control stick for the fly-by-wire system is done in cast metal, and
there is a separate metal cockpit raising assembly and some type of
avionics/air-conditioning detail provided behind the seat.
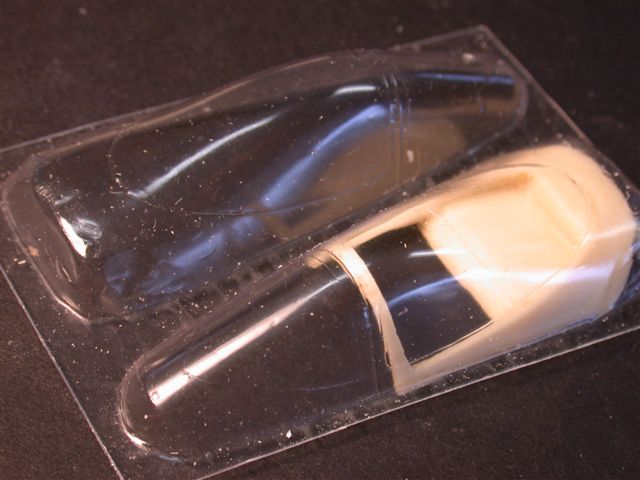
Clear Parts
Two vacuformed canopy/windscreens are provided. They’re appropriately
thin, but both have slight surface “frosting”-- I don’t know if
Future-dipping will save the day– and some small surface bumps which,
fortunately, can be fixed since they’re on the canopy surround rather that
the canopy clear portion. The canopy’s aft edge (that mates with the
fuselage when closed) is in the shape of three “teeth” (to maintain radar
stealthiness), and here the vacuforming could have been better accomplished
because the toothed edge is too close to the end of the vacuform master,
making the whole area rather indistinct and not as crisply shaped as the
rest of the canopy.
A welcome kit feature is that Collect-Aire has chosen to include a
substantial resin canopy frame assembly. This is especially important to
advocates of open-canopy models. Unfortunately, the frame’s front “bow”
isn’t quite parallel to the slant of the canopy/windscreen mating line, and
the builder will have to judiciously apply hot water to bring the resin bow
into alignment.
Landing Gear
Sturdy, crisply molded, two-piece metal main and nosegear struts will
easily carry the weight of this hefty airframe. Resin wheel/tires have
decent detail.. Maingear wells are, well, somewhat detailed, if you can call
a strut mount and five strips of Evergreen square stock applied to the side
of each well detailed. The nosegear well is completely unadorned. The
maingear doors are plain and have clunky-looking lengthwise “bars” to act as
hinges. I’ve never seen detailed closeup pix of said airframe, but the whole
deal looks hokey, and I’ll probably cut off the bars and fabricate two or
three hinges from plastic stock. The nosegear door has some inside detail
and four normal-looking hinges.
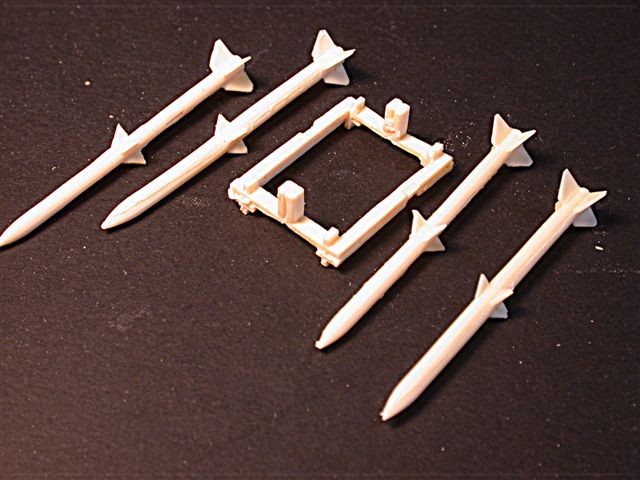
Weapons
As with the Raptor, weapons are carried internally. Collect-Aire
furnishes four AMRAAMs, a resin launcher assembly and cast metal bay door
hinges and air deflectors. Even though the bay parts and surface detailing
are welcome, in the end I decided to configure the bays closed because when
posed open on the ground, I believe they significantly detract from the
overall sleekness of the airframe design.
Gluing the bay doors closed required lots of fitting and plastic stock
support along the center join line of the doors.
Decals
Thin, with excellent color registration.
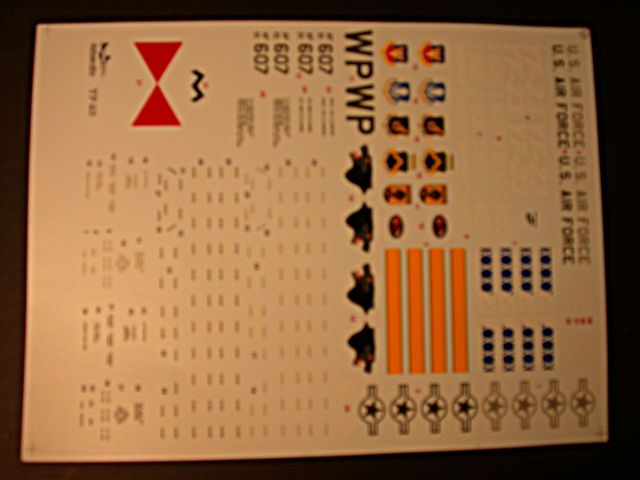
The modeler has the choice of markings for not only either of the two
prototypes but also for a hypothetical scheme (my personal favorite) from
the South Korea-based 8th Tac Fighter Wing “Wolfpack.” Command, wing and
squadron logos are especially well-done, as are the wolf’s heads located on
the fins. I’m guessing that talented Gerry Asher, honcho of Ft. Worth’s Fox
3 Studios must’ve done the decal design–he has painted many Collect-Aire box
art originals, including this one–because one of the many stencils reads
“C/C: SSgt P.G. Asher.”
Instructions
A twelve-page pamphlet details the history of the bird and includes
simple assembly parts ‘blowups” which in this case are OK because there
aren’t many parts. Also provided are full-page planform and profile drawings
of all three versions with good color callouts and shapes, as well as the
locations of the copious markings/stencils.
A sleek, menacing design that deserves a place in every 1/48 modeler’s
stable of current aircraft. You might have to take a gentle face slap or two
during construction, but certainly not a resin “beating.”
Review Text and Images Copyright © 2006 by
Phil Brandt
Page Created 13 December, 2006
Last updated 24 December, 2007
Back to HyperScale Main Page
Back to Reviews Page
|
 Home
| What's New |
Features |
Gallery |
Reviews |
Reference |
Forum |
Home
| What's New |
Features |
Gallery |
Reviews |
Reference |
Forum |