|
Airfix 1/48 scale
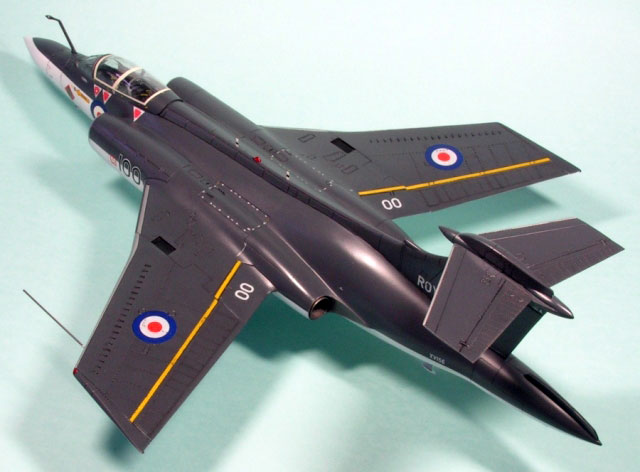
HS Buccaneer
by Jon Bryon
|
HS Buccaneer |

HyperScale is proudly supported by Squadron.com
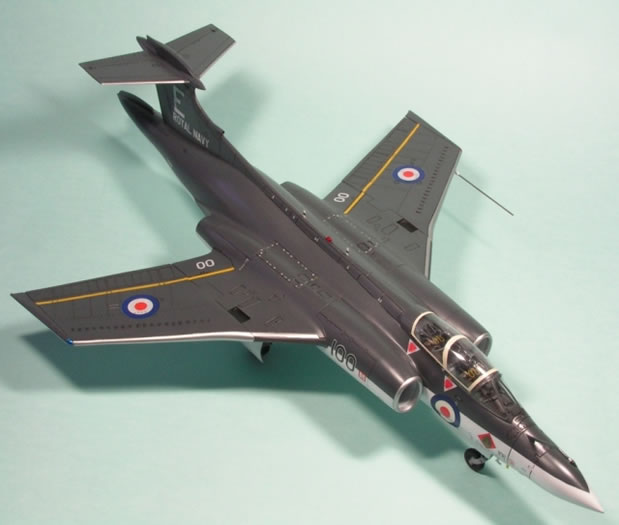
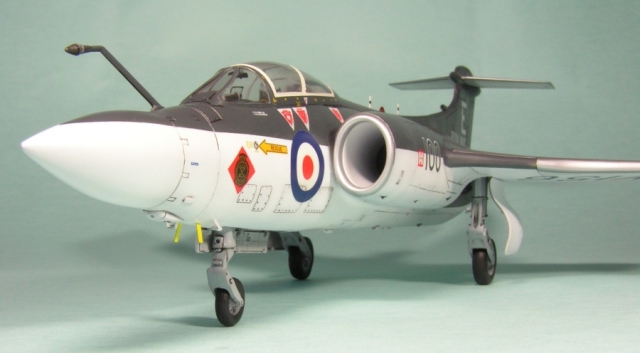
This is a kit with a reputation. It's also the kit which kicked off my current collection; my first attempt, built a distant 14 years ago, was of the S.2B version in RAF service during the first Gulf War. But to my eyes, the Buccaneer, with its distinctive blend of the avian (beak-like nose and gull-like wings) and the acquatic (fish tail and muscular haunches) should be in Royal Navy markings. So, after languishing in the stash for 6 years, the S.2 version made it to the top of the 'to-build' pile.
Aside from the inherent challenges of building this kit, I was presented with other problems. My upper fuselage was in two pieces (it should be in one), the rear fuselage having been torn from the front at the rear of the cockpit opening. I presume this happened in the post from the UK to China. Furthermore, the tip of the nose was missing from the lower fuselage half. In terms of the plastic provided, Airfix only supply three blade aerials, so I would have to make my own since I needed four. The last problem was the surface texture of the plastic. It ranges from smooth to matted (like the mould was made from unfinished fibreglass), with large areas having a deep pebble texture and plenty of unfinished and wobbly panel lines. Since I knew that I had a challenge ahead of me I simply hoped that all the rubbing down and primer coats would even the surface texture out.
The kit has little cockpit detail. When I bought the kit in 2001, I had invested in the Eduard exterior and interior photo-etched sets, as well as Paragon seats. Subsequently, Neomega released a resin cockpit set; I wish I'd got that instead. The Eduard cockpit set is adequate for an aircraft with a closed canopy, as mine would have. It's too two-dimensional if the canopy is to be opened, but does just enough to give a better impression of realism than the kit-provided decals. The photo-etch is tricky to deal with, but worth it; the instructions were misleading, and if followed in sequence would result in a complete mess (pay particular attention to when the cockpit walls need to be installed; it must be done earlier than Eduard suggest). The Airfix-provided control stick for the pilot is massively overscale — another reason to use the Neomega set.
While talking about the cockpit, I am going have to mention the biggest gaffe with this model. When first looking at the model one may immediately ask, 'Where are the seats?' Well, they are in there, but are far too low! I don't know how this happened. I painted up the Paragon seats (which were predictably nice) and removed the 'stumps' moulded into the cockpit tub. I did this because otherwise the seats would be elevated too far above the instrument panel and side consoles. However, it also means the seats are far too low. I only realised this when it was too late. I can only speculate that the cockpit tub is too deep, although something else maybe to blame (like me).
The first thing to sort out was the upper fuselage half. Reattaching the front and rear ends was complicated by the plastic having been twisted and warped and it took a lot of superglue and patience to get the two parts back together. Once done, construction commenced in earnest. The rotating bomb bay cover has to be forced into the lower fuselage. Copious amounts of superglue were used to fair the insert in, followed by prolonged periods of sanding and rescribing. Nose weight is essential.
Much has been written about the moulding of this kit. Most commentators declare the fuselage halves are badly warped. Some claim this is intentional (to facilitate mould release) and that when the fuselage halves are attached section by section, the fit is good. I am in the latter camp: I first glued the fuselage together at one side of the nose, then the opposing side at the tail, then finished the nose, finished the tail and slowly glued the sides together across the wing roots. This took about a week, allowing each part to fully set before moving on the next section. The fit was excellent, with no gaps on the fuselage seams, only some levelling and shallow depressions to be filled and sanded. Having said that, nothing else in the kit fits. At all. I wanted to fit the airbrake closed. The parts fitted where they touched, and were glued together as a separate unit. To achieve this, all of the moulded raised rivet detail had to be removed. I couldn't be bothered to replace it. The huge seams were filled with superglue and sanded smooth. This was then attached to the rear fuselage and lots more superglue used. After about five iterations of fill (using superglue) then sand, I was reasonably happy with the result. Rescribing the prominent joins between the moving parts was achieved with a sewing needle and regular cellotape; inevitably it necessitated further filling, sanding and scribing (I still can't find Dymo tape in China...).
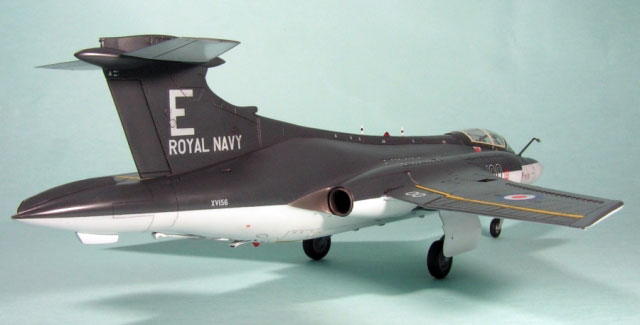
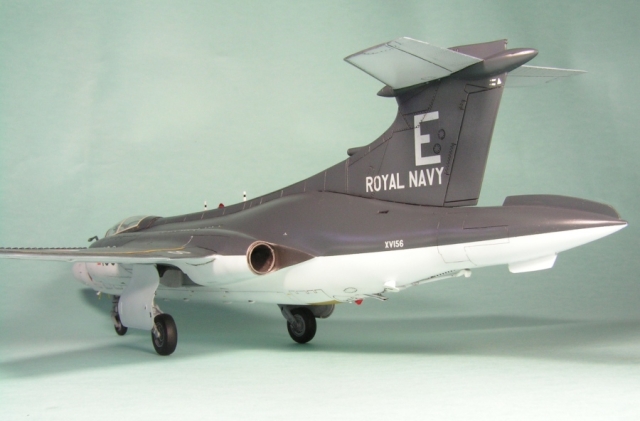
Further fuselage appendages were added. The interiors of the intakes were prepainted white and the lips painted silver. These were masked and attached to the fuselage, followed by a lot of superglue, sanding and rescribing. The exhaust fairings were a worse fit — beyond superglue — and required Gunze Mr White Putty followed by repitition of fill, sand, rescribe <I>ad nauseam</I>. If I could have found any, I would have replaced the exhausts themselves with brass or plastic tube, but I had to make do with what was provided in the kit. The fin was completed and attached (more superglue and rescribing), but I left off the horizontal surfaces until after painting. The rear cone behind the tailplanes was made from putty; I couldn't get the kit part to work at all.
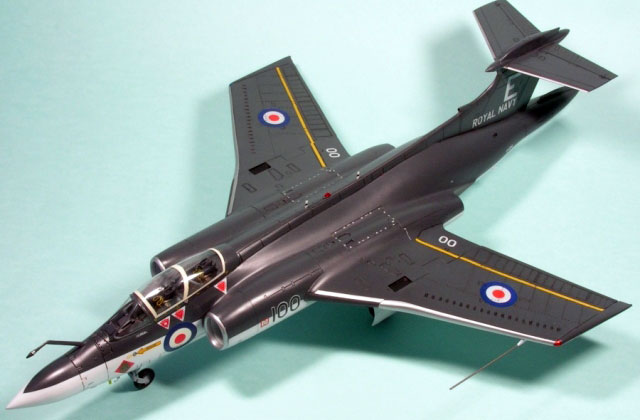
The wings were next. The wingtips were stuck to the upper wings; the fit was fine. Then the upper wings were attached to the fuselage. I found the kit-supplied bulkheads were necessary to provide some rigidity to the wings. Finally, the lower wings were added. Predictably, there were large gaps on the under surface of the wing and along the length of the outer wings.
The main airframe was now together. After consulting www.blackburn-buccaneer.co.uk I made several modifications to the kit during the build to (hopefully) more accurately represent an early S.2 (pre-Mod.1044):
-
Removal of the fuselage fairings (or bulges) in between the intakes and the fuselage.
-
Removal of the forward wing hinge door; apparently these were usually removed. Furthermore, the wing hinges were filled and rescribed, as in the kit they are far too small.
-
Removal of the noseleg landing light (apparently not fitted to naval Buccaneers).
-
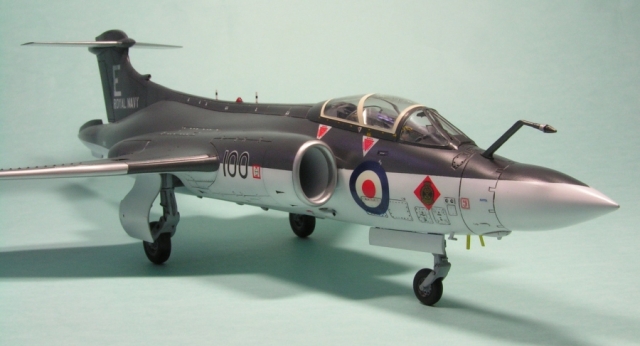
Furthermore, I didn't attach the fin-mounted aerials or the radar passive warning pods under the wings (they were removable and not always carried). One item I couldn't correct was the wing vortex generators; there should be 21 but there are 20. I also believe the recess for the tailhook may be the wrong shape for aircraft with XV serials, but that was too difficult for me to fix (and I'm not sure if it's necessary anyway). Owing to the amount of time I spent on constructing the airframe, I couldn't be bothered to add any underwing ordnance, and I rather like the appearance of a clean aeroplane. The canopy was fitted in the closed position; the windscreen fitted fine, but the main canopy was more troublesome. One further inaccuracy (which I forgot to fix) is that there should be a groove in the fuselage spine along which the canopy opened
The Eduard exterior photo-etched set was rather wasted on me, since it mainly adds detail to an opened airbrake and folded wings. It did, however, add some small details in places like the intakes, exhausts and undercarriage bays. I also replaced the underwing pitot with brass tube, and the four fuselage aerials were fabricated from spare scrap photo-etched parts.
Painting commenced with my now-standard preparation procedure: Wash the model with water and detergent, air dry, prime with Mr Surfacer 1000. Fixing the various seams then took a while (and, to my shame, there is a seam which still remains just visible on the underside of one of the exhaust fairings) and the model was washed again and reprimed.
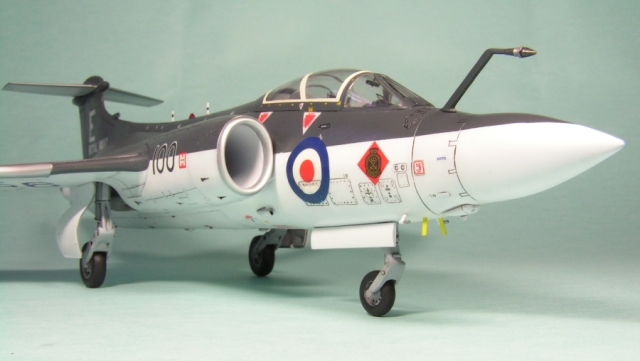
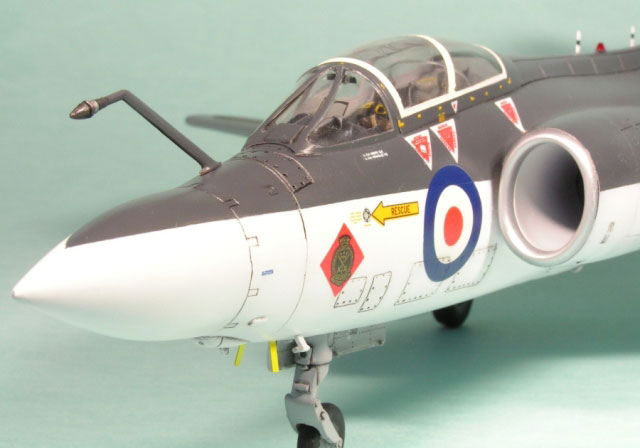
The colour scheme was airbrushed on using Gunze Mr Color lacquer acrylics, silver first for the wing and tailplane leading edges, followed by Extra Dark Sea Grey for the upper surfaces (and also used as preshading for the lower surfaces). I was absolutely set on making a Buccaneer in the white and EDSG scheme — it just looks great — but I knew that masking around the nose to get a perfectly symmetrical pattern would be tricky. Using lots of thin strips of Tamiya tape, I think I managed it, but I do find masking these kind of schemes stressful. Around the canopy I left the seal exposed and sprayed on a mix of white and sand. The white is Mr Base White 1000, which is a brilliant product as it dries in seconds and allows a very dense white to be built up quickly. The final areas to be masked and airbrushed were the brownish panel under the rear fuselage, the undercarriage bays and the exhausts.
The masking was removed and some touch-up airbrushing was inevitable; despite my laborious cleaning and priming (and only handling the model wearing gloves) the fragility of the Mr Color paints meant that there were a couple of (very small) areas that lifted under the Tamiya tape. Johnson's Klear was used as a protective coat and I then applied an oil wash, mixed from very cheap black oil paint and Zippo lighter fluid.
Decalling was next on the agenda. The decals in the kit are poor. If I were to build this kit again (unlikely!) I will try to find aftermarket decals. Those in the kit are extensive but poorly printed; some are out of register and the white and yellow markings had a tendency to shatter at the edges. I coated the remaining decals with Klear, but not before I had already applied one of the yellow wingwalk markings which shattered in places and now looks very ragged. Furthermore, the decals are extremely matt and did not respond very well to either Microsol or the Gunze setting products (Mr Setter and Mr Softer). I found the resulting silvering impossible to eliminate.
 Before the final varnish coat I added all the remaining parts to the airframe: undercarriage and doors, refuelling probe (which is incorrect; the top part should be more parallel to the ground), various aerials, lights, tailplanes, arrestor hook, pitot tubes, etc. Before the final varnish coat I added all the remaining parts to the airframe: undercarriage and doors, refuelling probe (which is incorrect; the top part should be more parallel to the ground), various aerials, lights, tailplanes, arrestor hook, pitot tubes, etc.
Owing to the silvering of the decals, I decided not to use a matt varnish (as this tends to highlight the silvering) and went with straight Polly Scale satin instead.
The masking was removed from the canopy and revealed that there was some fogging on the inside of the glass; I've no idea what caused it, since I used no superglue around the canopy or when installing the seats...
So there we have it. I was pleased to finally get this model done. It is a difficult model, and I could have improved it in many more ways — most obviously by installing the seats higher, completely sanding down all the surfaces and rescribing and adding aftermarket decals. I don't feel the urge to ever build another one, but maybe in 14 years time I'll be tempted to see how much my skills have improved.
Compared to my first Buccaneer it is a huge improvement, but my mistakes with the seats, the poor quality of the decals and the marring of the canopy still mean there's lots of room for improvement.
Having said that, it is a great looking aircraft and in the white and EDSG scheme I think it looks superb.
Model, Images and
Text Copyright © 2008 by Jon Bryon
Page Created 12 February, 2008
Last Updated 12 February, 2008
Back to HyperScale
Main Page |
 Home
| What's New |
Features |
Gallery |
Reviews |
Reference |
Forum |
Search
Home
| What's New |
Features |
Gallery |
Reviews |
Reference |
Forum |
Search