|
Xtrakit's 1/72 scale
Canberra PR.9
by
Brett Green
|
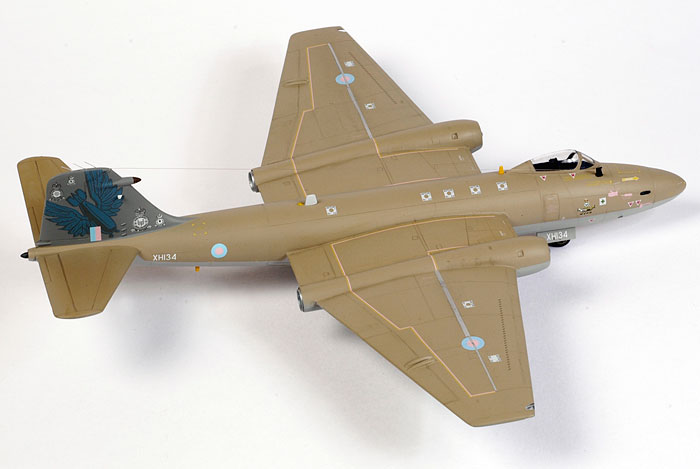
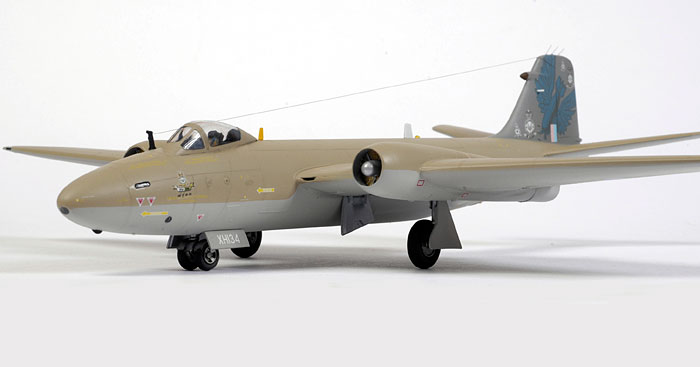
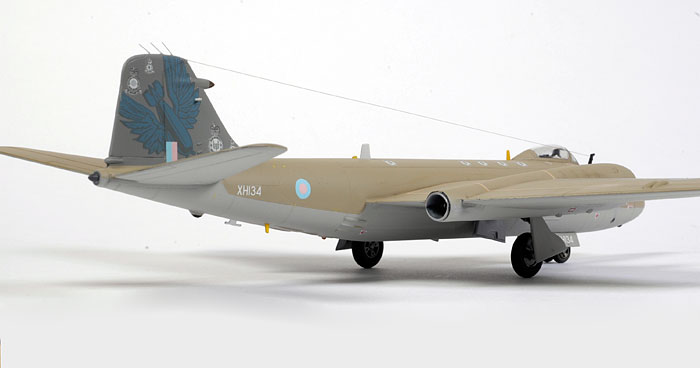
Canberra PR.9 |

HyperScale is proudly supported by Squadron.com
Background
The English Electric Canberra was a groundbreaking aircraft when it entered service during the early 1950s.
The Canberra set and held many altitude, distance and speed records in its early years. In addition to widespread and long service with the Royal Air Force, the English Electric Canberra was exported to many countries including Australia, New Zealand, Sweden, France, West Germany, India, Pakistan, Rhodesia, Ethiopia, Argentina, Chile, Ecuador, Peru and Venezuela.
The PR.9 was the photo reconnaissance version of the Canberra.
The Canberra's service record was remarkable in its longevity, spanning from the Suez crisis to Vietnam right through to Operation Telic in the Persian Gulf. The Canberra finally left RAF service when the the PR.9 was retired in 2006.
This is not the first Canberra PR.9 that we have seen in 1/72 scale. Matchbox released an early version of this variant three decades ago. That old kit had raised panel lines and fairly basic detail typical of the era.
Xtrakit has now released an all-new Canberra PR.9, representing the final version of this faithful reconnaissance stalwart. This model has nothing in common with the old Matchbox kit.
Xtrakit's Canberra PR.9 in the Box
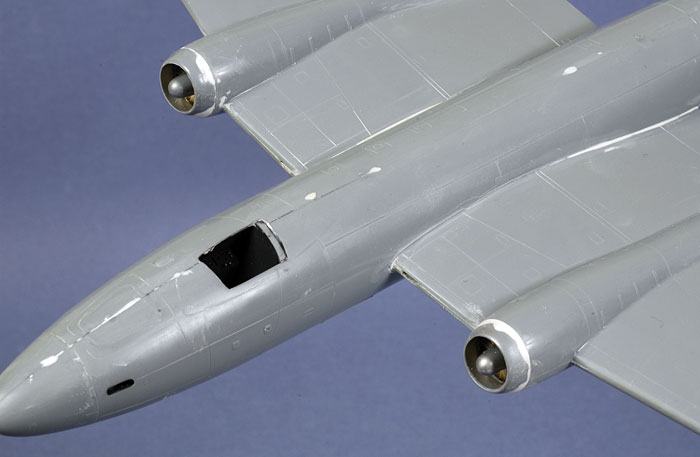
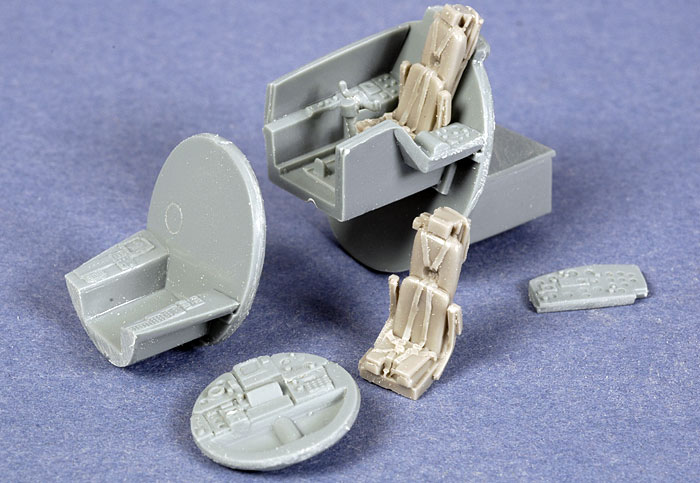
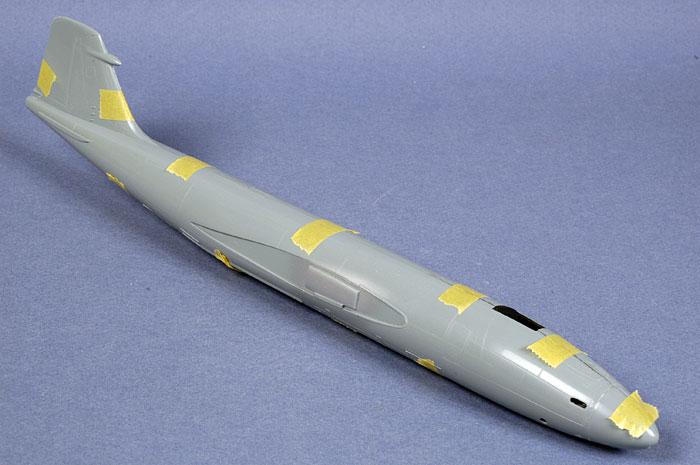
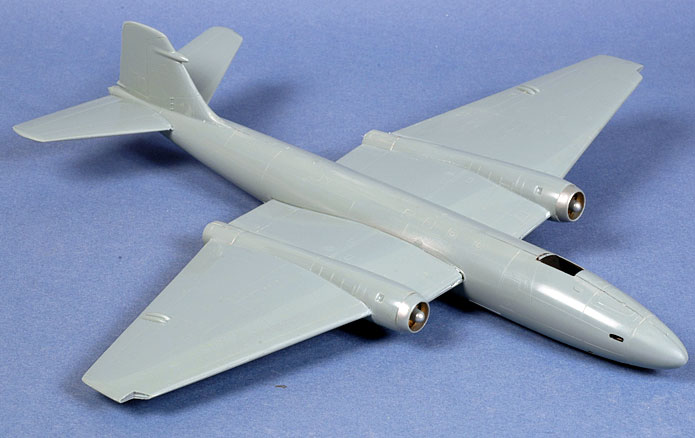
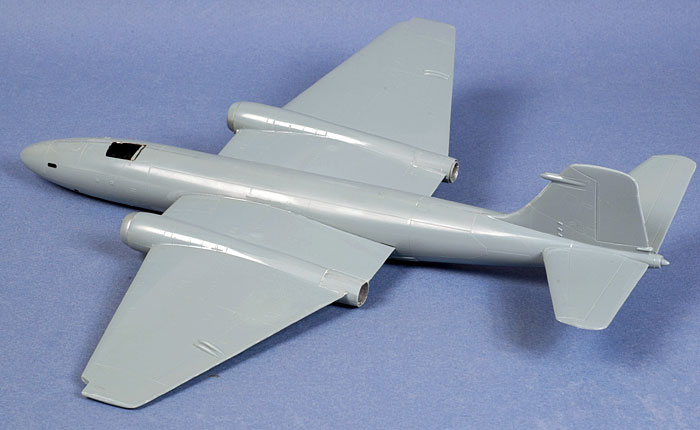
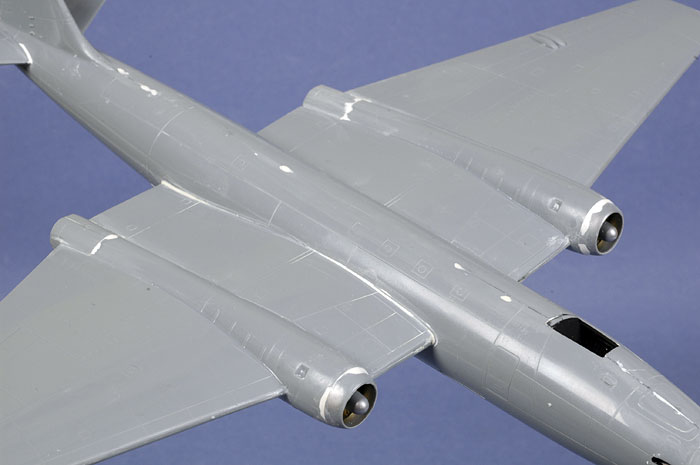
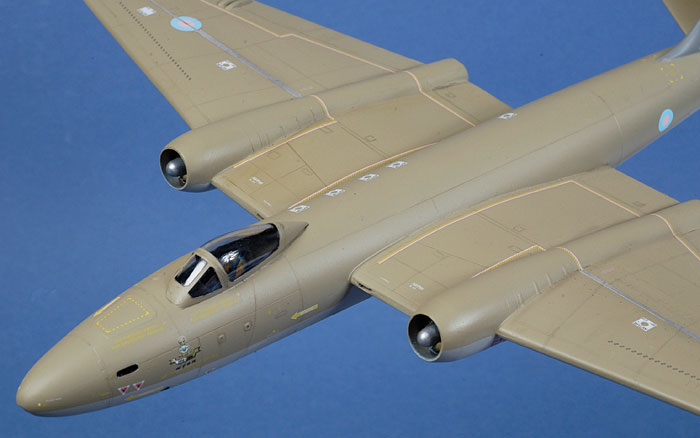
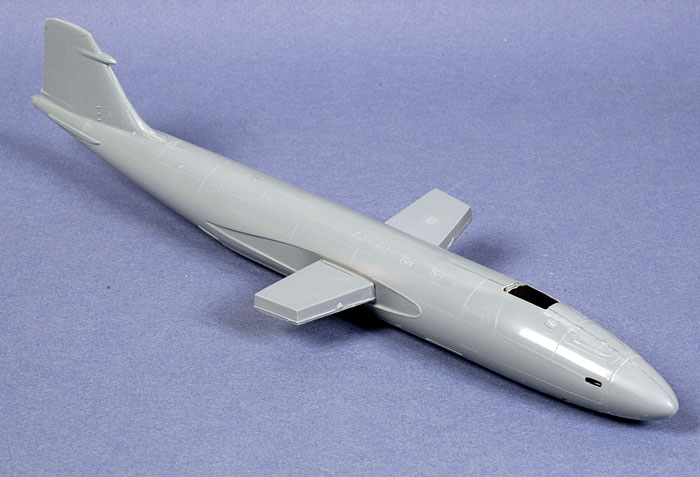
Xtrakit's 1/72 scale new Canberra PR.9 comprises 66 parts in grey plastic, two in grey resin, seven parts in clear and markings for two aircraft.
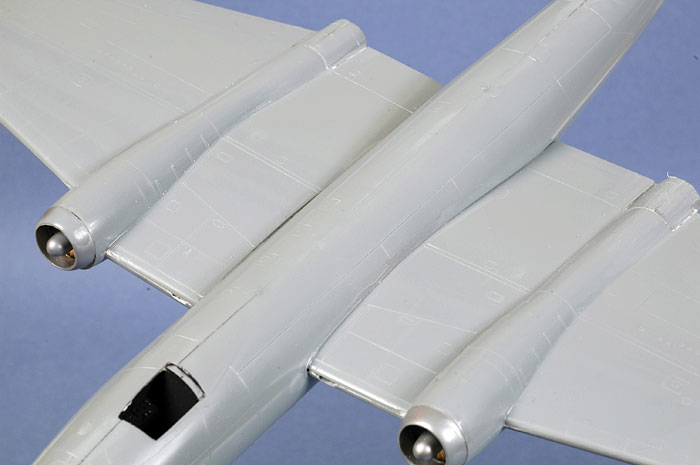
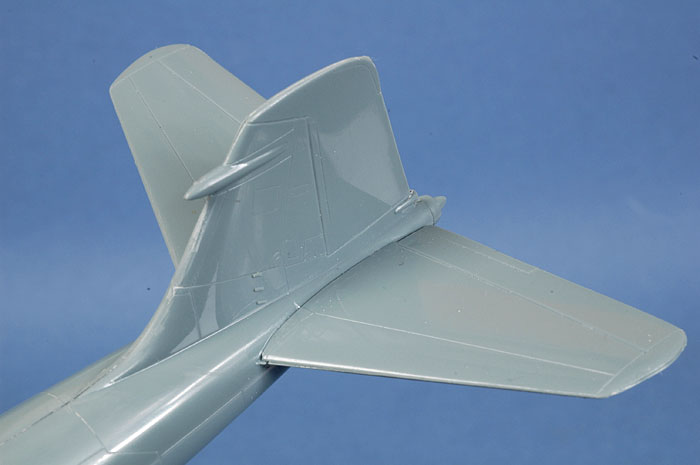
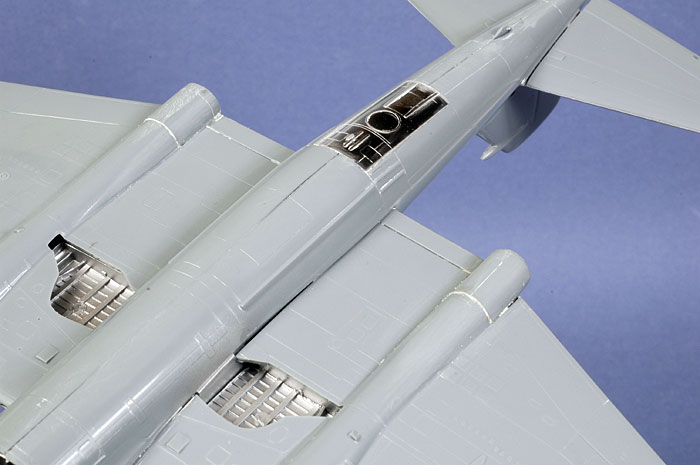
The plastic parts are manufactured to a very high standard. The grey styrene is cleanly moulded, glossy and well detailed with fine, crisp recessed panel lines and selected raised detail (e.g. vortex generators) as appropriate. The only imperfection on my sample is one large ejector pin in each main wheel well.
There are some raised ejector pins on the inner surfaces of some parts. These will not be visible on the finished model, but those on the mating surfaces of the wings and tailplanes will need to be sliced off so that they do not interfere with fit. There is a little flash (thin excess plastic) that needs to be removed from some parts.
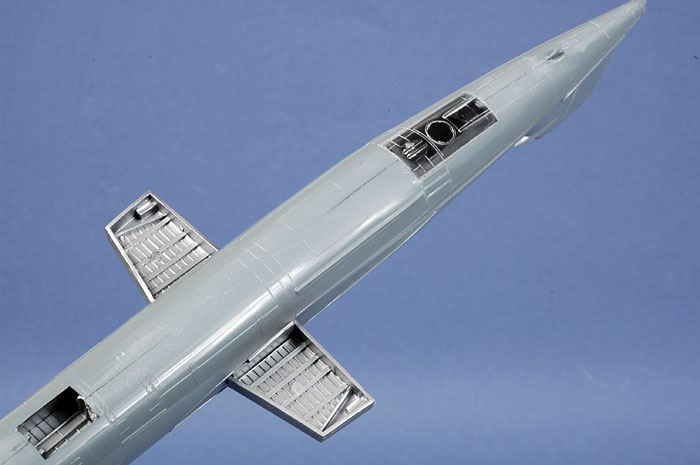
Parts breakdown is quite conventional. Wings are supplied as full-span top and bottom halves. The wheel wells are separate parts that may be glued to the fuselage before the wings are fitted. If the wheel wells are left to dry on the fuselage, they should act as large and effective wing spars.
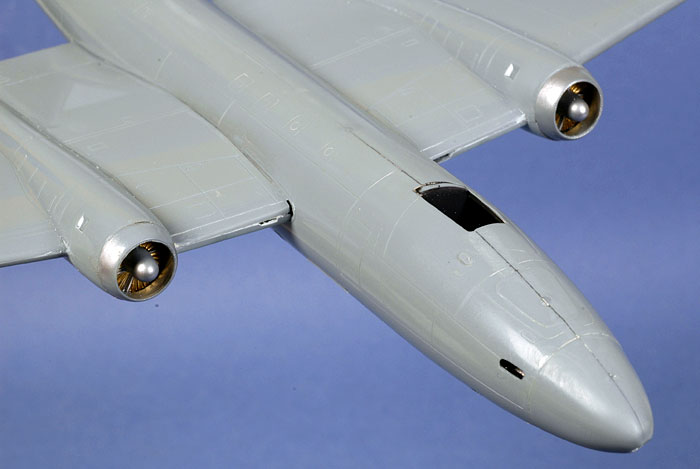
The model requires extra weight up front to help the nose wheel stay on the ground, but there is plenty of space in the nose to allow this.
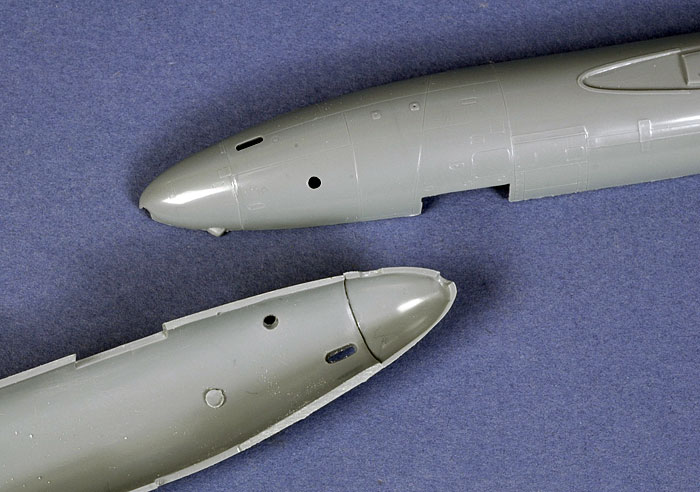
The nose is supplied as two separate halves, suggesting possible bomber variants in the future.
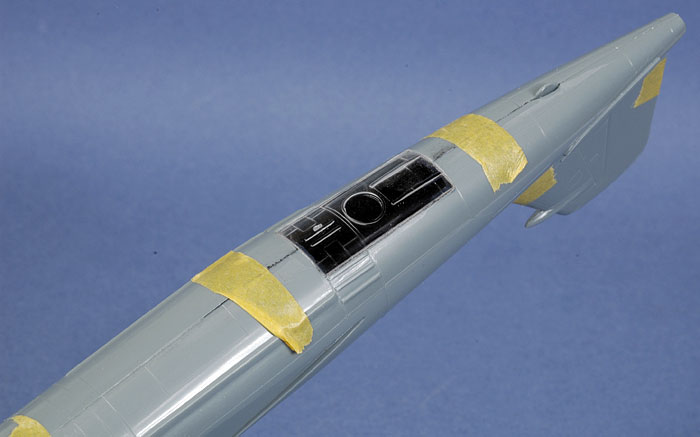
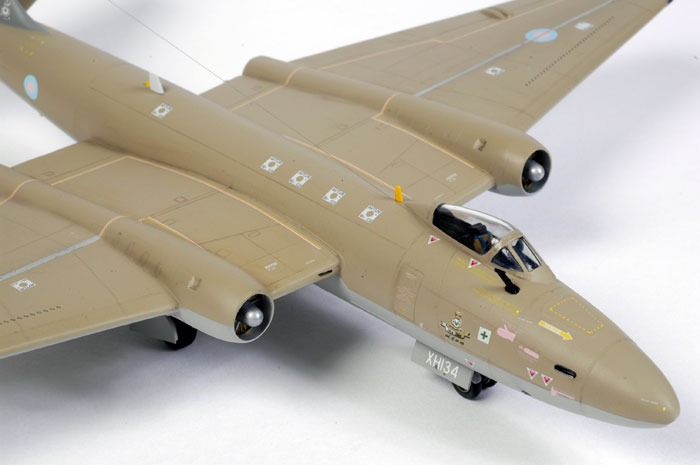
Cockpit detail is very good. The instrument panels and side consoles are moulded in injected plastic with raised and recessed details. I was pleased to see two resin seats included in this release, as the pilot's seat is likely to be the only feature visible in the Canberra's dark cockpit with its narrow opening.Undercarriage detail is good too. I particularly like the nose wheel with the mud guard moulded to the tyre.
Engine fan and exhaust detail is also depicted.
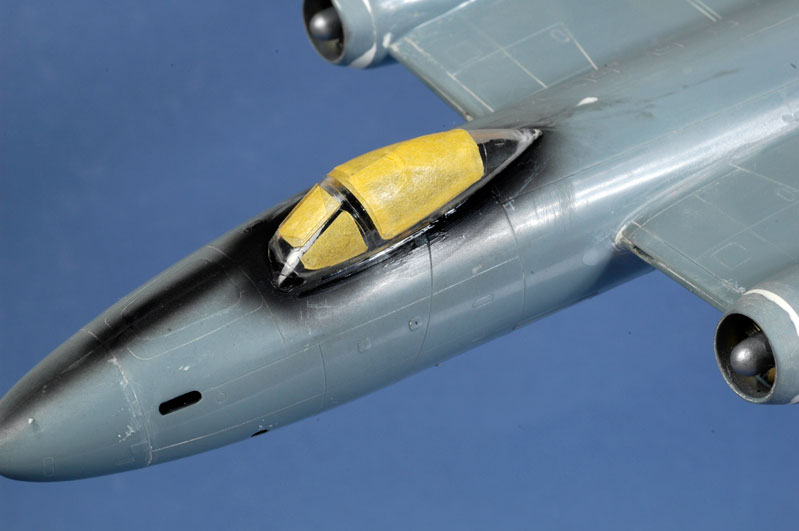
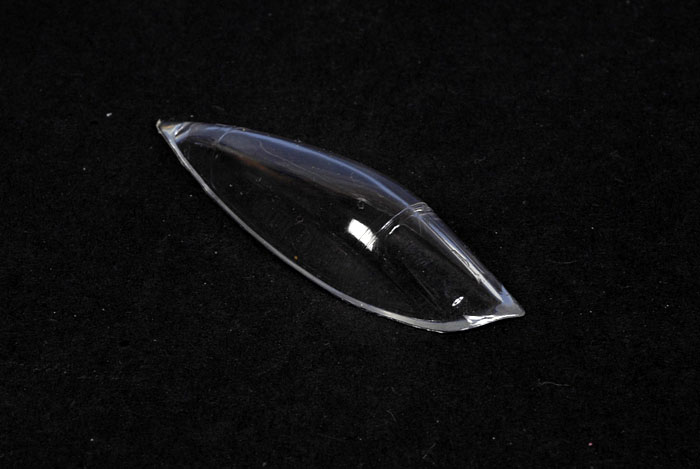
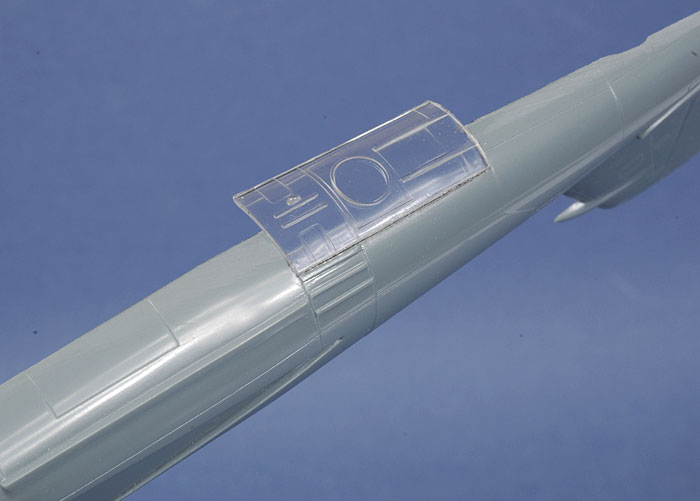
Clear parts are very thin and free from distortion. They look a little cloudy on the sprue but they shine after a bath in Future floor polish. The canopy is provided as a single part, so if you want to display the cockpit you will have to spend a few minutes carefully cutting the part open with a razor saw. If you do this though, keep in mind that this is a hinged canopy, not sliding. You will have to cut the canopy at the front windscreen and the rear hinge line if you want to display the cockpit.
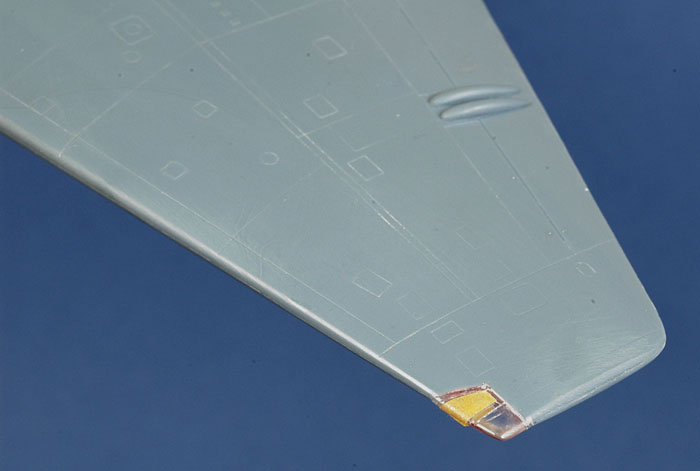
The inclusion of the ventral camera ports on a clear part is a nice touch. Small windows and wing tip navigation lights are included too. Markings are supplied for two aircraft:
Comprehensive low visibility stencil markings are included
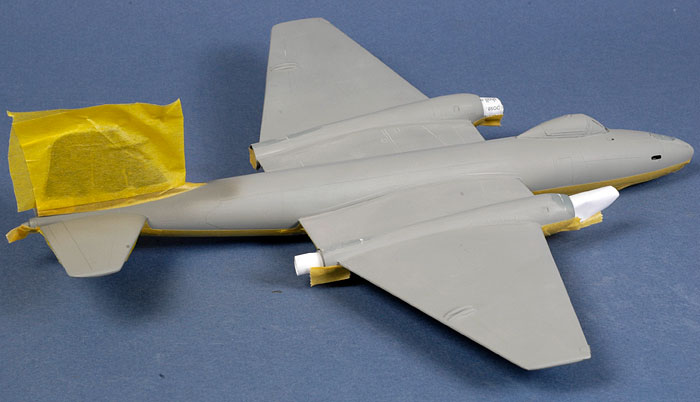
Before starting the model, I spent about an hour and fifteen minutes removing the plastic parts from the sprues and cleaning them of any remaining attachment points and flash.
I disregarded the sequence suggested by the instructions and started by gluing each nose cone to each fuselage half. This gives a better chance for a close fit around the cross section of the fuselage. The fit was almost perfect.
Next I assembled the cockpit components. These are very nicely detailed. It is a shame that everything other than the pilot's seat will be effectively hidden inside the small opening of the black cockpit.
The pilot's cockpit and the forward wheel well are cleverly designed as a single element. This is easy to line up inside the fuselage. No trimming or adjustment was required.
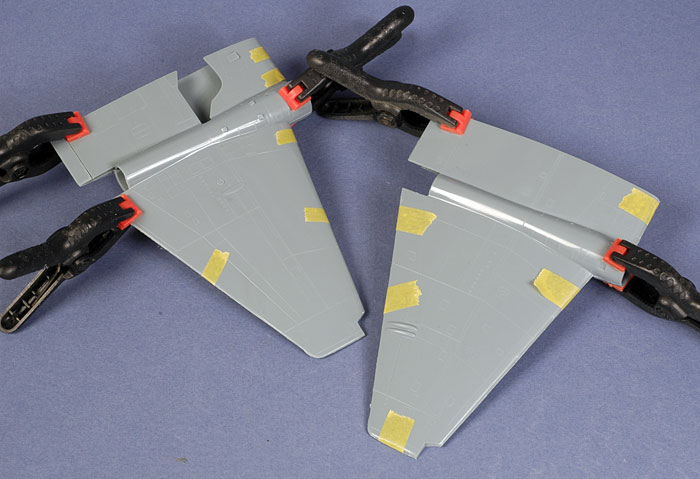
The wing halves were glued and clamped. They were allowed to set while the fuselage assembly proceeded.
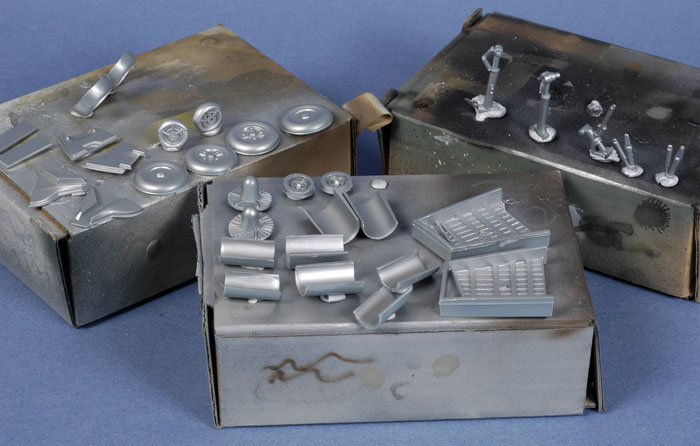
I like to pre-paint as much of the model as possible, especially elements such as the wheel wells and undercarriage. I attached all the silver parts to small boxes using Blu-Tack. This makes the small parts easier to handle, and avoids getting paint on my hands and fingerprints on the parts.
In some cases, the parts were rotated and sprayed again to paint the spots covered with Blu-Tack (mainly the undercarriage legs and retraction struts). The process was repeated, this time in dark grey (substituting as a scale black), for cockpit components.
Nose weight is essential for this model. As the navigator's position would be completely invisble, I elected not to intall it. I used the extra space in the forward fuselage for more nose weight.
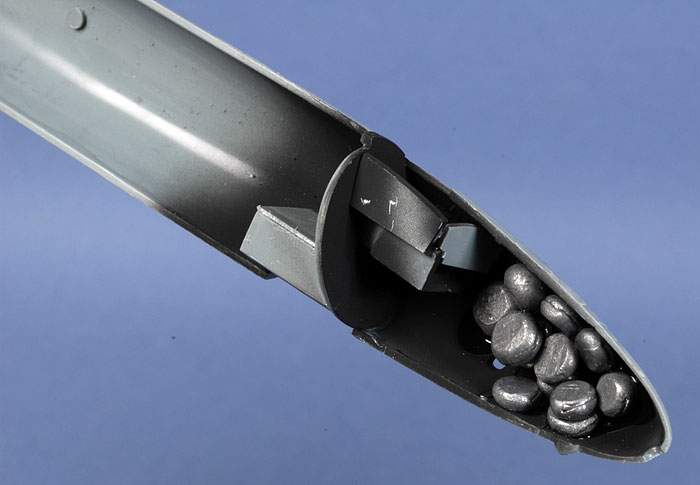
I am sure that there is enough room in the nose for sufficient weight even if the navigator's position is installed, but this was quicker and easier.
The same amount of weight was installed in the starboard side of the nose too. This is more than enough to keep the nose wheel firmly grounded.
Deviating from the instructions again, I glued the clear ventral camera panel into one side of the fuselage prior to joining the halves. There was a bit of extra flsh that had to be carefully cut out of the opening to permit a snug fit for the clear part. With care, a good fit can be achieved in this area.
The fuselage halves were brought together, first gluing and clamping the large tail section and progressively moving forward with Tamiya Extra Thin Liquid Cement and Tamiya tape, ensuring that the long fuselage seam was properly aligned. Even without locating pins, the fuselage join was a good fit.
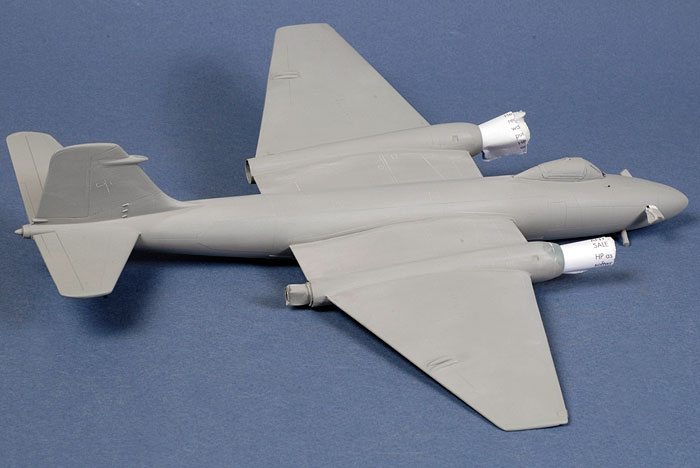
With the fuselage assembled, it was time to think about the wings. I have found that the slight dihedral of the Canberra's wide wings has been tricky to accurately portray on other models, so I decided to use the plastic wheel wells as wing spars to help set the correct angle.
First, the wheel wells were tacked to the fuselage sides inside the wing root with two tiny spots of super glue. This permitted me to test fit the wings over the wheel wells and make sure that they were set at the correct height. I had to do this a couple of times before gluing the wheel wells in place.
The fit along the fuselage seams is pretty nice even before any putty is applied.
The bottom seam line is good too. I just needed to sand the edges of the clear camera panel to bring them in line with the rest of the fuselage.
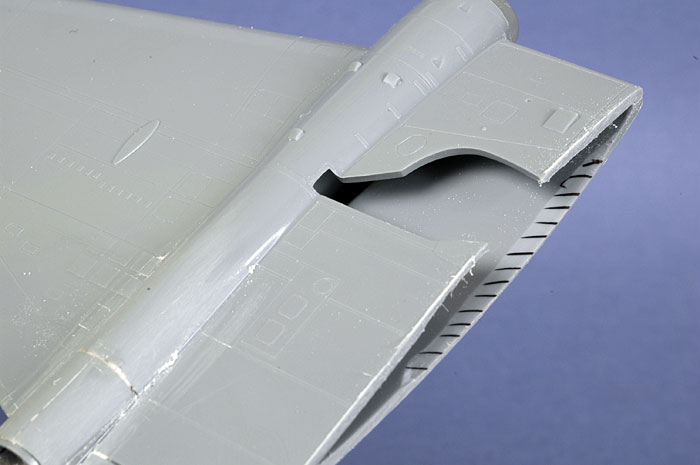
The wings needed a bit of fiddling to improve the fit. I sanded the mating surfaces at the wing root, then thinned the inside of the top wing halves as indicated in the hatched area in the photo below. This permitted the top wing half to fit properly between the top of the wheel bay and the shallow wing root recess in the fuselage.
Once this very minor surgery was performed, the fit at the wing roots was very good, with only minor gaps at the top and slightly larger gaps at the bottom. Even so, these could quickly be dispatched with an application of Milliput.
I was very happy with the dihedral angle, and the join at the wing root seemed robust.
I had intended to reinforce the tailplane join with brass pins, but the kit's method of locating the horizontal stabilisers on a small ledge seemed to work pretty well. Once again, the fit at the top seam was very good indeed.
There was mercifully little filling required. The main areas were some narrow gaps at the wing roots (above and below), underneath the tail planes and a few minor issues at the fuselage seam (partly of my own making).
The join between the engine nacelles and the intake needed the most putty. There was no gap, but a noticeable step on both nacelles.
I used Milliput White exclusively. I like this very fine two-part epoxy filler because I can remove most of the excess with a moist fingertip while the putty is still pliable. Although it takes more time to mix a two-part putty than squeezing the filler straight from the tube, the Milliput remains workable for around 30-30 minutes, and it does save a lot of sanding later on.
Just a few small applications of Tamiya Surfacer and the model was ready for paint.
At this stage I dipped the canopy in Future. As expected the canopy, although slightly cloudy straight from the box, positively sparkles after its Future bath.
Painting
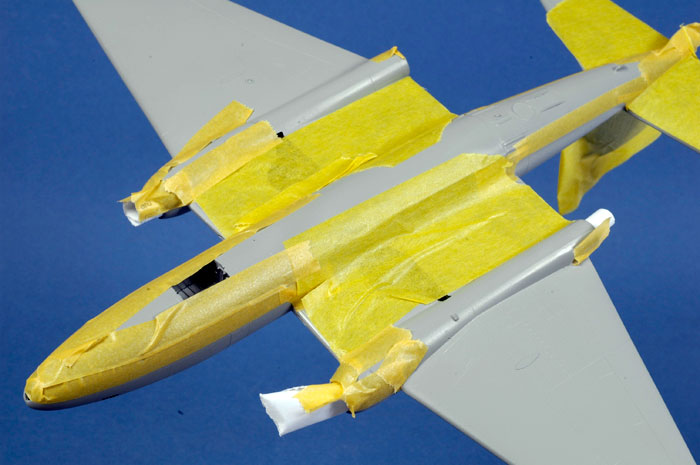
I used Xtracrylix acrylic paints for this job, as I really like their interpretation of modern RAF colours. I have found that Xtracrylix paints perform best over a primer coat, which acts as a "key" for the slippery acrylic camouflage colours.
With the canopy installed and masked, and the various other openings plugged, the model was treated to two coats of Tamiya Grey Primer applied straight from the can. The primer was buffed with Micro Mesh 6000 cloth after each coat.
Xtracrylix XA1015 Light Aircraft Grey was applied very thinly to the lower surfaces. A hair dryer was used to speed the drying process - my last remaining use for this particular appliance. A second coat delivered even coverage. The fin was sprayed XA1003 RAF Medium Sea Grey. After a few hours, the entire fin plus the camouflage demarcation on the fuselage, wings and engine nacelles was masked with Tamiya tape and the same painting process was repeated on the upper surfaces using Xtracrylix XA1016 RAF Hemp.
 My trusty Testor Aztek A470 airbrush fitted with the fine Tan coloured tip was used for all painting. My trusty Testor Aztek A470 airbrush fitted with the fine Tan coloured tip was used for all painting.
I also used Xtracrylix thinners this time, which worked very well. I have used Windex in the past too, but other alcohol based thinners do not work with Xtracrylix.
Two coats of Future, mixed with around 10% alcohol, provided a nice glossy base for the decals.
Decals
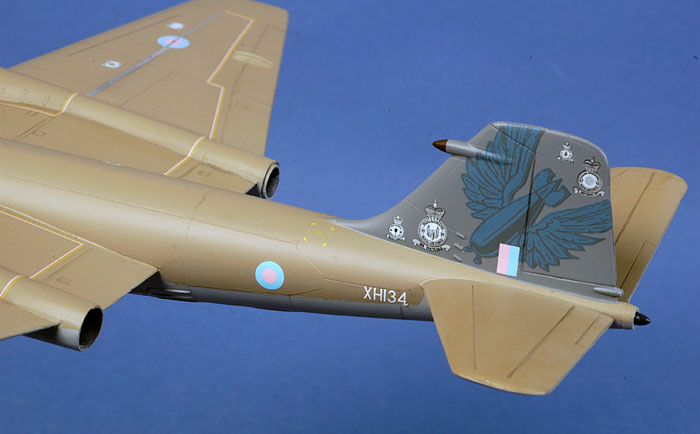
Alistair from A2Zee Models kindly supplied the 1/72 scale Model Alliance Limited Edition decals for the Canberra PR.9 Retirement Scheme, item number MAS-729032. Before starting on the larger markings, however, I decided to tackle the stencils.
The stencils are supplied on the Xtrakit decal sheet. There are many of these markings, and some are very small. The effort is worthwhile though, especially the wing walks and the colourful cluster of stencils around the nose. I spent almost three hours applying the stencil markings alone.
The metal strip running along the mid span of each wing was represented with strips of self-adhesive aluminium foil.
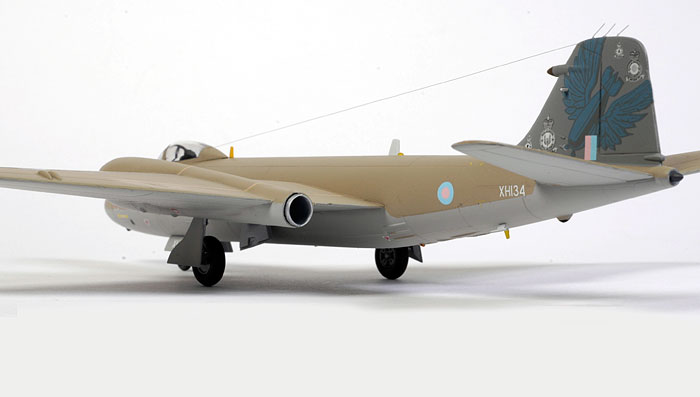
The Model Alliance decals came next. The individual unit markings were each supplied in two parts - a white backing and the black/coloured detail. The large winged bomb on the tail settled down well under a coat of Micro Sol. In fact, all the decals - kit markings as well as Model Alliance - performed perfectly.
Finishing Touches
The model was given a top coat of Polly Scale Flat. A single application over the gloss finish resulted in a slight sheen, which seemed appropriate for this aircraft.
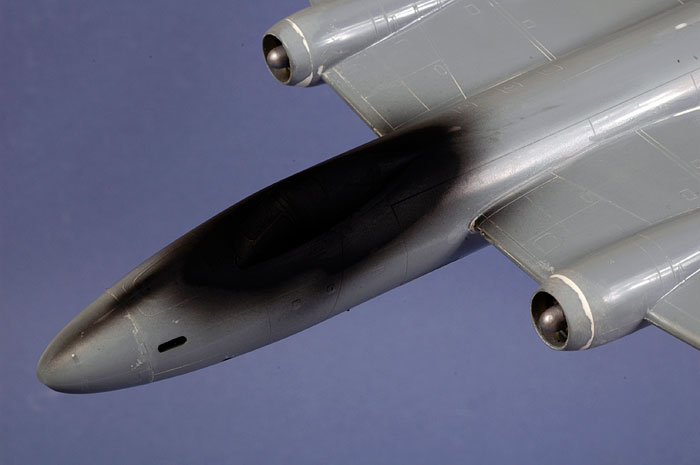
As this was a presentation scheme, weathering was kept to a minimum. I did spray my customary thinned black/brown mix along the recesses of the engine nacelles where they met the wings, but I decided against wider use. Instead, I simply applied a very thin wash of Tamiya Semi-Gloss Black to the control surface hinge lines and the panel lines. This offers just the slightest hint of the structural layout of the airframe.
The small windows and ports in the forward fuselage were filled with Micro Krystal Kleer.
The undercarriage was painted and quickly assembled. The attachment points are positive and robust. The sit of the aircraft looks right when the model is sitting on its wheels too.
The various vane and blade antennas and masts were painted and installed before rigging the long aerial wire. Smoke coloured nylon monofilament was used for this job.
The fin and the trailing surfaces on the real Canberra PR.9 was fitted with short, fine trailing antennas (at least I assume that they are antennas). I cut three of these from stretched sprue and installed them on the top of the fin, but they were so delicate and difficult to handle that I decided not to bother with any more.
Xtrakit's late version Canberra PR.9 fills an important gap in the 1/72 scale model lineup. It is a very nice kit - well detailed, accurate and it is quite easy to build too, thanks to sensible parts breakdown and the minimal use of multi-media parts.
Being a limited run kit means that this Canberra has no locating pins, so extra time will be required to test fit and align parts before committing to glue. Make sure you clean up all the parts of any flash before assembly too.
If you make this small extra effort though, Xtrarkit's 1/72 scale Canberra PR.9 will not present much more of a challenge than most mainstream kits.
Thanks to Hannants for the sample
Xtrakits, Xtraparts and Xtradecals are all available online from Hannants' website
Model, Images and
Text Copyright © 2008 by Brett Green
Page Created 7 February, 2008
Last Updated 7 February, 2008
Back to HyperScale
Main Page |
 Home
| What's New |
Features |
Gallery |
Reviews |
Reference |
Forum |
Search
Home
| What's New |
Features |
Gallery |
Reviews |
Reference |
Forum |
Search