Academy (Hobbycraft) 1/48 scale
Boeing P-26A Peashooter
by Tory Mucaro
|

|
Boeing P-26A Peashooter |

Academy's 1/48 scale P-26A is available online from Squadron
Every year my model club has a gift exchange at our annual holiday meeting. The idea is that whatever model you receive in the exchange you have to complete by the following holiday meeting, thereby giving each member one year to finish his model. I received this kit at the last gift exchange. Though I most likely would have never gone out and purchased one myself, I’ve always liked the little “Peashooter” and was happy to have the opportunity to add one to my collection.
The model was built pretty much straight from the box. The kit comes with a very nicely detailed interior, which was painted in Tamiya bright silver. The kit supplied engine is a thing of beauty, and builds into a very nice representation of the Pratt and Whitney “Wasp” that powered these little fighters.
It was finished with various Tamiya and Testors paints. Most of the model was assembled prior to painting, with the landing gear being left off until after the paint and decals were applied.
Paint
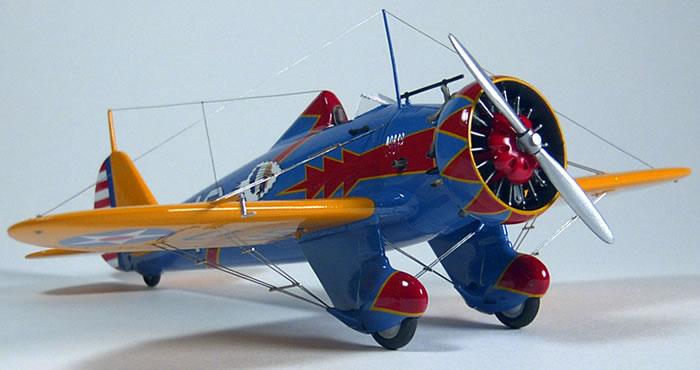
 The model was first given a coat of Krylon flat white. I was unable to determine if this aircraft was painted OD with Chrome Yellow or Blue with Chrome Yellow as no color photos exist of it and trying to interpret BW photos can be subjective at best. I decided that the brighter colors appealed to me more and went with the blue and yellow scheme. The model was first given a coat of Krylon flat white. I was unable to determine if this aircraft was painted OD with Chrome Yellow or Blue with Chrome Yellow as no color photos exist of it and trying to interpret BW photos can be subjective at best. I decided that the brighter colors appealed to me more and went with the blue and yellow scheme.
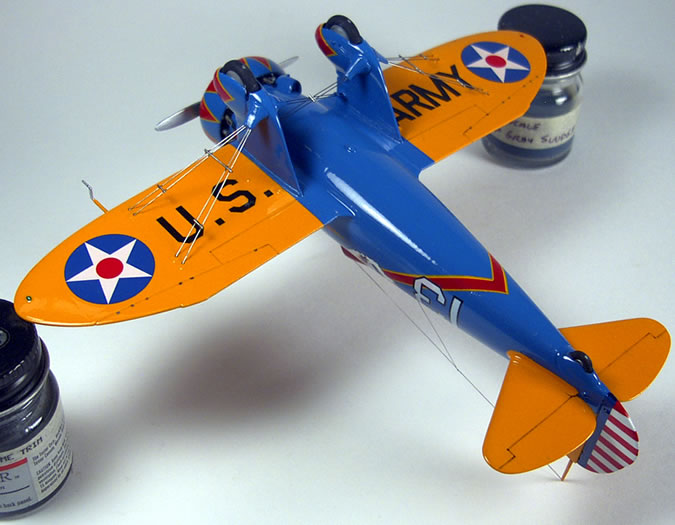
The areas that were to be painted blue were masked off and Polly Scale Chrome Yellow was applied to the wings and tail surfaces. These were then masked and Floquil Military Colors USAAC Blue was applied.
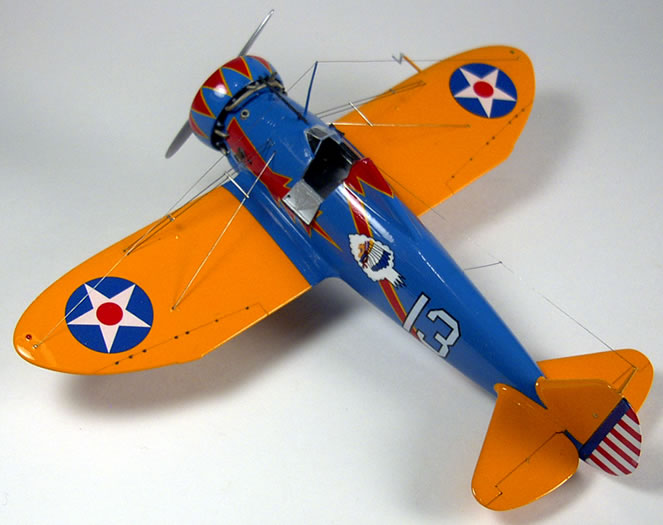
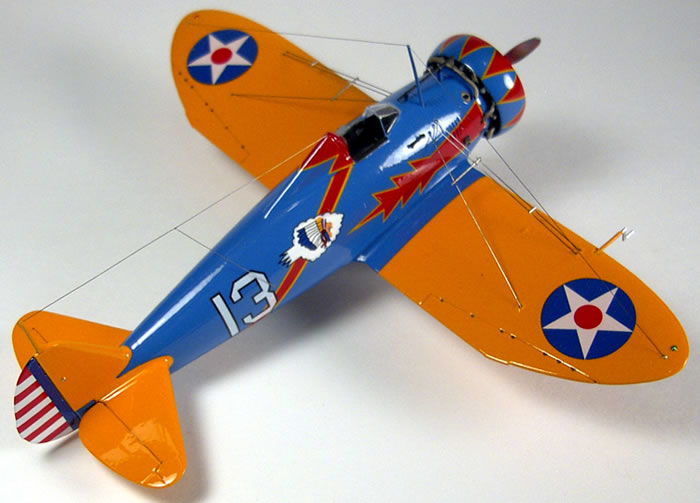
I had read somewhere that the white on the decals was somewhat transparent so I cut a mask in the shape of the arrowhead marking and masked it as well before applying the blue.
The model was then coated with Polly Scale clear gloss in preparation of the decals.
Decals
I used the kit supplied decals which were a bit on the stiff side. The cowling and wheel pants markings were especially difficult to get to conform to all those compound curves. But with liberal applications of Solveset and some pressure using a damp tissue I was able to get them to snuggle down.
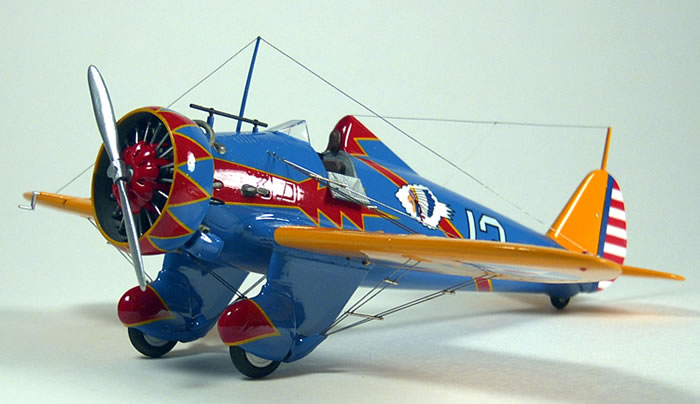
Speaking of the cowling, it was unclear as to whether the triangles should face the front or rear; again I was unable to find any conclusive photographic documentation so I went with what I thought looked best. After all the markings were in place the entire model was clear coated with two part automotive clear topcoat yielding an arguably too high gloss finish. These aircraft were kept in a state of high polish as evidenced by many photographs from that period, but probably not to this degree. Chalk it up to my model car building obsession!
Final Details
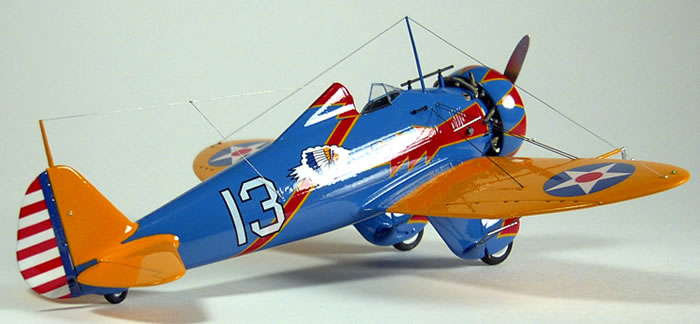
Once everything was dry, I began final assembly. The engine was attached, along with the landing gear. I pre drilled all of the holes to receive the flying wires, which were added with .009 music wire from Small Parts Inc. It is held in place with Testors clear parts cement.
The antenna wire is .005 music wire also from Small Parts and also held in place with Testors Clear Parts cement.
For the most part, this was a very enjoyable build. Positioning the little flying wire attachment parts was tricky, and the decals were not very cooperative, but otherwise I enjoyed every aspect of the build. And now I have a “Peashooter” in my collection!
Model, Images and Text Copyright © 2009 by Tory Mucaro
Page Created 17 February, 2009
Last Updated
17 February, 2009
Back to
HyperScale Main Page |
 Home
| What's New | Features | Gallery | Reviews | Reference | Resource Guides | Forum |
Home
| What's New | Features | Gallery | Reviews | Reference | Resource Guides | Forum |