|
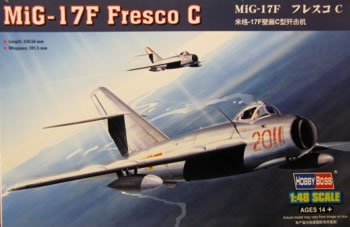
Hobby Boss' 1/48 scale
MiG-17F Fresco C
by David W. Aungst
|
MiG-17 Fresco |

Hobby Boss' 1/48 MiG-17 is available online from Squadron.com
This was a planned project that has been on my "to do" list for years. What finally brought this up to the top of the list is the modeling calendar I keep with a couple of my modeling friends. We plot out "topics" for the entire year, one per month. It is a fun list with no real need that you built what is in the list, but it can be a source of inspiration when you are not sure what you want to build next. The March block in the calendar for this year is "...And Kill MiGs". The topic is to model a subject found in the "...And Kill MiGs" book from Squadron Signal Publications.
With the F-4 Phantom being my "phavorite" aircraft, you might think this a no-brainer, just build a Phantom. But, I can't build a Phantom (that is intended to stay on my display shelves) in less than two months. When I decided to build this "...And Kill MiGs" topic, I only had four weeks. So, I chose to pull out the Hobby Boss MiG-17. It looked to be quite build-able in a four week window.
The Kit
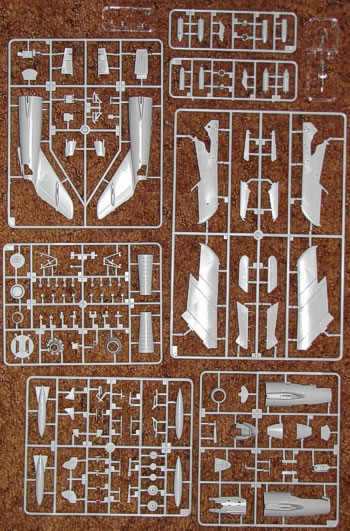
This is the recent release of the MiG-17 from Hobby Boss. The tooling and details are far above the old SMER kit that was the only real show in town before this was released. My understanding is that Hobby Boss is a second name brand from the same company the produces Trumpeter model kits. The moldings certainly have a similar "feel" to those I have seen from Trumpeter.
The plastic is molded in light gray. All the scribing in engraved. The cockpit detailing is raised (where there is any at all) and simple, but considering the lack of view into the cockpit of the completed kit, it is adequate. The kit provides two different ejection seats. As the kit I bought is for the MiG-17F, the instructions ignore one of the seats. On looking at my reference materials, I found the other seat is appropriate to earlier MiG-17 versions. There is also an alternate upper nose piece that is only applicable to earlier MiG-17s. Expect Hobby Boss to release another MiG-17 kit for the earlier versions of the aircraft.
A full and reasonably complete engine is provided, but the instructions tell you to glue it into the fuselage where it will never be seen again. I also found a few places in the kit where there was molded detail on the inside of kit pieces that get covered up as you build the kit. I can only assume Hobby Boss is planning other kits with possibly more details molded into them.
Except for replacement decals, I kept this build totally out-of-the-box.
As with most aircraft kits, construction of this kit started in the cockpit. I painted the Russian interior blue color in the cockpit (a Testors Model Master enamel paint color). I got feedback on the HyperScale forums that this color is not right for MiG-17s and the Russia did not start using this color until long after the MiG-17 was out of production. Oh well, there was no changing it by that point. I got my reference on this from images of a restored (and flying) MiG-17 cockpit. I guess whoever did the restoration did not get the memo...
I detail painted the cockpit with black, gray, silver, and red. After a very short time, I was ready to construct the cockpit and glue together the forward fuselage.
I ran into issues with the forward fuselage fitting around the cockpit. The initial fit of the two main fuselage sides was not a problem. Where the trouble came was when I went to add the underside piece and the intake ring. There were significant gaps to deal with. After some careful study of the parts, I found the places where it was being held apart and did some judicious trimming to fix the gaps. I hate filler and sanding, so 15 minutes of tinkering with the fit of these parts was worth it to save the hour or two it would have cost to fill and seal the gaps.
The next step in the instructions is to assemble the engine. I did this very quickly and only used the pieces that were structurally required. Since the engine gets sealed into the rear fuselage with no way to see it, I did not bother doing any painting or construction that would slow down the overall build. With a sigh of relief, I found the engine actually does fit in the rear fuselage. I wrapped the fuselage pieces around the engine and added glue to make it permanent.
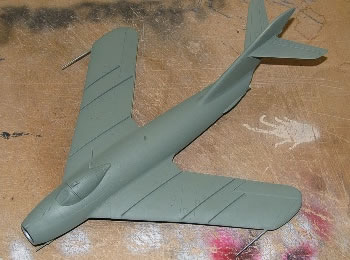
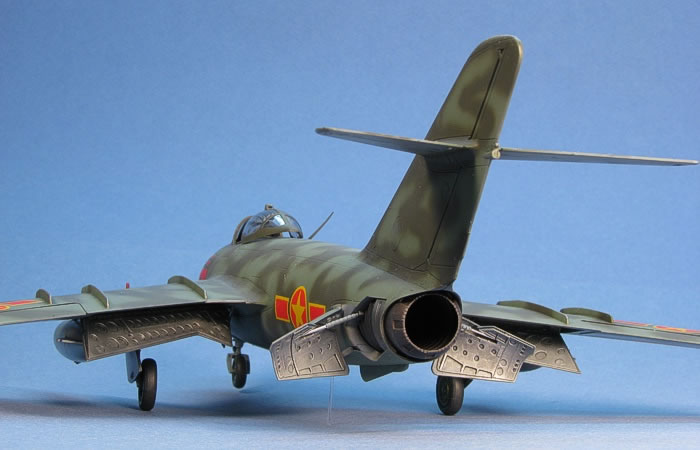
The wings and horizontal tails came next. These assemble easily. Hobby Boss, like Trumpeter, is captivated with providing separate flight control surfaces. This complicates the assemble of the wings and tails with double the pieces you would need. Fortunately, the added parts all fit as expected and did not require any real extra work. After some minor tinkering to improve the wing fit to the fuselage, I brought all the sub-assemblies together and had a completed airframe to fly around my work room.
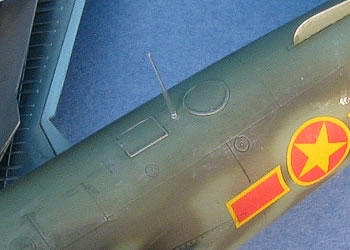
I have found that detail parts like blade antennae, temperature probes, and pitots are best handled by attaching them before painting, so I got all the needed details together and attached them to the airframe. Attaching the windscreen and loose-mounting the canopy made the model ready for the paint shop.
Paint
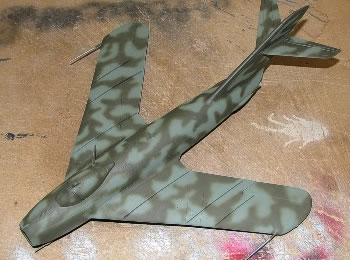
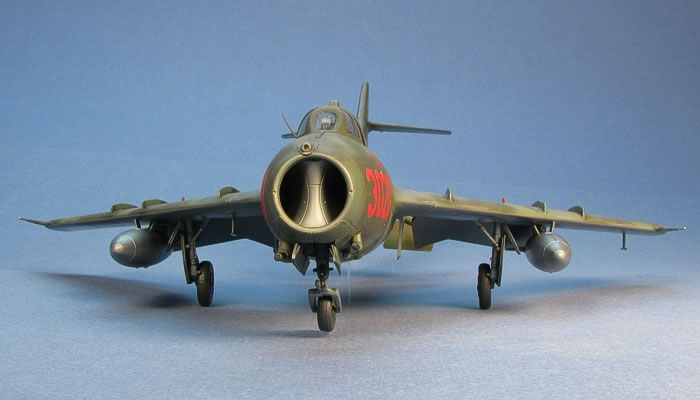
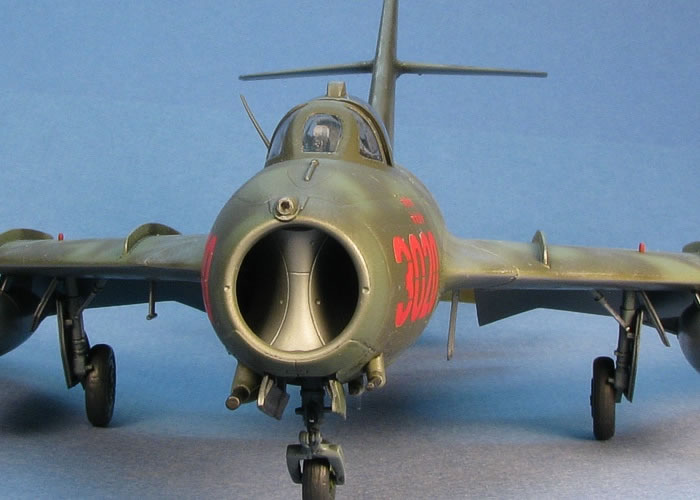
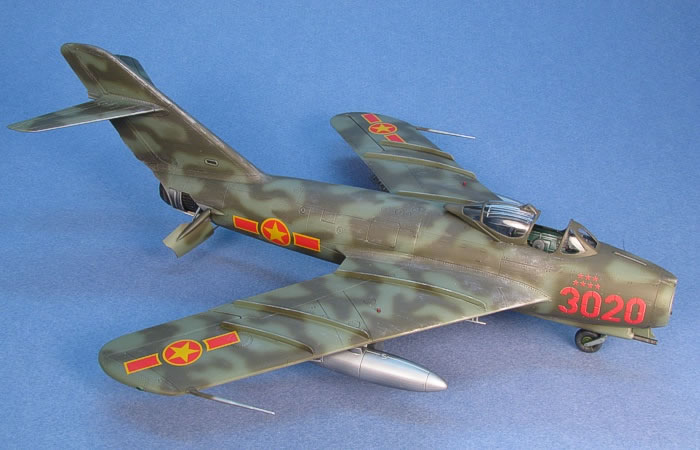
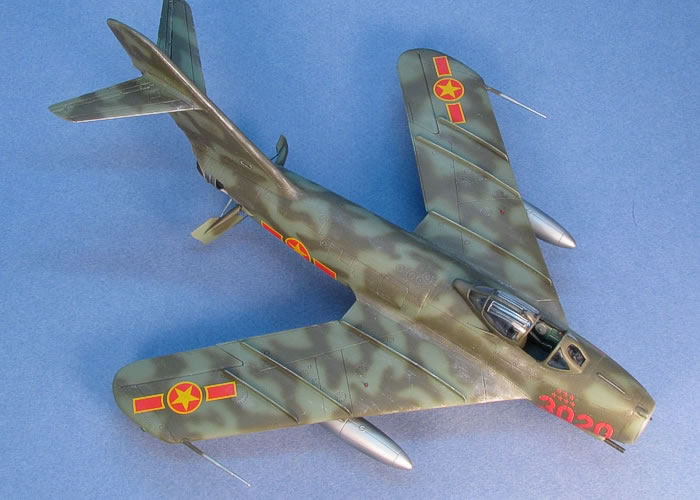
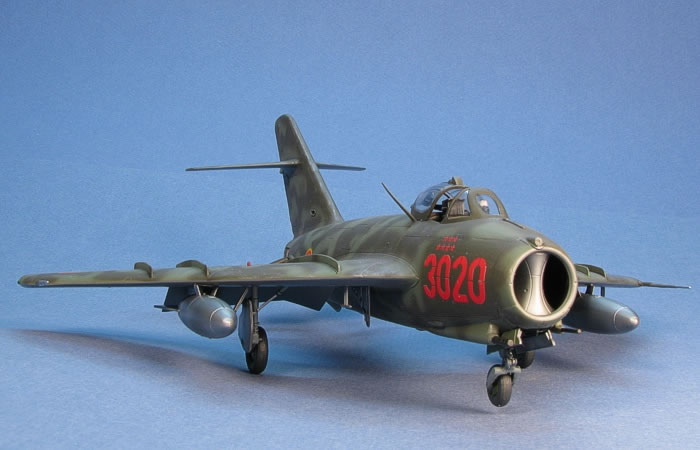
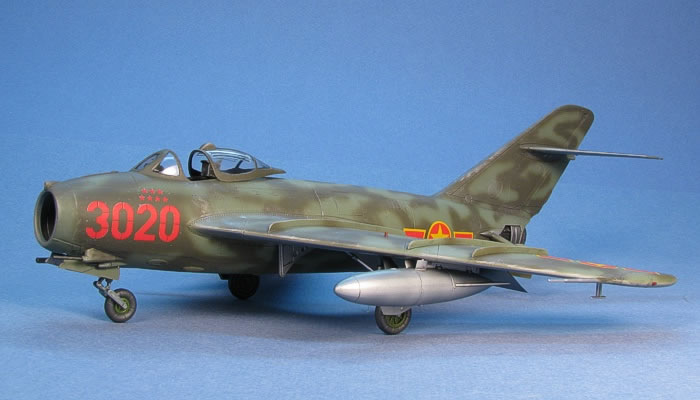
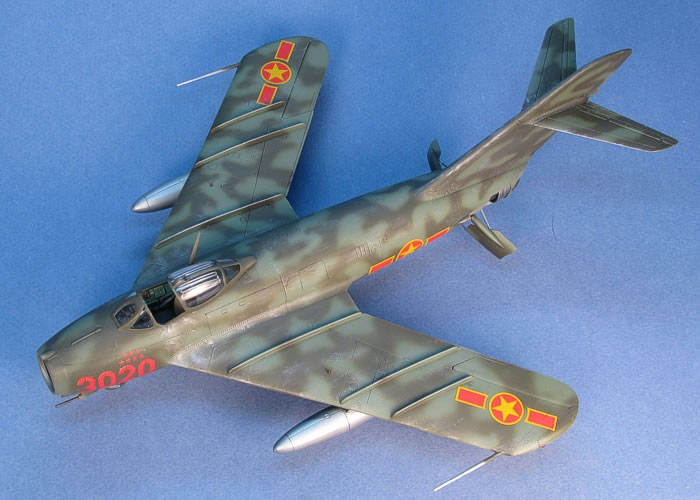
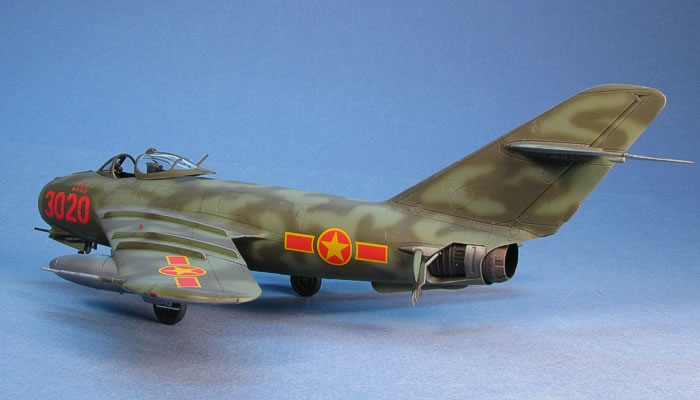
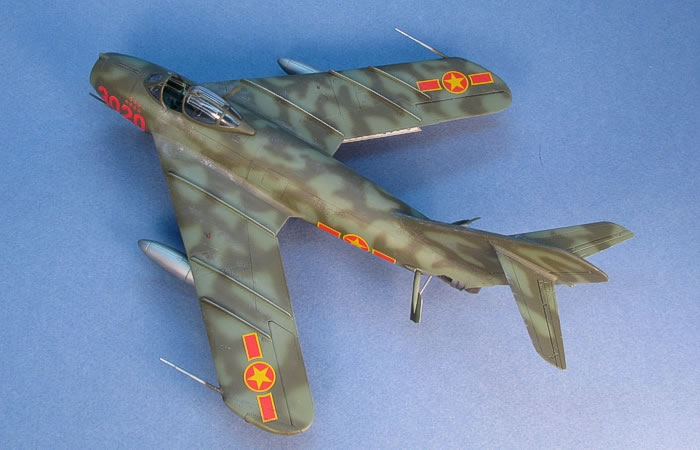
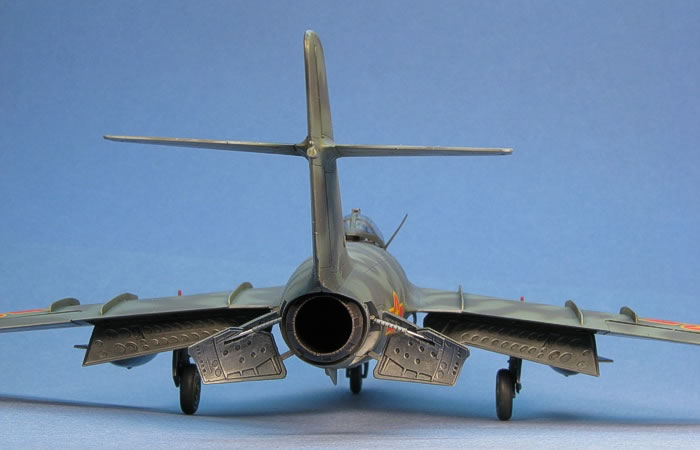
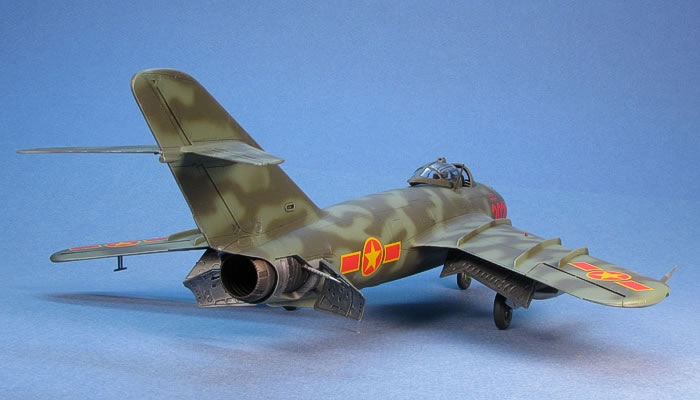
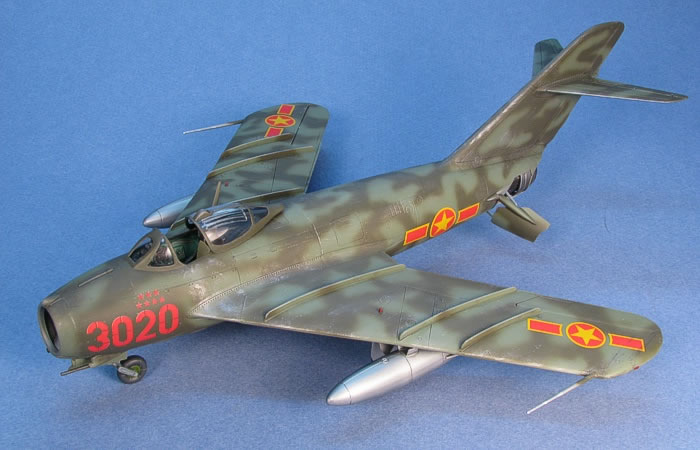
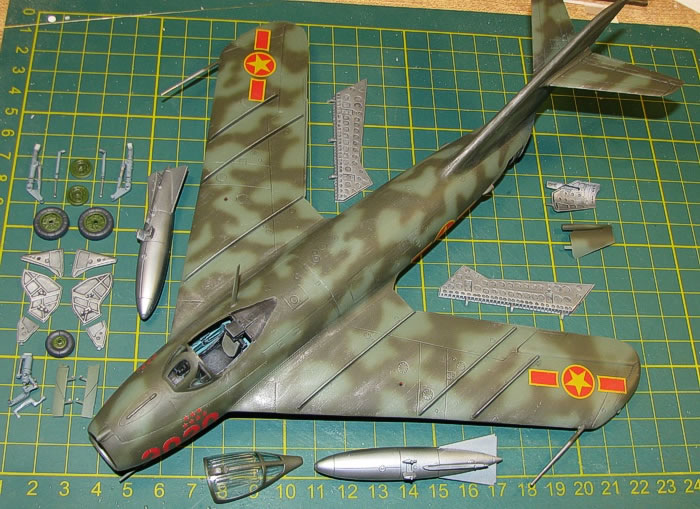
 There is only one MiG-17 that I have ever wanted to build. It is a N.Vietnamese aircraft in the mottled green camouflage scheme of "Col. Tomb". Yes, I have read that this is not the true pronunciation or spelling of his name. I have also read the accounts that say he actually did not fly the MiG-17 that was shot down by Cunningham and Driscol. All this not withstanding, a green mottled Vietnamese MiG-17 is the only one I have ever wanted to build. There is only one MiG-17 that I have ever wanted to build. It is a N.Vietnamese aircraft in the mottled green camouflage scheme of "Col. Tomb". Yes, I have read that this is not the true pronunciation or spelling of his name. I have also read the accounts that say he actually did not fly the MiG-17 that was shot down by Cunningham and Driscol. All this not withstanding, a green mottled Vietnamese MiG-17 is the only one I have ever wanted to build.
There is almost as much controversy over how these aircraft were truly painted as there is over the "Col. Tomb" story. The aircraft were originally delivered in unpainted metal. Then, the Vietnamese started painting some fo the aircraft. Initially, the common belief was that the colors were black and green. Then, further research surfaced suggesting the colors were either gray and green or two shades of green. Still more research surfaced saying the color was just one green, applied in a mottled pattern over the original metal finish. Opinions on the bottom-side color range from blue-gray to light gray to unpainted metal.
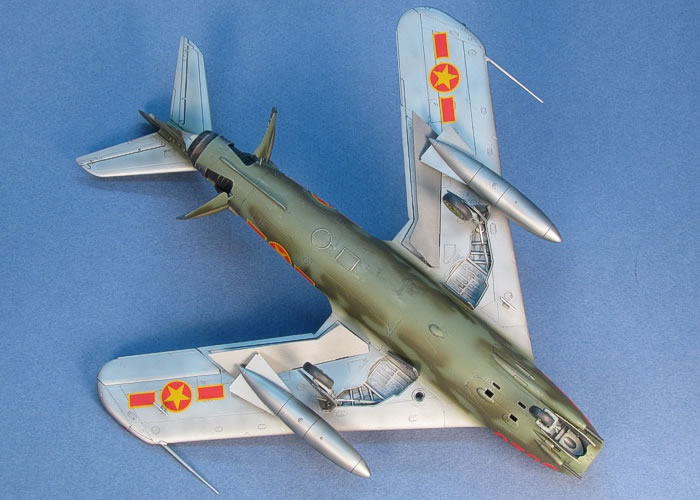
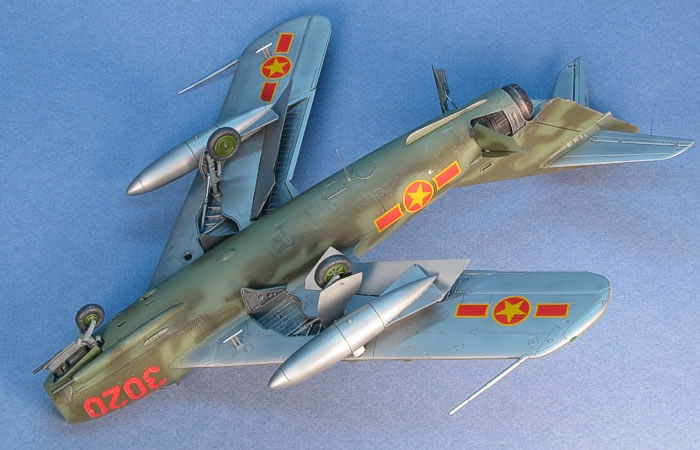
Since the only period photos I have seen are all in black and white, there is little to go on to prove which is the correct answer to the colors. I decided to pick what I liked and let it go with that. To that end, I decided that the colors in a color plate in the Squadron "...And Kill MiGs" books looked nice. After all, that is the source from where this topic was coming. I chose to build my model in those colors. They are two shades of green that wrap all the way around the fuselage. The bottoms of the wings and tails are not visible in the color plate, so I decided on an unpainted metal bottom. All the inner areas like inside the engine intake, wing flaps, and speed brakes would also be unpainted metal.
Now that I had a general plan for the painting of the model, I had to decide on exactly what colors I wanted to use. I pulled out my color chips and mixed and matched chips to arrive at the combination of Green Drab (F.S.34086) and SAC Bomber Green (F.S.34159) for the camouflage. For the bottom of the wings and tails, I used a couple shades of metalizer paints. All the paints on the model are from the Testors Model Master enamel paints and metalizers lines.
|
|
Overall Light Green |
Dark Green Mottle Added |
When applying the dark green mottle over the light green base, I tried to keep scale and human ability in the mix. After all, this was done by some guy standing next to the aircraft (or on the aircraft) with a spray gun and applying the mottle. I tried to keep the reach of the guy in mind as I painted areas. This also meant the dark patterns near the belly (under the aircraft) have significant over spray leading under the aircraft, on purpose. I felt this added a more believable flavor to the mottle pattern.
After a quick gloss coat over the whole model, decals came next. I had a number or sources for getting N.Vietnamese national insignia. I had both AeroMaster and Eagle Strike sheets for the MiG-17, not to mention the kit decals also provided N.Vietnamese insignia. The kit decals appeared to have proportional issues with their size and shape, so I discounted them. I liked the color and details of the AeroMaster markings, so I used these on the model.
With all these sources of decals, though, none provided the aircraft I actually wanted to build, the "Col. Tomb" aircraft with "3020" on the nose. I have not had good luck with my ALPS printer printing red, so I was going to just fake it with some of the other number that are provided on the decal sheets. But I decided to try one last approach to printing a good red on the ALPS printer. I lied to the printer and told it the magenta and yellow ink cartridges were really the white cartridge. This force the printer to print solid areas of the magenta and yellow ink instead of a stipple dot pattern. It worked! Printing a solid yellow, followed by a solid magenta created a very passable red color. I was in business and could do the "3020" aircraft that I wanted.

There are no data markings on the aircraft from what I could tell, so the whole decal effort consisted of only eight markings -- six national insignia and two nose number decals. Since all the markings are each two-part decals, there are 12 decals to do the national insignia and four to do the nose number, thus sixteen total decals on the model. That is it!
For weathering, I used my typical style of thinned down enamel paint washes and air brush shading. I finished the weathering with some dry brushing in silver to pop out the surface details and represent wearing paint. For a more complete discussion of what I do to weather my models, see my posting on "Weathering Aircraft".
Finishing Touches
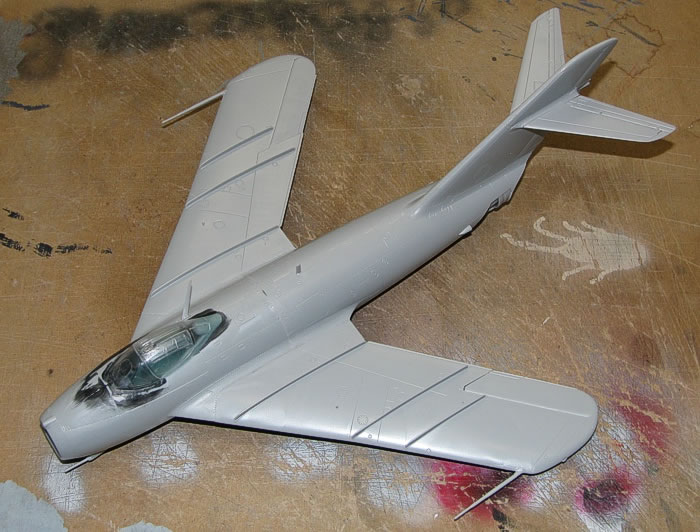
The following picture shows where I was with the project following the application of the weathering to the model. I had been painting and working on the various detail pieces and sub-assemblies at the same time as the main airframe, so all I had to do now was attach everything in the right places.
The landing gear came first. The nose and right wing gear plugged in easily and firmly. The left wing gear needed to have the peg shaved a bit to make it fit the hole in the wheel well. I sat the model down for the first time and went "OH - MY - GOD!". I never ever thought about nose weight in the model! This model is a big-time tail-sitter.
 So what do you do with a completed model that now needs you to find a way to add weight in the nose? And, let us be clear, there is not any real place in the nose to put weight. So what do you do with a completed model that now needs you to find a way to add weight in the nose? And, let us be clear, there is not any real place in the nose to put weight.
There is a large cockpit cavity on top, a wheel well on the bottom, and air intake ducting on both sides of the nose. What to do? What to DO?? WHAT TO DO???
There was really only one answer to the situation. I hated doing it, but there was no other course of action. I broke out a small stretch of clear rod and added a prop under the rear fuselage. The prop is pretty unobtrusive. You don't even see it in most views. But, it annoys me that it is there, none the less. It case you are looking for it, I photo-shopped it out of most of the images in this posting.
Completion Date: |
13 December, 2009 |
Total Building Time: |
22.9 |
Research: |
0.0 |
Construction: |
3.7 |
Painting: |
13.8 |
Decals / Markings: |
3.0 |
Extra Detailing / Conversion: |
2.4 |
I built this as a quick and fun project. Indeed, at only 18.1 hours of building time, this is nearly a record build for me. I would recommend it for anyone looking for a quick and easy model to build. I can not speak much to the kit's accuracy. I only have a passing interest in the MiG-17, and it looks like a MiG-17 when it is built. About the only real omission I found in the kit is that the canopy needs a decking piece added in the rear portion. But, I ignored this on my model and kept things out-of-the-box (except for the prop under the rear fuselage).
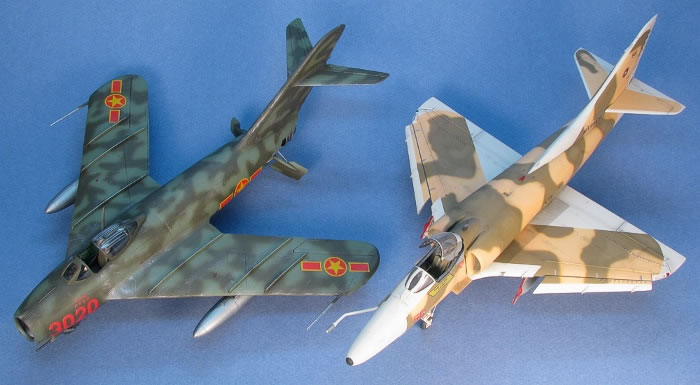
An interesting comparison is to place the real MiG next to the "MiG Skyhawk", which is deceptively camouflaged to form the outline of a MiG-17 in the camouflage. It also is a simple side-up comparison of the MiG-17 to a Skyhawk, which was the aircraft chosen by Topgun to best represent the MiG-17 in adversary training.
Models, Description and Images Copyright © 2010 by David Aungst
Page Created 19 August, 2010
Last Updated
19 August, 2010
Back to HyperScale
Main Page

|
 Home
| What's New |
Features |
Gallery |
Reviews |
Reference |
Forum |
Search
Home
| What's New |
Features |
Gallery |
Reviews |
Reference |
Forum |
Search