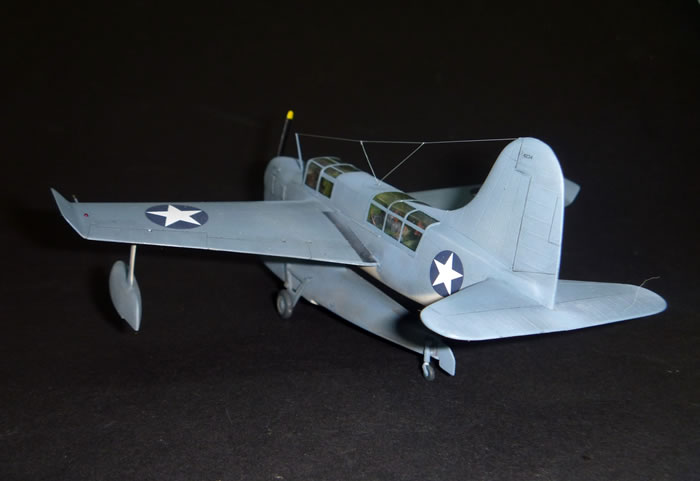
Sword's 1/72 scale
Curtiss SO3C Seamew
by Mark Davies
 |
Curtiss SO3C Seamew |

Sword's 1/72 Curtiss SO3C Seamew is available online from Squadron
 The old adage “if it looks right it probably is” was not applicable to Curtiss’s lamentable SO3C. It had looks that even its mother would struggle to love. The old adage “if it looks right it probably is” was not applicable to Curtiss’s lamentable SO3C. It had looks that even its mother would struggle to love.
The SO3C was a response to a USN requirement to replace another Curtiss product, the SOC Seagull, aboard battleships and cruisers. The latter’s hangars dictated the aircraft’s maximum dimensions. Another USN dictate largely condemned it to appalling mediocrity however. This was the requirement to use the Ranger V-770 inverted V-12 air-cooled engine. This troublesome motor was plagued with overheating problems and was barely powerful enough for the aircraft’s specification. The prototype SO3C first flew in October 1939.
My “First Look” review of this kit and its wheeled version boxing may be found here on HyperScale, dating from March 2012. At the time, I concluded that:
These are nicely engineered kits, sharing virtually all the same parts, and are of good quality. They should be nice straightforward builds, with the potential to produce a very attractive, err no, let’s call that appealing, or maybe interesting, Seamew model.
The lack of an arrestor-hook for the FAA wheeled version is a surprising oversight, but not a major obstacle. Nor is the absence of resin seats with harnesses, this being more of a missed opportunity than a failure.
Is this an ugly subject? Yes undoubtedly! Just as certain is that these Sword kits are very good examples of the limited run kit art.
Definitely recommended.
The build was as I expected, fairly straightforward. There was predictably a little bit of flash to deal with, this being a limited-run kit; mainly found around the various openings in the cowl area. I found that most of the work effort with this build related to the fuselage.
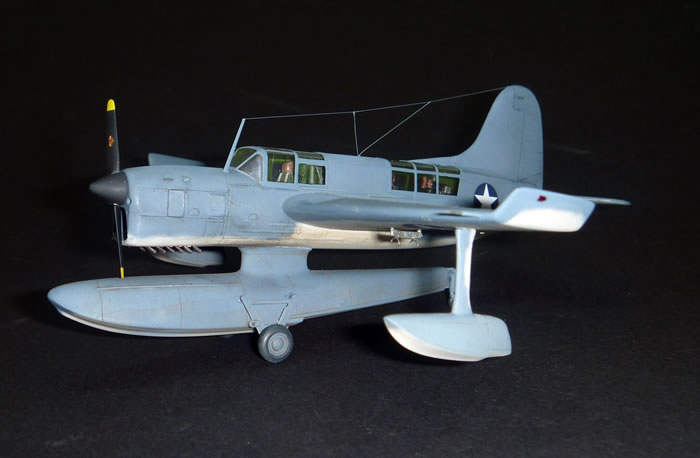
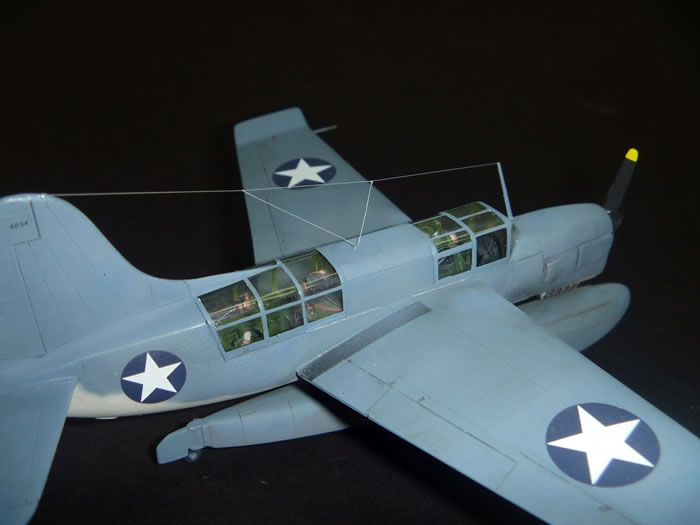
There is fair amount to fit inside the fuselage; a resin engine, combined resin and styrene cockpit, and a combined resin and styrene radio operator/gunner’s station. The resin parts fit well inside the fuselage, although I took the precaution of thinning down the backs of the resin cockpit sidewalls. I added some cabling to the gubbins behind the pilot’s head armour and the radio, and added a small DF loop on top of the radio; all done as an approximate representation based on reference images. I left out the instrument panel to add later with its coaming, but did stick the rudder pedal bar to one fuselage side. I cheated with the gun-ring by fixing a rod between the gunner’s seat and the floor rather than try to “hang” it in position on one fuselage half first.
Whilst the resin inserts fit well, I found that both transparencies were a tad oversize in width and height, with the gunner’s canopy being a smidgeon long as well. The tiny bit of extra length was easily accommodated by trimming the edge of the rear cockpit opening. I hid the excess height by cementing a 0.010”strip of plasticard to the upper fuselage between the cockpits, and blending it in. I considered shimming the fuselage join to accommodate the extra canopy width, but I had already joined the fuselage when I realised the need. This would also have meant some shimming would be needed to ensure no gaps between the various resin detail inserts. However, I will shim the fuselage join if and when I build my wheeled version of this kit.
I also had to widen the cowl front a fraction by cutting the lower mouth and adding a shim. A better solution, that would also retain the exact air inlet shape, may be to trim the forward edges of the fuselage to cause the front to taper a little more; although the resin engine may then need to be trimmed down, or the fuselage halves ground out, to make the engine fit. I also fitted the wheeled version’s surplus tail-wheel to fill the slot it fits into; then I cut the tail-wheel off flush with the fuselage and sanded it smooth.
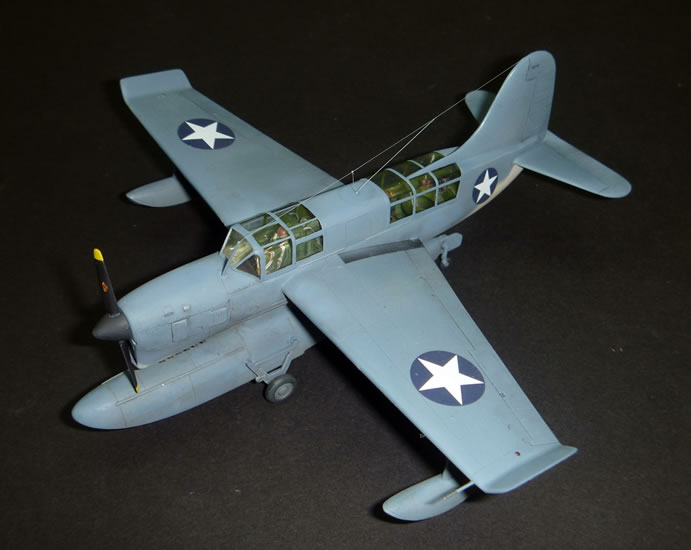
I found that the single piece horizontal stabilizer a single elevator running through to each side was hard to align horizontally and square to the tailfin. This was because the stabilizer roots moulded with each fuselage half were at different heights, making the stabilizer appear skewed when viewed end-on. My fuselage half alignment may not have been perfect, but I think the kit was also at fault. If the Seamew had had separate stabilizers, each with its own elevator, the difference could have been balanced out by individual adjustment. But this type of adjustment was impossible because of the single elevator joining the two stabilizer halves, so I had to remove one root and reposition it to get the stabilizer tail to sit level.
The wings are a butt-join, with about 75% of the lower wing-root aligning with a protruding rib moulded with the fuselage halves. I forced the upper and lower halves apart at the root using sprue scraps to achieve the correct wing root thickness in order to match the outline moulded with the fuselage. Care is needed when joining the wings to ensure they are even on both sides with matching dihedral. Some minor trimming and shimming was needed to achieve this. Once dry, the butt-join proved strong enough.
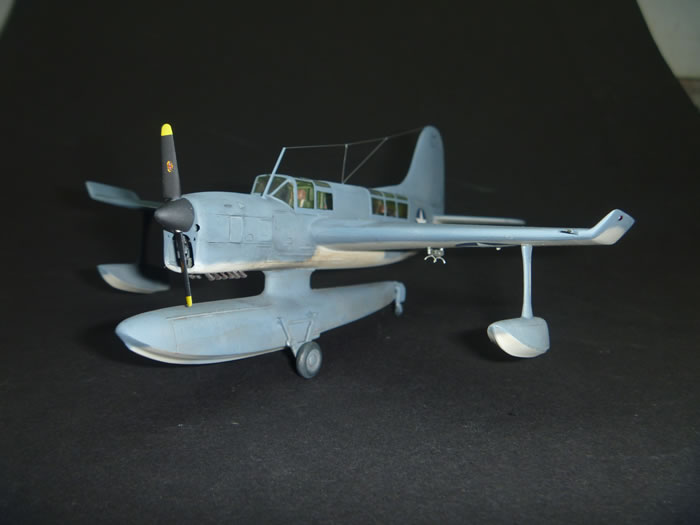
I chose to leave the main and stabilizing floats off until later in the build. I did however make a thick tab from 0.50”plasticard to insert into the main float’s pylon. I cemented this to the lower fuselage centreline in a position that would ensure the float fitted in the right place. This meant I could paint the float separately and fix in place using cement on the inside of the pylon, not around its base; thus ensuring a join a that would not damage finished paintwork with any oozing excess cement. The tab also proved to be handy clamping paint for a haemostat to hold the model during painting.
Up to this point only a little filler had been required, mainly around the shimmed areas of the wing-roots, and a bit where I had relocated a stabilizer root. The soft limited-run styrene is easy to work with, whether sanding and polishing, or re-scribing lost detail.
I did the painting with the floats off, and then joined the main float afterwards, but left the stabilizer floats off until almost the build’s end. A few little jobs I attended to were to thin the prop blades a little, drill out the holes in the bomb racks and add sway-braces from fuse wire, drill the holes in the beaching gear, plus scratch-build a pitot and antenna mast as the kit items were a little clunky. The resin exhausts fit from the outside, and I found that I needed to trim down the blocks the exhaust stacks are attached to in order to have them sit inside the cowl slots enough. A word of advice here – Avoid snapping an exhaust stack off and loosing it to the carpet monster as I did; they are very fiddly items to carve from scrap plastic!
I suspect that I have made building this kit appear harder than it in fact was. Most of the issues are typical of limited-run kits, and none was difficult to overcome. The kit was completed in six evenings of building, two of these being taken up with painting and decaling.
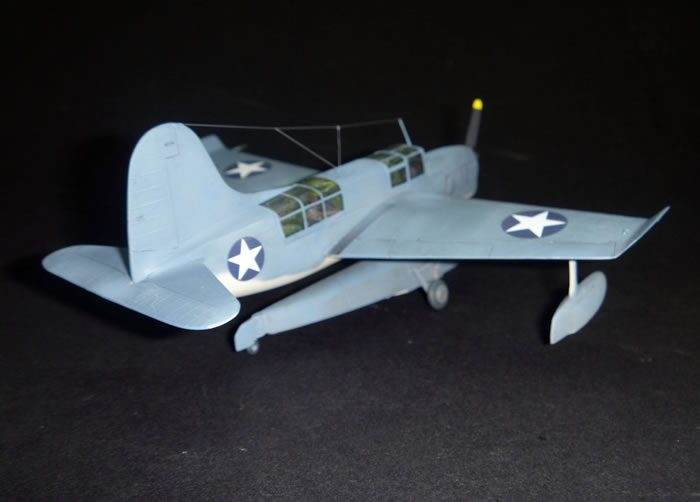
I chose one of the two out of the box schemes. A mate of mine is building the same kit and had already chosen to do the more colourful three-tone USN camo-scheme with red outlined stars and bars. This suited me, as I have always liked the simplicity of the scheme I finished mine in.
I use several brands of paint, and am not fussy about using enamels, lacquers or acrylics on the same model. It just so happened that the colours I needed came from my stock of Testor's Model Master matt enamels. This of course meant I needed a gloss coat for decaling and weathering. I normally either use car-painter’s clear lacquer or Future for this. I chose Future because Model Master is a delicate paint, and there would be no compatibility issues. I have brushed and sprayed Future, but tend now to spray at about 30-psi to get good atomization, and sometimes hurry things along with hairdryer between coats.
The kit’s Techmod decals were great to use, and settled into a bed of fresh brushed Future. No wetting or solvent agents were needed. Weathering was with oil washes, some dry-brushing and a mix of water and graphite from a sanded pencil.
All that was left to do was add a stretched-sprue antenna wire and job done.
This was an enjoyable and, as limited-run kits go, a fairly straightforward build.
I have to confess that a little more effort was needed than my “First Look” review foresaw but, in my defence, I think the issues I found can only be discovered by building. Besides, one of the most important ingredients needed to build limited-rum kits is optimism! So don’t let my account put you off building a Sword Seamew. After all, forewarned is forearmed, and it really is quite an easy kit to build.
The key conclusion from my “First Look” review still stands with regard to this kit – Definitely recommended.
Thanks to Sword Models for this review sample.
Model, Images and Text
Copyright ©
2014 by Mark Davies
Page Created 26 June, 2014
Last Updated
26 June, 2014
Back to HyperScale Main Page
|
 Home
| What's New | Features | Gallery | Reviews | Reference | Resource Guides | Forum |
Home
| What's New | Features | Gallery | Reviews | Reference | Resource Guides | Forum |