Brengun 1/72 scale
MQ-8B Fire Scout
|
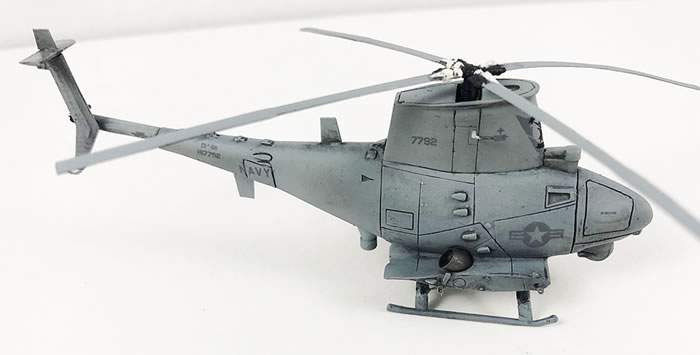
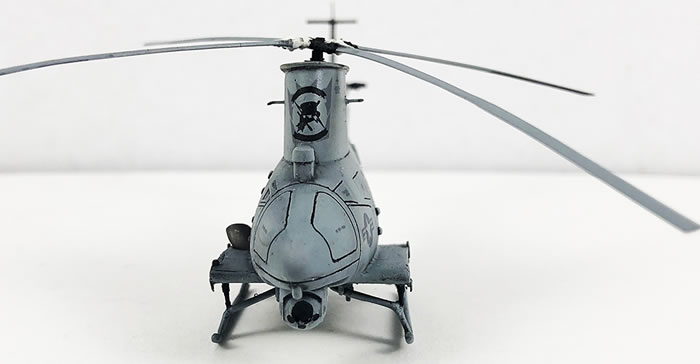
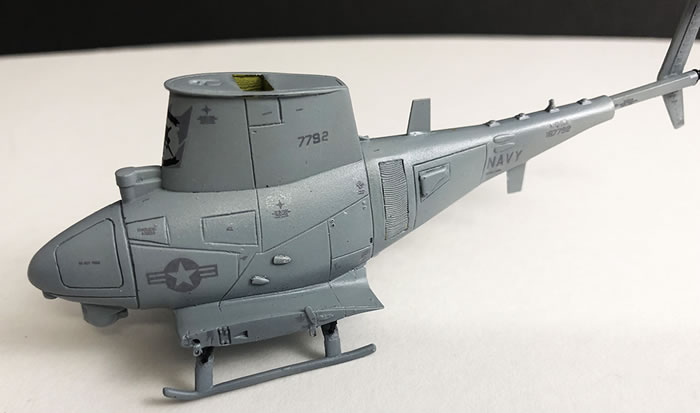
MQ-8B BuNo. 167792, HSM-35 Magicians, LCS-3 - USS Fort Worth, May 2013 |
by David Couche

Hobby Boss' 1/72 P-61A Black Widow is available online from Squadron.com
For regular visitors to Hyperscale, you may remember I did a review on the Brengun MQ-8B Fire Scout a few months back and promised to build it. Well here it is and it was not without its challenges both kit and self-created.
Firstly, a warning to others contemplating build this kit. It has many small fragile parts being resin so work carefully. That stated, when cutting the casting block from the upper engine section I didn’t realise I had it resting on the cutting mat and consequently split the fine rim that is around the top of the housing off. Whilst not totally breaking it off it certainly created a number of issues in gluing it back and retaining the fineness of the original casting. Totally my ham fistedness and nothing to do with the kit.
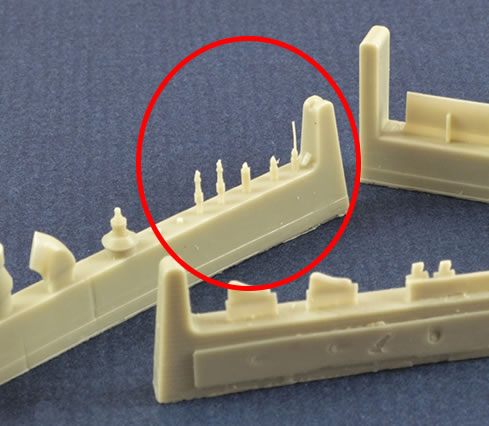
Secondly, in getting all the parts out and preparing them for the build I realised that the casting block that was supposed to have the small shock absorbers for the skids had them missing. Thinking I had knocked them off I check back to my review photos where I had taken them straight from the box but found they were missing from the start. A quick email to Jan at Brengun had a replacement block in the mail in 2 days. I must applaud Jan at Brengun for providing wonderful aftersales service, which is unfortunately lacking from quite a few companies. So consequently my build had to stop whilst I waited for the postman to deliver my parts to Adelaide, Australia…waiting….waiting….waiting.
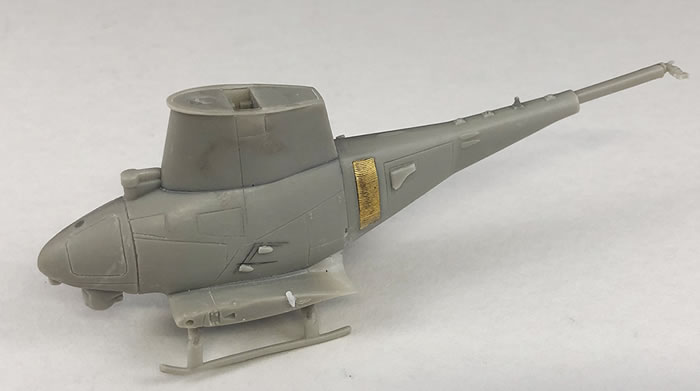
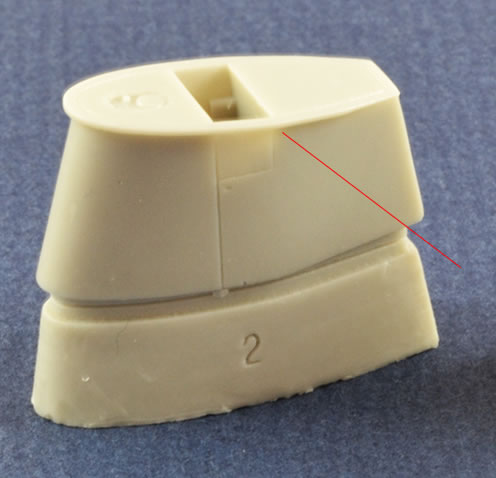
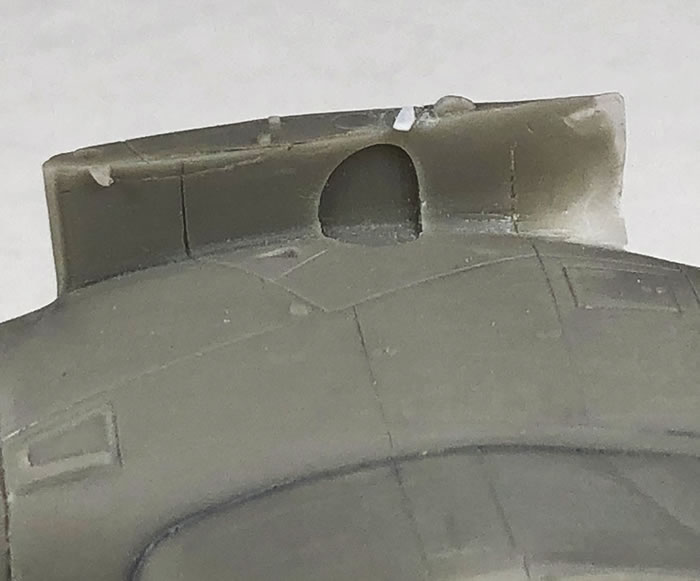
The third problem was that the main body had a short pour on the rear of the winglet areas, as shown in the photo.
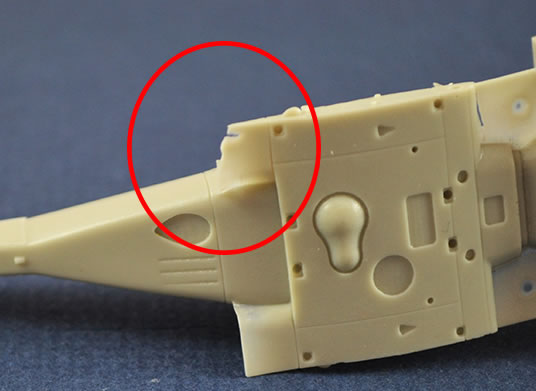
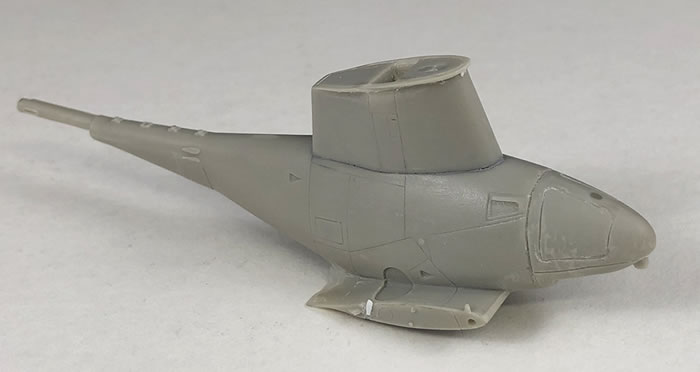
This is a very fine part so I spent a good deal of time building this area up with superglue and carefully filing and sanding it back to gain the same fine profile as the other side. This did take a good deal of time as I had to let the glue cure naturally to prevent tiny air bubbles that sometimes occur with using an accelerator. A final result photo is shown.
Once I had that sorted out, I was a simple job to assemble the completed body. The parts go together with little need for filing, although I did add a wipe of Mr Surfacer around the top seam to ensure there were no gaps at all.
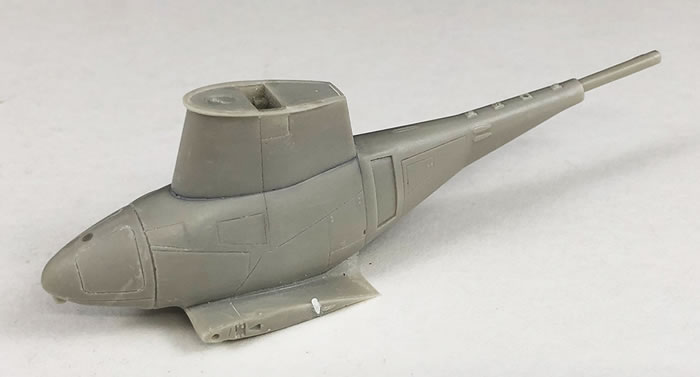
The next stage saw the addition of the FLIR unit and a range of larger aerials and parts to the body. All parts fitted beautifully into any recesses. I also added the photo-etched panel of the air intake filter on the port side. Whilst this part was happening my replacement parts arrived so it on full speed with the rest of the build.
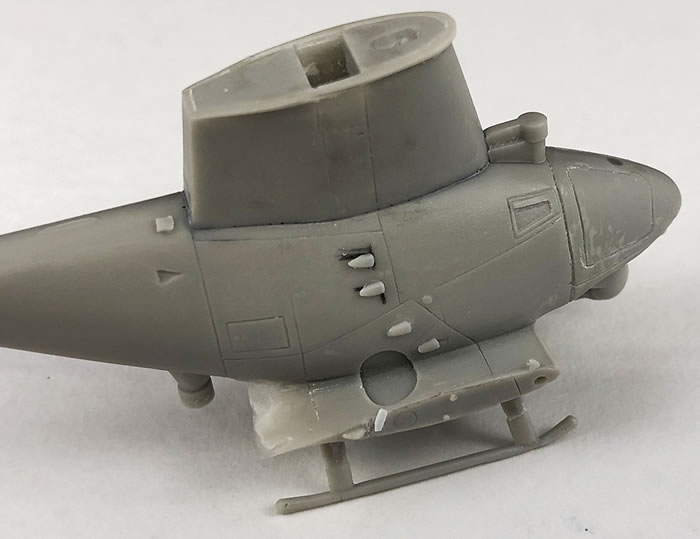
The building of the skid structure was quite fiddly but working carefully saw it come together well. A word of warning though…….the shock absorbers for front and back are a different size so make sure you follow your parts diagram to place them correctly, otherwise the drone will gain a nose down attitude on the ground.
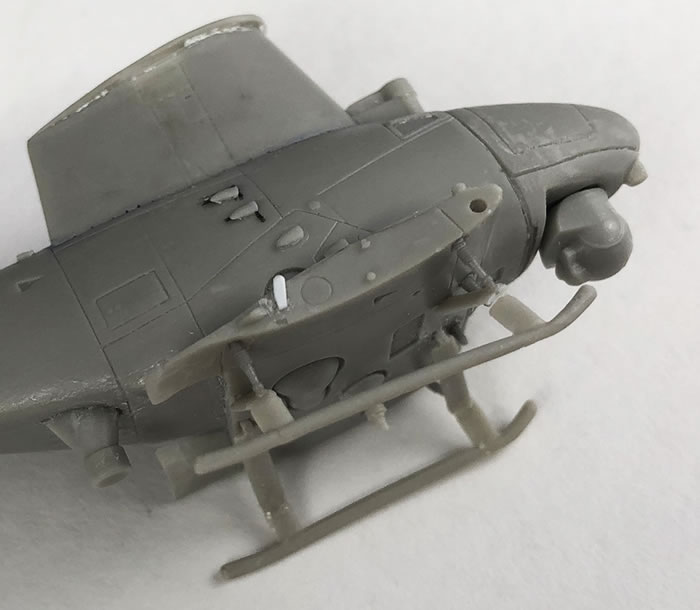
Following on from the undercarriage the air intake scoops are put on. You will need to draw up and get your locations points organised here, as there are no position markings on the body. I also added the smaller aerials under the body now they were not going to be knocked off. At the same time I added the tail unit which had the drone looking close to complete. The photo-etched blade antennas were added at this stage as well.
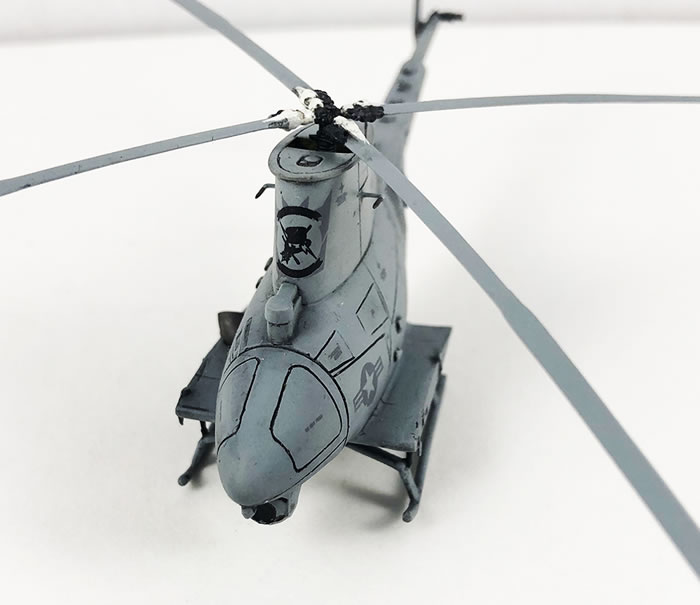
Priming then followed which saw some of the panel lines cleaned out as they had lost definition and a few flaws cleaned up. The rotor bay on the top had zinc chromate sprayed into and masked off for a coat of Model Master Ghost grey overall. The tail and shockers were painted black and it was on with a gloss coat, my often go to is the MM Metal Sealer which gives a near glass like finish, but I only use this when using MM paints.
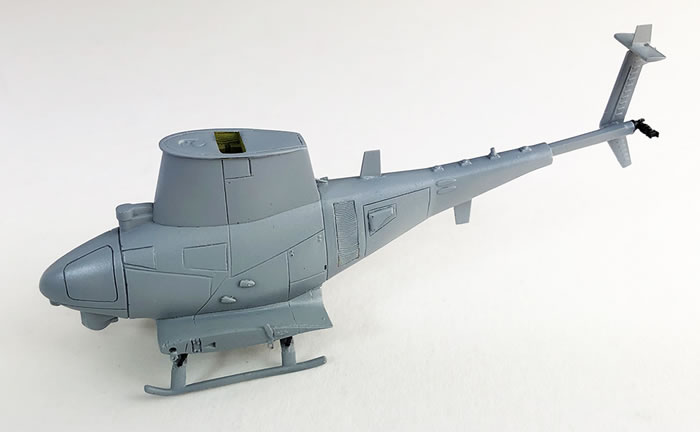
The decals were thin and went on well with the majority of them being the data stencilling. Another quick gloss coat and then a watercolour wash to give some depth to the panel lines. A flat coat finished the process off, again MM Flat lacquer which I love using.
As this was going on the etched tail rotor was given a coat of white, had the stripe masked off, a coat of red and then I created a mask master from some plastic card and cut the 4 curved masks need for the steel edge of the blades. This tail rotor is actually tiny to have this detail sprayed onto it and I was pleased with the final result. The blades were cleaned up and at that stage I decided that I was going to pin them to the tiny rotor head, so out with a No. 77 drill, some fine brass wire which I rolled under a steel rule to harden. This process certainly challenged both my eyes, thank heavens for magnifying head sets and my accuracy but eventually they all slotted together nicely. It was then onto the painting and detail painting which was straight forward. I did find that the detail on the blade grips and dumpers was very soft and so small to try and increase the level of detail so I did leave it as it was. I did spray the exhaust outlet and the external part on the bottom of the body with a MM burnt metal Metalizer.
Final assembly them occurred and this nice little drone chopper was complete.
This little drone was to refire the modelling mojo which was missing, due to family and house renovating issues for the last 10 months in which not models were harmed and nothing was built.
I wanted this completed to enter the Rotary Wing Category at the Melbourne Model Expo in June. This is an Open category so you are competing with all scale up to and including the new KH AH-6 so I was extremely pleased to gain a third place.
All in all a good build but it did take longer that I had expected, not only due to waiting for replacement parts but also to the fiddly nature of a small and fairly complex model.
Now onto my next big build...
Text and Images Copyright © 2019 by David Couche
Page Created 15 0October, 2019
Last updated
15 October, 2019
Back to HyperScale Main Page
Back to Reviews Page

|
 Home
| What's New |
Features |
Gallery |
Reviews |
Reference |
Forum |
Search
Home
| What's New |
Features |
Gallery |
Reviews |
Reference |
Forum |
Search