Hasegawa's 1/48 scale
F-16A Fighting Falcon
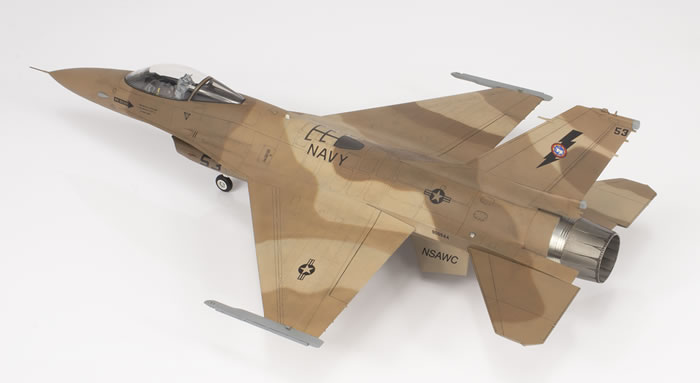
NSAWC, US Navy
by Jon Bryon
|
F-16A Fighting Falcon
|

Summary
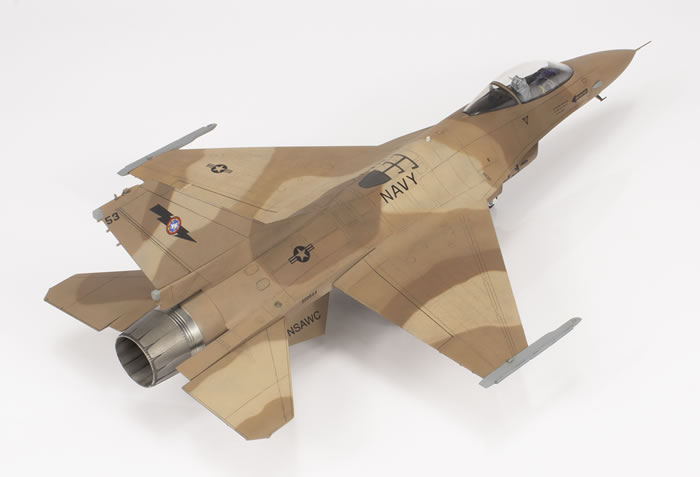
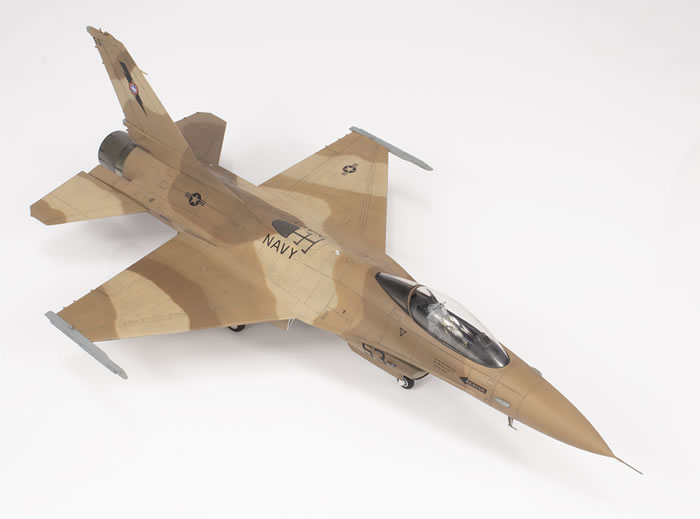
Hasegawa 1/48 Lockheed (General Dynamics) F-16A Fighting Falcon
with Quickboost resin seat, Eduard resin wheels and Kinetic decals
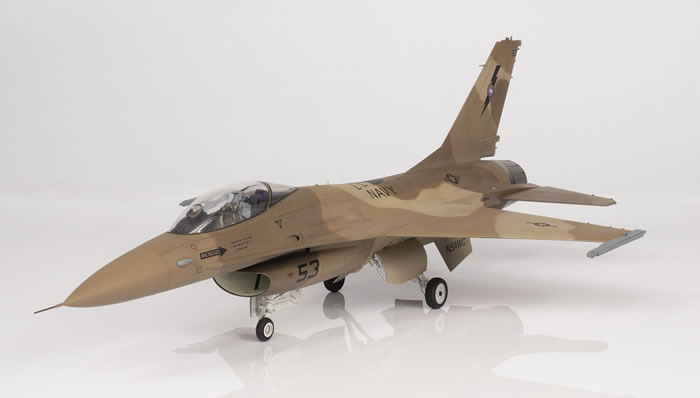
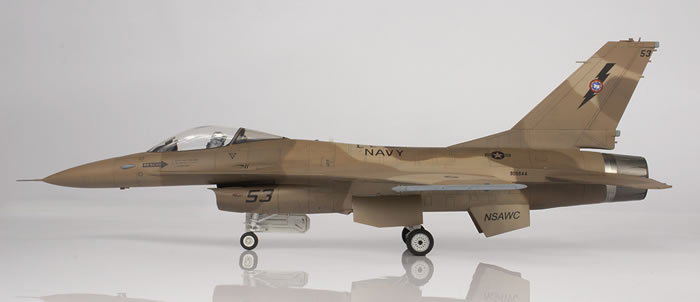
NSAWC, US Navy, USA 2004
Background
Although finished in US Navy markings, this was actually made from the ‘Royal Norwegian Air Force’ 1993 boxing of the venerable Hasegawa 1/48 F-16A kit. I believe the original tooling is from 1983.
I picked this up cheap from the second-hand shelf at the old Colindale Hannants a long time ago, back when the Hasegawa kit was by far and away the best 1/48 kit of the Fighting Falcon around. Sadly, things have not got much better, and when you think about it, it’s amazing that this aircraft has not been better served in this scale. Tamiya released their wonderful kit in 2007 but have somewhat poisoned the well by thus far deciding to limit their releases to the F-16C/N models. Those of us wishing for modern F-16A/B/D/E/I/V/etc. kits have had the option of using the Kinetic kits since 2008, but these are generally considered disappointing. I’d have thought a comprehensive range of well-detailed and accurate F-16s would be right up Great Wall Hobby’s street…
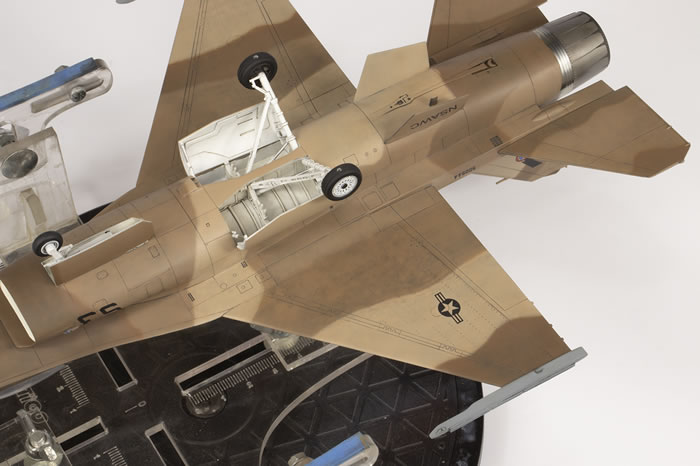
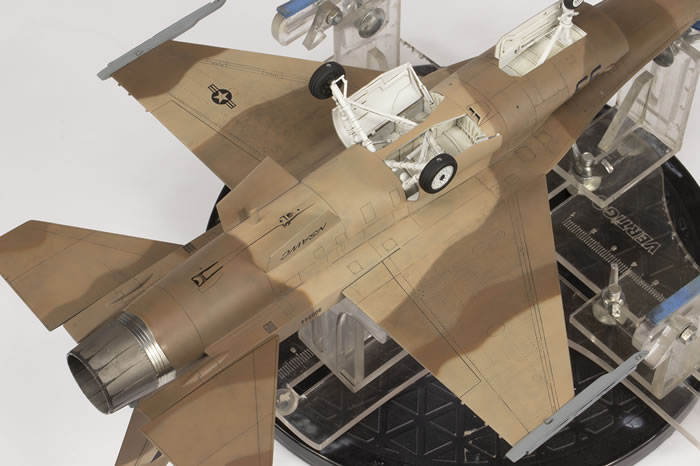
So here we are with the Hasegawa kit. This is actually the fourth I’ve built, but the last was 20 years ago, so it’s been a while. Nevertheless, the key points remained fresh in my mind: it’s very easy to install the landing bay bulkheads wonky and thus end up with a crooked airplane. Similarly, make sure you glue the wings on level!
On the positive side, the kit is pretty accurate, has nice surface detail and fits quite well. On the downside, the moulds were tired even by the 1990s (there’s a fair amount of flash, and the intake lip took a lot of cleaning up), the detail is very poor in places like the landing gear bays, the intake ducting is incomplete and there are tons of annoying ejection pin marks.
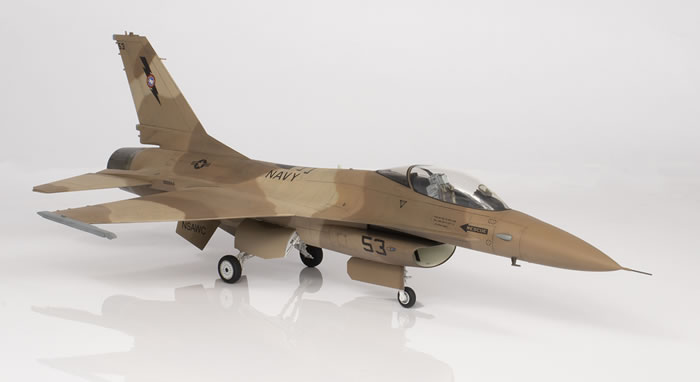
It was only last year when my thoughts turned to making this kit, and I decided the RNoAF was not really up my street. What I really got a hankering for was an F-16 in US Navy aggressor markings. I built the F-16N decades ago, but made a real hash of it, so this would be an opportunity for a second go. Problem is, decals for Navy aggressor F-16As are very, very difficult to get hold of. After plenty of internet searching, I came up blank on anything being still available, but then I had a brainwave. I discovered that Kinetic had made an F-16A/B two-in-one kit with US Navy markings for both. And so, for little more than the price of a decal sheet I had a new kit with nice decals for both versions. The B will make an appearance on these pages in due course, finished in blue.
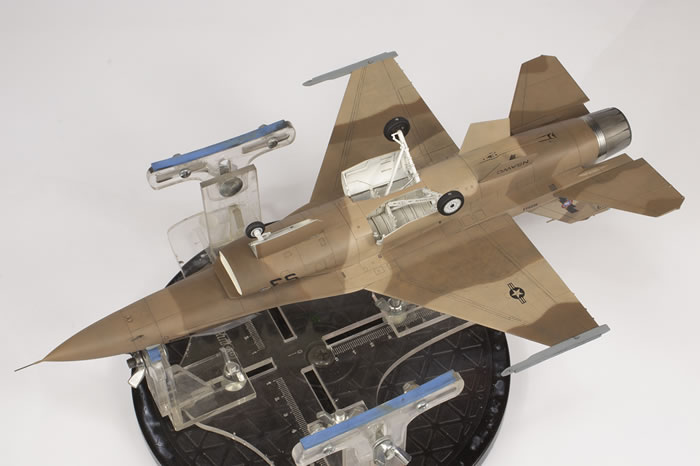
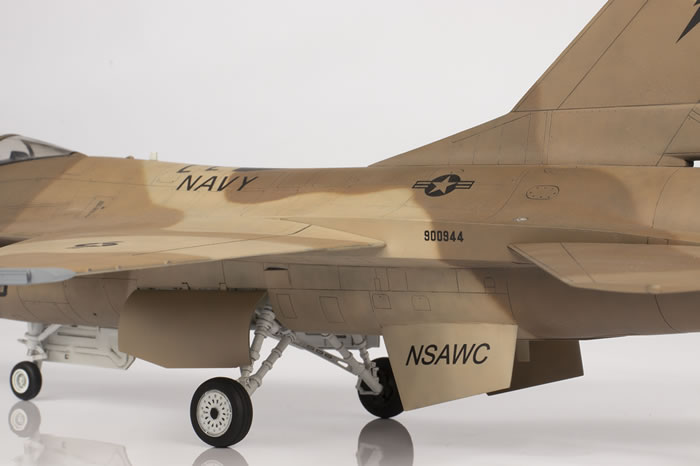
I limited aftermarket to a Quickboost resin seat and some Eduard resin wheels to replace those in the kit, which are inaccurate for this aircraft. The Eduard wheels were designed for the Tamiya kit and so I needed to hack away some of the legs where the main wheels attach. I did not bother replacing the nose wheel as the Eduard example was barely better than that in the kit and it’s locating hole was too small. Some spare etched brass missile rails were glued to the wingtip pylons. The plastic nose pitot was replaced with one made from telescoping brass tube by Albion Alloys and assembled using sweat soldering. The shape at the tip is not accurate (it’s more complex in reality), but close enough for me and better than what’s in the kit.
The Hasegawa F-16 is, relatively speaking, a very simple kit that goes together easily. The cockpit detail is nicely moulded but limited. Since I have found that my cockpits are largely invisible under a closed canopy and on the display shelf, I did not spend much time on it other than in painting up the seat.

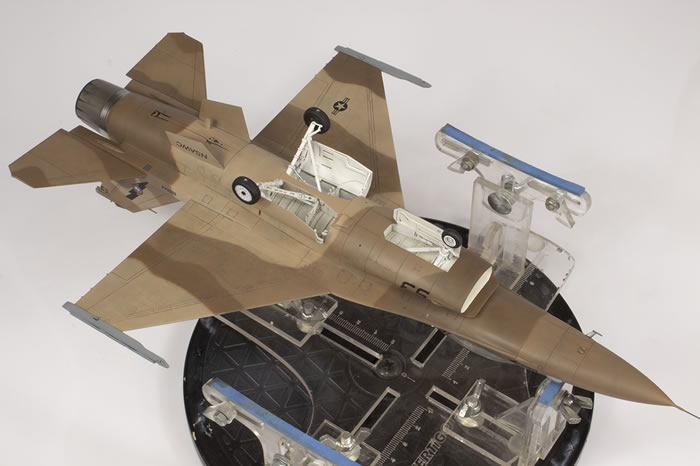
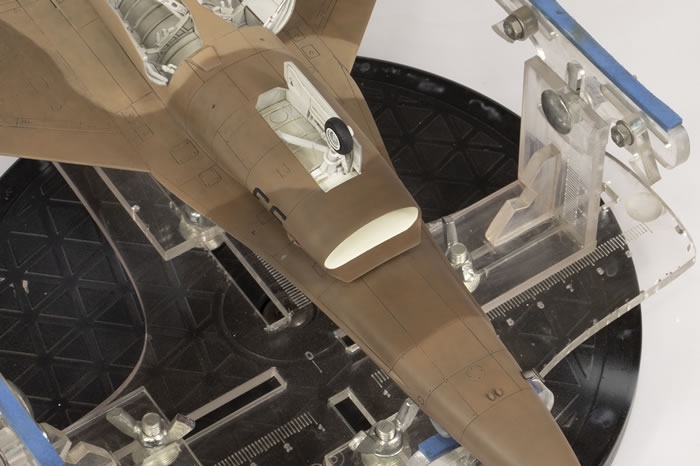
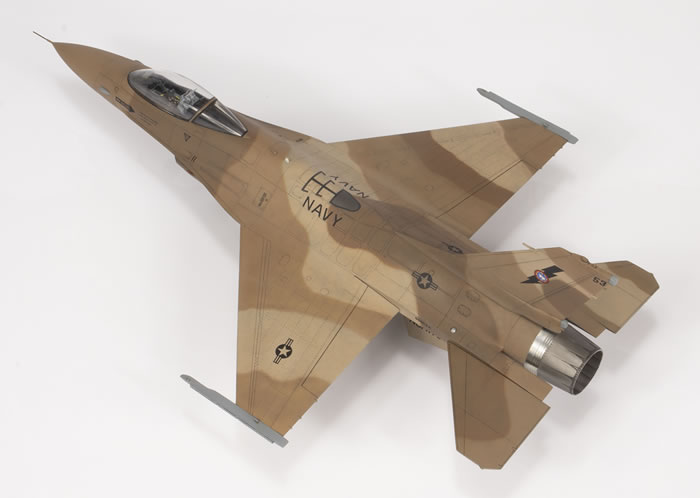
After closing the fuselage halves, I spent a long time on the intake, trying to get it seamless on the inside using Milliput and Mr Surfacer 500. I succeeded with the first 10mm or so – beyond that it gets a bit ugly. I know there are seamless intakes out there and I was too cheap to try one. In my view, this is the central problem with the kit. I also painted up the intake section before adding it to the lower fuselage. This allows the paint to be airbrushed between the lower fuselage and the upper side of the intake section without worrying about access or the paint going gritty in the turbulent air.
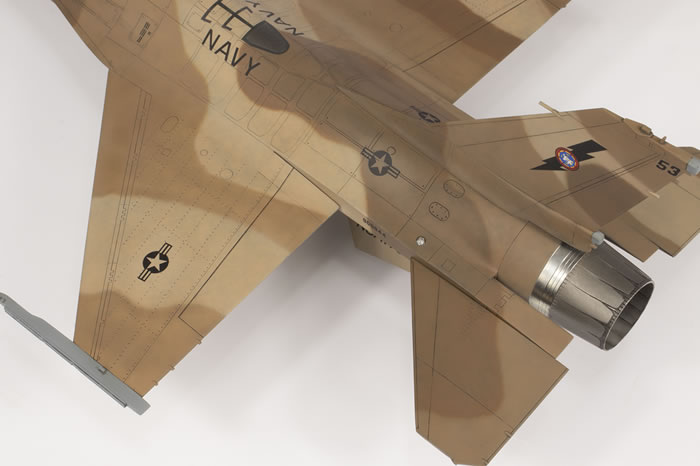
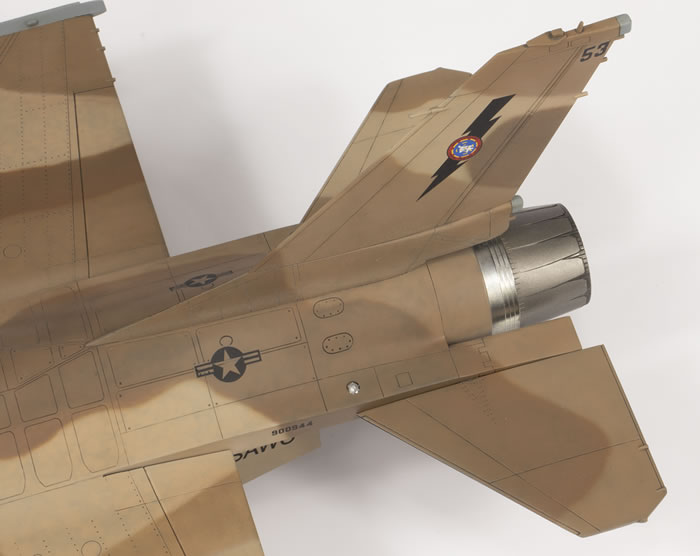
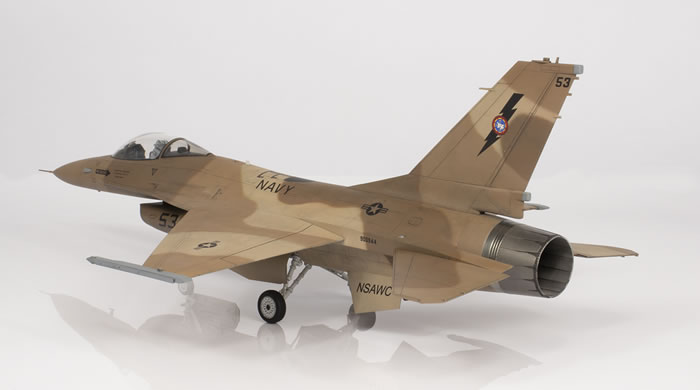
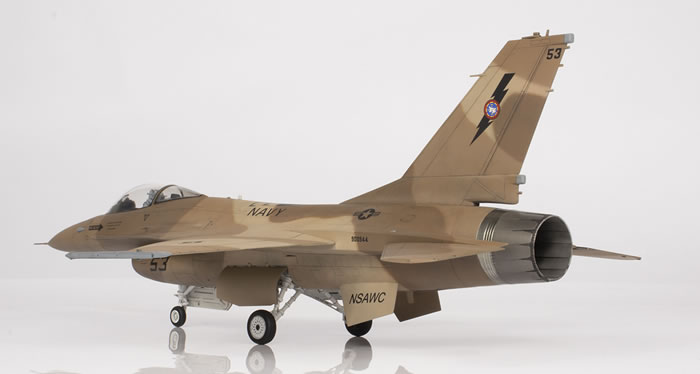
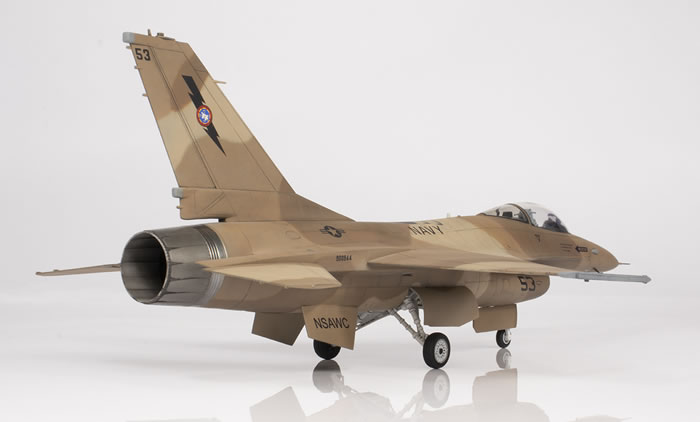
Likewise, I also painted up the exhaust before adding the tail, just to make life easier. The basis of the exhaust is Alclad Magnesium for the feathers and Alclad Stainless Steel over Mr Color GX2 Gloss Black for the rings.
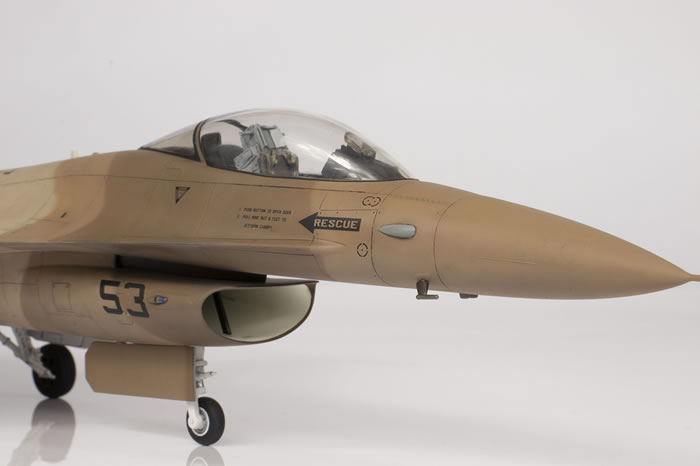
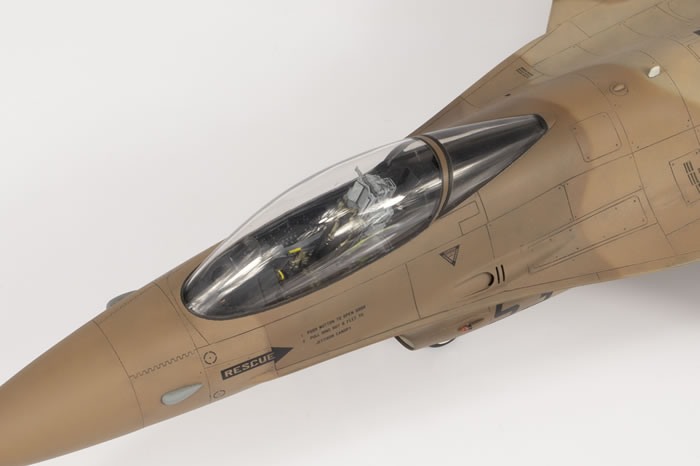
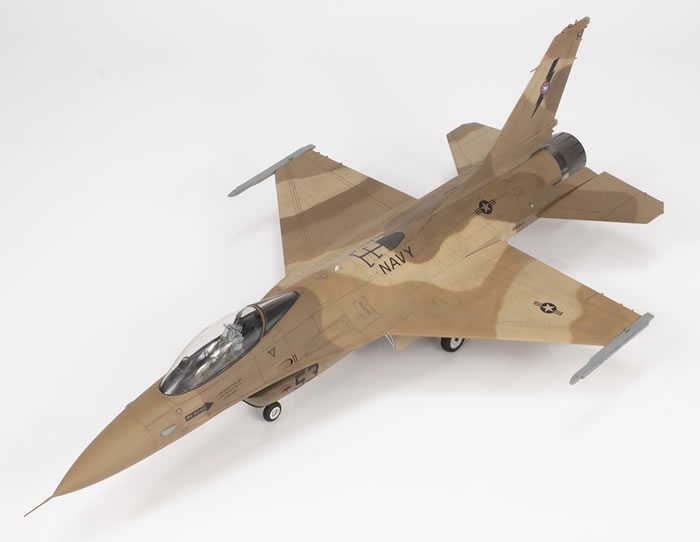
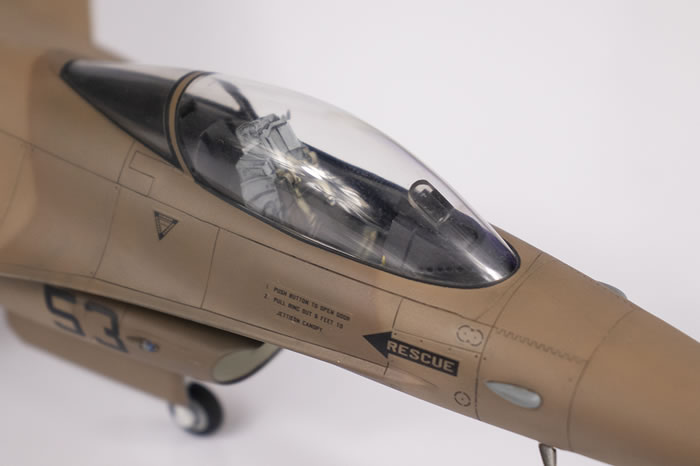
There are a few photos of this aircraft floating around on the internet. A couple are from 2004 and others from later on when the paint was far more degraded and the markings changed. Looking at the photos indicated to me that the front opening portion of the canopy was clearer than the rear, fixed part, which appeared to be tinted. The Hasegawa kit I had only came with tinted clear parts, as (it appears) did the previous boxings of this kit I had built, going by the lack of any colourless canopies in my spares ‘box’ (which in reality, of course, is many, many boxes).
After establishing that canopies from the Tamiya and Kinetic kit that I had to hand could not be used, I made an appeal on Britmodeller for an unwanted colourless Hasegawa example. I must therefore extend my thanks to Niels, who not only sent me what I needed all the way from Norway, but two of them after the first arrived crushed. I am a great believer in helping out fellow modellers around the world with parts and decals they might need, and have benefitted on many occasions, but I’ve also been able to help out; the same week I received the canopy from Niels, I sent some A-4 parts to Scott in America.
I primed the whole model with Mr Finishing Surfacer Black 1500 heavily thinned with Mr Leveling Thinner. The black strip around the canopy was masked using Aizu tape.
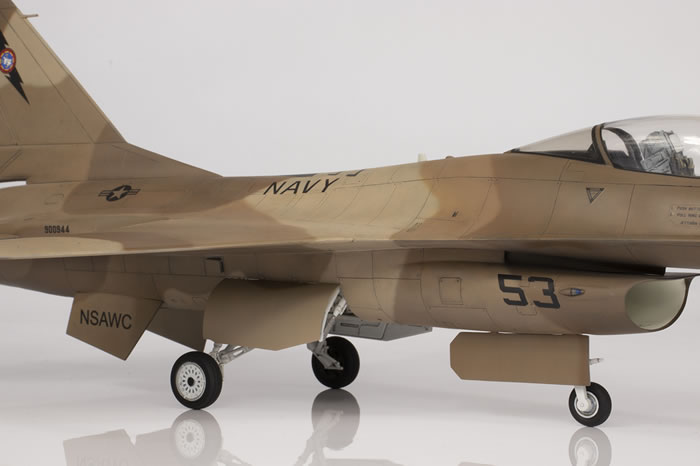
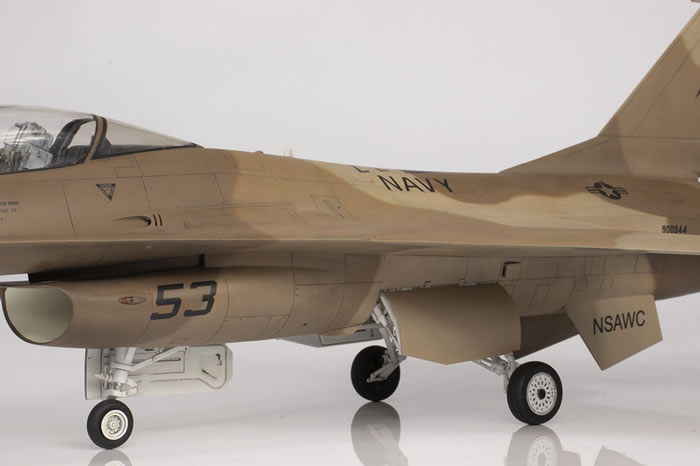
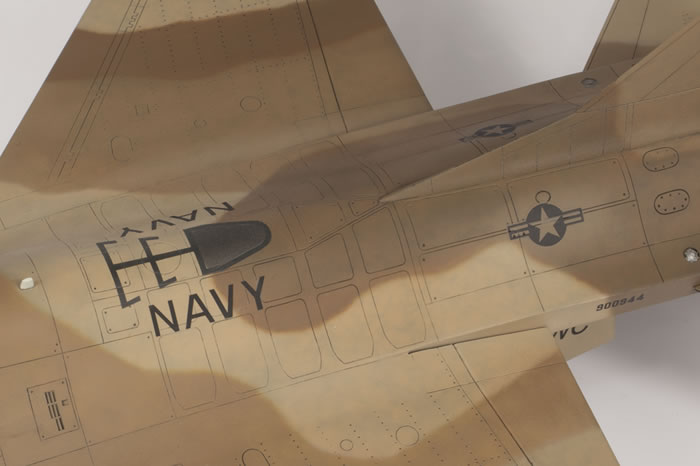
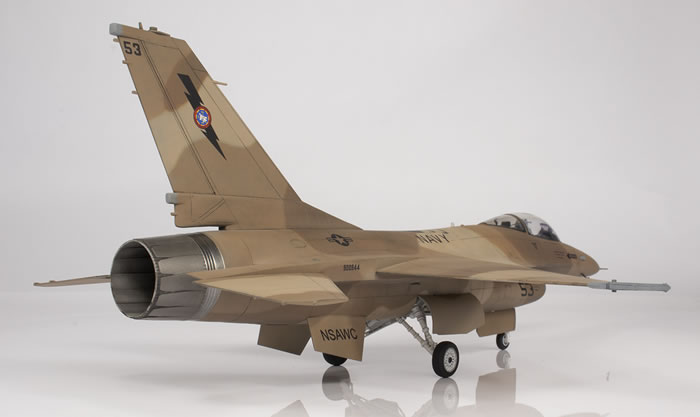
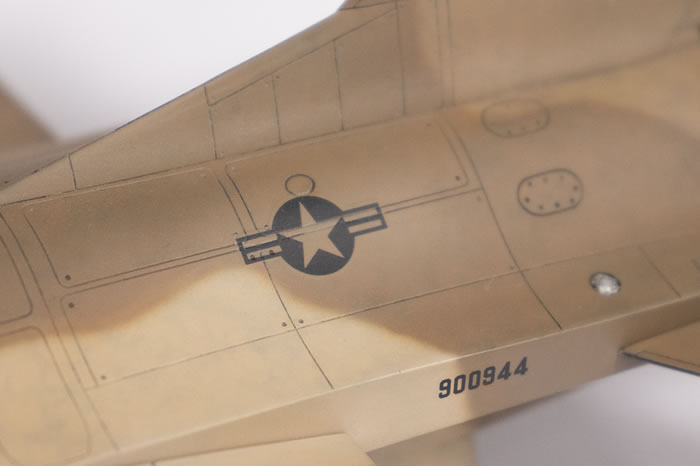
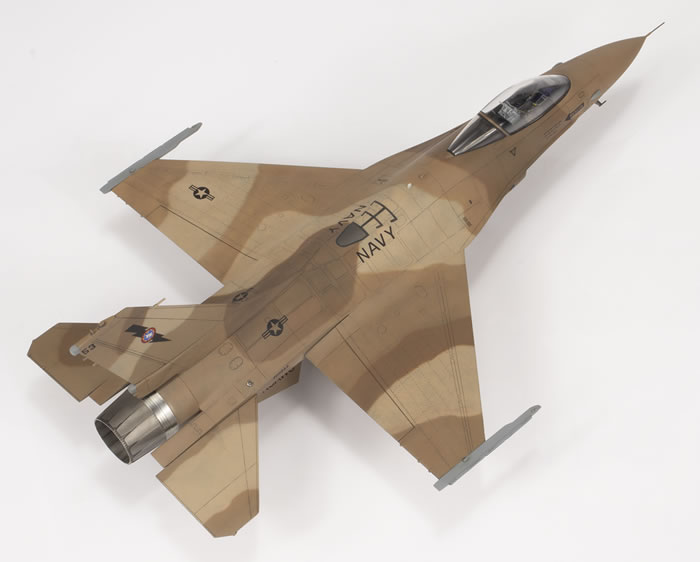
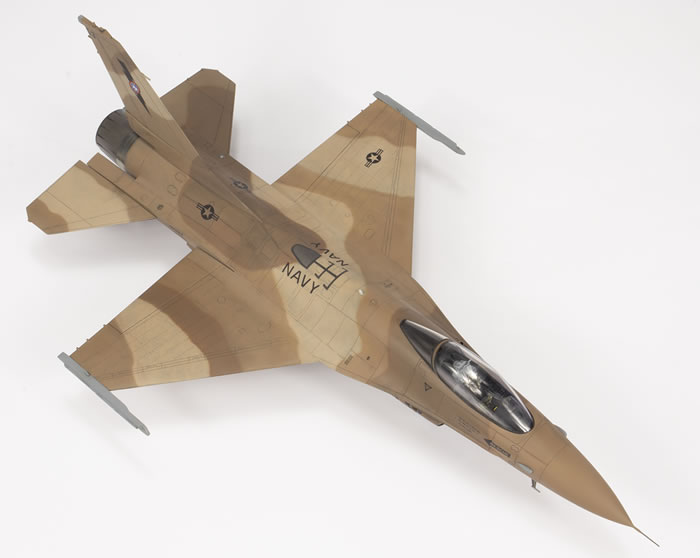
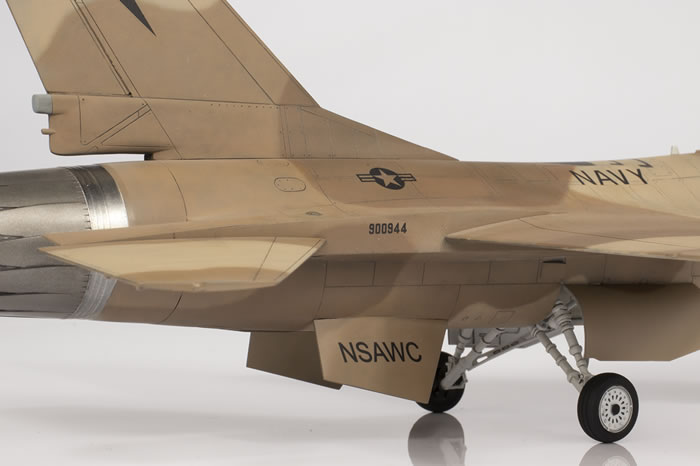
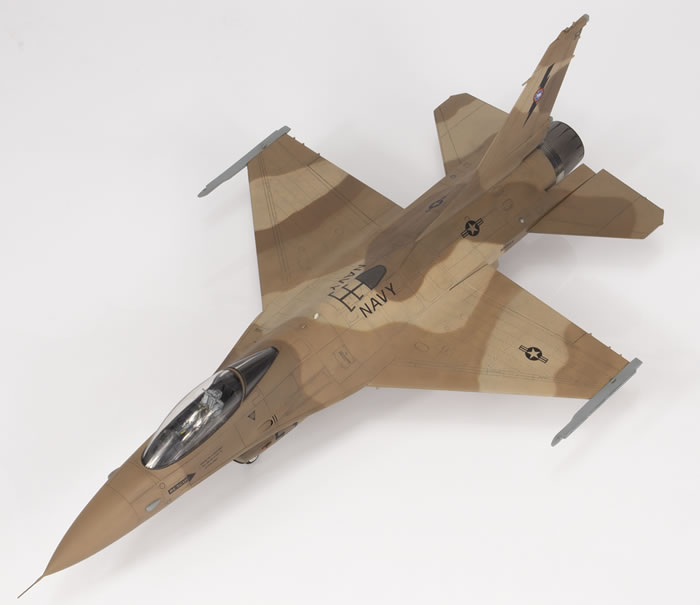
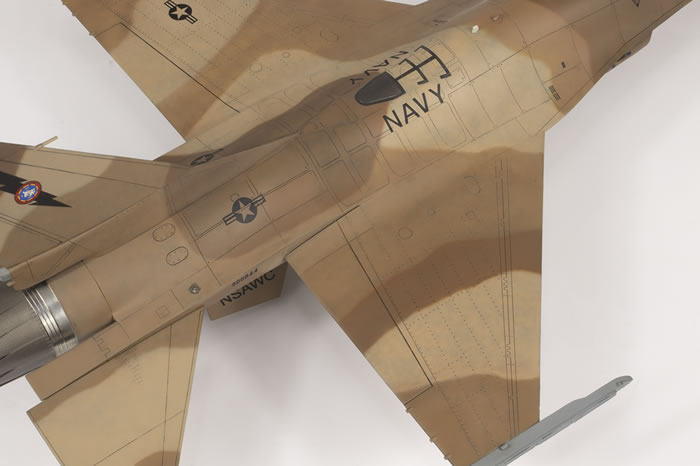
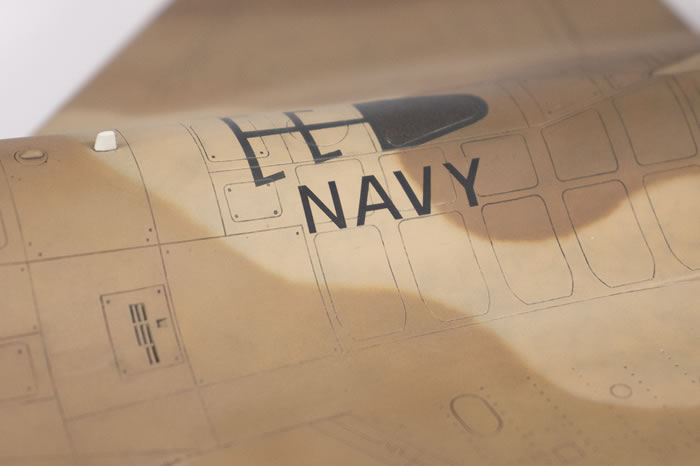
The decals, of course, come from the Kinetic kit. It appears that F-16A 900944 has worn at least three variations of the brown camouflage scheme, and that provided in the kit is for the first iteration from 2004. The scheme remained unchanged for the second version, but the colourings of the markings were altered from black to brown and the refuelling receptacle stencil was removed. The Kinetic markings were researched by Fightertown Decals and I assume it is Kinetic’s error that the plan markings for this scheme are completely wrong. Fortunately, most of the scheme can be pieced together from photos and Fightertown have the correct camouflage plan on a separate set; you can find the instructions for these also at various places on the net. I was unable to verify the scheme under the wings from photos.
All sources that I could find for this scheme – Kinetic, Fightertown, Eduard (who made markings for 900944 – their colour diagram is also wrong) – quote the three brown colours as FS30279, 30219 and 30140. I used MRP for the 30279 and 30140 and initially Mr Color 319 for the 30219. The latter seems a bit too ‘coffee’-coloured compared to the photos, so I switched to the Hataka lacquer version, which was less saturated. I airbrushed all three freehand with an Iwata Custom Micron-B, which left a slightly feathered finish – more so than I would like. I recognise that this is not quite accurate as the camouflage demarcation in real life looks pretty hard. Were I to recreate this scheme again, I would probably mask it using Blu-Tac or vinyl tape.
Kinetic do provide a decal for the refuelling door stencil, but of course it’s sized for the Kinetic kit. The Hasegawa decal was yellow and thick, so I decided to trace it in Inkscape and then cut a vinyl stencil using my Silhouette cutter. The marking was then airbrushed with Tamiya Nato Black. This worked pretty well, I think.
I found two photos of 900944 from 2004, the timeframe the kit markings purport to be from. I found the following differences between the decals and the real thing:
-
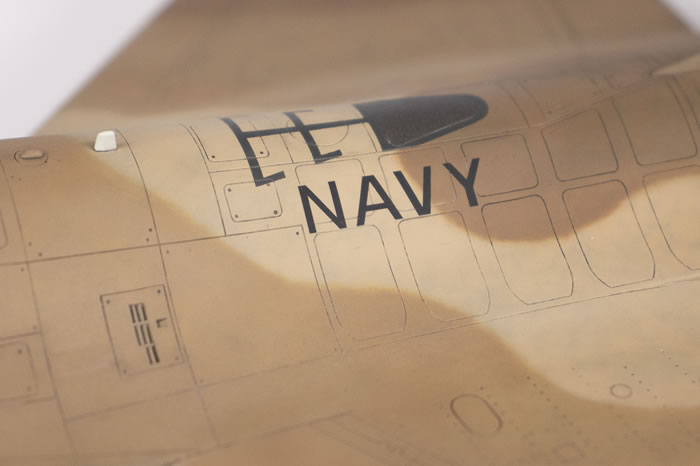
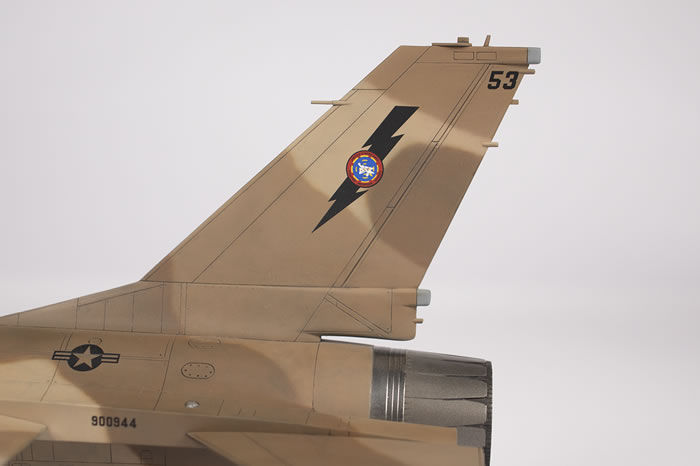
The tail flash is too big
-
The ‘RESCUE’ arrow is the wrong shape and has the wording in the wrong font
-
The stencilled instructions for canopy release are wrong. They should be smaller and in a dark grey box
-
There are no little arrow-shaped markings at the wing trailing edge/horizontal stabliser leading edge on the fuselage sides of the real thing
-
The circular stencils around the nose should have a pale coloured dot in the centre, not a black dot.
I went with the kit decals unchanged, but I think they’re a bit wrong.
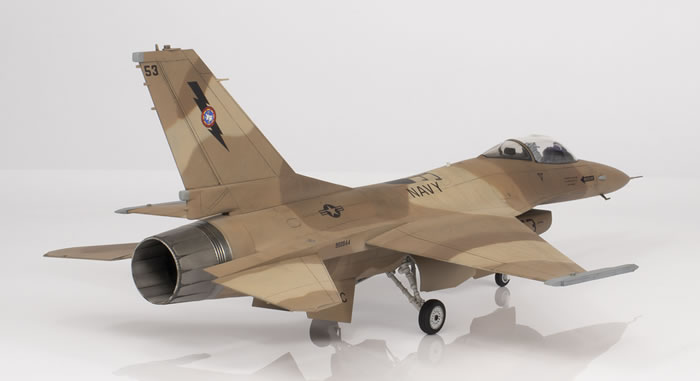
The final finish is Mr Color GX113 matt clear. I thinned this with Mr Rapid Thinner, as recommended by some online pundits, and was aiming for a pretty flat finish as photos seemed to indicate. However, I think this thinner flashes too quickly and the clear went a little bit chalky in some places. I’ve never had this happed before when using Mr Leveling Thinner, and didn’t mind too much in this case as it adds to some of the tonal variety in the paint. What was a problem was that it dried gritty around some of the perpendicular areas, like the base of the tail. Initially I thinned it 60% with thinner and later tried 70% thinner. The effect was the same in both cases. In future I think I shall revert to Mr Leveling Thinner as for me it dries smoother and just as flat.
Some of the details on the Hasegawa kit are pretty clunky and remained unchanged, like the solid plastic position lights on the missile rails, the top of the tail and the circular ones on the upper rear fuselage. I experimented with some Molotow chrome covered by UV-curing resin over the latter. This didn’t work: the resin dissolved the chrome and it was all a bit of a mess.
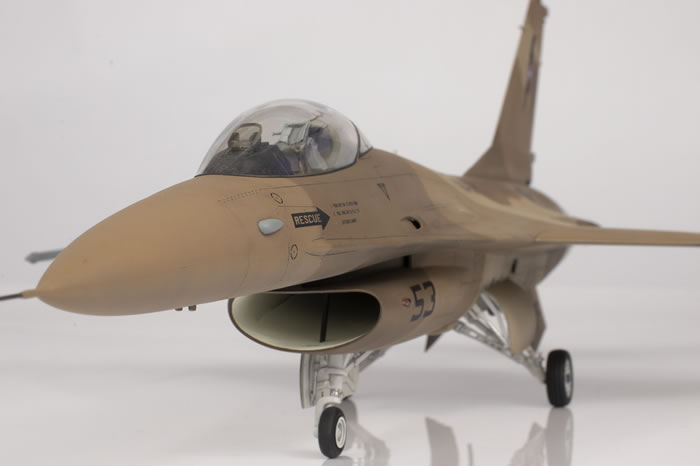
The final result is a pretty unexceptional build, but I do love this marking scheme and I think it’s striking enough to distract the viewer (or at least me!) from some of the rough edges of the finish and the basic nature of the kit. Sadly, it you want an F-16A in 1/48 I’m not sure you can do any better than the Hasegawa kit, but next up will be a Kinetic F-16B, and maybe that will change my mind.
For more articles like this please visit my website at http://www.jonbryon.com
Text and Images Copyright ©
2020 by Jon Bryon
Page Created 22 December, 2020
Last Updated
23 December, 2020
Back to
HyperScale Main Page
|
 Home
| What's New |
Features |
Gallery |
Reviews |
Reference |
Forum |
Search
Home
| What's New |
Features |
Gallery |
Reviews |
Reference |
Forum |
Search