Canopy Masking
Tips & Tricks Part Two
Canopies With Round and Oval Corners
by John Miller

Canopies With Round and Oval Corners |
In Part 1 of Canopy Masking Tips and Tricks, techniques for maskingbubble canopies were presented. In Part 2, we’ll expand on these techniques and apply them to masking canopies with round- and oval-shaped corners. Canopies with round/oval corners are pretty common in aviation so sooner or later the average scale aircraft builder will be challenged with masking one. Canopies with rounded corners are especially challenging if you subscribe to the art of cutting the masking tape after it’s applied to the canopy. The challenge of cutting around rounded corners always exceeded my ability with an X-Acto. That said, with a couple of easy tricks, masking canopies with rounded corners is quite easy.
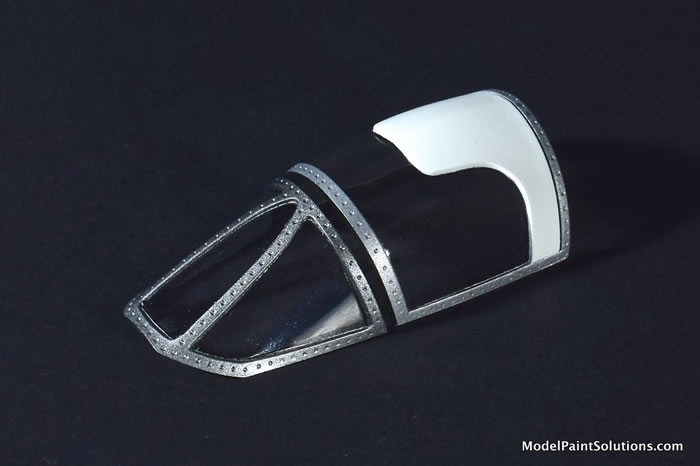
A good example of a canopy with multiple rounded corners is that of the Lockheed U-2
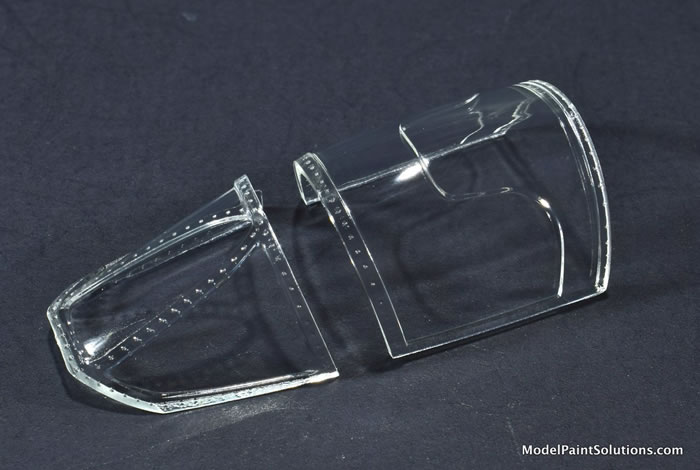
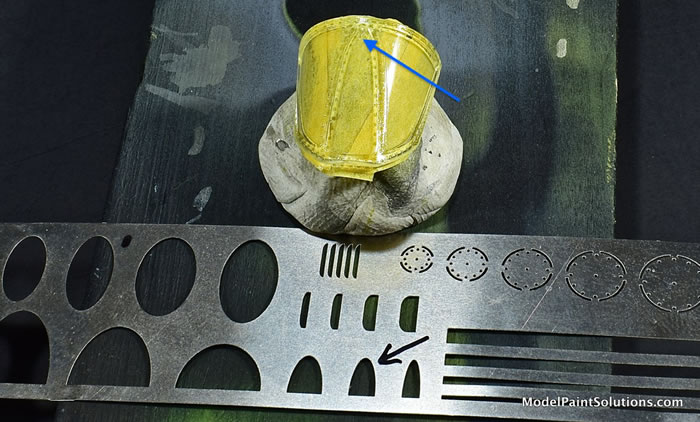
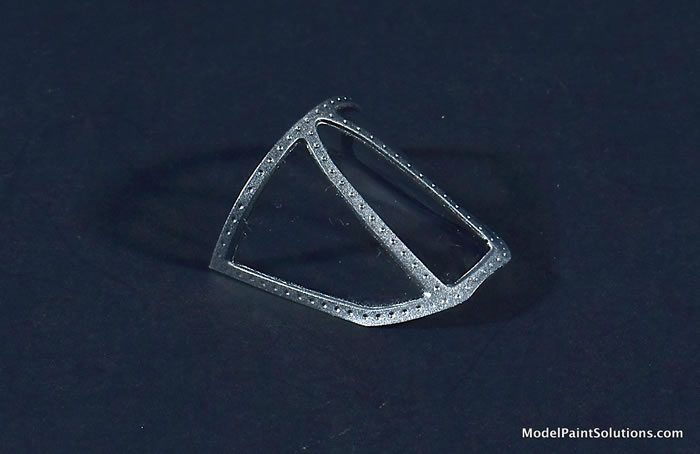
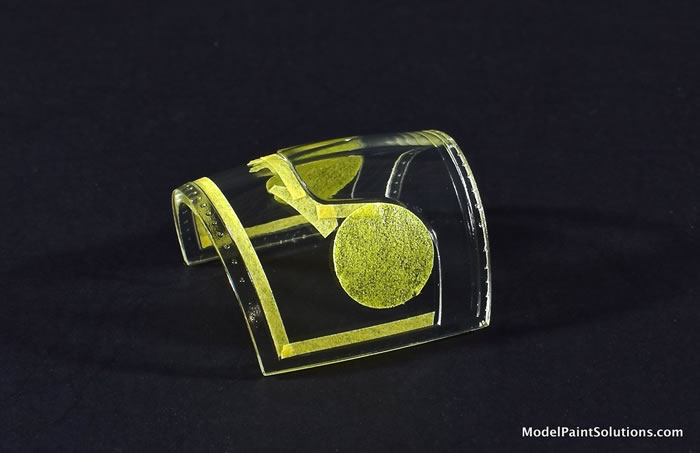
I’ve enjoyed building the new 1/48th scale U-2A from AFV Club and fortunately for me, the canopy was ready for masking and paint. So, with the front portion of the canopy immobilized on a building board, I began the masking process by finding a PE stencil with an oval-shaped guide of the appropriate size for cutting a mask that would fit the apex of the front wind screen (Arrow). Windscreens with with an oval-shaped apex are pretty common and this trick makes them a breeze to mask.
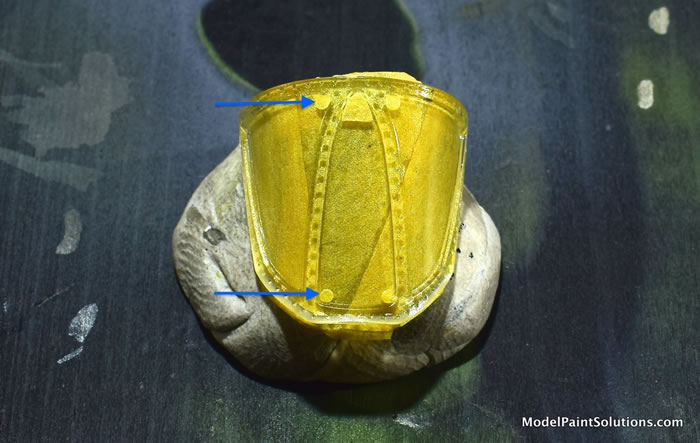
Once the apex of the front windscreen was masked, the rounded corners on the front and side panels were masked using small, die-cut circles.
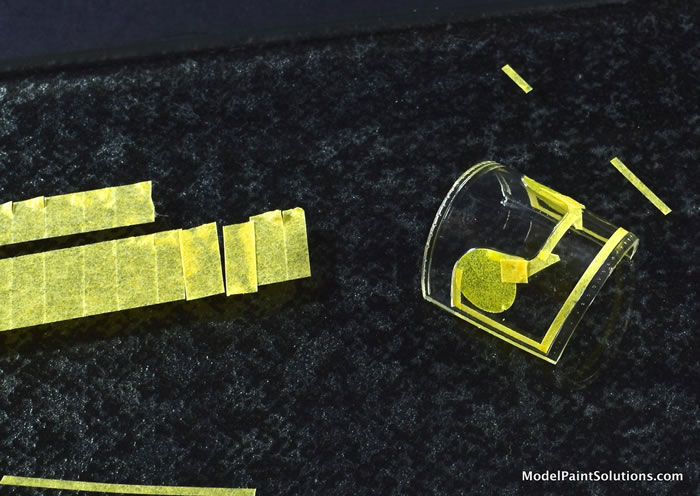
Circles as small as these are difficult to cut cleanly by hand. Fortunately HIQ Parts produce quality sheets of die-cut circle and square masks in three handy size ranges: Small (1.0-2.8mm), Medium (3.0-4.6mm), and Large (4.8-6mm).
With the corners masked, 0.40mm Aizu Micron Masking tape was used to “connect the dots” so to speak, producing outline masks for the front and side panels.
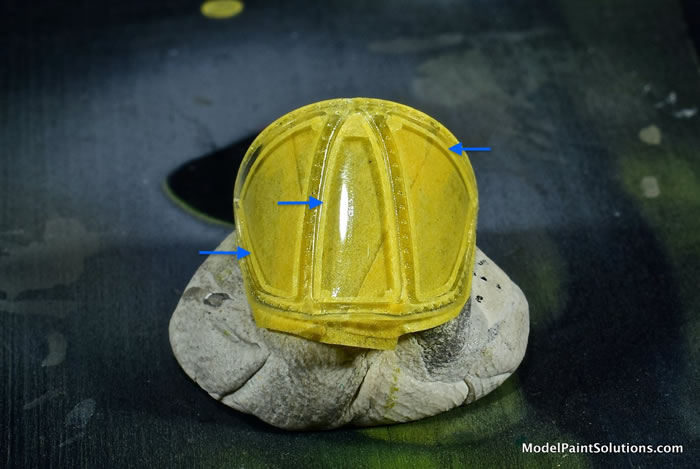
The use of such thin tape permits the contours of the panels to be easily followed versus a wider tape. Moreover, the 0.40mm wide tape is sufficiently thin so as to not entirely cover the small corner circles. This allows the strips to be burnished onto the circles to ensure a paint-tight seal where they overlap.
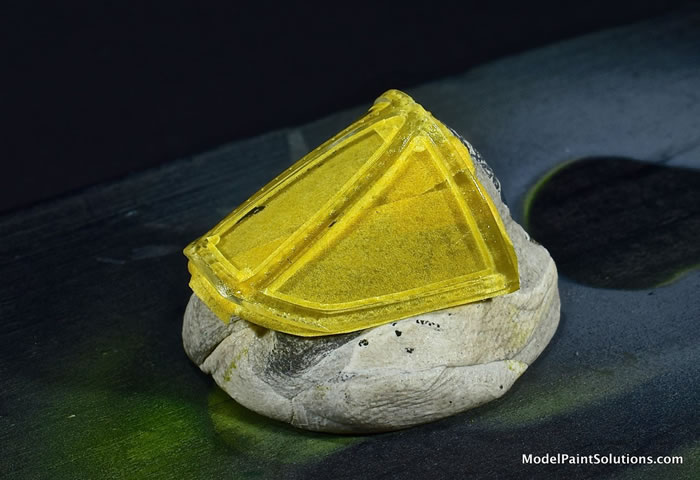
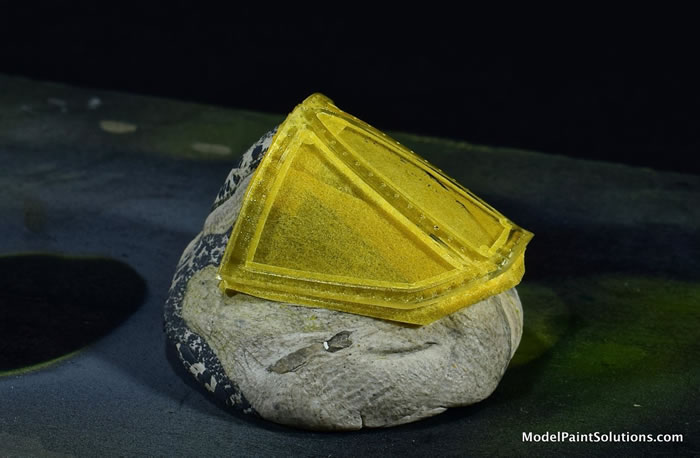
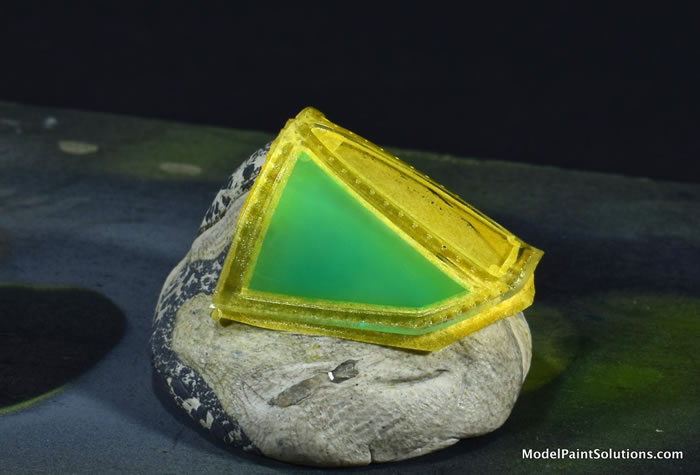
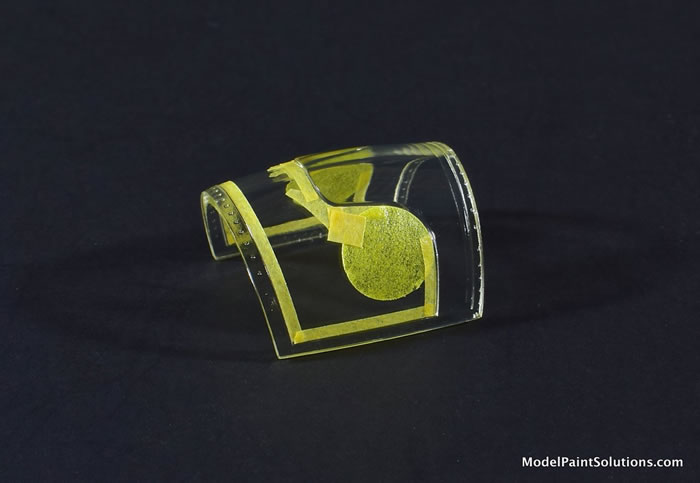
Once outlined with tape, each clear panel was easily filled in with a few drops of Mr. Hobby Mr. Masking Sol R applied with a tooth pick; quick and easy, guys :)

Note that the Masking Sol R was applied over the masking tapes to ensure a paint-tight seal
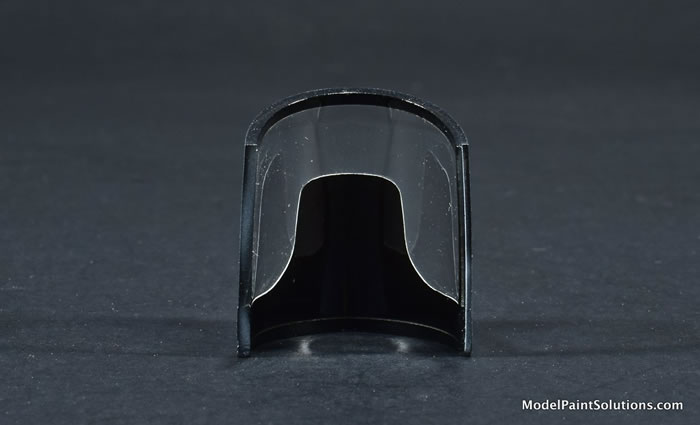
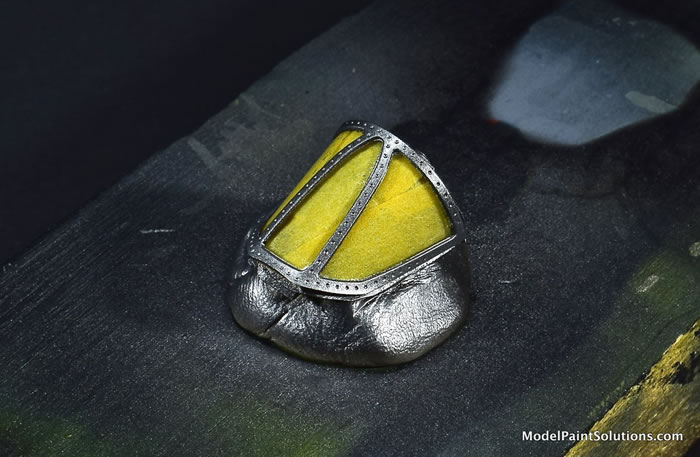
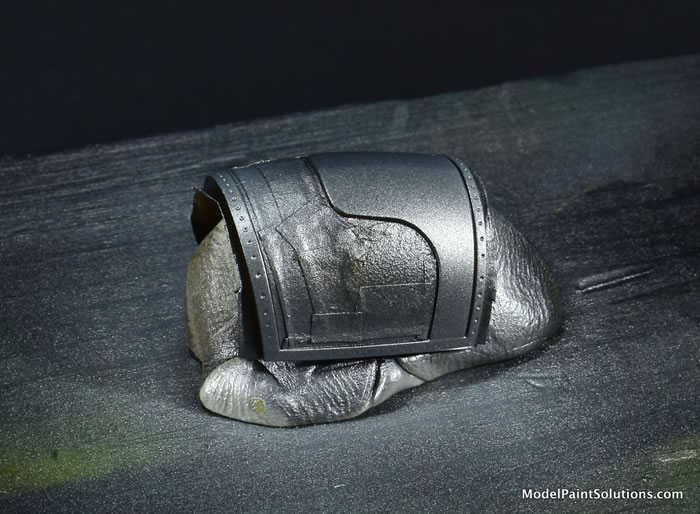
With the canopy still affixed to a building board, it was sprayed with Mission Black Primer followed by Mission Aluminum. After drying for ~30 minutes the tapes were carefully removed.
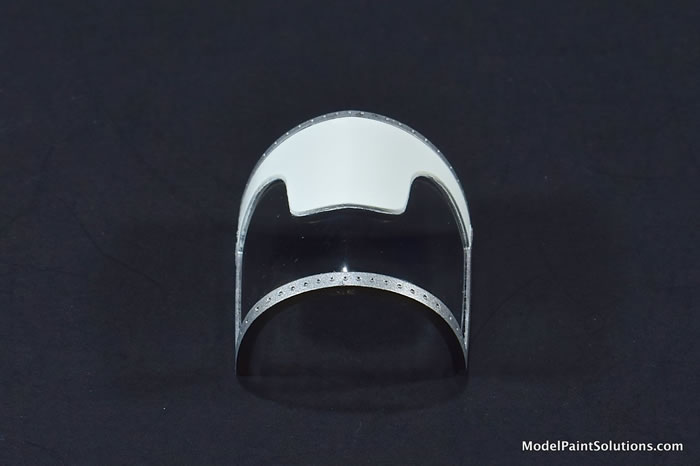
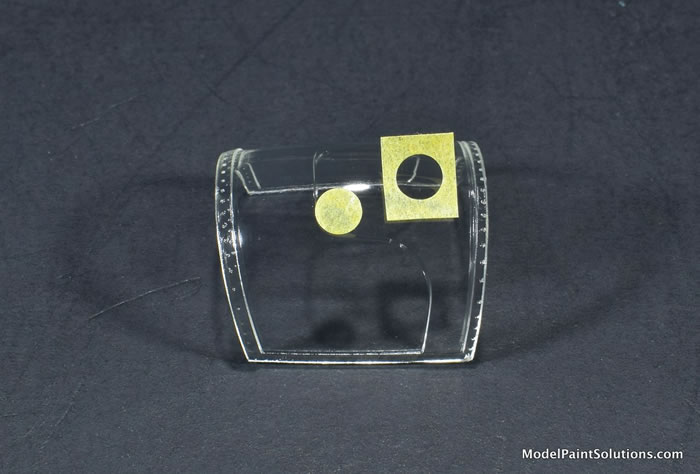
With the front portion of the canopy set aside to cure, I moved on to the rear portion with it’s curved white sun shield. To start the masking process a die-cut circle (HIQ Parts) was found that matched the radius on the corners of the sun shield. The circles on the HIQ Parts sheets are arranged within correspondingly sized die-cut squares.
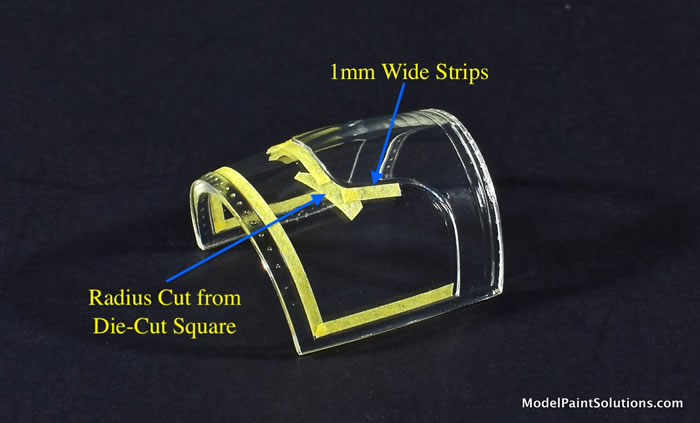
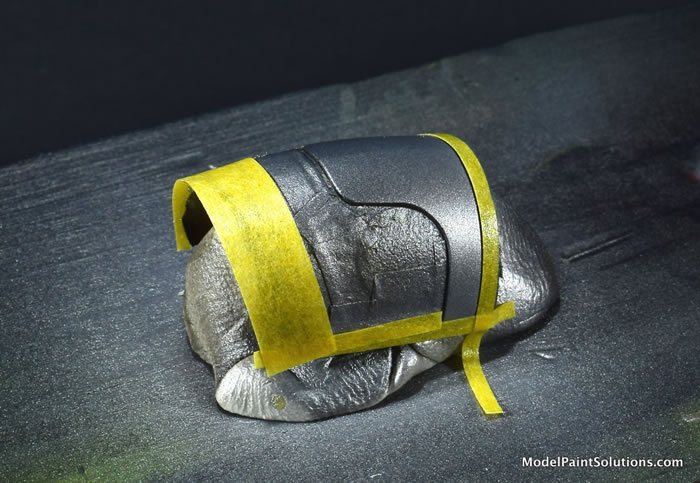
A portion was cut from corresponding die-cut square that comprised ~1/5 of the total radius of the inner circle. This piece matched the rounded corner of the sun shade. With corner masks applied and burnished in place, strips of 1mm wide Aizu Micron Masking Tape were applied to the straight portions of the sun shield as well as the vertical and horizontal frames.
A PE stencil with a circle that matched the radius of the sun shield on the sides of the canopy was found and used to produce a corresponding circle mask cut from Tamiya tape
With the addition of more strips of 1mm tape, an outline mask for the clear portions of the canopy was completed.
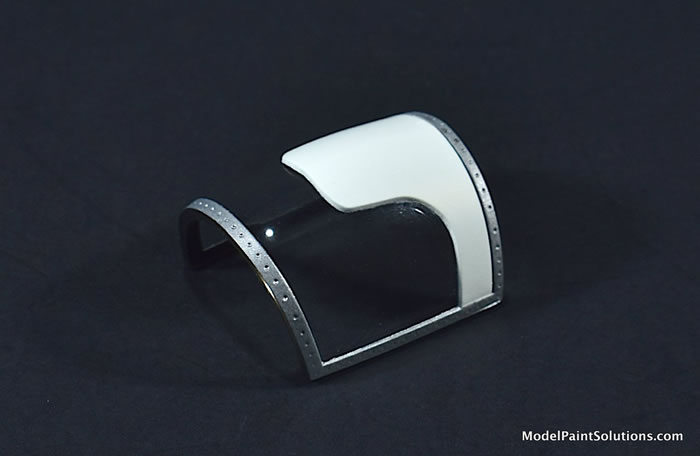
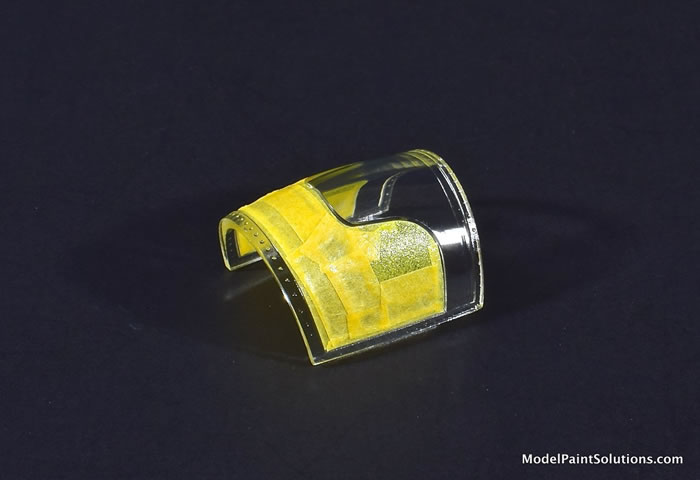
At this point it would be quite easy to simply fill in the outline mask with Mr. Hobby Mr. Masking Sol R as was done with the front portion of the canopy. Instead, I opted to mask the remaining portion with small squares and strips of Tamiya masking tape.
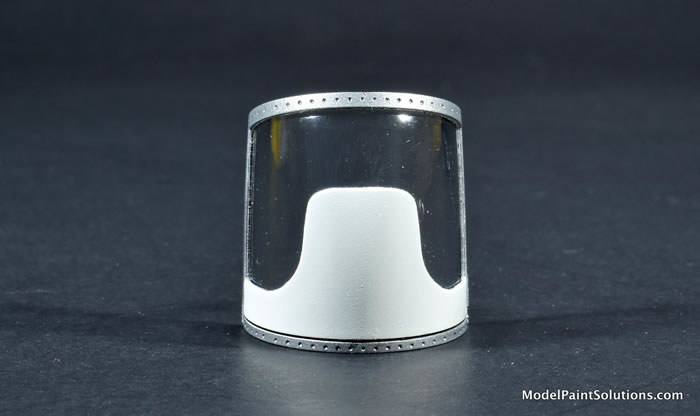
With the canopy affixed to a building board, it was shot with Mission Models Black Primer followed by a Mix of Mission Aluminum and Dark Aluminum.
Prior to shooting the sun shield white, the canopy frames were masked with strips of Tamiya tape
The sun shield was then shot with a mix of Mission White and Elfenbein (off-white) and following ~30 of drying time, the tapes were carefully removed.
When combined with the front portion of the canopy the result is pretty convincing. Now, I just have to finish a U-2 to put under it!
Thanks for reading along. I hope you found something useful. With the aid of a good assortment of PE stencils, Tamiya tape, and some patience, canopies with round- and oval-shaped corners can be masked with out too much trouble. When the clear panels are sufficiently small, I prefer to outline them with tape then fill the outlined area in with Mr. Masking Sol R. Since Masking Sol R is a liquid and obeys the law of gravity, use of it on larger canopies requires careful application to ensure good coverage without pooling in corners and along taped seams. In Part 3 we’ll take on masking “bird-cage” canopies; often a source of frustration for new builders but easily done with a few tips and tricks.
—John
For more on this review visit Modelpaintsolutions.com
https://modelpaintsol.com/guides/canopy-masking-tips-round-oval-corners
Text and Images Copyright © 2021 by Model Paint Solutions
Page Created 14 January, 2021
Last updated
15 January, 2021
Back to HyperScale Main Page
Back to Reviews Page

|
 Home
| What's New |
Features |
Gallery |
Reviews |
Reference |
Forum |
Search
Home
| What's New |
Features |
Gallery |
Reviews |
Reference |
Forum |
Search