AFV Club's 1/48 scale
AIDC F-CK-1C Ching Kuo
by Jon Bryon
|
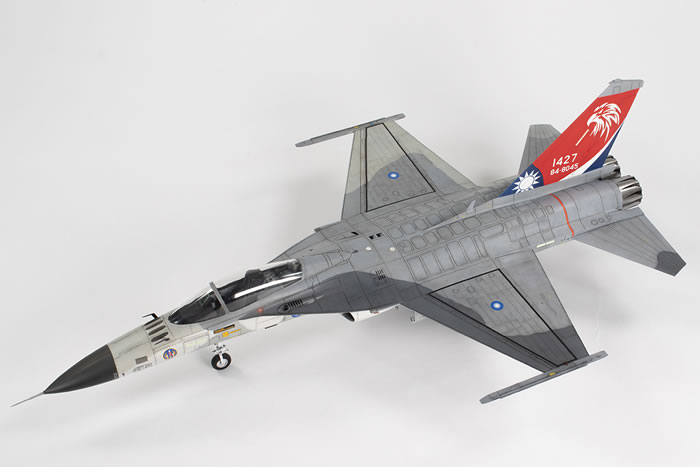
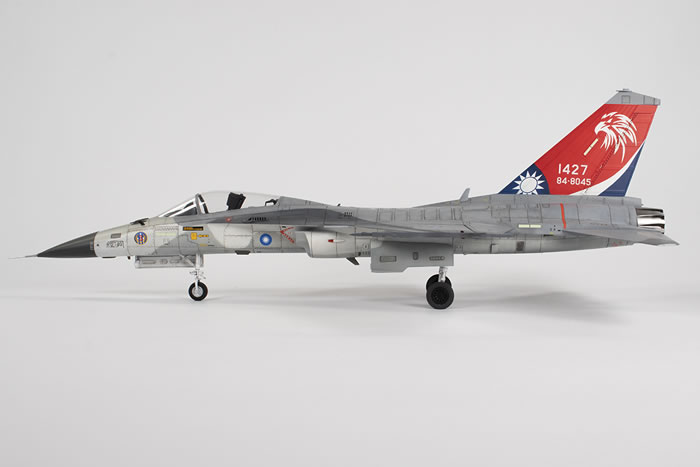
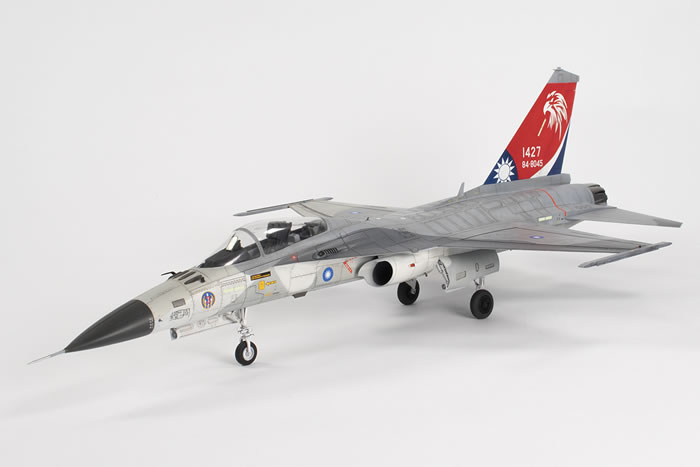
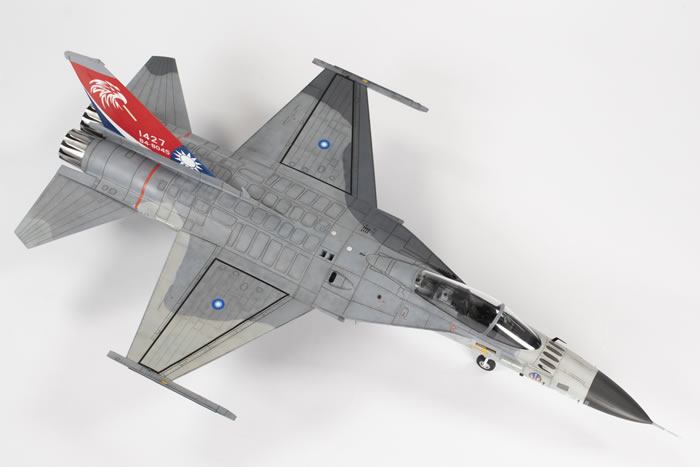
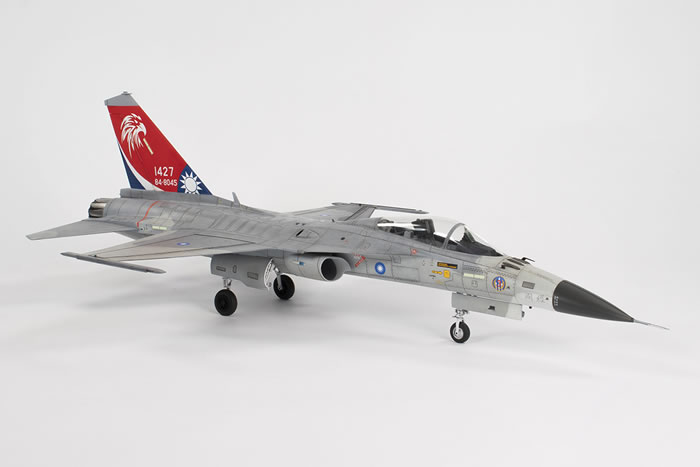
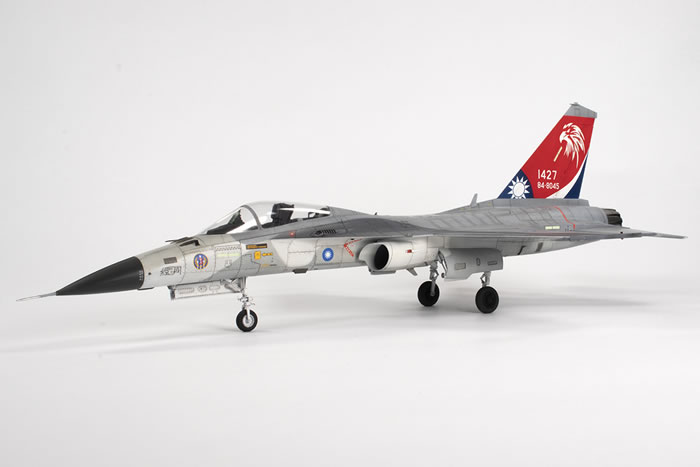
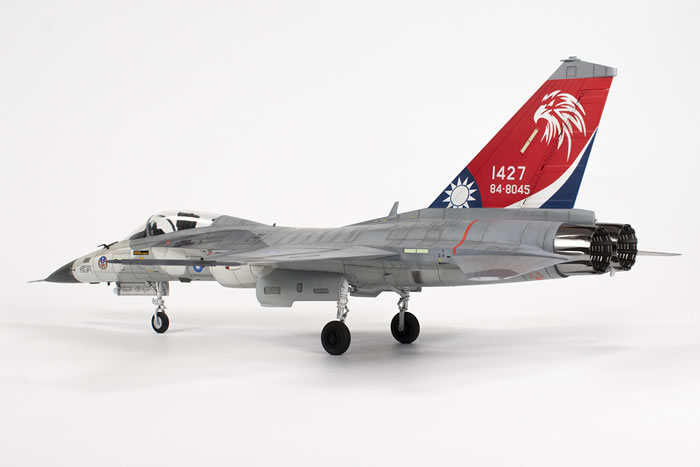
AIDC F-CK-1C Ching Kuo
7th TFG, 427th TFW, Republic of China Air Force, Taiwan, 2017
|

When John Chung makes a model of something, it’s usually pretty much the definitive word on that subject in that scale. Everything else sits in its shadow. If you want to see this kit made to the highest possible standard, I recommend you seek out his build on the internet or in Military Illustrated Magazine. If you want to see what an average modeller can do with it in a couple of months, read on…
The unfortunately named F-CK-1 is kitted by two manufacturers in 1/48: Freedom Model Kits and AFV Club. They’re both pretty expensive in the UK and I only ended up getting this as it was being sold off a little cheaper by Hannants due to a damaged box. It turned out this was a bit of a false economy.

In the box the parts look quite nice at first glance. There is a small fret of photo-etch, which is not terribly useful and doesn’t include parts really suited to the medium, like a HUD and seat belts, and a couple of pieces of resin to update the cockpit. The plastic has a fairly rough texture to it, which is par for the course these days, and would benefit from a thorough rubbing down after priming. I couldn’t be bothered, but the finished article would have benefitted. The surface detail is quite chunky and fades significantly towards the edge of the moulds. The decals are printed by Cartograf, but look thick on the sheet, with a matt finish and a very wide margin of carrier film.
This kit only spent a couple of years in the stash before I pulled it out to conclude my ‘F-16 and children’ series. Opening the box revealed that was not all that was damaged. The LERX is moulded incredibly fine and is consequently very fragile; mine had split and warped in several places. The radar warning antennae, which lie at the LERX/wing root junction, had also split away from the fuselage and warped upwards. Finally, there was a hairline crack in the forward part of the canopy. There’s nothing like an un-fixable problem to kill one’s mojo, but we press on…
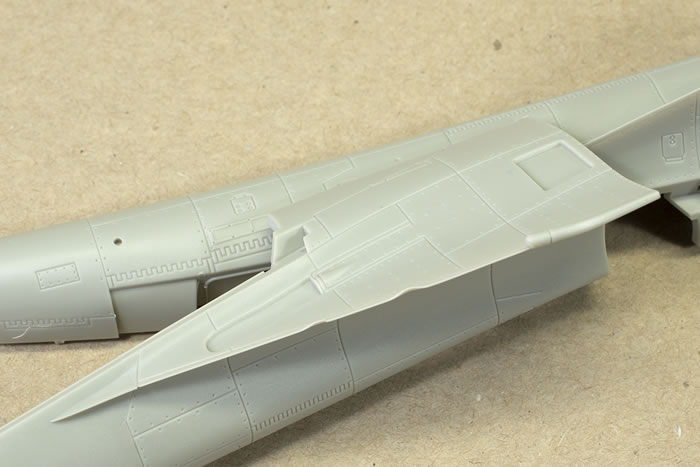
Damage to the port LERX and RWR. The plastic is paper thin at the leading edge.
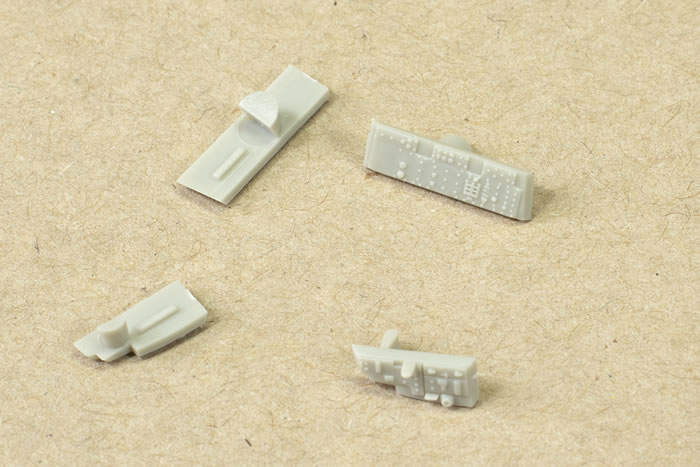
Detail is nicely moulded. Note, however, the huge ejector pin towers. These plague a lot of parts, but are easy enough to remove.
A couple of parts are provided in resin, presumably to cater for the later C model.
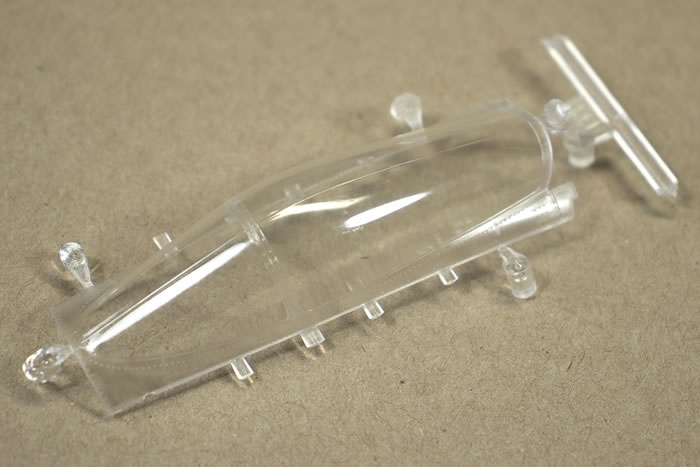
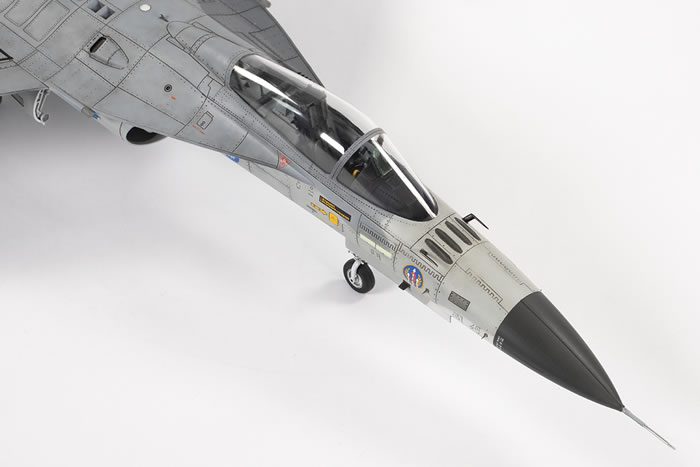
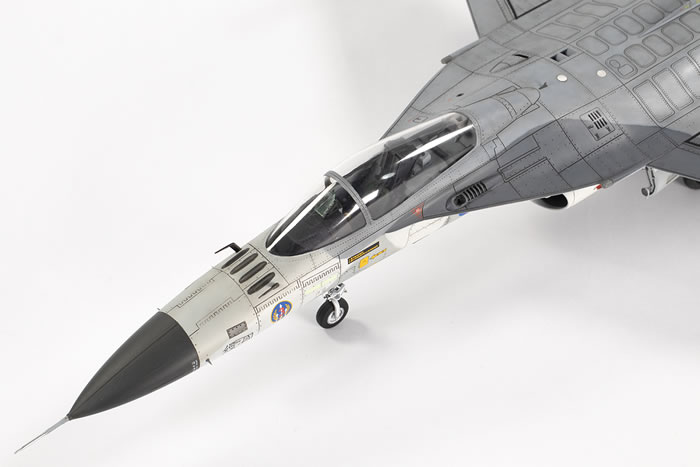
The canopy is very, very thin, which is probably why it was cracked and chipped. There’s a significant mould seam to remove and a lot of sprue gates to clean up.
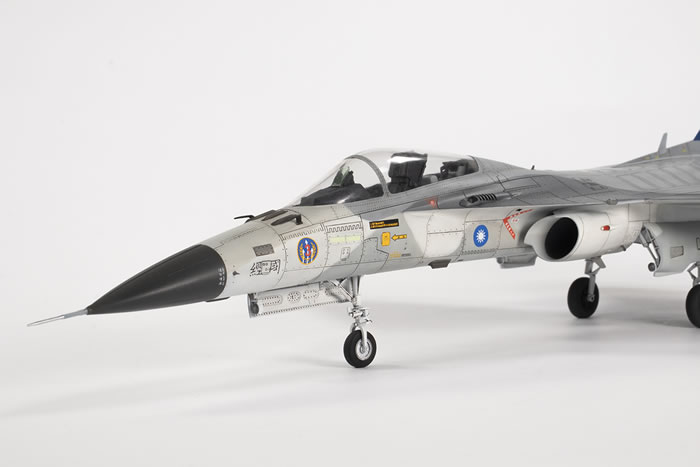
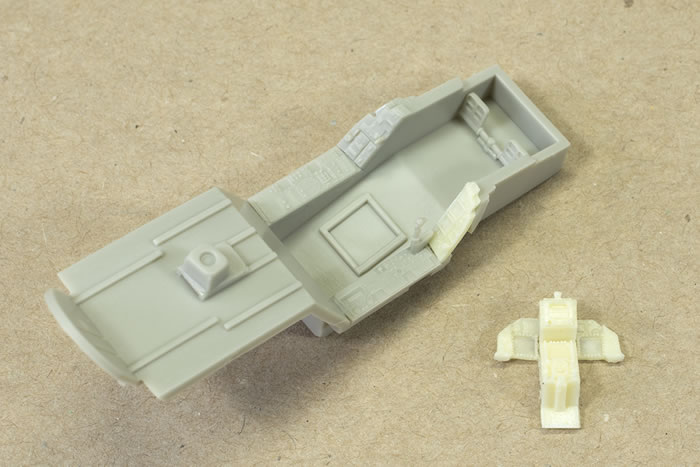
In essence, the detail in the kit, and the fit, are generally pretty good. I kept everything very basic and the only additions I made were to rebuild the pitot from sweat-soldered brass tubing and to add some generic photo-etched seatbelts. The seat is average, but the cushion did not fit at all at the correct angle into the frame. It also fouled the top of the canopy when closed, so I had to chop off the corners of the headbox for it to fit. I actually did not fit a fair amount of the cockpit detail (mirrors, internal framing) as I deemed it not worthwhile for a closed canopy.
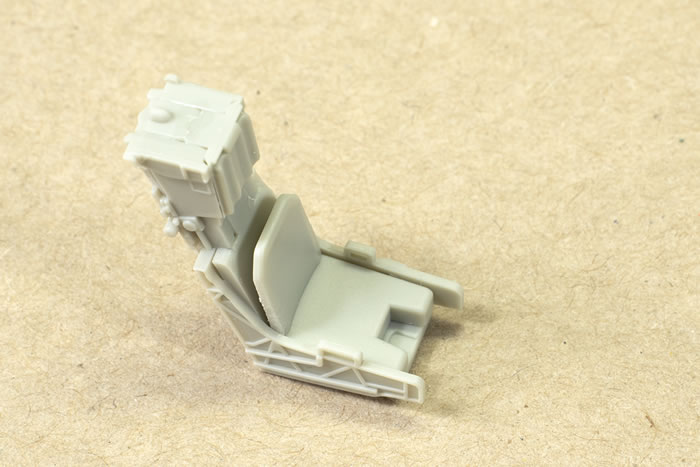
The kit ejection seat, with cushion fitted with a gap at the top…
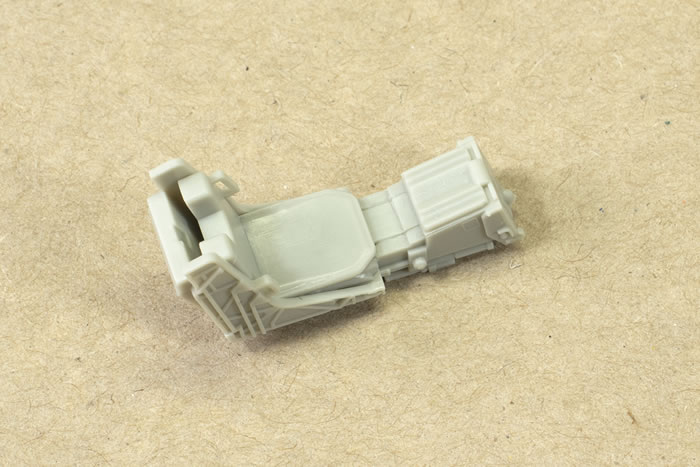
…and fitted with the gap at the bottom. I decided to live with this.
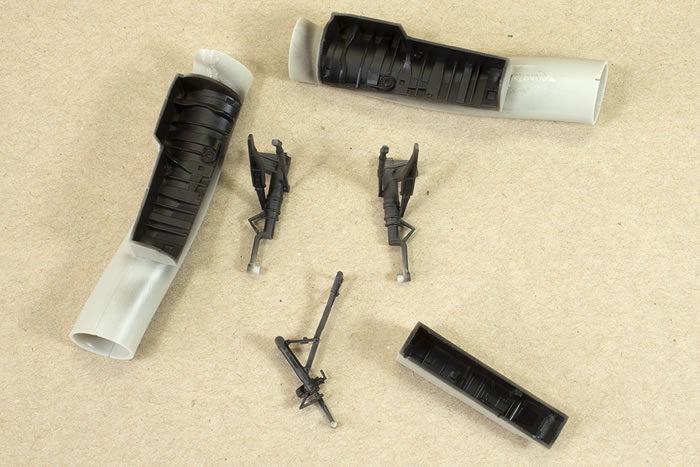
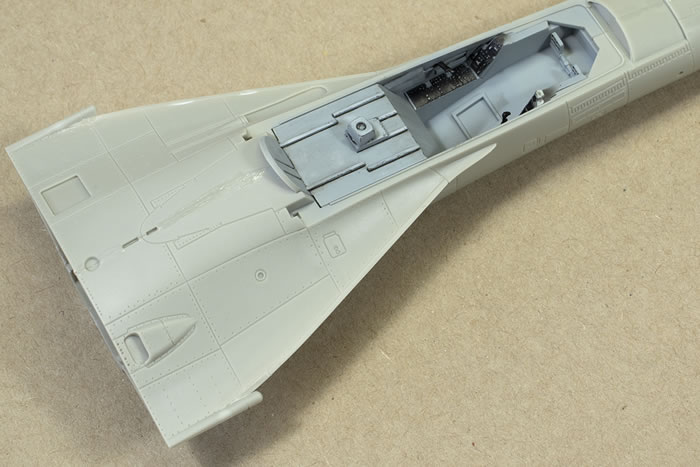
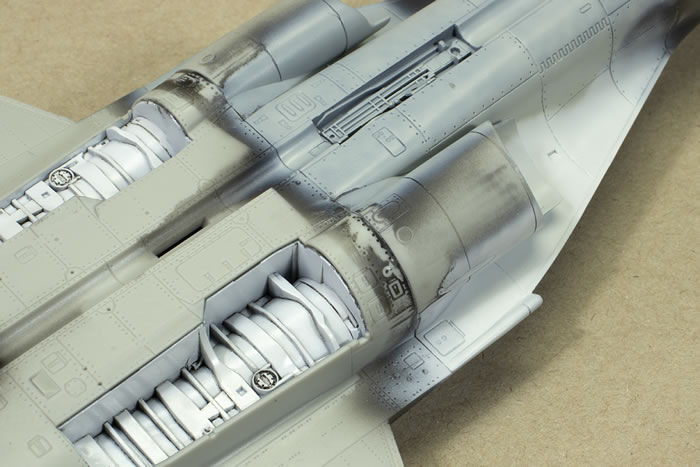
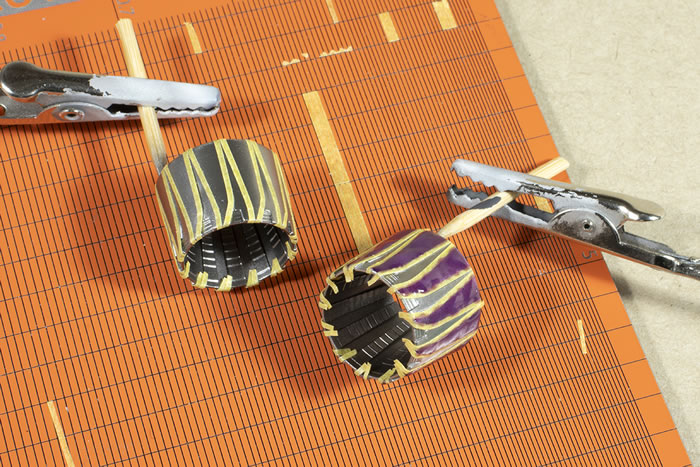
As with all the kits in this series, the main ballache was dealing with the intakes. These are full length and one of the more complicated designs I’ve seen on a kit. I did spend a fair amount of time getting rid of the internal seams, but with the limited visibility and dark intake colour, it was a long run for a short skid. To assist with removing the seams, I ignored the instructions and actually completed the trunking with the main gear bays prior to installing the whole assembly into the lower fuselage.
I’d heard that using a dark coloured base for white paint produces a more vivid result. I found this not to be the case…
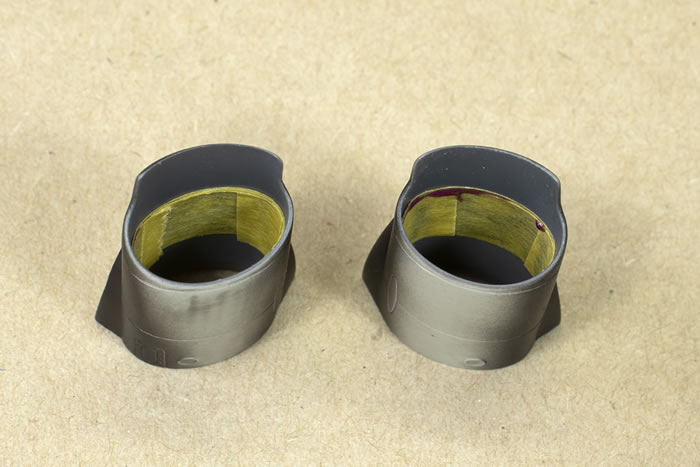
Masking for the front of the inner intakes.
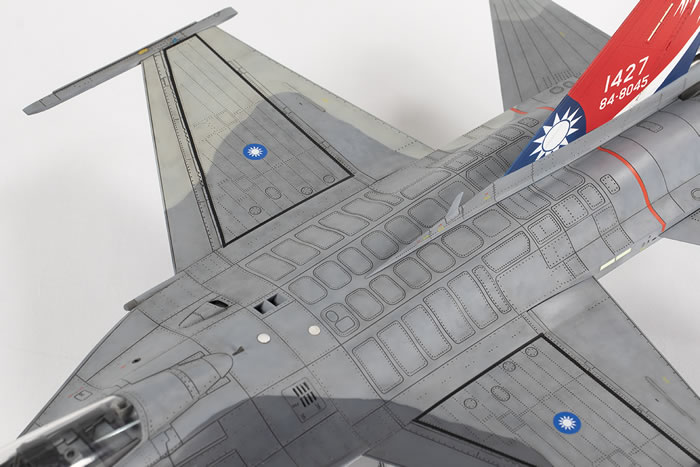
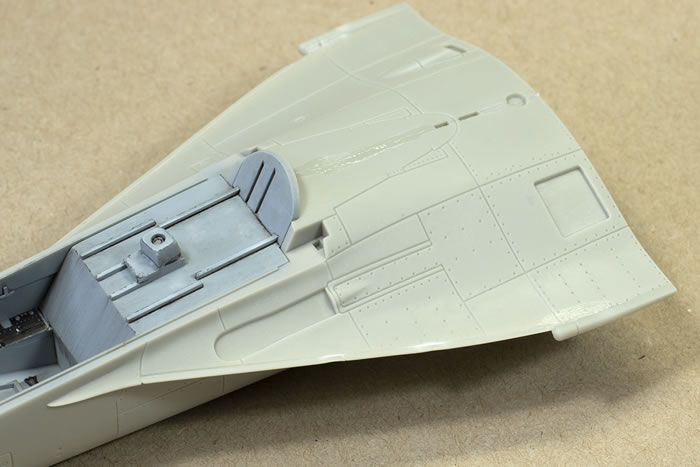
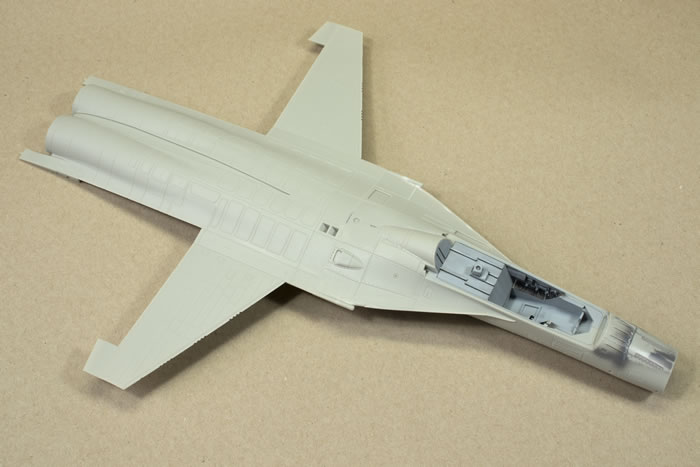
The main fuselage is split horizontally, with the front section split vertically. The fit is not bad. The intakes were less satisfactory and took quite a lot of sanding to blend in, leaving some difficult to restore panel line detail on the underneath.
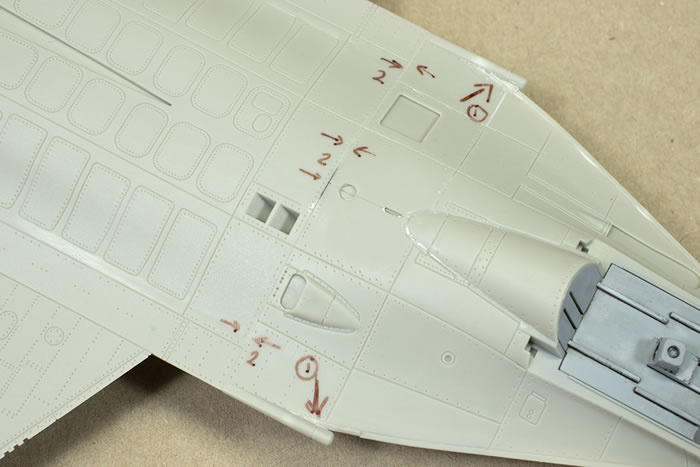
Beginning to address the damaged LERX/RWR areas (1) and nose to fuselage joint (2).
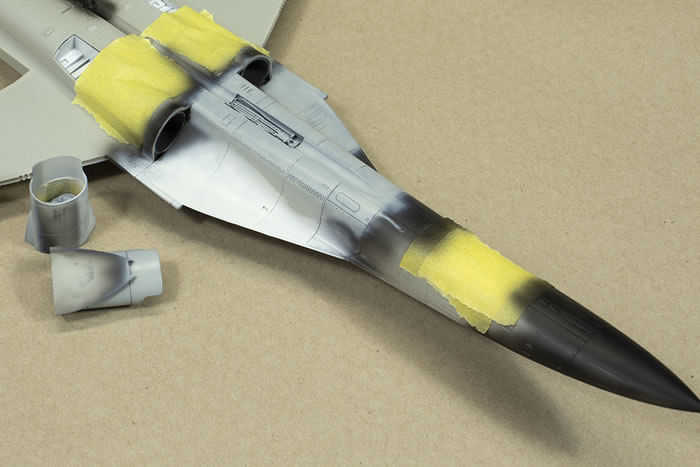

Painting the intakes prior to fitting to help get a smoother finish.
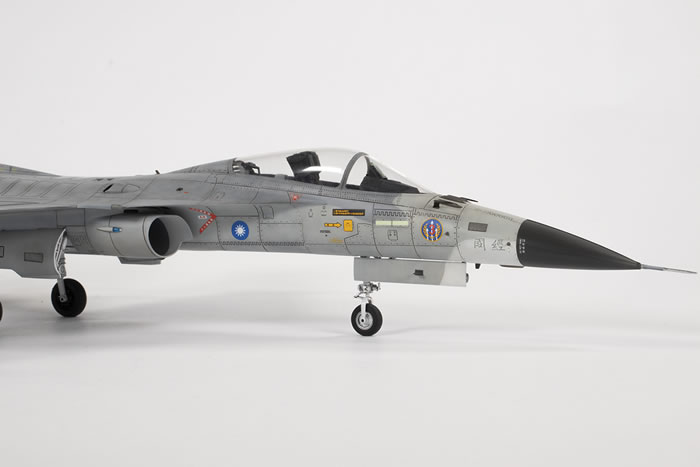
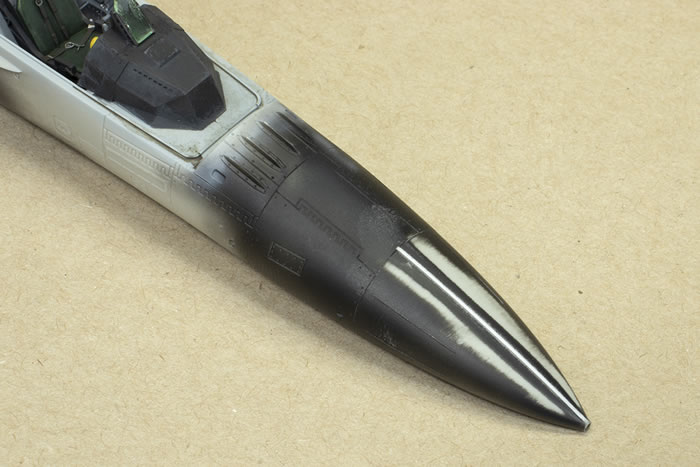
There’s a circular kit piece on the upper fuselage. I followed AFV Club’s instruction to paint it white, but I think it should be a light. There’s another pale-coloured circular feature which AFV Club neglected to model, so I simply scribed it in and painted it an off-white colour.
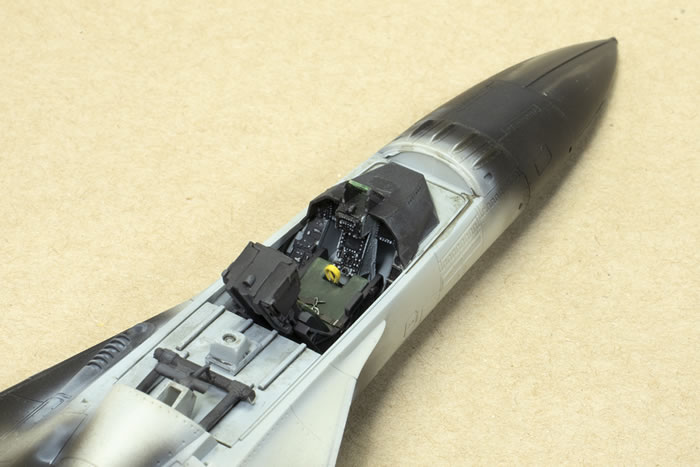
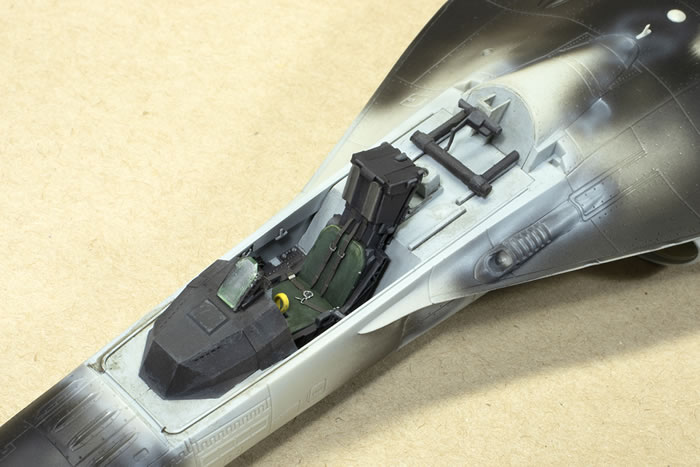
My usual cursory effort with the cockpit. With a closed canopy, I never want to put too much effort in.
I inadvertently sanded this strip off during clean up, so replaced it with some plastic card.
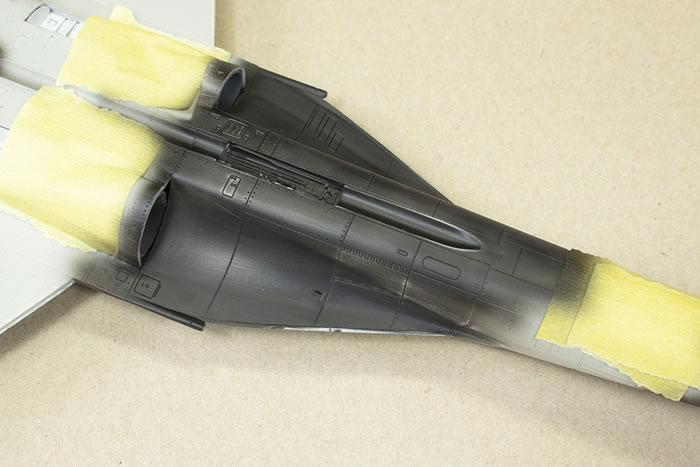
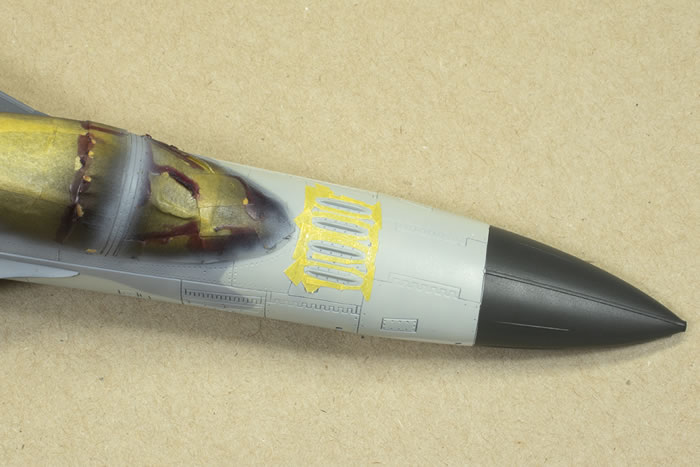
Masking up the exhausts using tape and Maskol.
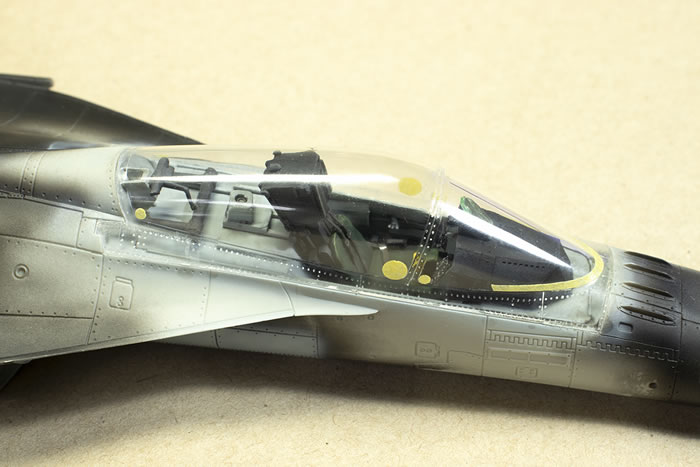
Starting the canopy masking. The die cut circles are from HiQ Parts.
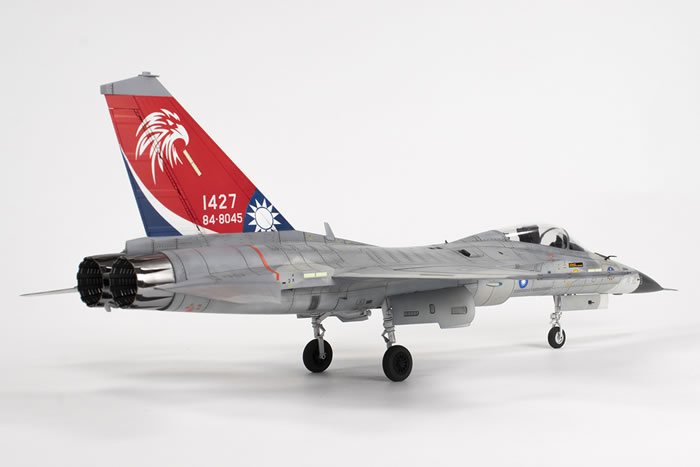
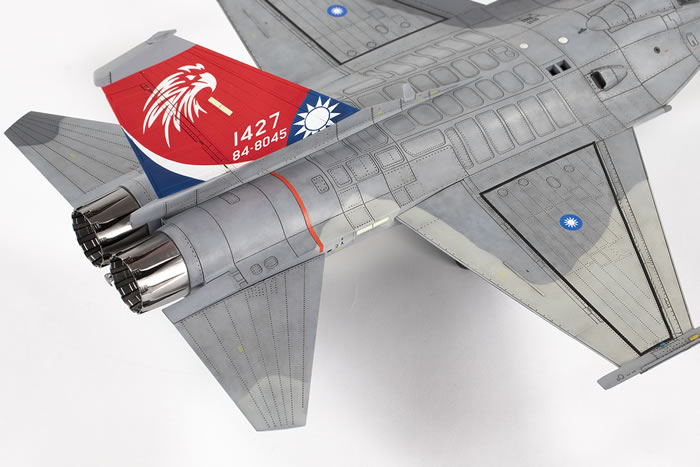
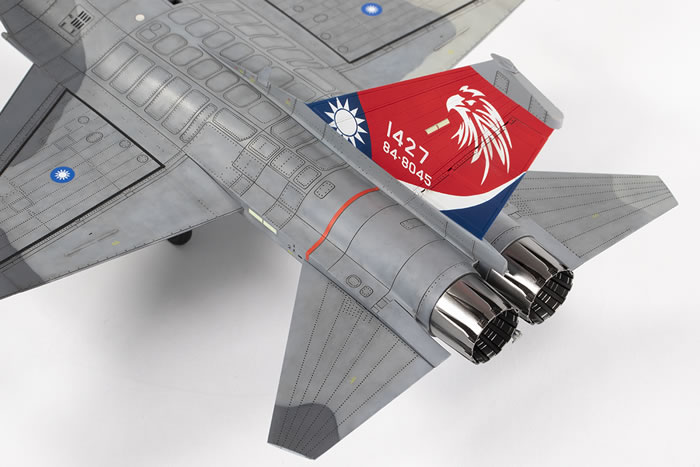
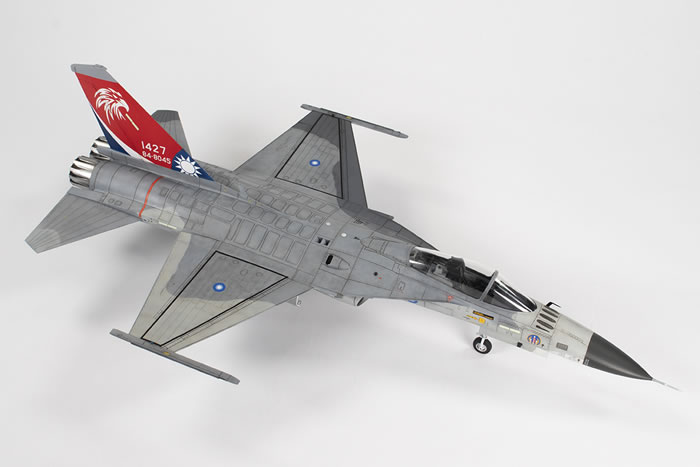
AFV Club supply quite a few decal options – more than it would seem at first – and since I am a sucker for a bright red tail, I opted for the most colourful scheme. There are two such airframes, and I went for 1427. Some googling throws up loads of photos of this particular aircraft between about 2014-2019.
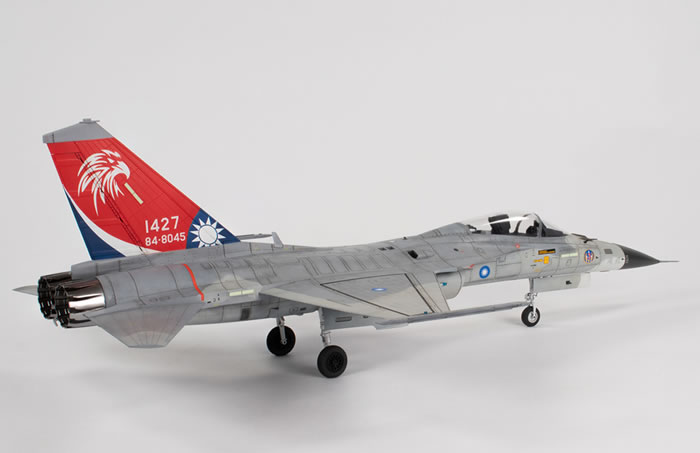
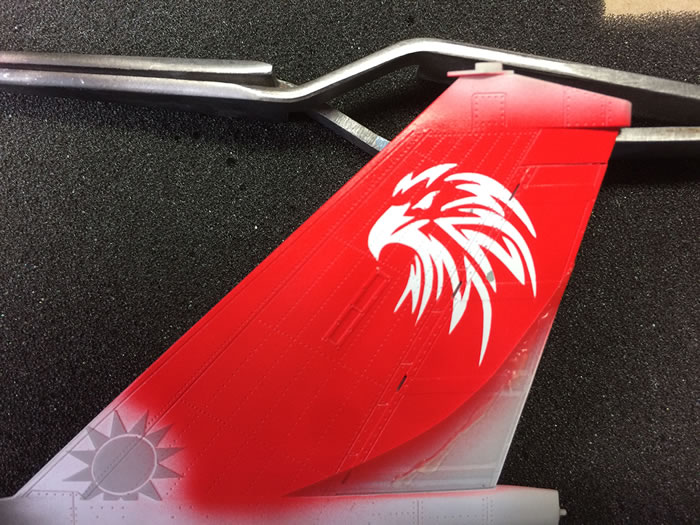
There are several ways one can approach the tail, and that is where I started. The first is to use the decal for the whole tail which includes the red background, blue and white sections and the white eagle’s head and tail code. The second is to paint the red and use the separate decals for the other elements. The third, which I took, is to mask and spray all of it except for the tail number. This is more involved but gives, I think, a better result.
The first stage is to scan the decal sheet and trace the eagle outline using Inkscape. I then cut this out using a Silhouette Portrait 2 cutter. My settings are depth 2, force 2, speed 1 with 1 pass and an overcut of 0.01mm. This is for cutting into Artool Ultramask, which is a vinyl film that comes in a roll. Once cut (and I make several to allow for mistakes), the eagle head design is laid over the tail, which had been airbrushed with Mr Finishing Surfacer 1500 White. Doing that is the really tricky bit. I repeated this for the white and blue flash at the base of the rudder, and the star design at the base of the front of the fin.
After the mask was placed I mixed up a red from 75% Tamiya X-7 Red and 25% Gunze H14 Orange. I have found that these paints are much better to airbrush over vinyl masks than lacquers. Lacquers have a tendency to stick to the side of the mask causing flaking when the mask is removed. In this case, the red went down extremely well and the masked white was nice and sharp, but a spot of the white paint lifted from the plastic and had to be fixed later.
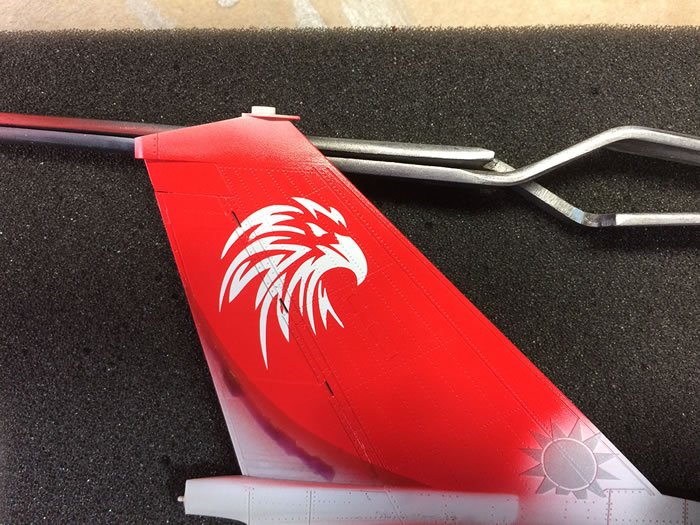
Masking removed from the eagle head design. You can see where the paint lifted on the port side.
When it came to the blue I didn’t have any Tamiya acrylics to hand, and had to rely on a mix of Mr Color blue lacquer paints (80 and 322; it’s a bit darker than it should be). Unfortunately, this paint did flake when the masks were removed and touch up was fairly tortuous since I had to respray the white, reapply the masks, and do the blue again. Still, once all was said and done, I was fairly pleased with the outcome.
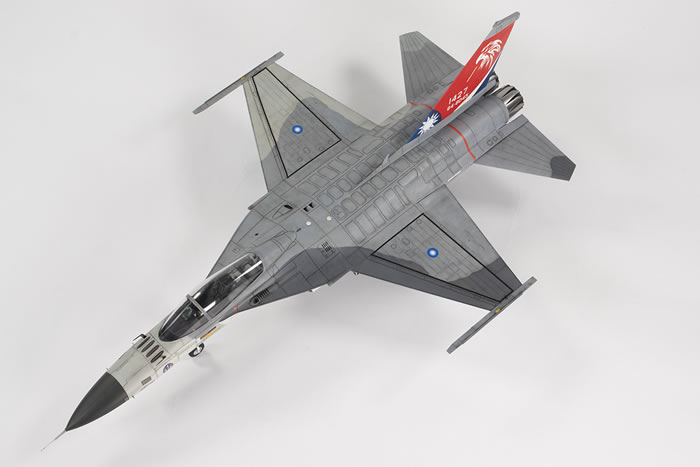
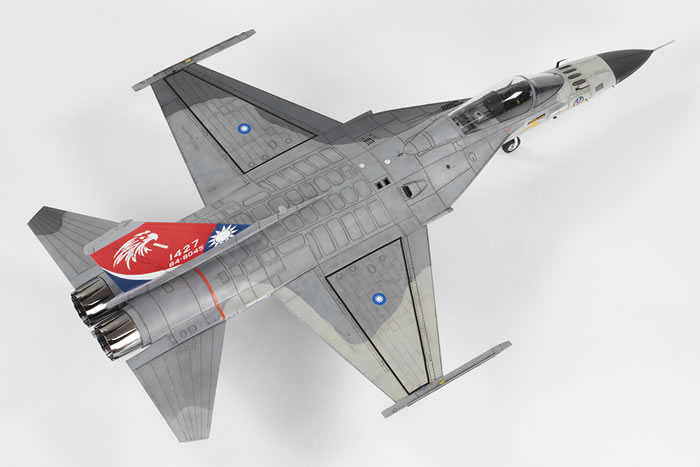
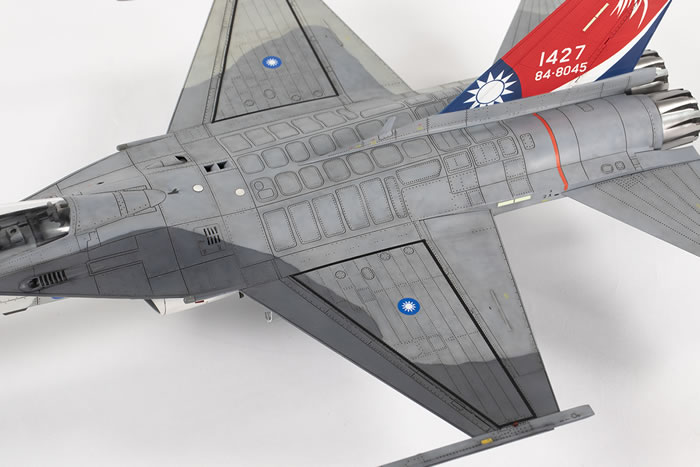
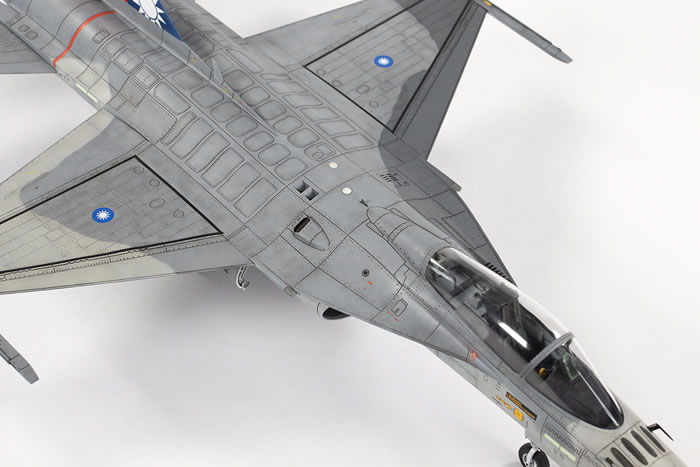
With the tail out of the way, I made a start on the main camouflage scheme. It should be mentioned that the AFV Club diagram is not correct for 1427. Fortunately, the excellent photos online provide enough coverage for the correct pattern to be established (at least to my low standards). The model was black-based and the four-colour camouflage pattern airbrushed in a tight marble pattern or through various mottling masks, starting from the darkest shade through to the lightest. I used Mr Color C305 for the dark grey, C306 for the medium grey, C325 for the light grey, and C69 for the white (which photos show is clearly not white, and so Gunze’s Off White is an excellent match). The nose cone and various aerials are C301.
I freehanded the scheme and then tightened up the demarcations using the rolled Blu-Tack method.
AFV Club recommend painting the top of the tail on the port side with FS36622, a very pale grey (C311). This did not look right to me at all, and I went with C306.
Masking the IFF aerials. This is always difficult as the shape is complex and small.
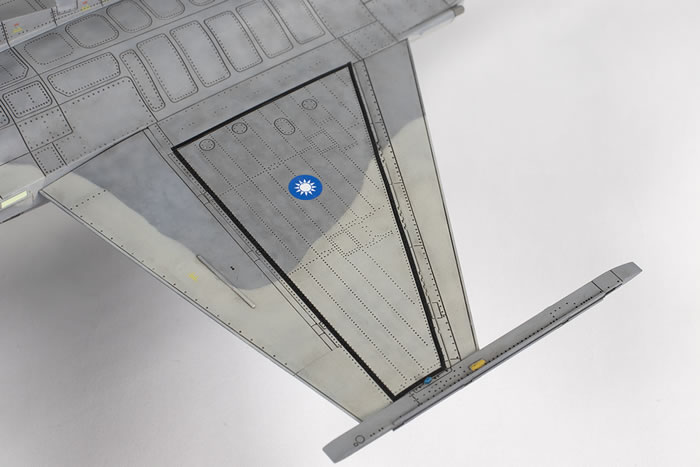
Oil washes made of various Abteilung 502 colours (Sepia, Dark Mud, Faded Grey, Black, Neutral Grey) were applied to the recessed detail. The panel lines are mostly quite deep and rather wide, so the effect is somewhat over-powering – certainly when compared to photos of the real thing – but the effect is artistically pleasing enough in my view. I left the bright colours on the tail alone as this contrasts well with the more weathered greys.
I forewent a gloss coat and decided to apply the decals directly to the matt paint. I was sceptical about the decals as they were quite ‘blobby’ on the sheet. After soaking them very briefly in hot water, and floating them on a pool of Mr Mark Setter, I left them alone and they melted down into the detail perfectly well. Sadly, when using some masking tape to enable me to touch up the demarcation around the nose cone, I overestimated the strength of the bond between the decal and the paint and the ?? marking on the starboard side of the nose lifted away completely. There was another I could use from the decal sheet, but it’s the wrong colour as it should be black.
Close examination of some photos shows there are a lot of stencils missing from the aeroplane.
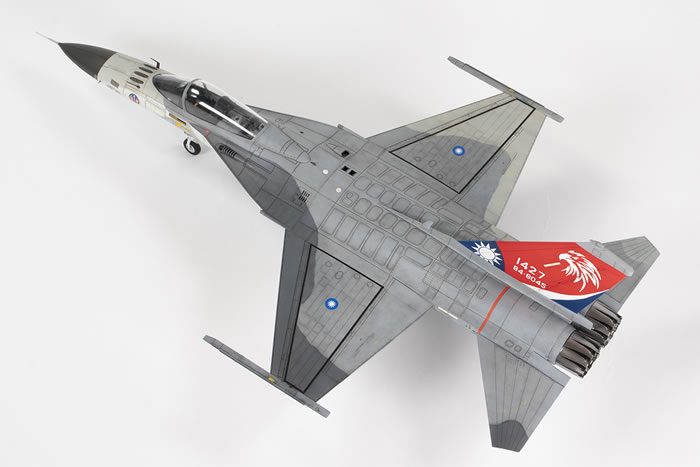
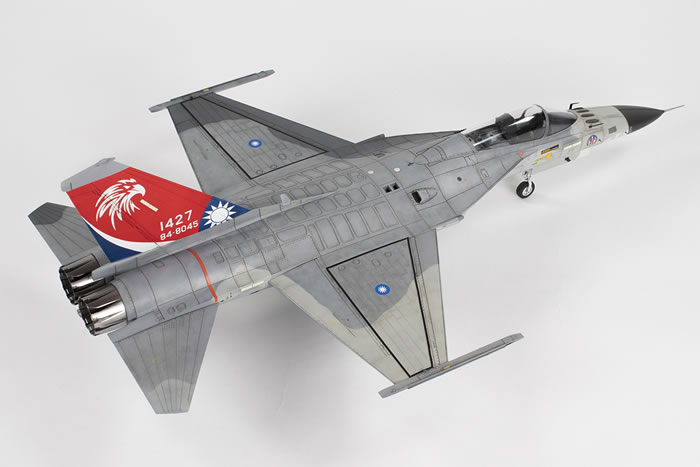
The engine exhausts are a bit weird. They are meant to attach to the full length engines within the fuselage, but these lack positive locating points and mine ended up seated too low. There’s a significant lip where the exhausts meet the fuselage (as if the exhaust diameter is too small), but the parts seemed to be designed this way. Regardless, the way the exhausts attach to the fuselage is not pretty. They were tedious to mask, too.
I had built up the undercarriage early in the build, but not glued it into the bays so I could remove the units and paint them separately. They were extremely straightforward to fit prior to completion and resulted in nice and level wings. In my experience, it was one of the easier undercarriages to install, which made a nice change from the usual stress.
The final finish is mostly native Mr Color, although the decals, some panels and the tail were airbrushed with a couple of wet layers of VMS Satin Varnish, which is an awesome product.
The finished article is a bit of a catalogue of errors: the distorted LERX, lots of little cracks in the canopy, incorrect ?? marking on the starboard side of the nose, misaligned tail markings, poorly attached engines, etc., but it looks striking enough to me from its shelf in the display cabinet. Not the most inspiring of kits, but the aircraft is much better looking in the flesh than I had supposed from photos, and it’s a nice way to conclude this run of F-16-based aircraft from my stash.
For more modelling articles like this, please visit my website http://www.jonbryon.com.
Text and Images Copyright ©
2021 by Jon Bryon
Page Created 7 October, 2021
Last Updated
8 October, 2021
Back to
HyperScale Main Page
|
 Home
| What's New |
Features |
Gallery |
Reviews |
Reference |
Forum |
Search
Home
| What's New |
Features |
Gallery |
Reviews |
Reference |
Forum |
Search