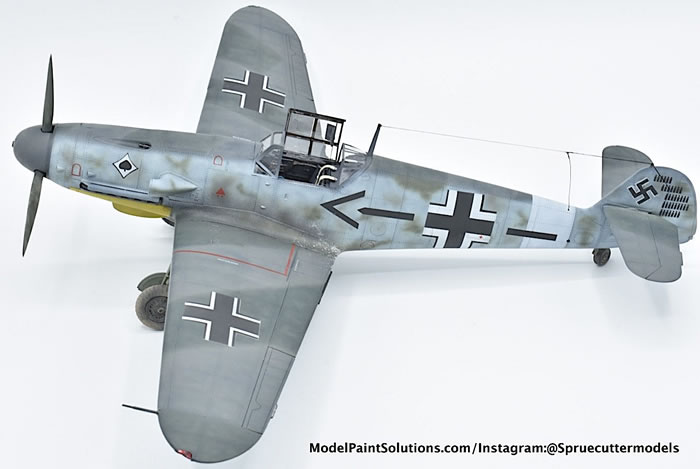
Trumpeter 1/32 scale
Messerschmitt Bf 109 F
by Mat Mathis

Summary
Kit#: 02292
Scale: 1/32
£35.99 Plus Shipping at Hannants
Review Type: Build
Introduction
Time to scale up to 1/32 for my next project: the Trumpeter Bf 109F-4. This is only my third build in 1/32; behind my Revell P-51D and Das Werk Junkers Ef 126/127. While I primarily work in 1/48, I can see the added value and enjoyment of 1/32. The biggest limitation, of course, is the extra space they take up. In my display case, I can comfortably fit 3 1/48 aircraft whereas the same space would only allow one 1/32 plane per shelf.
I purchased this kit while visiting my in-laws in Cedar Rapids, IA. My father-in-law knows a guy who, at the time, ran Charlie’s Plastic Models (he has since sold the business) but Charlie’s Plastid Models lives on. Charlie let us come and raid his warehouse (basement) to see if there was anything we liked. Well, I obviously couldn’t walk away without a few kits – the Trumpeter kit being one of them. For this build, I decided to “throw the kitchen sink” at it, as I like to say. After market items for this build included Quinta Studio interior 3D decals, Ares Exhausts, QuickBoost propellor blades, and 1ManArmy Paint Masks (more on this later).
So without further ado, let’s start the build!
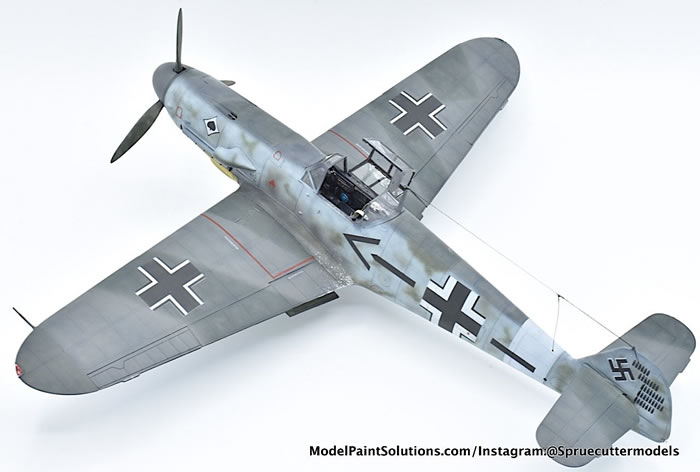
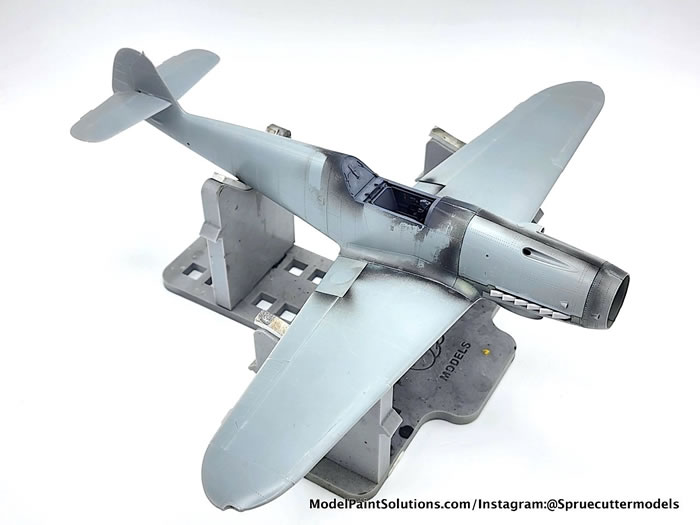
This being my first Trumpeter kit in 1/32 and only second Trumpeter kit built, I didn’t really know what to expect when it came to detail and kit. Of course, I could see the level of detail on the individual pieces, but I wasn’t sure how it would all come together. I can say that in both aspects, I was generally impressed. I built-out the front office as much as possible and removed some of the raised areas so that I could apply the Quinta decals. I’ll go into the decals more later.
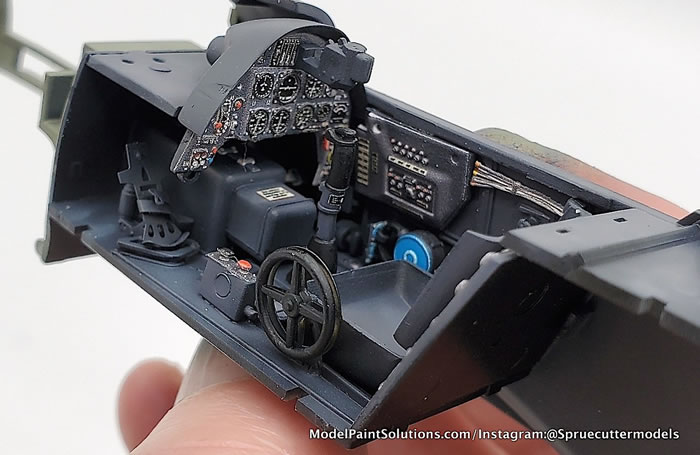
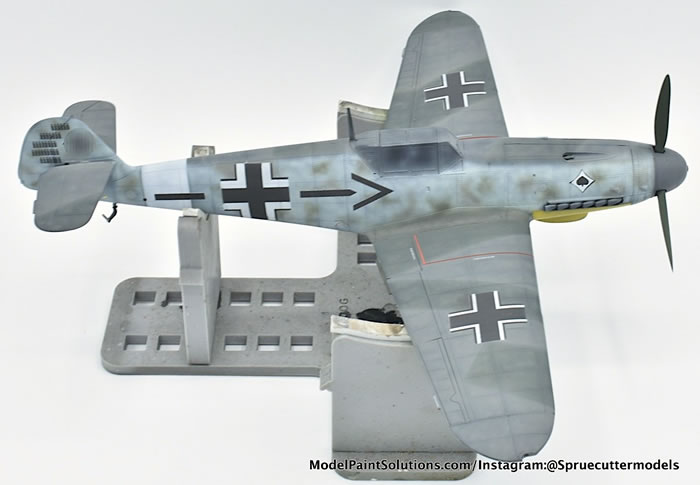
Moving on from there, the beautifully detailed engine was built out. The detail right out of the box is perfect for an open engine display – unfortunately that didn’t happen for me, though. Prior to mounting the engine, I dry fit the engine mount and the fuselage halves and noticed that the exhausts provided with the kit didn’t quite make it so that they were exposed. After trying different alignments, it seemed like it just wasn’t to be. Because the exhaust were individual pipes, rather than a single run, the only option was to get some aftermarket exhausts, mount them in the proper orientation, and close up that beautiful engine with the covers. With those glued into place it was time to build out the rest of the airframe.
The rest of the build went on smoothly, from there. With some seams to clean up and a couple small gaps at the wing root to fill, it was time to move into painting. Just before priming though, I completed a very important step that I always do before moving into paint: I wipe down the whole model with 95% isopropyl alcohol (IPA) to wash away any dust, debris, skin oils, etc.
I don’t think it’s any secret that painting is my favorite portion of the build. At this point, I don’t consider myself to be one to stick very closely with references (in fact for this build, I was going completely off the rails and doing a made-up scheme/markings) so I feel it’s where I can put my own spin on a model.
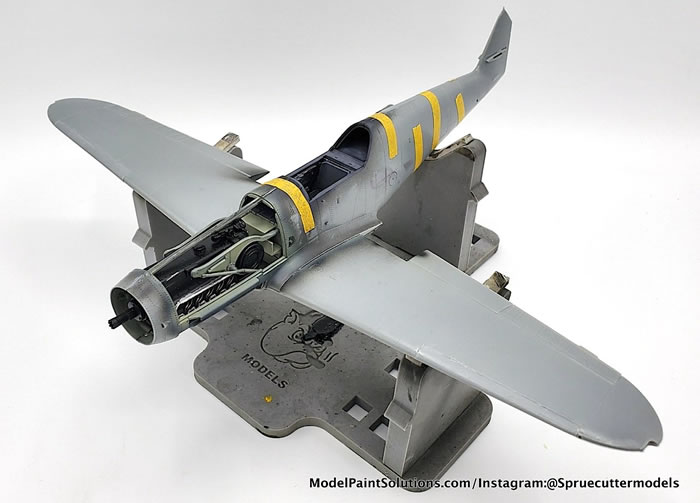
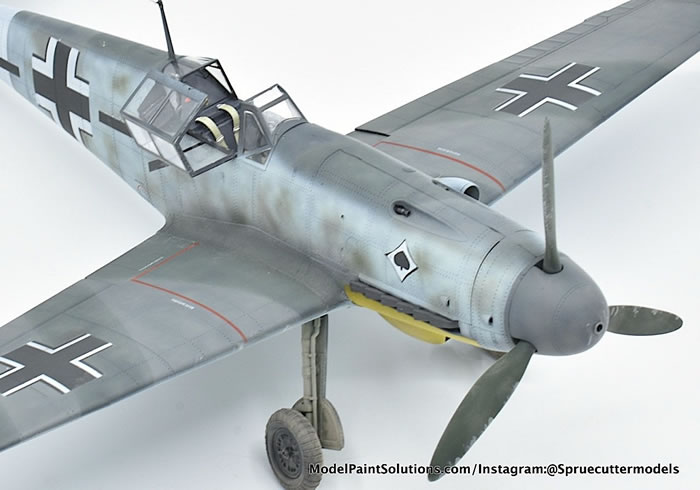
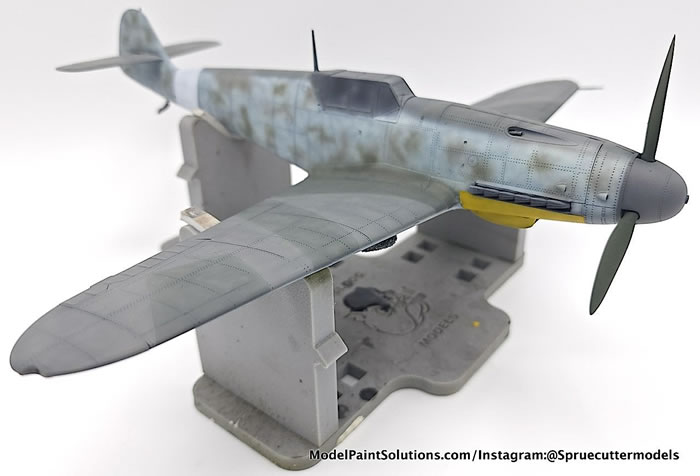
After priming the model with Alclad Black Primer and Microfiller using my Harder and Steenbeck fitted with a 0.4mm needle/nozzle, I contemplated how I wanted this model to look. My usual process would be to layer several colors that are similar to the final scheme color in order to make the finish a bit more interesting to look at and to act as a sun fading effect. This time around, however, I stuck to shading the entire model with a white mottling effect over the entire surface, being careful to steer clear of panel lines so they were naturally a bit darker. To do this, I used Hataka Orange Line paint with a ratio of about 40-50% paint to 50-60% of the Hataka Lacquer thinner. This is a naturally thin paint right out of the bottle, so I didn’t need to thin it down any further to ensure that I was able to control the layers I was putting down. During this process I used my Harder and Steenbeck Infinity with a 0.15mm needle/nozzle at a pressure of about 12-15psi to further control my layers.
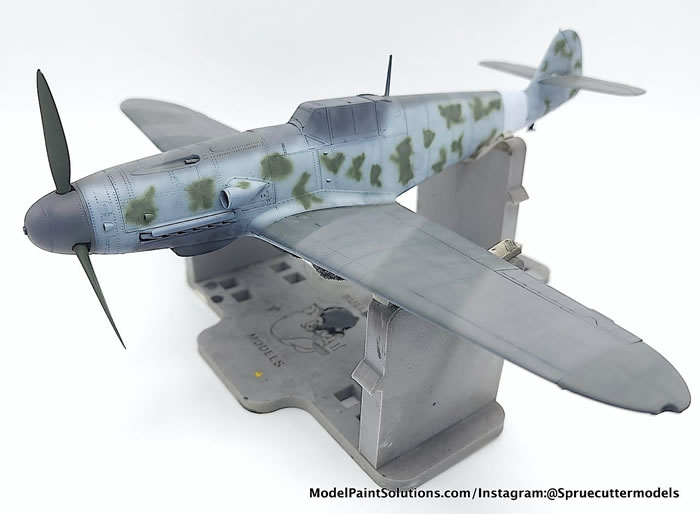
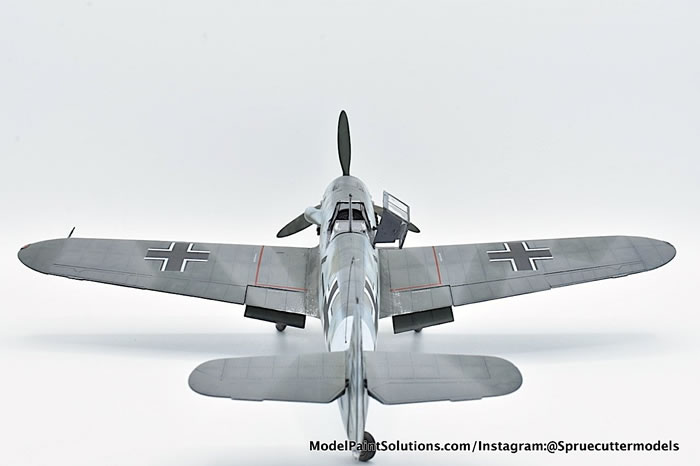
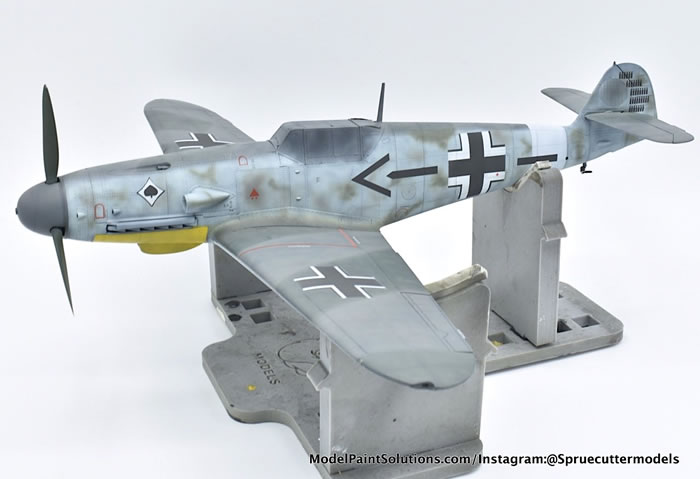
From there, it was time to lay down the main scheme. I started with the splinter camo on the wings, rear stabilizers, and top of the fuselage. Admittedly, I was a bit indecisive on this step. Originally, I planned to do all this freehand with the aforementioned Infinity in order to create a soft edge between the transitions. After I added the RLM 74, I altered course and decided I wanted a hard-edge splinter, so I masked off the edges so I could lay the RLM 75. Unfortunately, some of my masking wasn’t great so when the masks came off there was this weird color in a few spots created by the RLM 75 going on top of the RLM 74. In the end, I had to blend these transitions using the originally planned free-hand to blend them how I liked them – this is a story of how you should just stick with your gut. We learn!

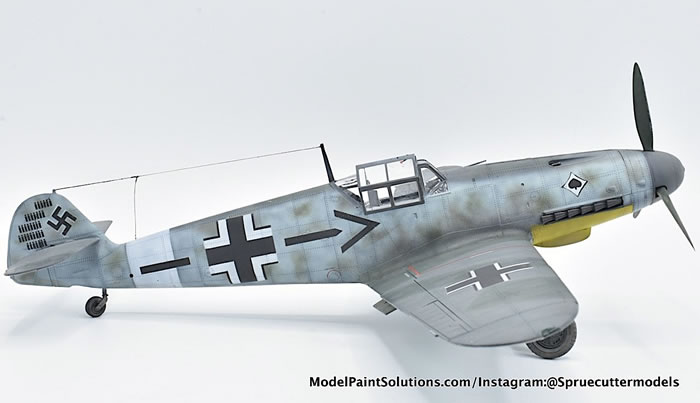
With the Splinter done, it was time for the RLM 76 on the remainder of the fuselage and underside. Sticking with my gut, this time, all of this was done freehand so I had the soft transition between the fuselage splinter and RLM 76. Thankfully, I was able to achieve a result I was happy with right off the bat. Before I went into the mottling, I wanted to paint the white fuselage band, so this was masked off, painted with the Hataka Orange Line White again and then the band was masked over so I could do the mottling.
This is where the build went awry for me. Knowing that I was doing a fictional marking, I didn’t have a particular reference photo in mind or even an artist’s rendering of a profile, other than what was included with the kit (which was a full color page that, any other day, would’ve been very helpful). So, my mottling was left very much up to my own interpretation, very loosely based on the kit profile, which called for RLM 70 as the color for mottling. With airbrush in hand I proceeded full force, taking the kit profile too literally. The result was a mottle pattern that was far, far, far too stark and pronounced for my liking in terms of the size and shape of the mottles, the harder edged pattern, and the color.
Instantly after I finished, I knew that I wanted to take a mulligan and do it over, but I decided that I would let it sit for a day or two to see if anything changed in my mind. Well, it didn’t. The next night I decided I would take the fuselage back to primer and start fresh. So, in came the Alclad, then the white shading, then the splinter camo, and finally the fuselage base color (but not that white band – thank goodness for that masking still being on!).
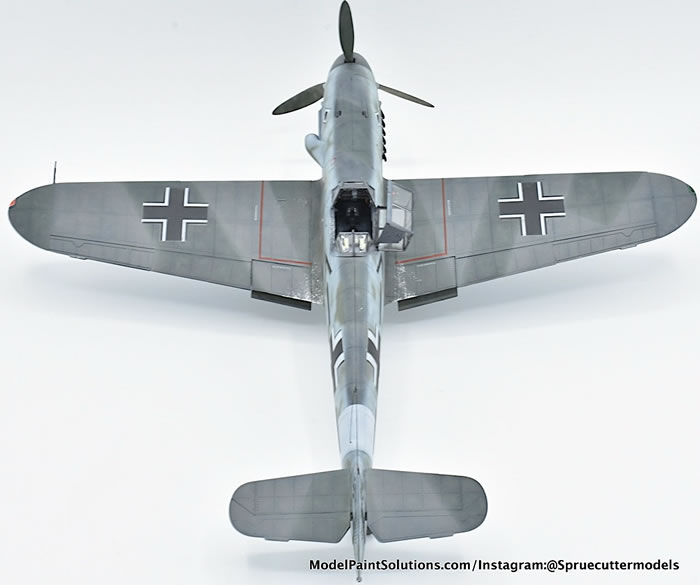
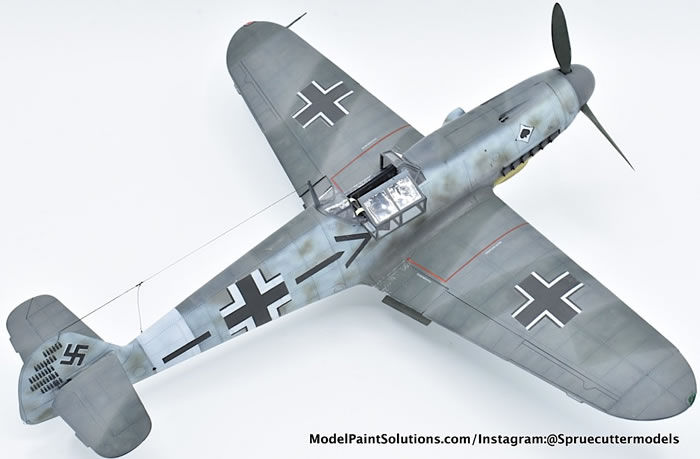
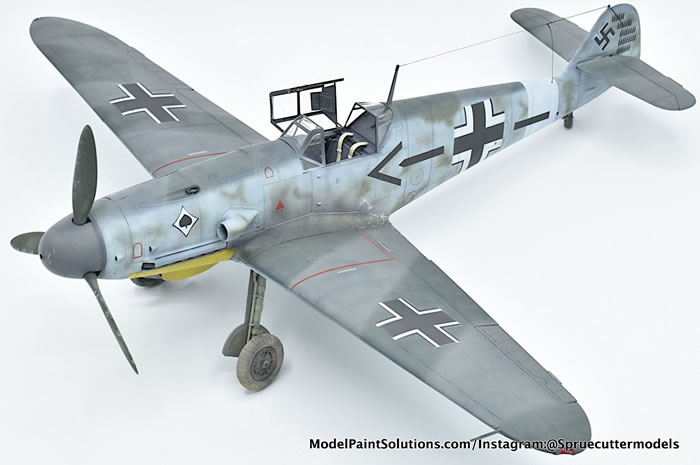
Then I went back for a second attempt on the mottling. This time I did a much more random pattern, with softer edges, loosely based on a reference I found online. I also decided that I’d use the RLM 74 and RLM 75 as the mottling colors to tie in the fuselage better with the wings. The scheme wasn’t very difficult, but the result was something that I was much happier with. Once the mottling was done it was time for decals.
Decals
JUST KIDDING! The decals for this kit were done when I was detailing the cockpit. The only decals used on this build were some Quinta Studios 3D printed decals for the interior. These are very well detailed 3D printed parts that are lifted off the decal paper and put into place with CA glue. A great addition to any build, especially in 1/32 scale. By my own estimation, they are much easier than using photo-etch parts.
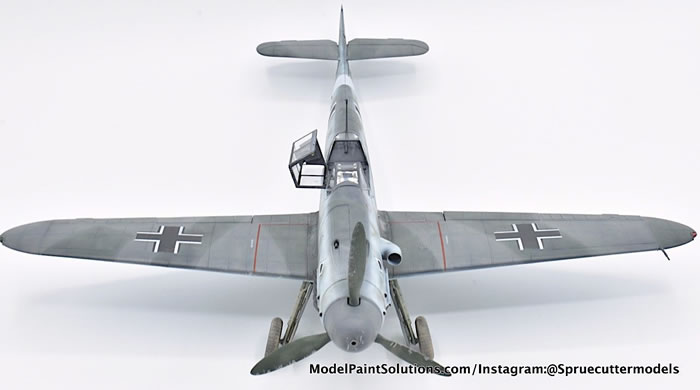
The “traditional” decals that you think of for a build were not utilized in this project. That’s because I was sent an amazing set of paint masks by Sven at 1ManArmy, based out of Belgium. 1ManArmy is a new company that offers paint masks for 1/32 scale World War II era aircraft. I know what you’re thinking right now, “Oh, this is just another aftermarket company that creates paint masks so you can paint on some national insignia and unit markings.” Well, you’re wrong about that one! Sure, the set comes with national insignia, individual markings for a few aircraft, but that’s not where it ends!
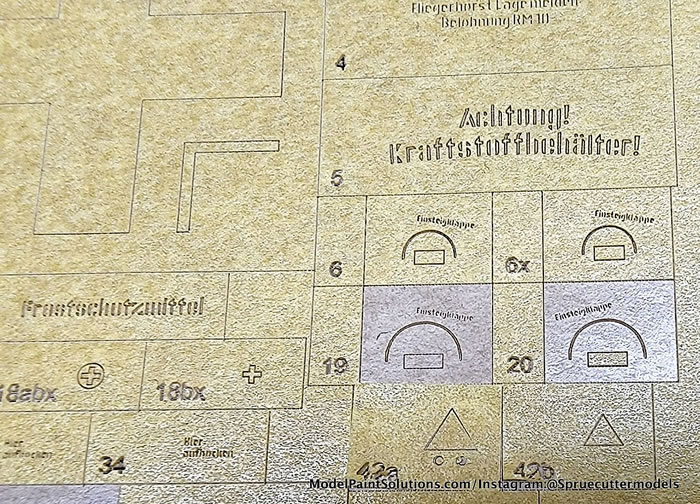
1ManArmy is the first, by my calculation, company that offers paint masks for the markings that we would normally call “stencils” on a decal sheet. That’s right, these masks give the ability to paint on those little words that can hardly be read at a foot or two of distance. Why go through the extra effort of masking off all of the individual markings, you ask? My answer is simple – we all go for that “painted on” look when we decal, since that’s the way markings are applied. Well, with these paint masks, that’s exactly what you are getting!
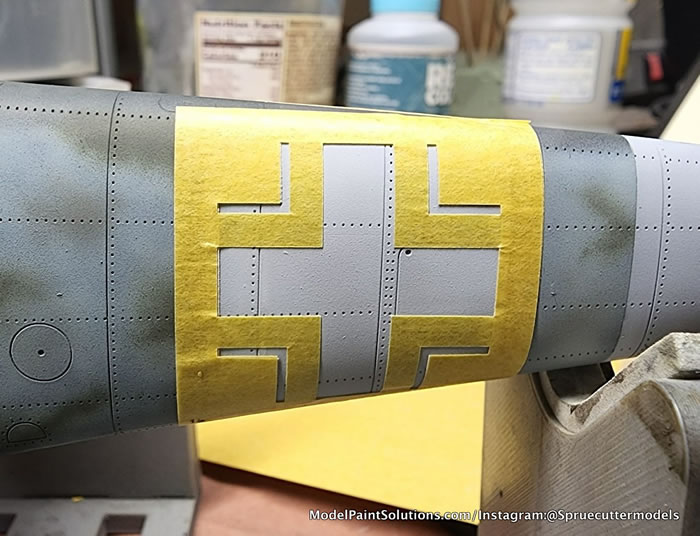
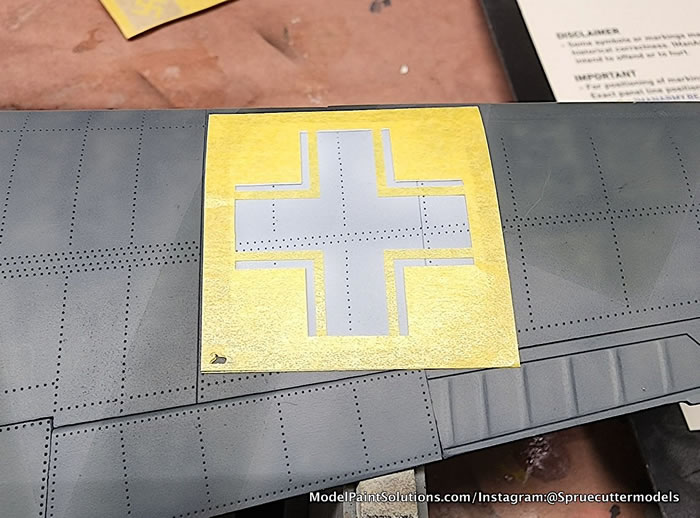
In each set, 1ManArmy includes a full allotment of national insignia, individual markings for multiple aircraft, a comprehensive set of stencil markings for one aircraft, and a very useful user guide. The masks themselves are a tape-like material (i.e. similar to a Tamiya making tape sheet) not vinyl like a Montex Mask set, for example. I’m obviously not 100% sure on the manufacturing process but I did find out that these are laser cut and that’s why they are able to be so precise to include the stencil masks. Sven has told me there was a lot of trial and error in optimizing the cutting process, but in the end the result was a cut that allows you to read individual lettering without any issues.
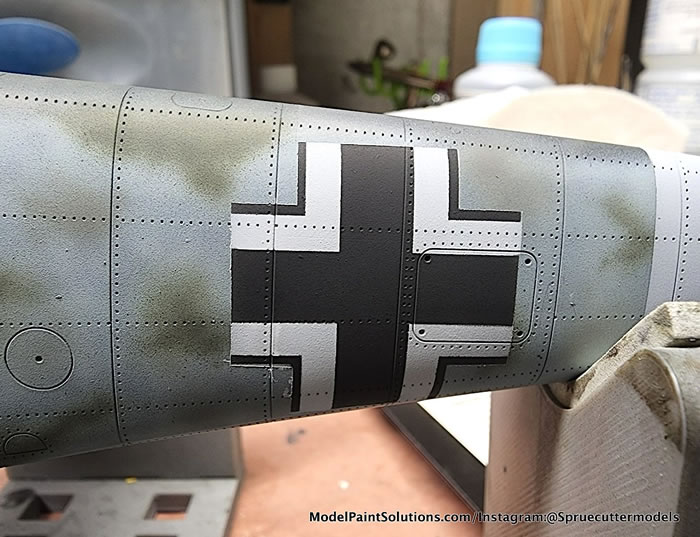
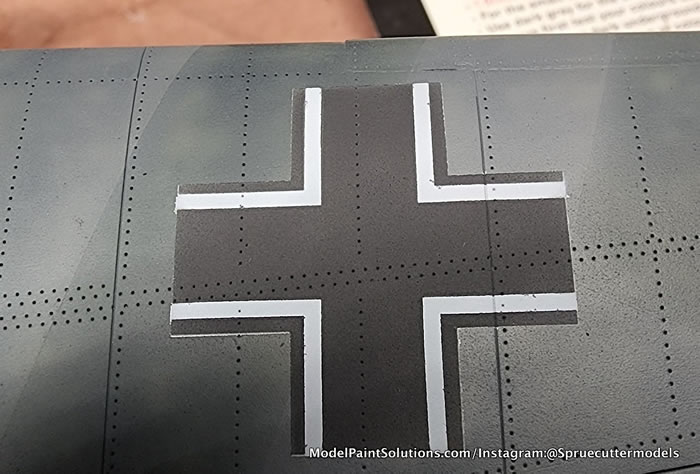
Markings that are multiple colors (e.g. a Luftwaffe Balkenkreuz) utilize a two mask system. You lay the first mask to paint the lighter color, and then lay the second mask to paint the second, darker color. When transferring the masks from the sheets to the models, it’s very important to use transfer tape (just a piece of low-tack masking tape) to help lift the mask from the sheet to ensure that the mask isn’t distorted while it’s being applied. Also, when doing the second mask (or third, if needed) it’s very important that the alignment of the four corners of the mask is perfect, in order to ensure the second color lines up with the first correctly. There was a bit of a learning curve on this, for me, which led to some of the markings needing some touch ups. Eventually, I learned the process and the latter markings didn’t require any touch up.
When applying the paint for the markings, it’s also very important to use very light layers and to not flood the mask with paint. For the painting process I used Tamiya paints thinned with Mr. Leveling Thinner to about 25% paint. The thin layers are also very important so that there isn’t a raised edge where the mask contacts the model, once it’s removed. If there is, a quick wipe down with a paper towel is usually enough to smooth it out. If that doesn’t work, a high grit sanding sponge (e.g. 3,000 or greater) will buff it right out.
Once the national insignia and individual plane identifiers were painted on, it was time to move into the stencils. These masks are applied much in the same fashion as the larger markings. There are some handy tips in the user guide on how to optimize the placement of these markings. I can say that they were very useful and prevented some errors in placement angle and location. When I finished painting these stencil markings I was amazed at the level of detail and ability to read the wording.
After completing the process, I was very pleased with the overall results and the extra effort I took to paint the markings on. In reality, it didn’t really add all that much extra work, and the results speak for themselves. Painted markings are a theme you may start to see in subsequent builds.
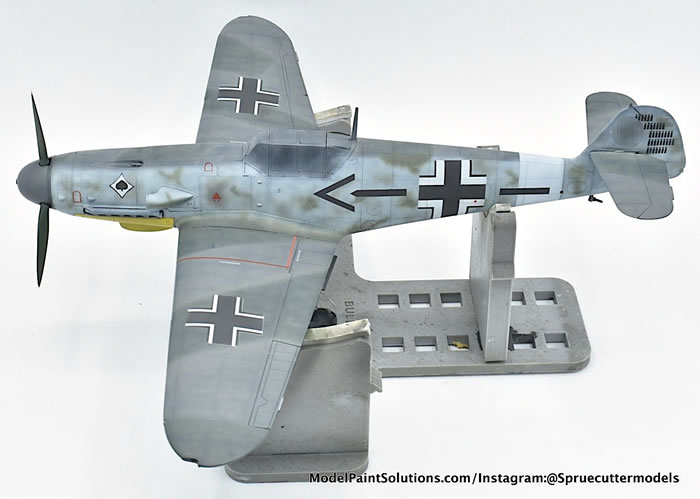
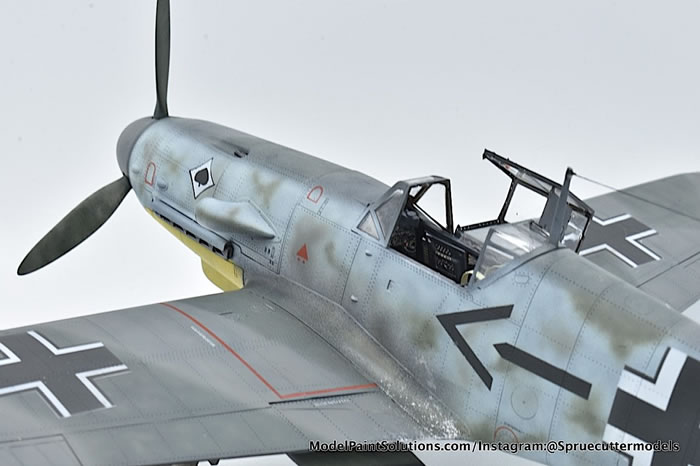
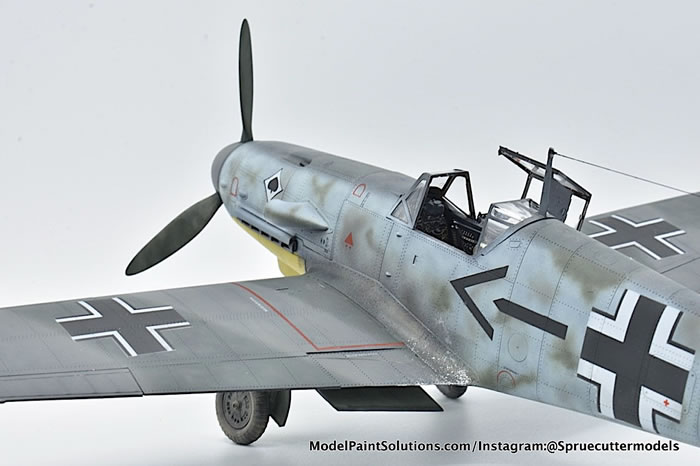
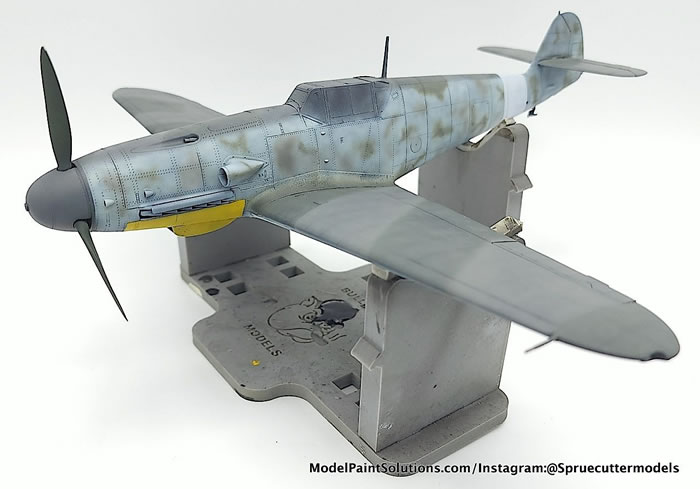
The only markings that aren’t included in the set from 1ManArmy is the unit shield emblem that is painted on the nose of the fighter. In this instance, I wanted an Ace of Spades for Jagdgeschwader (JG) 53 on this plane. As it is a two-color emblem, this would be quite easy to include on future sheets. For the more complex emblems that involve more colors, it’s understandable why they would not be included in the set. For this marking, I utilized my newly acquired Cricut cutter to create and cut a mask so I could paint it on (much more on the cutter on my next article). In the end, I was able to paint on every marking on the plane – a feat I had never completed before. While the only items on the market for 1ManArmy right now are 1/32 scale. World War II aircraft, they do have plans to expand the product line. In the future they plan to expand into 1/35 scale armor and other eras for aircraft. At the end of the day, I highly recommend picking up a set of 1ManArmy masks for your future projects. I know I will!
Finishing
Going into this build, I wanted a lightly weathered model, as I wanted to focus specifically on painting the markings. As such, I simply did some light chipping at the wing roots and applied some exhaust staining with my airbrush. After that, I applied the rigging, landing gear, and canopy and called this one done! I may revisit the weathering in the future, but only time will tell.
This ended up being my longest model build since joining this hobby two years ago. It was also one of my proudest builds to date. While I didn’t really push the bounds on weathering or uber detailing the model, I did take the time to correct mistakes that were made along the way (e.g. exhausts, painting, etc.). I was also very proud to have not used a single decal or varnish on this model (I was able to get a uniform finish on the painting and light weathering process). In addition, I would recommend the 1ManArmy mask set if you want to paint everything on your model for that real “painted on” look. It’s a high-quality aftermarket offering that certainly adds to the build. Up next, we have another Luftwaffe staple. Stay tuned for the next article! In the meantime, check me out on Instagram, @spruecuttermodels.
Until next time!
Mat
@spruecuttermodels
For more on this build visit Modelpaintsolutions.com.
Text and images copyright ©2022 by Mat Mathis.
Text and Images Copyright © 2022 by Mat Mathis
Page Created 29 July, 2022
Last updated
29 July, 2022
Back to HyperScale Main Page
Back to Reviews Page

|
 Home
| What's New |
Features |
Gallery |
Reviews |
Reference |
Forum |
Search
Home
| What's New |
Features |
Gallery |
Reviews |
Reference |
Forum |
Search