Special Hobby 1/72 scale
Curtiss P-40N Warhawk
by Vince Mokry

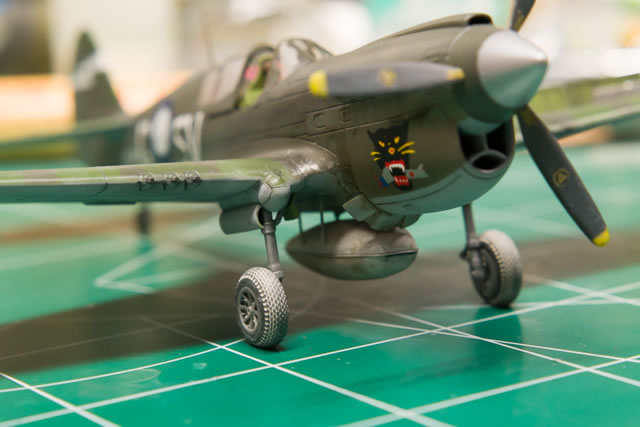
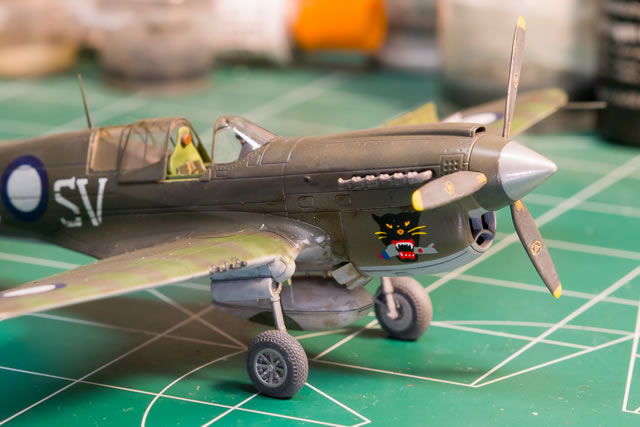
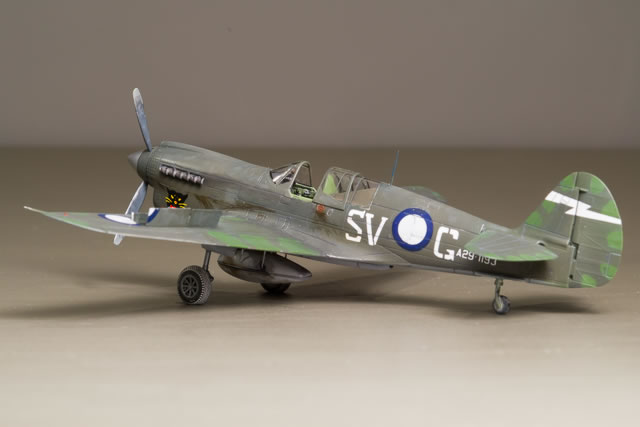
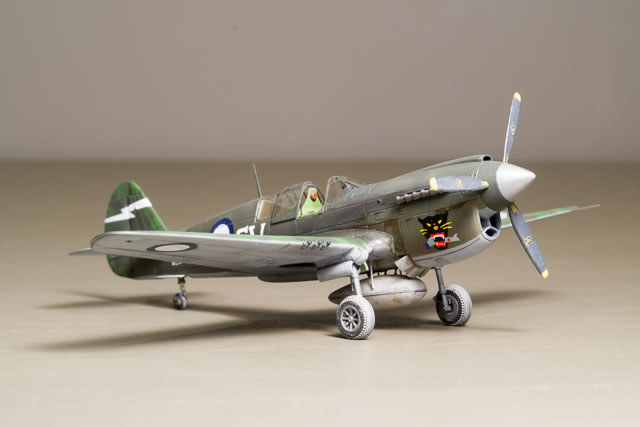
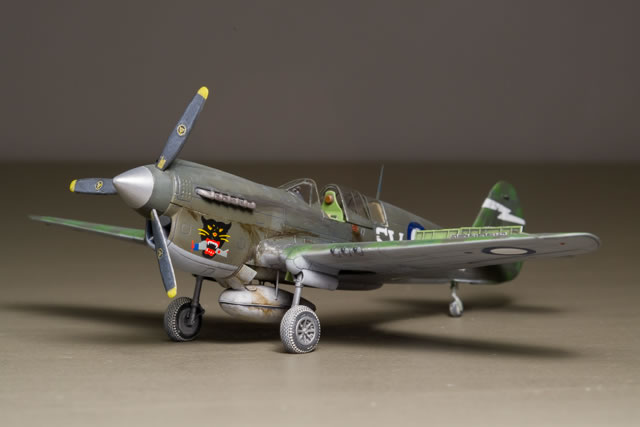
Forty years ago, I bought my first aftermarket decal sheet. My friend and I were killing time before a movie by checking out Village Hobby in Austin, Texas. It was a $3 USD MicroScale 1/72 scale P-40 sheet…and I had to borrow cash from my friend's mother to buy it! This decal sheet provided several fun P-40 projects over the years. What a deal for $3! There was one Kittyhawk Mk IV on the sheet that I always wanted to do: it was the 76 sqdn RAAF foliage green scheme with nose art of a black panther biting a zero in half.
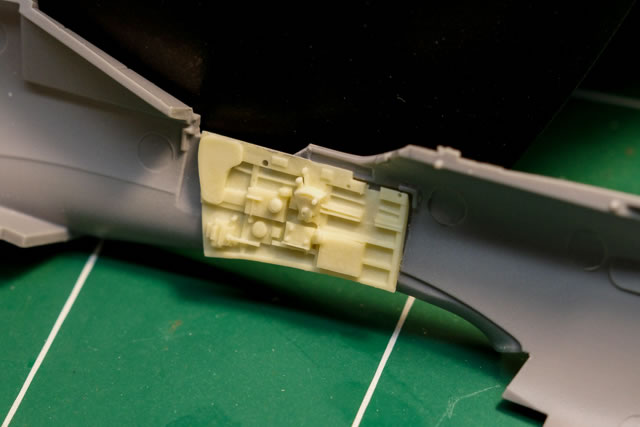
My kit of choice had always been the venerable Hasegawa kit, mainly because of a fairly accurate outline. Those old kits could turn out nice but needed a little help, especially in the cockpit. The new generation Special Hobby kits are near perfect in overall shape…so much so that I have now purged and replaced my stash of 1/72 Hasegawa Kittyhawks. So far I have not sold off several aftermarket sets that were made for upgrading the Hasegawa. I decided not to sell those parts and see if some could be adapted to the new SH kit. It turns out, the news was good…read on.
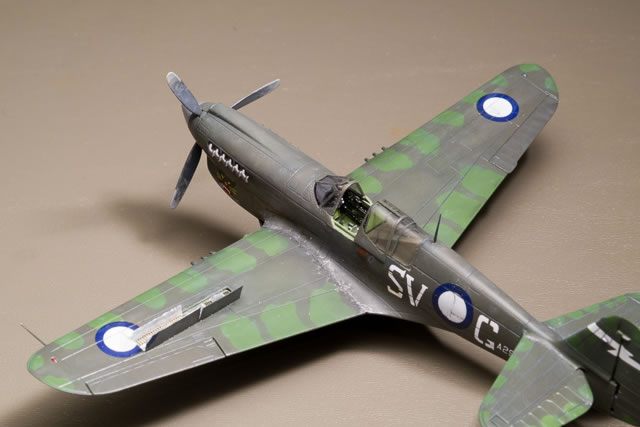
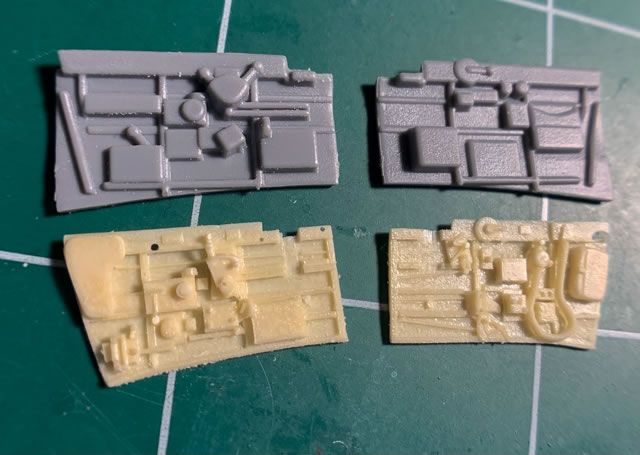
Perhaps the only real weakness I could find with the SH kit was also in the cockpit area. The side panels are detailed well for the scale; but are so thick that the instrument panel had to be designed about 1/3 too small. To fix this, resin side panels from an old True Details set were used and much to my surprise fit without modification! These panels are thin and have great detail. The only change needed was to increase the width of the kit’s rear bulkhead part to accommodate thinner side walls. The True Details set also provided a correctly sized instrument panel as well as a gun sight.
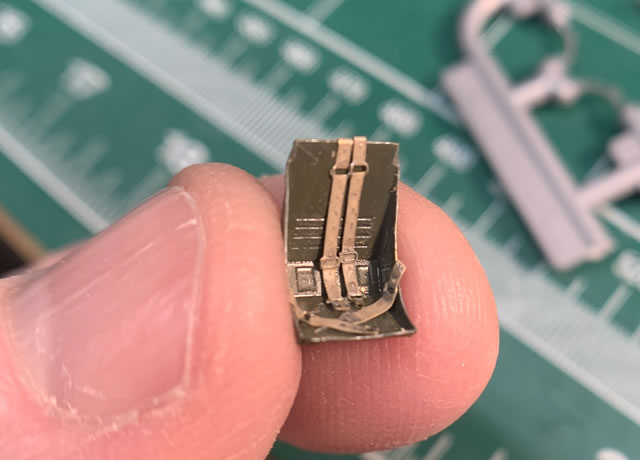
I sourced a nice, photoetch seat from a 1993-vintage Eduard set, itself intended for the Hasegawa P-40E. It was a square back seat introduced on later marks of the P-40N and, although Eduard got it wrong for the P-40E, I was happy to find it for use on my P-40N. I found delicate rudder pedals and seat belts on another old photoetch sheet, this time by Reheat Models.
My internet research on 76 Squadron photos showed that the RAAF used what I call a “double wide” belly fuel tank. To create this, I found an old Hasegawa belly tank in the spares box and used styrene blocks to widen it. The seam around the circumference of the tank was done with nylon thread held on with Future. This was fragile but after a primer coat, seemed to be permanent. This seam was a lot of work; but the resulting scale thickness was worth it to me.
The Eduard photoetch set had a nice ammo bay and doors. I painted the ammo part black and then sanded it lightly to reveal the bullets in relief. It was easy and looked great! Then, I used bare metal foil to cover the ammo covers and feed chutes. I put it into the port wing although the Eduard instructions show it inside the starboard wing (the feed chutes would be in the wrong position there).
I carved out the tailwheel well with a hobby knife and files. A modern Eduard Brassin set provided a nice tailwheel and strut as well as a tiny brass tailwheel cover. I scratchbuilt my own tailwheel doors from styrene sheet and employed photoetch inner door detail from that old Eduard set.
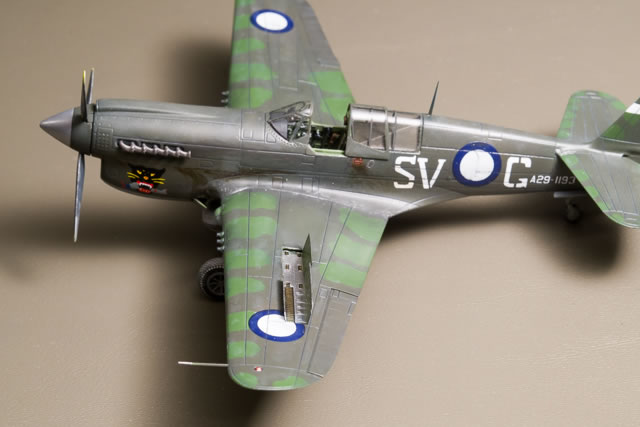
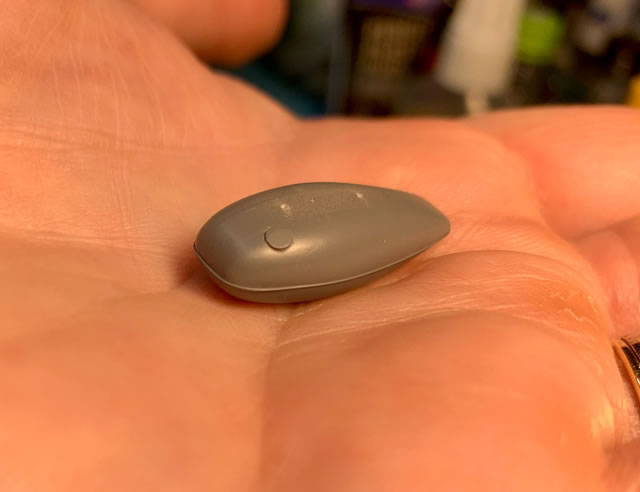
Moving to the sliding canopy, I wanted to pose it open to show off all that cockpit detail. I could have used an oversize one provided in the SH kit; but in 1/72 this looks strange. I used the closed canopy part to heat-form a thin sliding canopy part. It fit perfectly after careful trimming.
The last upgrade was modern Eduard Brassin main wheels. The detail they provide in 1/72 is hard to believe. I left the brass wheel covers off to show the fabulous spoke detail. This is artistic license because none of the wartime photos found show these wheel covers removed.
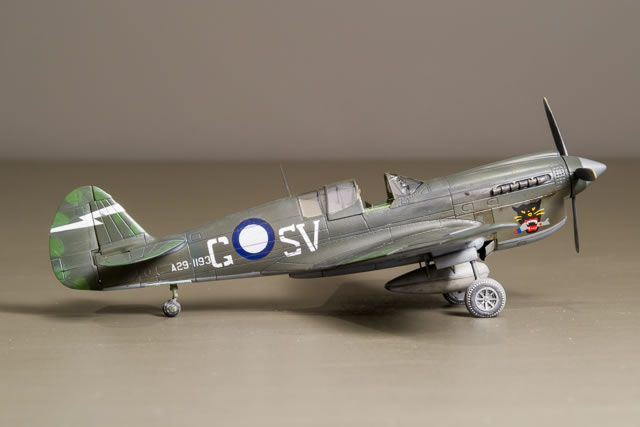
The model was finished with quite a plethora of paints: Mission Models, Testors Acryl, Testors Metalizer, Polly scale, and craft store acrylic. This followed into clear coats as well with vintage MicroScale gloss topped with Model Master Acrylic clears. Olive drab was chosen instead foliage green which was called out by MicroScale. Some recent references called for OD and the recent restoration of Kittyhawk “Gloria Lyons” backed that up as well. So why did these planes look so dark in B&W photos? It seems some of them were waxed and buffed and I found a photo or two to back this up. To mimic this I used a satin final clear coat instead of dead flat. Weathering was done with a combination of pre-shading and dot filtering with oil paint to render a subtle tonal variation. Oil and aviation fuel staining was also done with thinned oil paint. Tamiya dark gray panel line accent product was used and proved effective to my eye. A silver pencil in addition to thinned silver craft acrylic paint gave a restrained worn look for the scale. Vallejo weathering powder was used on the tire tread. It was mixed with flow aid and water which worked well. I recommend restraint because a little powder goes a long way in that it can be a bit too opaque.
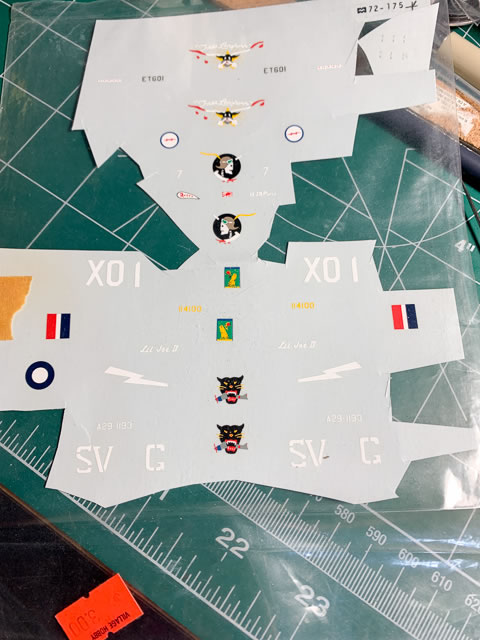
I have already mentioned the MicroScale decals and, even though they were decades old, they went down perfectly! I trusted their instructions to not trim away any clear borders and it worked out well mainly because these are so nicely thin. Curtiss Electric prop logos came from a ”Tally Ho!” brand sheet I had in my stash. The prop logos may also be artistic license as I didn’t see any on wartime photos. My attempt to paint the RAAF roundels using my own masks failed miserably. The masks I made using a circle cutter tool were great but peeled off some of the OD paint. After painstakingly repainting these areas again, I sourced some Red Roo decals from eBay for the RAAF roundels. These went down alright but needed some chipping touched up in the white areas. Next time I will treat them with Testors liquid decal film first.
There it is! I scratched my P-40 itch and had a lot of fun.
Go Special Hobby!
Text & Images Copyright © 2022 by Vince Mokry
Page Created 22 February, 2023
Last updated
22 February, 2023
Back to HyperScale Main Page
Back to Reviews Page

|
 Home
| What's New |
Features |
Gallery |
Reviews |
Reference |
Forum |
Search
Home
| What's New |
Features |
Gallery |
Reviews |
Reference |
Forum |
Search