Removing Eduard's
Decal Carrier Film
by Brett Green

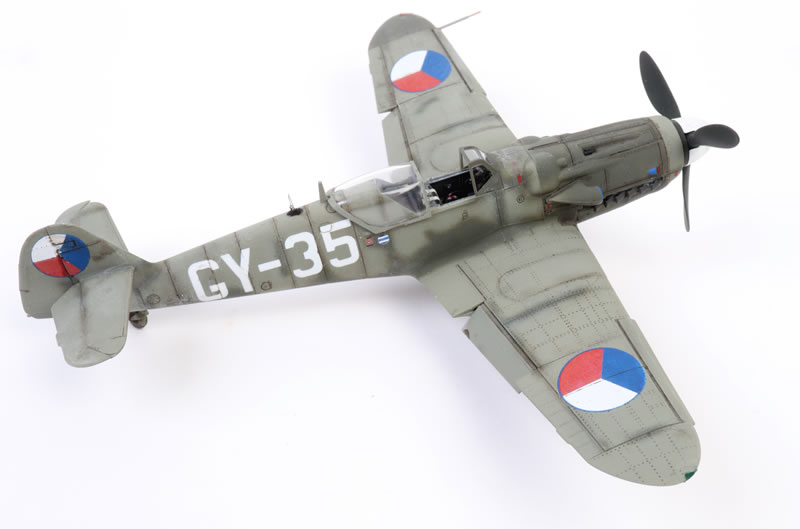
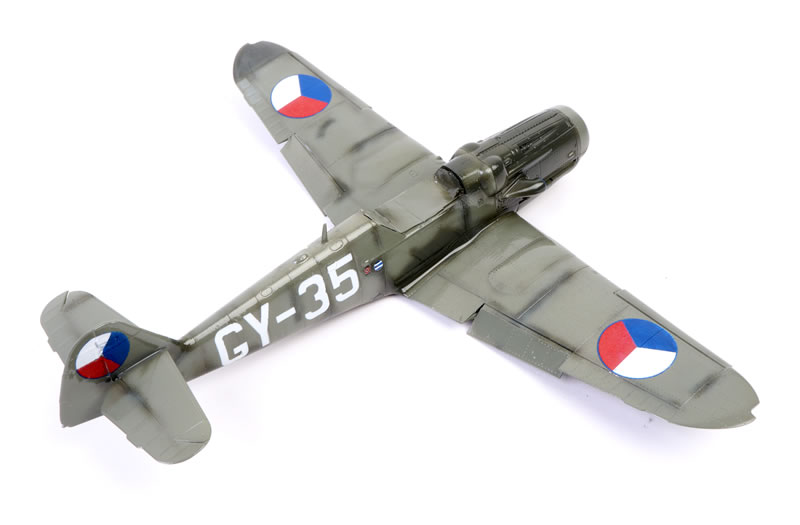
I have just finished Eduard's lovely little 1/72 scale Avia S-199 kit.
After being wary of removing Eduard's decal carrier film in the past, I figured it was finally time to have a go.
Removing the carrier film is entirely optional. The decals may be applied conventionally using setting solutions and the final result looks good.
However, if you would like a genuinely painted-on appearance, you might want to give this a try...
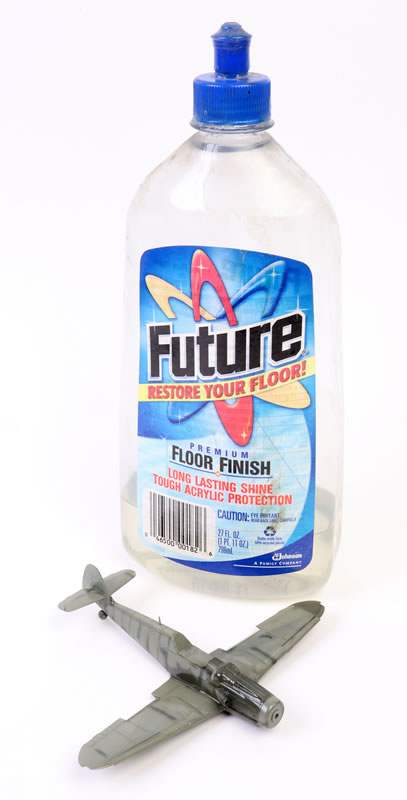
The model was sprayed with two coats of Future floor polish before the decals were applied, resulting in a high-gloss sheen. This is an important step before appying any decals.
After reading a few accounts online, I applied the decals normally including a coat of Solvaset to make sure they were completely settled in to the surface textures. I left the decals alone for 24 hours.
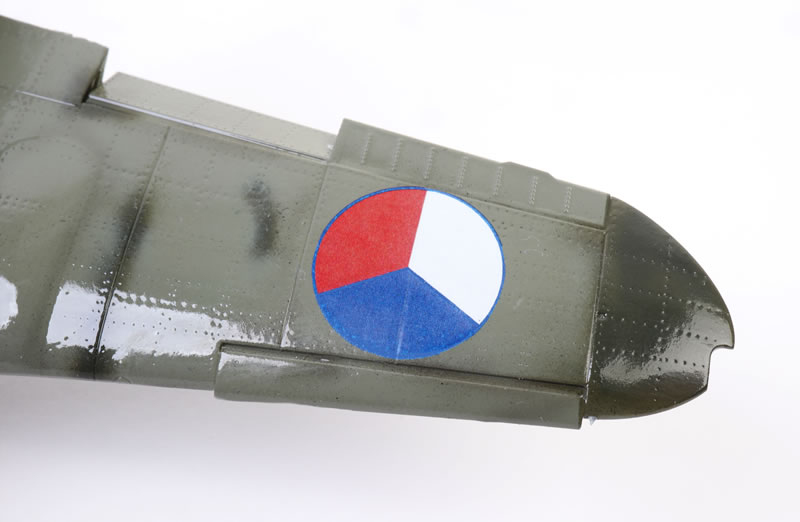
As you can see, the carrier film has almost disappeared against the glossy Future coat, but it is possible to remove the carrier film completely.
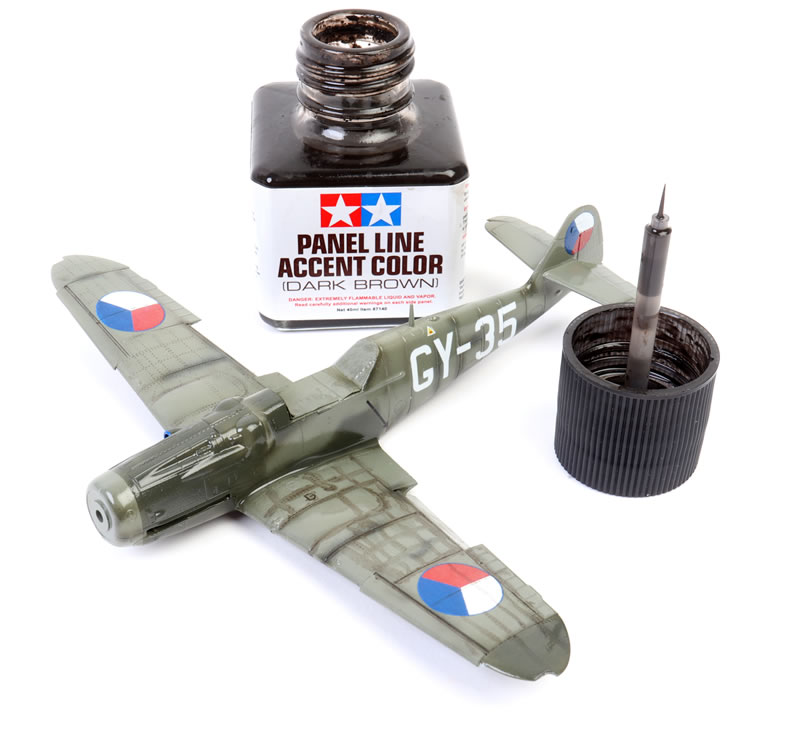
The next day I applied a coat of Mineral Turpentine using a cotton bud to the first decal.
Mineral Turpentine may be called something different in your part of the world, including white spirit or mineral spirit.
I left the turpentine covered decal for about a minute.

Next, I took a clean cotton bud slightly dampened in water and pushed the top carrier film from outside in, fairly quickly but without too much pressure. I got the hang of it after the first couple of roundels.
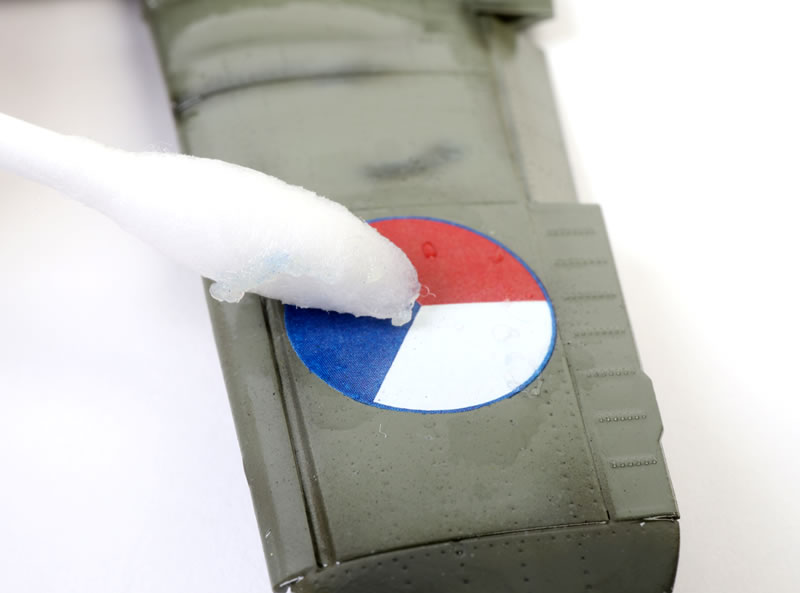
The sticky carrier film residue simply rolled up and could be removed from the decal. This worked well, with only couple of minor issues where the decal was not completely settled - my fault, not the decals. In any case all I had to do was touch the lifted areas with brush-applied acrylic paints and all was well.
It is hard to see the rolled-up and balled cler carrier film in the photos, but it really is there!
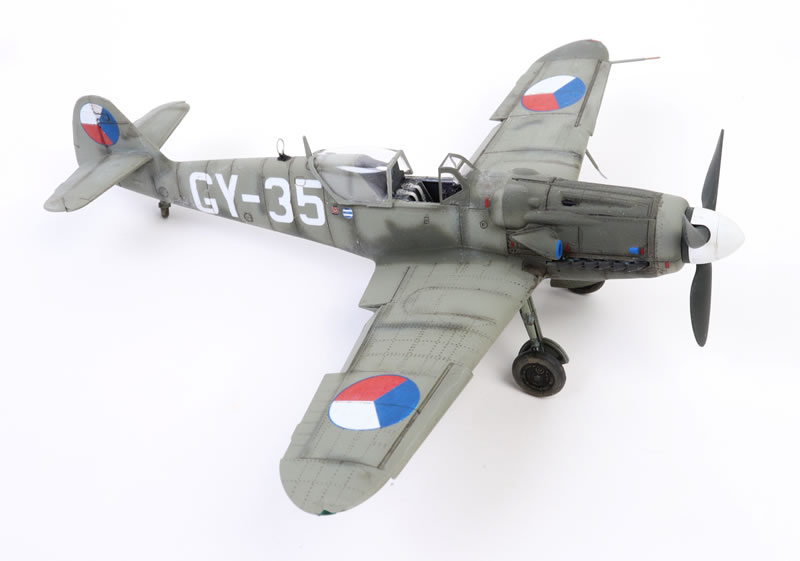
The result was a genuinely painted-on look.
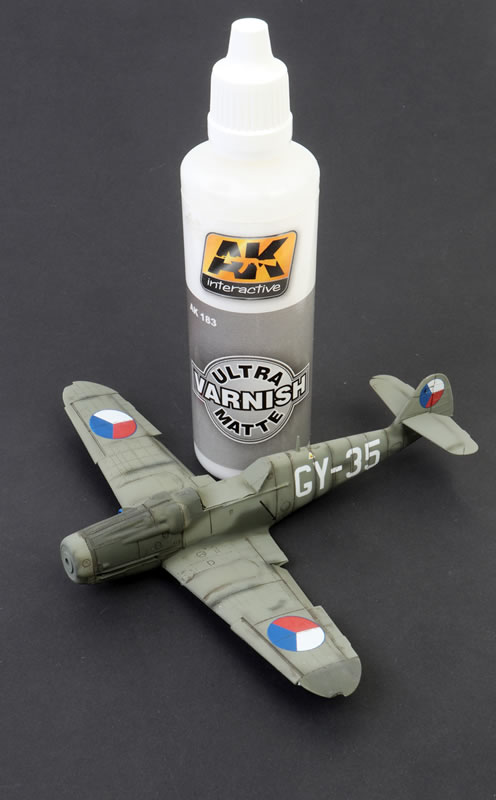
With the delicate decal now exposed, I sprayed the entire model again with Future, including the decals, and continued with weathering.
When the weathering was complete, the paint and decals were sealed with a coat of AK Interactive Ultra Matte Varnish.
I will certainly use this technique with any Eduard decals in the future.
Thanks to Eduard for the sample
Model and Text Copyright ©
2023 by Brett Green
Page Created 20 July, 2023
Last Updated
24 July, 2023
Back to HyperScale Main Page

|
 Home
| What's New |
Features |
Gallery |
Reviews |
Reference |
Forum |
Search
Home
| What's New |
Features |
Gallery |
Reviews |
Reference |
Forum |
Search